Top end rebuild

Hello Stan,

Thanks very much for that! :D

The timing set that was fitted into my 4.6 looked identical to yours, but I was not sure of the brand.

They are certainly vastly superior to the OEM Moorse set with their nylon teeth.

Ron.
 
harveyp6 said:
The distributor drive gears already have an oil supply, unfortunately it often gets obstructed by poor assembly of the camshaft timing gear woodruff key.

What's the correct method for the woodruff key, Harvey?

harveyp6 said:
If you're doing all this work including the high volume oil pump upgrade, in view of the fact that pressure can be lost in worn main and big end shells, and they can be done in-situ, I'd check these as well and replace if req'd.

Well, the sump's off and de-sludged. :) Do you have a copy of "Bearing Shells for Dummies" please Harvey? Or at least some tips! You're right..whilst the old girl's in bits it makes sense to at least check the mains and big ends.
 
The woodruff key needs to be fitted so that it sits parallel to the shaft, not with one end or the other sticking up. When you fit the cam gear you'll see that the slot in the gear looks to be too big, that's where the oil feeds through, and the key being out of place restricts/blocks the path for the oil.

As for the shells, remove couple of end caps one frontish, one towards the rear, then slide out the top shells from the rods and have a look at them, it's the top ones that wear most. You could remove all the mains caps, but a couple should do, it's mainly the bottom shells in the cap that wear.

Have a look-see and we'll take it from there.
 
harveyp6 said:
As for the shells, remove couple of end caps one frontish, one towards the rear, then slide out the top shells from the rods and have a look at them, it's the top ones that wear most.

Will do Harvey, thanks.

Now...'twas a dark and stormy night...

So I don't fancy going out in that, wriggling underneath and checking...but in the Parts Book, it looks like special nuts holding the big-end bolts. Is that right? Will I need a special socket?
 
SydneyRoverP6B said:
Hello Stan,

Just a normal imperial socket will fit the big end bolts.

Ron.

That's not strictly correct either, they're bi-hex nuts, so only a bi-hex socket will fit, a hex one won't.
 
harveyp6 said:
SydneyRoverP6B said:
Hello Stan,

Just a normal imperial socket will fit the big end bolts.

Ron.

That's not strictly correct either, they're bi-hex nuts, so only a bi-hex socket will fit, a hex one won't.

Well I don't mind admitting that I have certainly learnt something now. Until now, I had never heard of bi-hex nuts. I had seen questions on this very subject posed before, and the answers were all the same,...use a normal imperial socket, the crest of the splines fit into the corners within the socket.

When I dismantled my 3.5 following removal, I used a normal socket and encountered no problems, but then of course had I been in possession of a bi-hex socket of the correct size, then I would have used that instead.

Ron.
 
harveyp6 said:
SydneyRoverP6B said:
Hello Stan,

Just a normal imperial socket will fit the big end bolts.

Ron.

That's not strictly correct either, they're bi-hex nuts, so only a bi-hex socket will fit, a hex one won't.

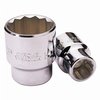
A normal socket like these, or ring spanner which most people use, will fit.


It is only the single hex sockets which won't
 

Attachments

  • socket.jpg
    socket.jpg
    4.4 KB · Views: 623
SydneyRoverP6B said:
When I dismantled my 3.5 following removal, I used a normal socket and encountered no problems, but then of course had I been in possession of a bi-hex socket of the correct size, then I would have used that instead.

Ron.

As pointed out above, you did have a Bi-hex socket, the most usually found in most sets, but although they will quite happily work on hex nuts, as will Hex ones, only the Bi-hex will fit the Bi-hex nuts.
 
Getting back OT, Stan,if you are going to replace the shells in-situ, do them before you refit the timing chain and gears. The front upper main shell is probably the most difficult to do, and not having the chain and gears on will give you a better view of what's going on.
 
harveyp6 said:
Getting back OT, Stan,if you are going to replace the shells in-situ, do them before you refit the timing chain and gears. The front upper main shell is probably the most difficult to do, and not having the chain and gears on will give you a better view of what's going on.

Thanks Harvey,

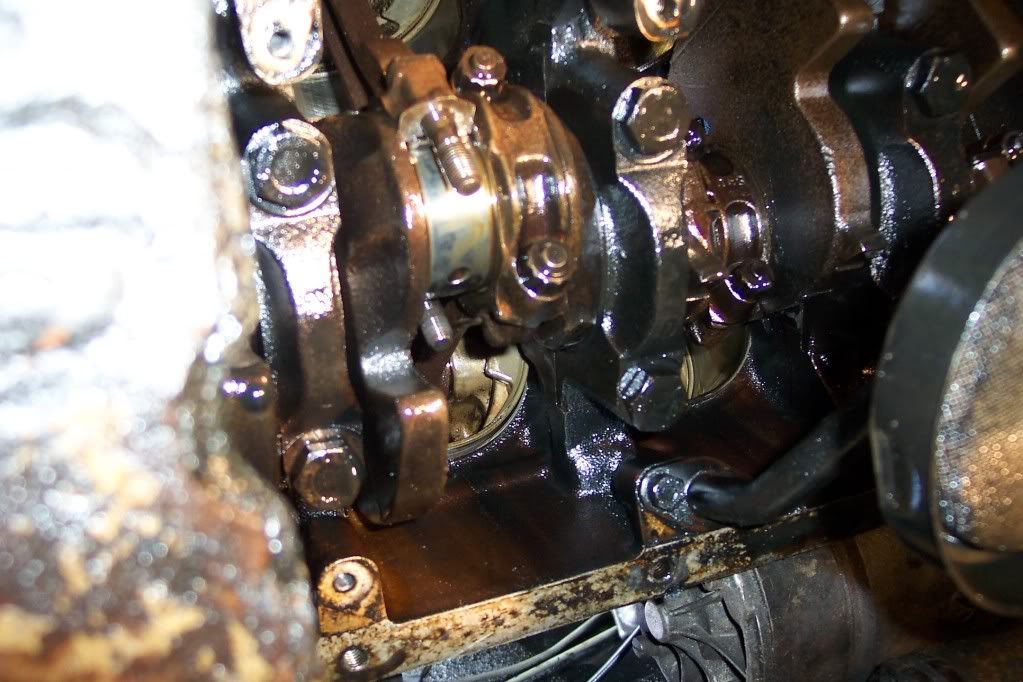
Daylight starting to go, and got to go spruce up for the signifcant other shortly :D ..but managed to pop the cap of one big-end to have a look...


Doesn't look to be any copper showing through on that one.

You really need to slide the top shell out and have a look at that.

I suggest you go out in your best togs and do it now :wink: ..............
 
harveyp6 said:
Doesn't look to be any copper showing through on that one.

You really need to slide the top shell out and have a look at that.

I suggest you go out in your best togs and do it now :wink: ..............

OK...posting in my pulling kit now...

Found it difficult to slide the top half round..was a little bit wary of scratching the crank. If I'd had some 5/16" bore plastic tubing I'd have slipped that over the bolts. Anyway..pushed the piston up the bore and similarly couldn't see any copper showing on the top shell.

I'm a tad in two minds now Harvey...

It'd be wise to have them all out to check/replace...but I'm very wary of doing more harm than good. I'll probably take the 2nd and 5th mains caps off to have a dekko tomorrow.
 
If there's no copper showing on any of the shells, the only other thing you could do is buy yourself some Imperial "Plastigage" off ebay and see what the running clearance is. But TBH if they all looked like that I'd probably reassemble it all using a nice coating of "Graphogen" on the shells.

See what the mains are like.
 
Cheers Harvey,

Right...I'd better get off and meet her...otherwise she'll be at least one glass ahead of me! :roll:
 
Hello Stan,

How many miles has the engine covered? Were the oil changes at regular intervals?

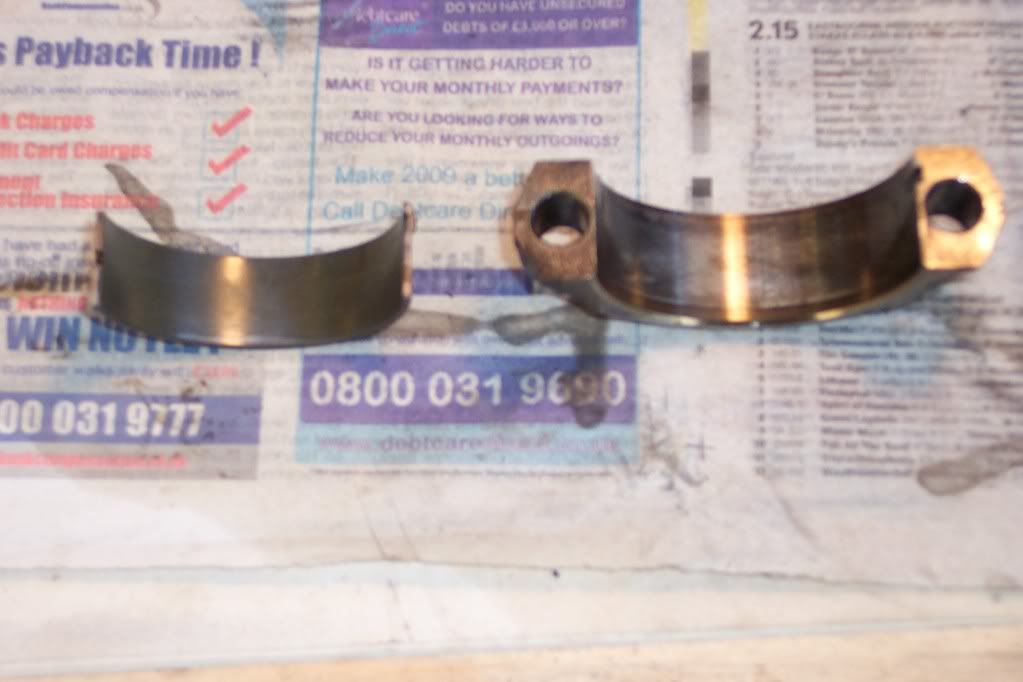
When I dismantled my 3.5 with 203,000 miles covered, regular oil changes every 2 to 2500 miles, all of the big end shells showed varying degrees of copper, but only on the top shells, which as you know experience the greatest loading. All of the lower main bearing shells showed copper, in fact quite a considerable amount, with the majority the display of copper being across the entire width of the shell, and along most of the shell length.

Before removing the main bearing cap bolts, I checked the torque on each of the bolts, and found all to be below the minimum specified setting. I mention this because during the late 1980s there was a noticable heavy knocking evident when at idle. I spoke with the chief mechanic at my local Range Rover centre and he advised that the main bearing caps were coming loose... :shock:
I removed the sump and sure enough the majority were below specification, some more so than others. I keep detailed records of all work undertaken on the car, mileage done etc.

When the caps were removed, there was noticable fretting of the block registers. The main bearing caps are not located anywhere near as well as they should be, and as such the caps "walk" within the registers. The bolt holes within the block can also crack, although I could not see any evidence of such, and of course when this happens, the block will need to be replaced. All P6B blocks are especially prone to this. There is a lot of information available on this subject,...RPI engineering is but one source. All of the two bolt blocks suffer in varying degrees with this problem, but the early blocks like those in the P6B suffer the most.

Studs and nuts can be used to secure the main bearing caps with far greater security, but of course to do so requres the engine to be removed. The main bearing caps are also an interference fit within the registers, and it is my understanding that the block can be ruined and subsequently consigned to scrap if the caps are not removed and replaced properly.

Ron.
 
SydneyRoverP6B said:
Hello Stan,

How many miles has the engine covered? Were the oil changes at regular intervals? Ron.

D'you know Ron?...I haven't a clue. The speedo reads around 78K...which could mean everything..or nothing. I bought the car just over a year ago because:

A) I've fancied a 3500S since I passed my test in 1972.

B) I never did get one.

C) My future pension's buggered anyway...so why not just do it?

I want my P6 to be an interesting and useable classic in good nick that'll invariably put a smile on my face for the 2000 miles or so I'll drive it every year. And will continue to throw up challenges as it continues to grow older gracefully as befits (IMHO) the last great Rover ever built. Financial constraints (real ale and women don't come cheap!) mean it'll never be Concours or developed far beyond Rover's original design, but then again, that's half the fun!

So yes, I've seen RPI's & other sites, read Des Hamill's book and know all the history of cap to block register fretting, etc. And having worked in engineering for a tad over 40 years, I guess I'll just take a little care with those caps!

There was no knocking from the bottom end when I was driving, but Harvey was right...having geared up to do all that work on the top end, it makes sense to check out the bottom end too.

Anyway...my favourite ale wasn't on in the pub so I'm feeling a little cranky... (pun intended :) )

Cheers,
 
Just a note on the anodised oil pump housing. I am not sure why anyone thinks they are anodised? It looks like an aluminium casting to me. (I work in the Aerospace industry and have first hand knowledge of aluminium structures). Anodising is not a hard surface anyway, neither a bearing surface. It is a process predominantly to stop corrosion. It will lncrease the wear resistance of the surface, but this is really more of a byproduct of the process. Anodized aluminium surfaces are harder than aluminium but only have low to moderate wear resistance. I had some minor score marks on the face of my oil pump and I flattened the surface with 400 grade wet'n'dry paper and light engine oil. The resulting surface appears visually identical to the rest of the housing.

I don't know what the right answer to this is question. I am pretty sure that even if the housing is anodised, it is not for wear resistance reasons, but much more likely for corrosion protection. I followed the recommendations of a TV programme, 'A 4X4 is born' with Mark Evans, who is a well known car restorer and builder. He did exactly what I have described whilst rebuilding his V8 engine for the Land Rover he was restoring.
 
On the subject of the anodised aluminium oil pump front cover. The new covers that I own, manufactured prior to 1976 are very dark grey in colour. Later covers I am led to believe look more like plain aluminium. The cover which was removed from my original 3.5 after 203,000 miles displayed score marks in varying degrees, bright aluminium against a dark grey background. Placing a scibe against the surface and dragging it across leaves a clear defined mark only on the section of the cover where the dark grey colour is no longer present. That to me suggests the employment of a surface treatment which has greater resistance to damage than the aluminium surface beaneath it.

Ron.
 
keynsham1 said:
Just a note on the anodised oil pump housing. I am not sure why anyone thinks they are anodised? It looks like an aluminium casting to me. (I work in the Aerospace industry and have first hand knowledge of aluminium structures). Anodising is not a hard surface anyway, neither a bearing surface. It is a process predominantly to stop corrosion. It will lncrease the wear resistance of the surface, but this is really more of a byproduct of the process. Anodized aluminium surfaces are harder than aluminium but only have low to moderate wear resistance. I had some minor score marks on the face of my oil pump and I flattened the surface with 400 grade wet'n'dry paper and light engine oil. The resulting surface appears visually identical to the rest of the housing.

I don't know what the right answer to this is question. I am pretty sure that even if the housing is anodised, it is not for wear resistance reasons, but much more likely for corrosion protection. I followed the recommendations of a TV programme, 'A 4X4 is born' with Mark Evans, who is a well known car restorer and builder. He did exactly what I have described whilst rebuilding his V8 engine for the Land Rover he was restoring.

Hi,
Everything I've read mentions the pump cover being anodised. But you're right that loads of people have refaced it. And as has been said in an earlier post, perhaps the anodising is worn by the time the engine's clocked a 1,000 miles anyway! Melling in the US do a cast iron wear plate that sits between the cover and the gears and I did consider this, but I'll be re-facing mine I get round to it.

If you've finished your top-end rebuild, how did it go? Pleased with the result? Or are you like me, still trying to find enough time! :)
 
Back
Top