

You are using an out of date browser. It may not display this or other websites correctly.
You should upgrade or use an alternative browser.
You should upgrade or use an alternative browser.
Top end rebuild
- Thread starter vaultsman
- Start date
vaultsman
Well-Known Member
Had a look at #2 lower main shell..no sign of the backing at all so that was a relief. ") Back in it went and was just torqueing up the bolts...when I remembered I'd not taken a pic! Hmmm...too late.
Back in it went and was just torqueing up the bolts...when I remembered I'd not taken a pic! Hmmm...too late.
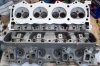
Got the cylinder heads back yesterday...acid dipped & a minimum skim. 1989 3.9 EFI heads...£30 the pair (including what look to be good valves after a decoke) + £40 for the clean up & skim. Springs I'll fit new.
The skim's cost me about .008" so I won't get the full benefit of using the composite gasket to reduce the compression ratio..but better to have them done I think. Quite happy with 'em. They're dead flat now anyway!
So...bit of lapping tomorrow.....
These have obviously had exhaust manifold gaskets on them, yet P6's don't use them. Why was that then? And should I use them on these heads?
Back in it went and was just torqueing up the bolts...when I remembered I'd not taken a pic! Hmmm...too late.Got the cylinder heads back yesterday...acid dipped & a minimum skim. 1989 3.9 EFI heads...£30 the pair (including what look to be good valves after a decoke) + £40 for the clean up & skim. Springs I'll fit new.
The skim's cost me about .008" so I won't get the full benefit of using the composite gasket to reduce the compression ratio..but better to have them done I think. Quite happy with 'em. They're dead flat now anyway!
So...bit of lapping tomorrow.....
These have obviously had exhaust manifold gaskets on them, yet P6's don't use them. Why was that then? And should I use them on these heads?
Attachments
P5B's, P6B's and Sd1 V8's were never fitted with gaskets, and never suffered because of it. The main problems were the cr*p lockwashers that never worked, always managing to be a pain to bend back on the car, only to find the bolts themselves loose.
Personally I wouldn't bother with manifold gaskets, once the faces are clean, just wipe a smear of grease over them and fit.
If you have problems with them blowing you have the option of fitting gaskets then, but TBH I've never used them, and I've never had any blows with the standard manifolds if they are in good condition.
Hello Stan,
Another option is to apply a small bead of high temperature gasket compound. That will ensure there are no blows, and you won't have to remove them again to fit gaskets or to apply the aforementioned.
Ron.
Another option is to apply a small bead of high temperature gasket compound. That will ensure there are no blows, and you won't have to remove them again to fit gaskets or to apply the aforementioned.
Ron.
Hello Stan,
The condition of the main bearing shell that you inspected sounds excellent indeed. So unless your engine was rebuilt at some point by a previous owner, it would seem that the 78,000 miles on the speedo could well be the real deal!
I have attached some pics covering some of the parts from my replaced 3.5, which saw 203,000 miles of service. Luckily your shells looked nothing like mine.
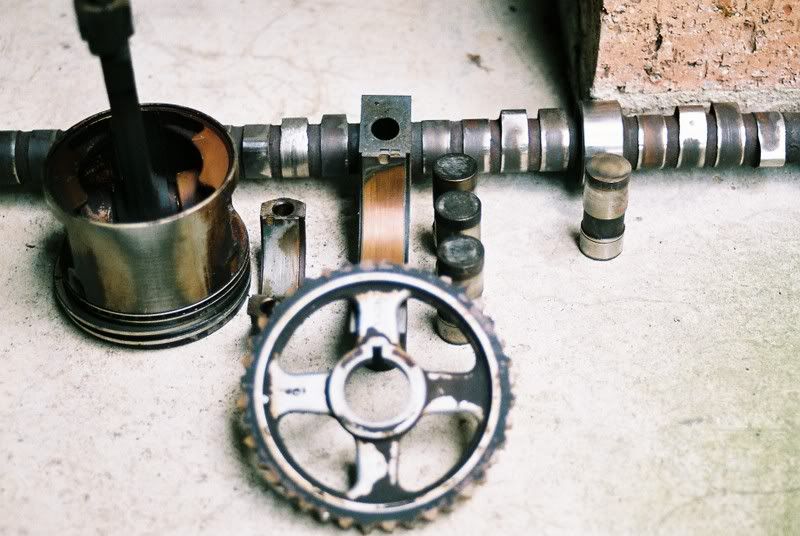
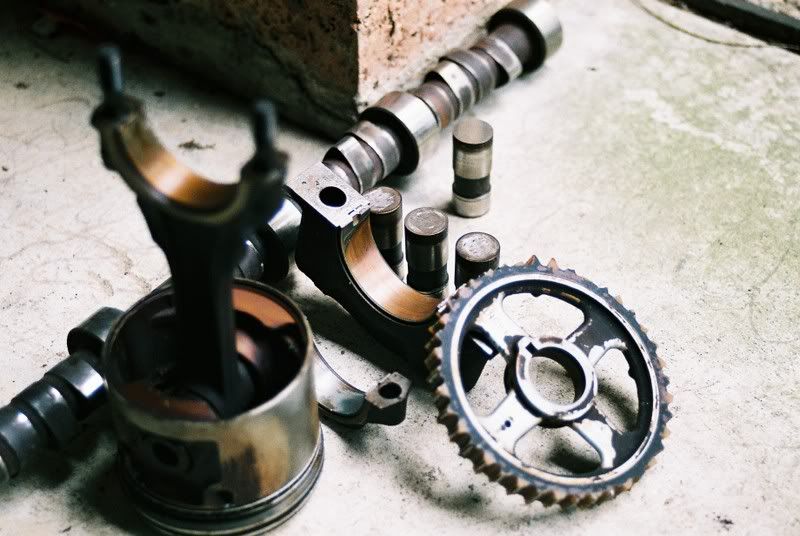

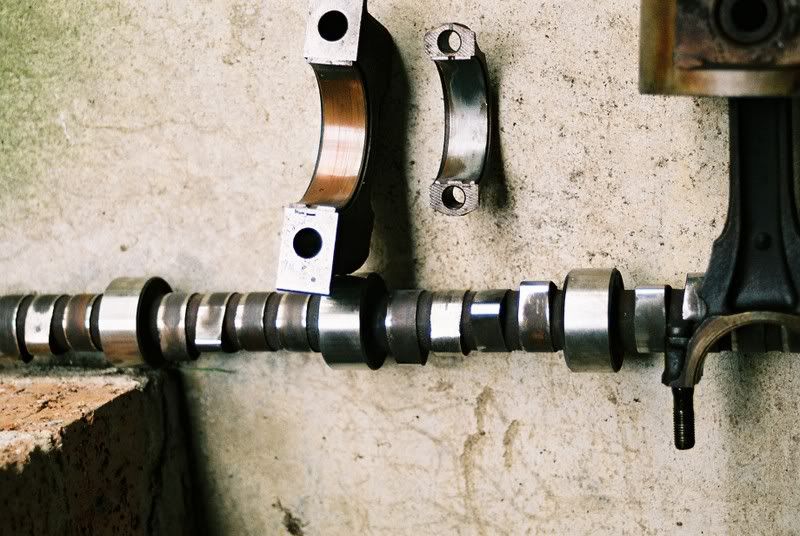
Ron.
The condition of the main bearing shell that you inspected sounds excellent indeed. So unless your engine was rebuilt at some point by a previous owner, it would seem that the 78,000 miles on the speedo could well be the real deal!
I have attached some pics covering some of the parts from my replaced 3.5, which saw 203,000 miles of service. Luckily your shells looked nothing like mine.
Ron.
vaultsman
Well-Known Member
Managed to get some time today...
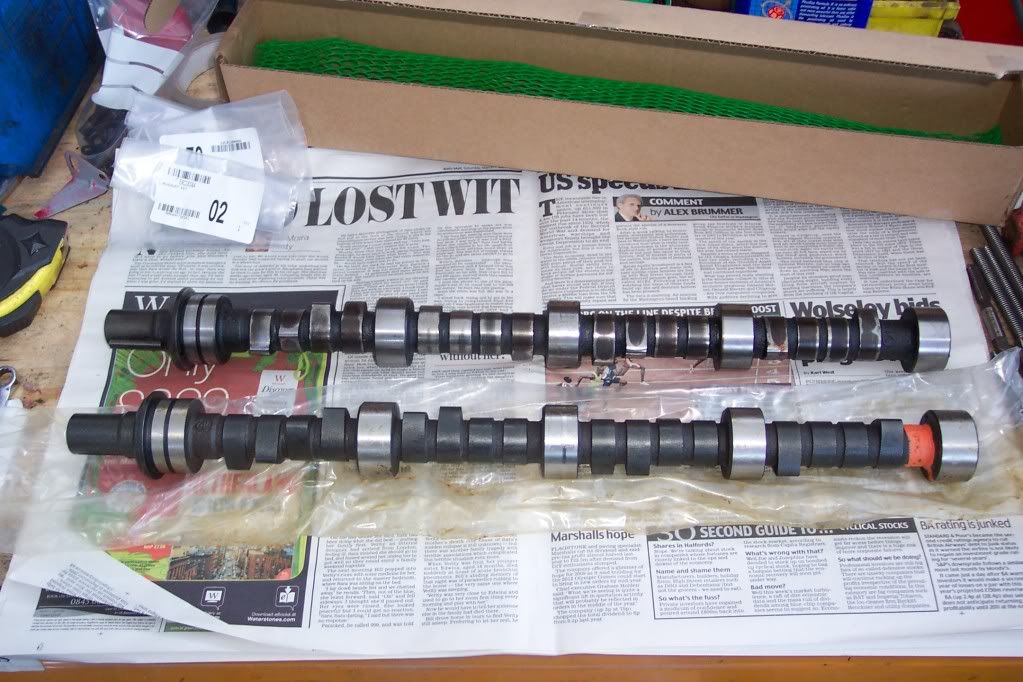
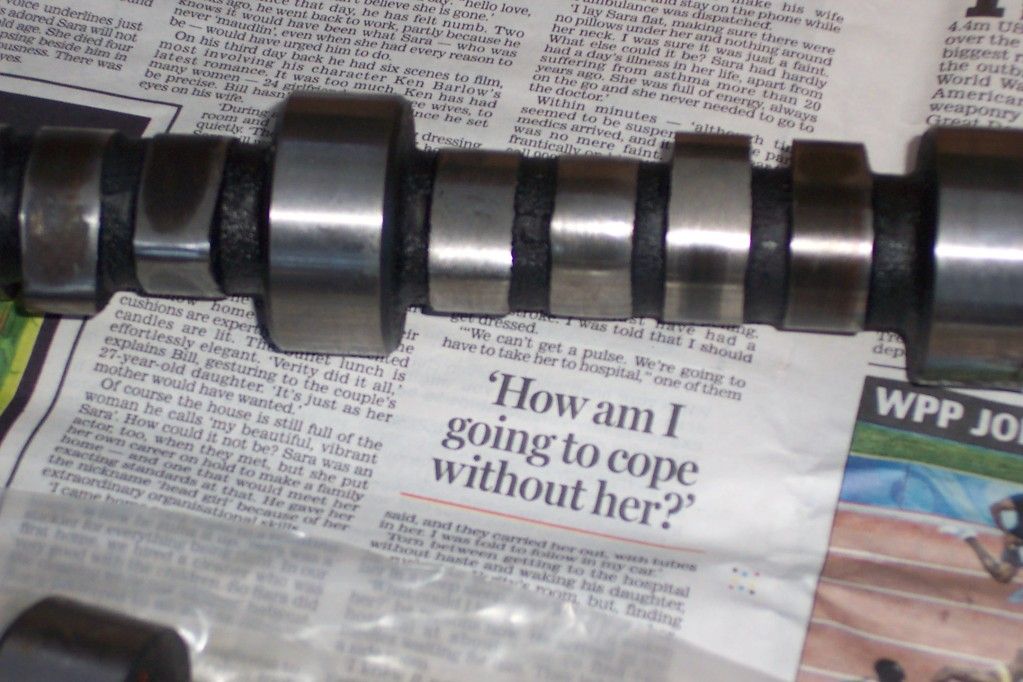
Old & new camshafts..
===============================================================================================================
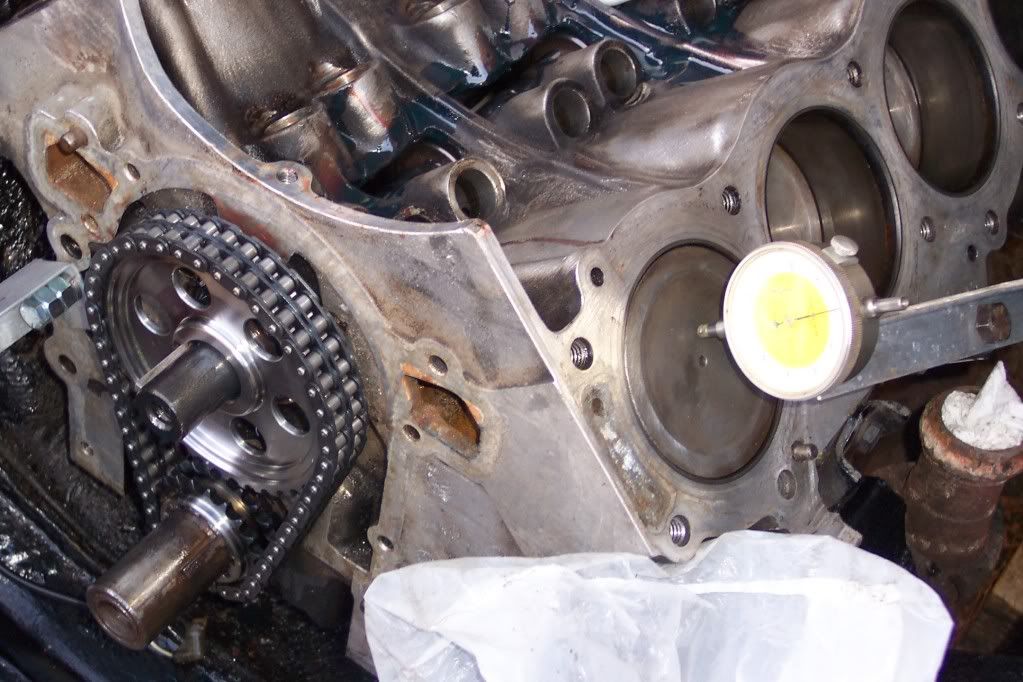
Camshaft in (bit of a fiddle...and I managed to tip the cam lube over! ) & timing set fitted
===============================================================================================================
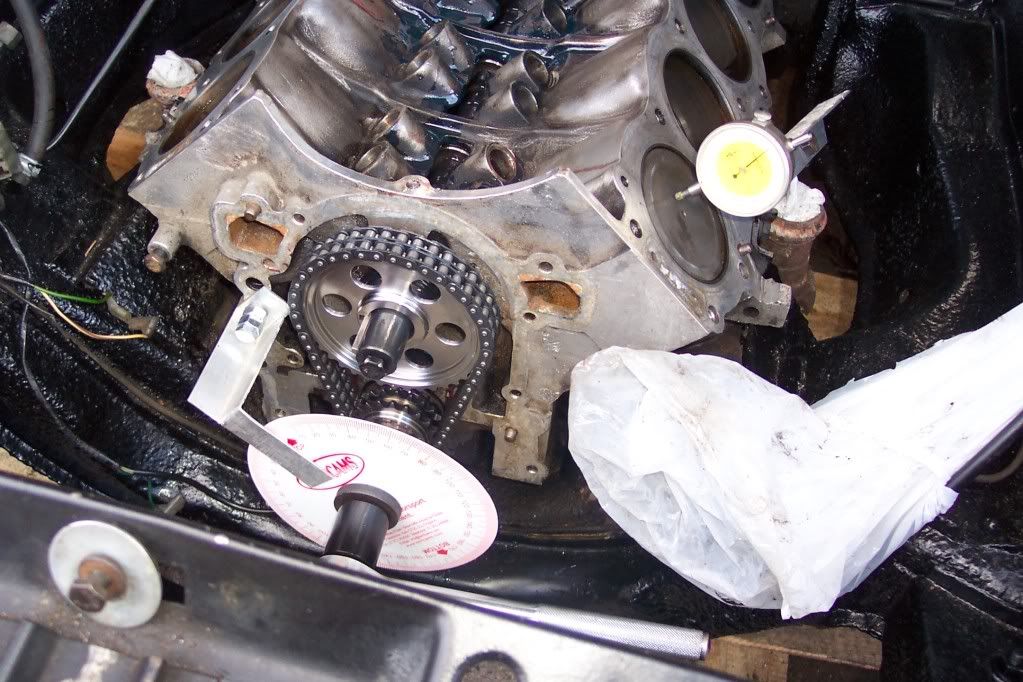
Although it's possible to set the cam between 6° retarded and 6° advanced, I fitted it 0° to check the valve timing.
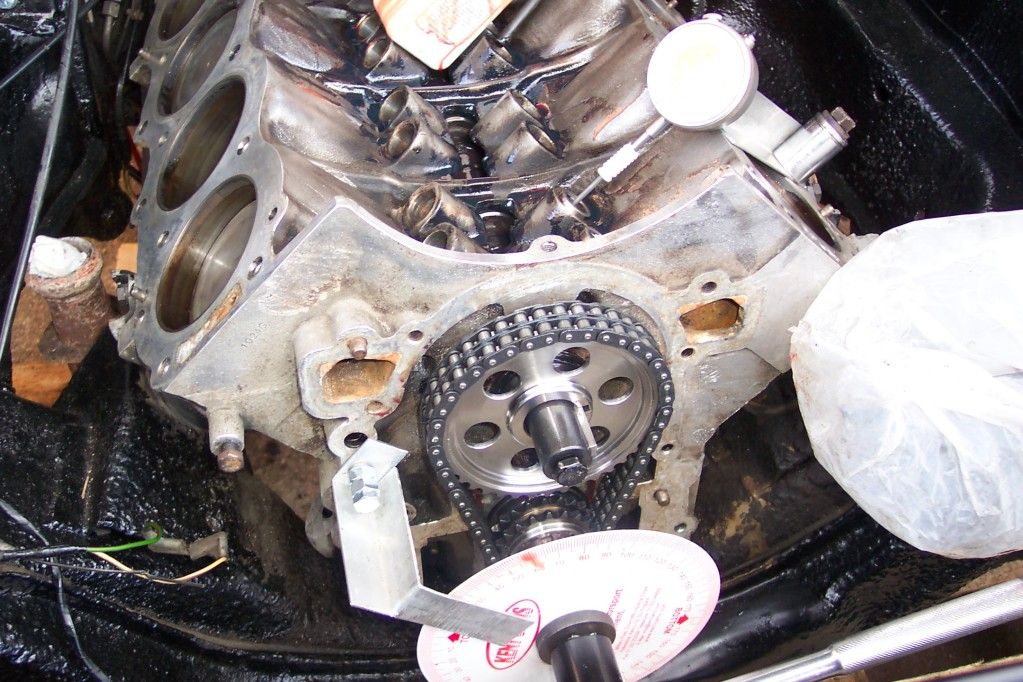
Inlet's opening 30° BTDC. Which I think's about right? And then it was time to leave off for a pint!
Old & new camshafts..
===============================================================================================================
Camshaft in (bit of a fiddle...and I managed to tip the cam lube over!
) & timing set fitted
===============================================================================================================
Although it's possible to set the cam between 6° retarded and 6° advanced, I fitted it 0° to check the valve timing.
Inlet's opening 30° BTDC. Which I think's about right? And then it was time to leave off for a pint!
DaveHerns said:How do you vary the cam timing with the standard wheels and chain ?
You can't with the standard set up, only way you could do it would be to make an offset woodruff key.
vaultsman
Well-Known Member
vaultsman said:Although it's possible to set the cam between 6° retarded and 6° advanced, I fitted it 0° to check the valve timing.
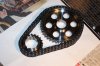
I may have have misled you with that comment Dave..the variation's only possible with this set by selecting one of the multiple keyways.
I bought the set really for its strength, and therefore consistency, compared with the standard setup.
Cheers,
Attachments
vaultsman
Well-Known Member
Well..one of my shiny rebuilt Range Rover heads let me down. Came to bolt up the exhaust manifold..and two of the threads were stripped enough not to hold a bolt! Cardinal sin of taking things for granted and not checking enough..hmm! :evil:
Anyway...managed to pick up a Helicoil kit off ebay for £15 inc postage. So not too bad.


And finally on and torqued up (Plug for Harvey's excellent laminated Datasheet included too - Cheers mate!)


Anyway...managed to pick up a Helicoil kit off ebay for £15 inc postage. So not too bad.
And finally on and torqued up (Plug for Harvey's excellent laminated Datasheet included too - Cheers mate!)
vaultsman said:And finally on and torqued up (Plug for Harvey's excellent laminated Datasheet included too - Cheers mate!)
Thanks for the feedback, I'm glad it was of use, and the picture shows it doing exactly what it was designed for, giving you all the info you need, without having to search through the book, and not making those nice clean workshop manuals all dirty.
It stands on the back of the engine quite nicely, that's a nice bonus we designed in! :wink:
Should anyone else be interested I still have some of the original batch available, and should there be a rush I can always do some more, all for a very reasonable price.
PM me for further details.


Hello Stan,
Are you fitting the later square type rocker covers? The reason I ask is that you have not refitted the splash panels, which are necessary if using the rounded type P6 rocker covers. They prevent oil from flooding the flame trap hoses and pouring out all over the place.
All latter type rocker covers have the splash panels incorporated within the actual covers.
Ron.
vaultsman
Well-Known Member
Hi Ron/Harvey,
I will be fitting the baffle plates. The rocker gear's on, just checking the fit and not torqued up properly yet 'cos next job's to check the preload..if I'm unlucky I may have to shim the pillars after the skim. Expect the best & plan for the worst..as the saying goes.
The rocker covers will be the originals and I'm lucky in that as part of my job I deal with an electroplating company, who are now putting a mirror polish & chrome on them for me at no cost. Lucky me!
They'll also doing the SU intake pipes for me and (funds permitting) I'll be fitting a pair of K&N's drawing from the rear of the engine bay. Certainly the carbs will be needing richer needles...but I'll leave that to the local experts once she's up and running.
Feeling good about the build now!
Cheers,
Guy Engelsman
New Member
I have been following this thread with interest. My new V8S (now named "Pooh" due to the colour), had had the engine "done" (badly) and needs a full rebuild. It has been a few years since I did a V8 and this is most useful!
Hope it fires first time and runs as sweetly as a Rover V8 should
Cheers
GUY
Hope it fires first time and runs as sweetly as a Rover V8 should
Cheers
GUY
testrider
Active Member
Hi Stan,
Good to see everything coming back together nicely, shame about the exhaust manifold threads though. I'm considering a similar project in the next few weeks so I've been watching eagerly for the next installment. It seems obvious now but I hadn't twigged before that the valve lift is affected by head skimming and different gasket thicknesses.
Presumably then, you'll have less valve lift than intended because you've got composite (thicker) head gaskets and, as such the rockers are further away from the camshaft, right? If so, do you have to compensate for this with longer pushrods or is there something I've missed?
vaultsman
Well-Known Member
Guy Engelsman said:I have been following this thread with interest. My new V8S (now named "Pooh" due to the colour), had had the engine "done" (badly) and needs a full rebuild. It has been a few years since I did a V8 and this is most useful!
Hope it fires first time and runs as sweetly as a Rover V8 should
Cheers
GUY
Hi Guy,
I'm finding it a great project. The only thing I'd say is...allow plenty of time, and at least 50% more cash than the first number you thought of! But if you've done one before I'm sure you know that!
Now why didn't I think of Pooh as a nickname?
Cheers,
vaultsman
Well-Known Member
testrider said:Hi Stan,
Good to see everything coming back together nicely, shame about the exhaust manifold threads though. I'm considering a similar project in the next few weeks so I've been watching eagerly for the next installment. It seems obvious now but I hadn't twigged before that the valve lift is affected by head skimming and different gasket thicknesses.
Presumably then, you'll have less valve lift than intended because you've got composite (thicker) head gaskets and, as such the rockers are further away from the camshaft, right? If so, do you have to compensate for this with longer pushrods or is there something I've missed?
Hi Paul,
Yes, I could have done without the stripped threads...but in reality it was quite a nice problem to have when the solution works...if you know what I mean!
AFAIK, oil pressure causes the hydraulic lifters take up any free play in the valve train, so valve lift will always be determined by the difference between the base circle and lobe height on the cam.
The tappet preload, which is the distance between the circlip and the pushrod seat, should be .020" - .060" with the valve closed - preferably towards the lower end of this range. Excessive preload leads to noisy tappets, premature wear..or worse!
Normally if the heads have been skimmed, the preload tends to need reducing. The normal way of doing this is by shimming under the rocker shaft pedestals. I'm not sure what mine will be...although the heads have been skimmed .005", I've fitted thicker composite gaskets. Hopefully it won't need any adjustment!
As the rocker ratio is 1.6, the thickness of the shims needs to take this into account. For example, if the average reduction in preload needs to be .020" the shims need to be (.020" x 1.6) = .032". The same size shim needs to be used under each pedestal, therefore all the tappets need to be checked and an average reduction worked out.
An alternative would be to use adjustable pushrods and set each tappet preload individually.
Hopefully..I've not dropped any clangers in this post!
There's a write-up on checking the preload here
Cheers,