

You are using an out of date browser. It may not display this or other websites correctly.
You should upgrade or use an alternative browser.
You should upgrade or use an alternative browser.
The inheiritance. 1976 P6b
- Thread starter ewokracing
- Start date
ewokracing
Active Member
Couple of issues
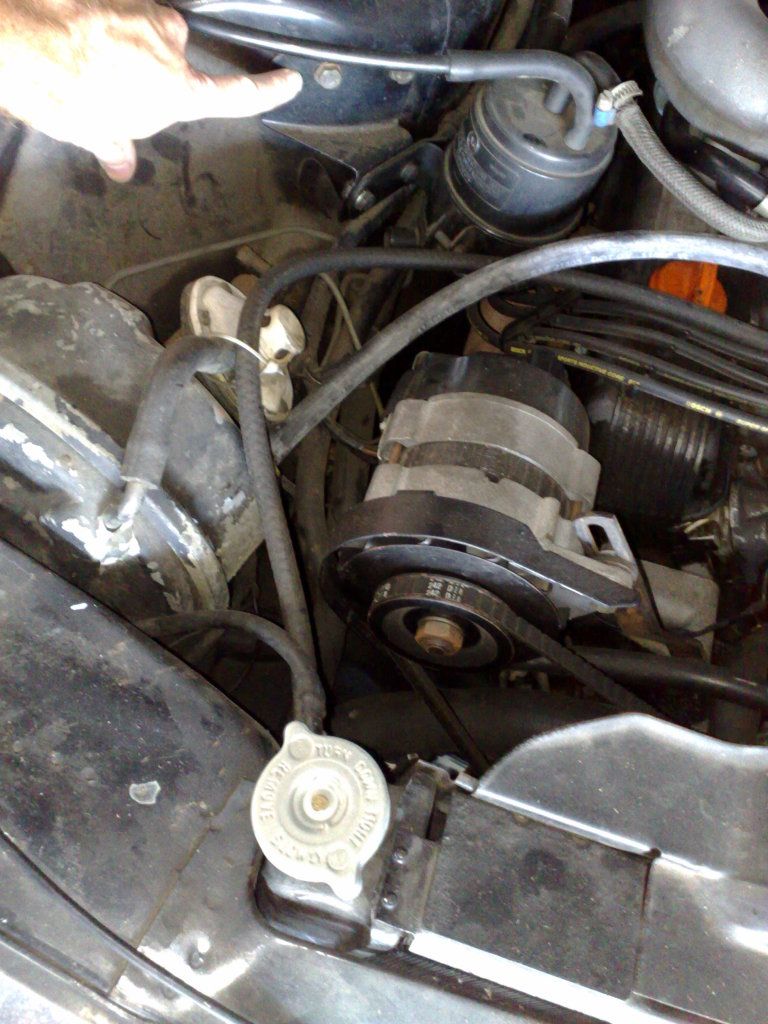
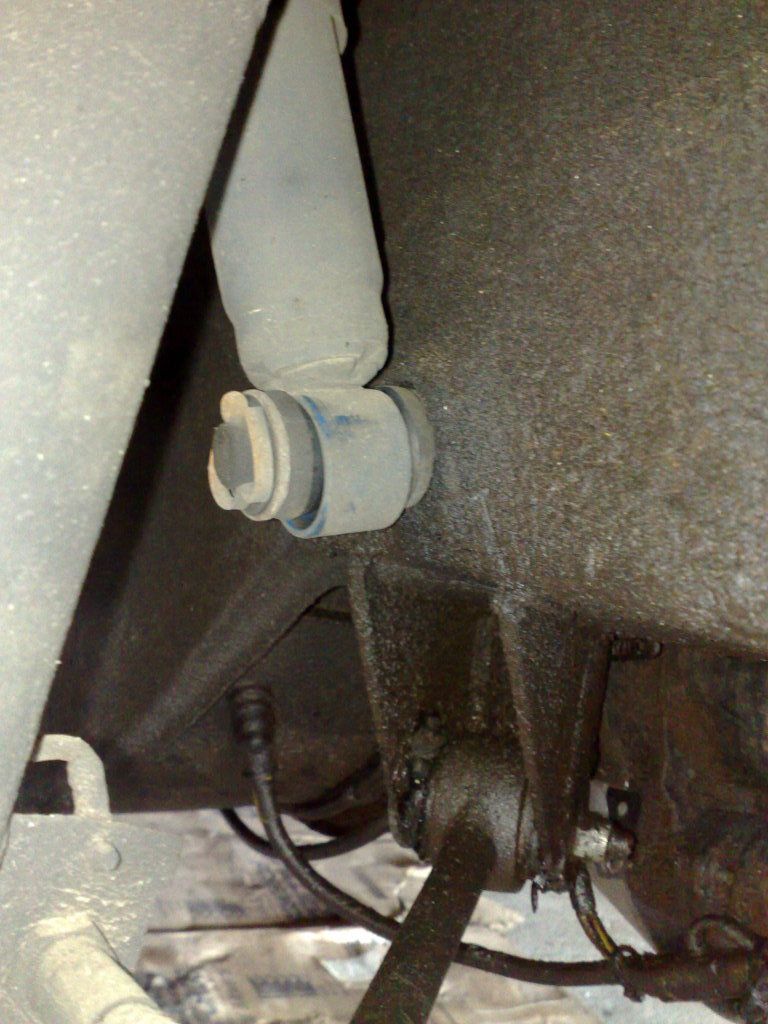
I keep loosing coolant as I have no expansion tank/overflow bottle. However, where other people have a MGB V8 or SD1 brass tank, I don't think I could fit one as I have the extra carbon canister (Japanese market carburettor cars seem to have two canisters?).
Any idea of where I could put an overflow bottle that looks neat? You can see here that space is a bit limited.
I had a fiddle to try and get the rear bushes perfect. They are perfect on the drivers side rear, a bit squashed on the passenger side. I'm happy enough. I did notice though that the rear bush that holds the bar to the diff carrier mount is poly and it's orange - I suspect it's a K-mac bush.

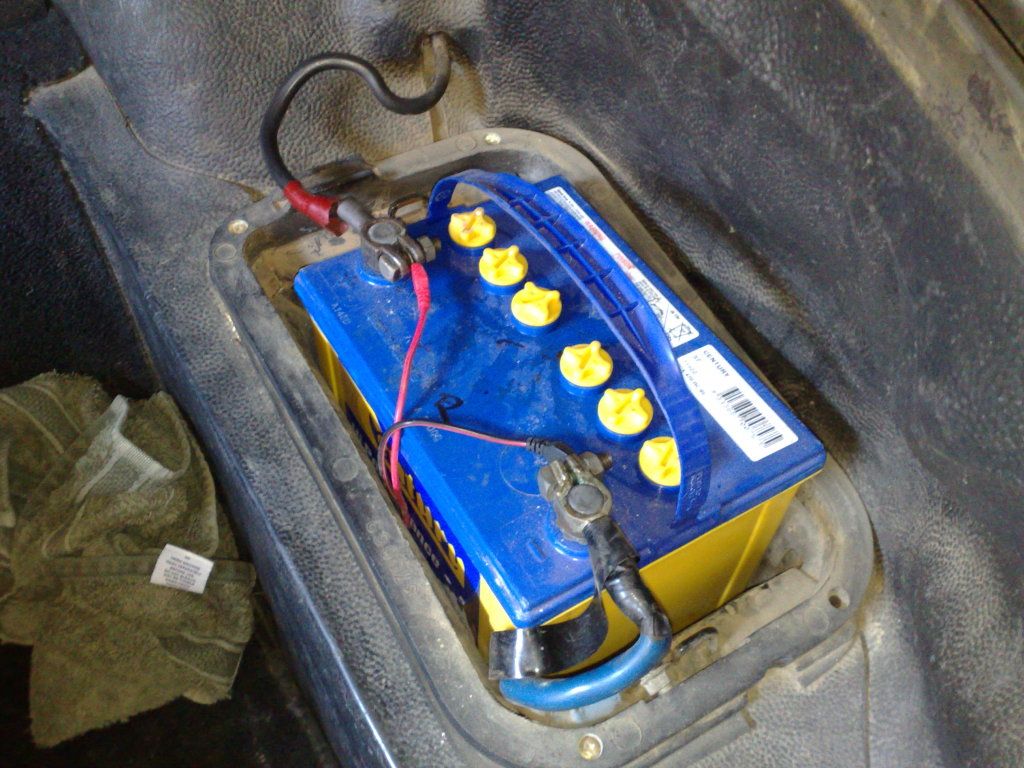
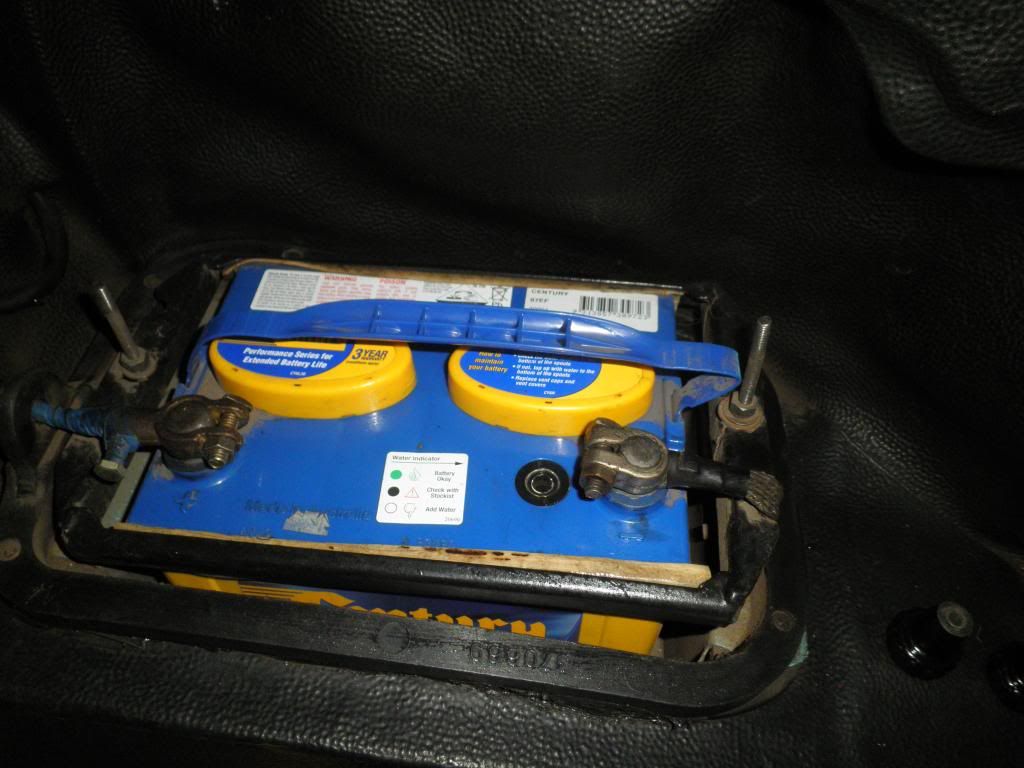
I also drilled a channel in the plastic tray that the battery sits in, now I have my ctek plug hanging underneath the battery so I can charge the car in the garage without opening the boot. I do have a reminder though on the steering wheel to disconnect before I drive off! I'll also POR15 the metal holder at some stage and I should find a plastic "trough" for the battery to sit in.
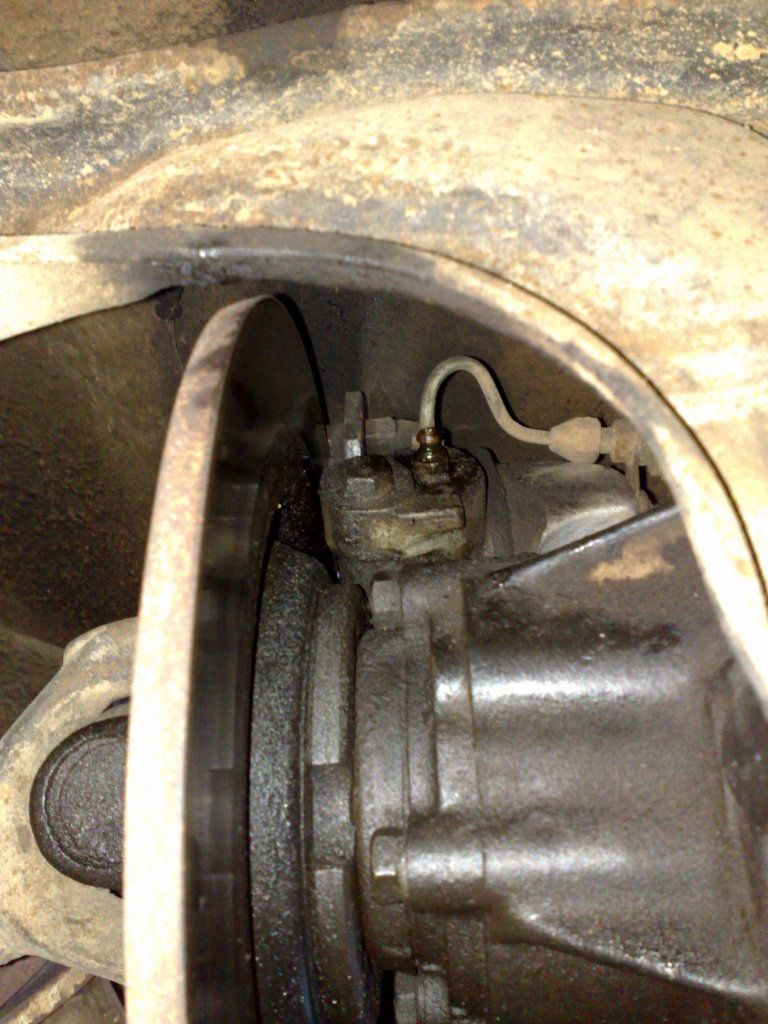
Finally I noticed that the passenger rear brake caliper seems to be leaking. Boooo urns. :?
I keep loosing coolant as I have no expansion tank/overflow bottle. However, where other people have a MGB V8 or SD1 brass tank, I don't think I could fit one as I have the extra carbon canister (Japanese market carburettor cars seem to have two canisters?).
Any idea of where I could put an overflow bottle that looks neat? You can see here that space is a bit limited.
I had a fiddle to try and get the rear bushes perfect. They are perfect on the drivers side rear, a bit squashed on the passenger side. I'm happy enough. I did notice though that the rear bush that holds the bar to the diff carrier mount is poly and it's orange - I suspect it's a K-mac bush.
I also drilled a channel in the plastic tray that the battery sits in, now I have my ctek plug hanging underneath the battery so I can charge the car in the garage without opening the boot. I do have a reminder though on the steering wheel to disconnect before I drive off! I'll also POR15 the metal holder at some stage and I should find a plastic "trough" for the battery to sit in.
Finally I noticed that the passenger rear brake caliper seems to be leaking. Boooo urns. :?
Hi Geoff,
Yes there should be a fibrous resin spacer block that raises the battery up off the fibrous resin insert that it is currently sitting on. This allows air to circulate around the battery and for any traped moisture to evaporate. I cleaned the plastic coating off the steel battery box over 20 years ago and painted it with Hammerite. It is still doing a sterling job, so I am very pleased with it. These days though as you mentioned, POR15 seems to be the stuff to use, and like many effective products appear to be, is extremely toxic.
What sort of Champion battery are you using and how is it performing so far?
The brake fluid appears to be coming from the bleed screw. Sometimes there can be a little bit of corrosion where they seat thus preventing a perfect seal. If you loosen and tighten a number of times so as to polish the interface, then remove the screw to clean prior to fitting, you may well find that it does the trick. If there is a problem with the bore or piston seal, then the fluid will leak into the metal canister until such time as it passes beneath the rubber seal around the base. The angle of the calipers usually means that any loss of fluid tends to run down the front of the differential, rather than behind.
Ron.
ewokracing
Active Member
Hi Ron
yes - sorry I should have been clearer - the battery sits on top of the resin insert and thats what I drilled a channel through for the ctek cable/lead. I have seen battery boxes in the parts book though and I suppose they would stop road grime splashing up into the battery space.
I have got a century battery. Had it in there since I first started working on the car, the century book said to use some massive battery, I ordered it, turns out that I think it was for an SD1. This is the same size for an EA falcon. Works a treat. I keep it charged with my ctek.
I thought it looked like the bleed nipple was leaking. It too is on the list of things to check...!
ghce
Well-Known Member
rockdemon said:I'd like a p76")
Madness :shock: even at the time they looked like big box, cant say my appreciation has increased
Graeme
I am not sure if we are talking about the same insert here Geoff. The battery should not make direct contact with the insert that I can see in your photo. It should sit up above it, so you could easily place your finger between the base of the battery and the insert that I can see in your photo. By the look of it from your photo, there is no gap between the two, hence the cut out to fit the wires.
There is also a metal frame with locating rods missing from the top of your battery. Once in place, it prevents the battery from moving within the case. Once the issue with my computer is resloved in the next day or so, I'll take some photos and post them here so you can see what I am referring to.
Ron.
ewokracing
Active Member
DaveHerns said:Is the red terminal of the charger loose between the 2 sides of the clamp?
yes and yes I realised yesterday after I posted it that it was loose! oops!
Here are the pics as promised Geoff.
The metal frame and succuring bolts
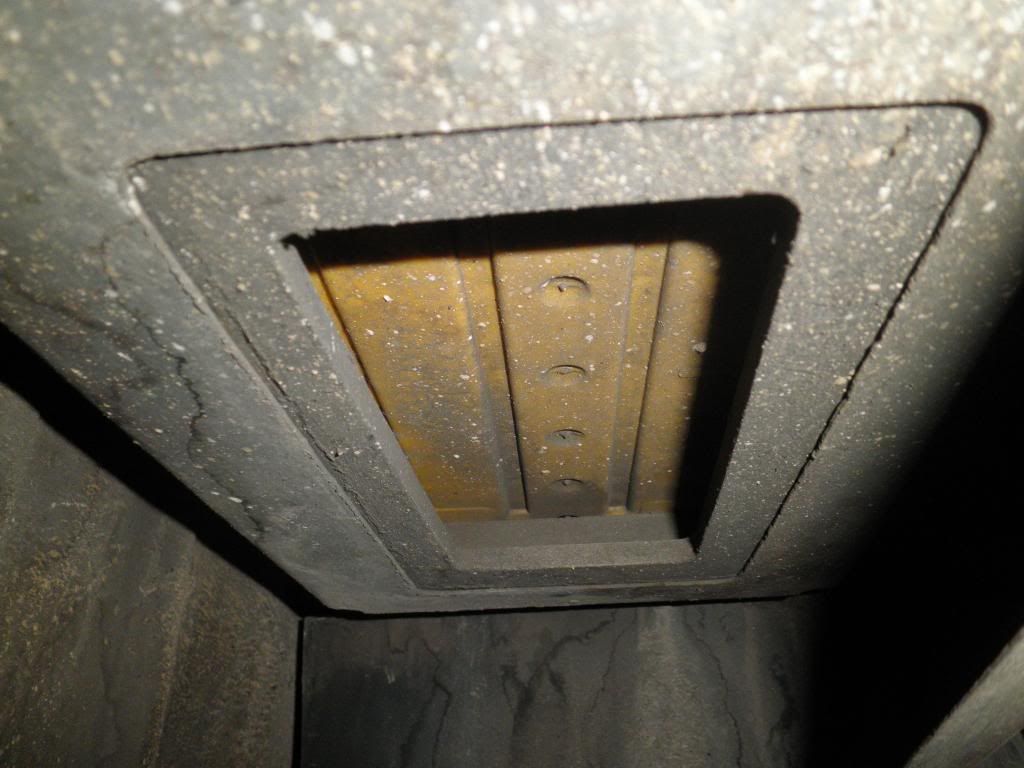
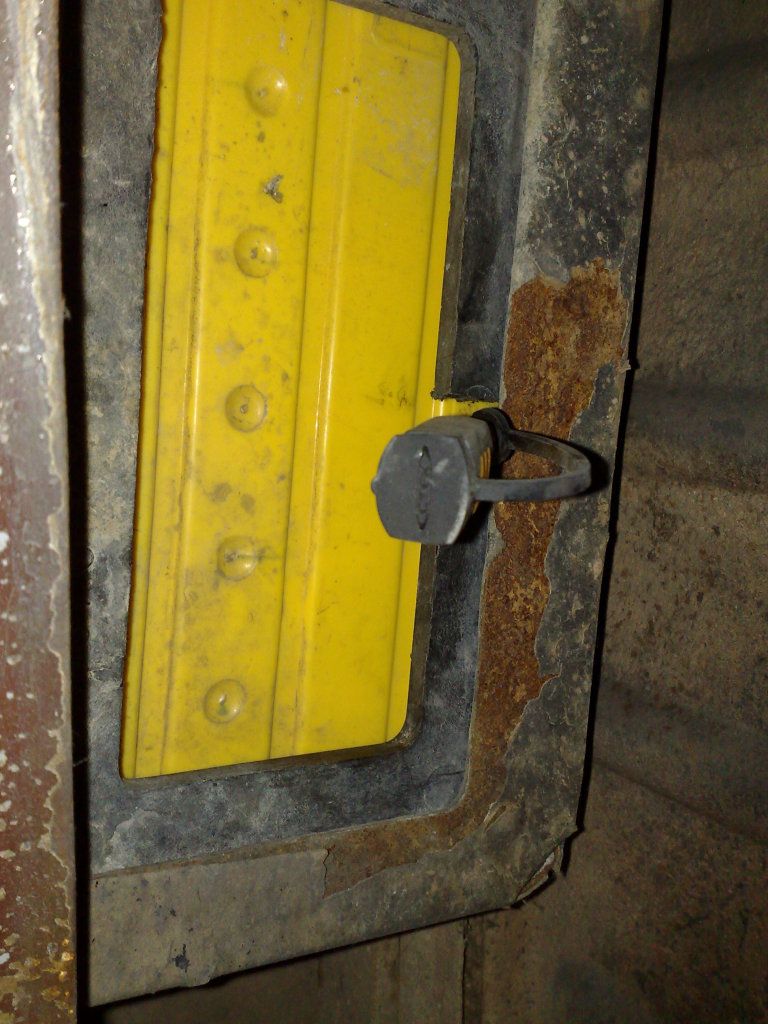
The underside of my Rover's battery.
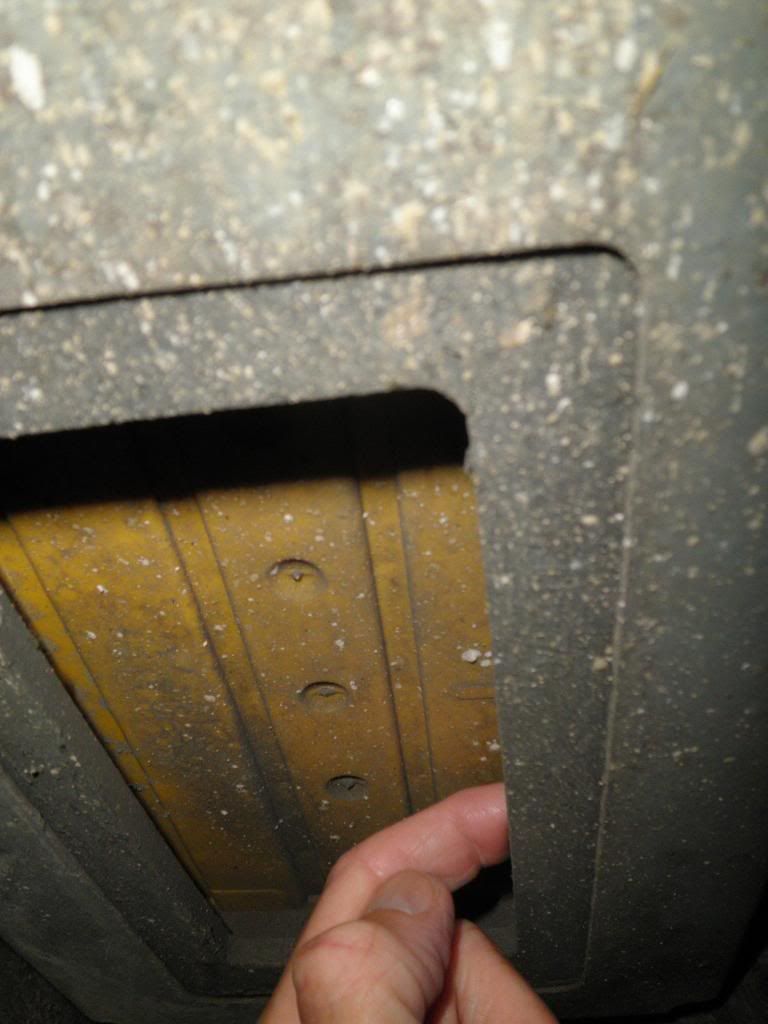
The gap between the fibrous resin insert and the battery.
Ron.
The metal frame and succuring bolts
The underside of my Rover's battery.
The gap between the fibrous resin insert and the battery.
Ron.
ewokracing
Active Member
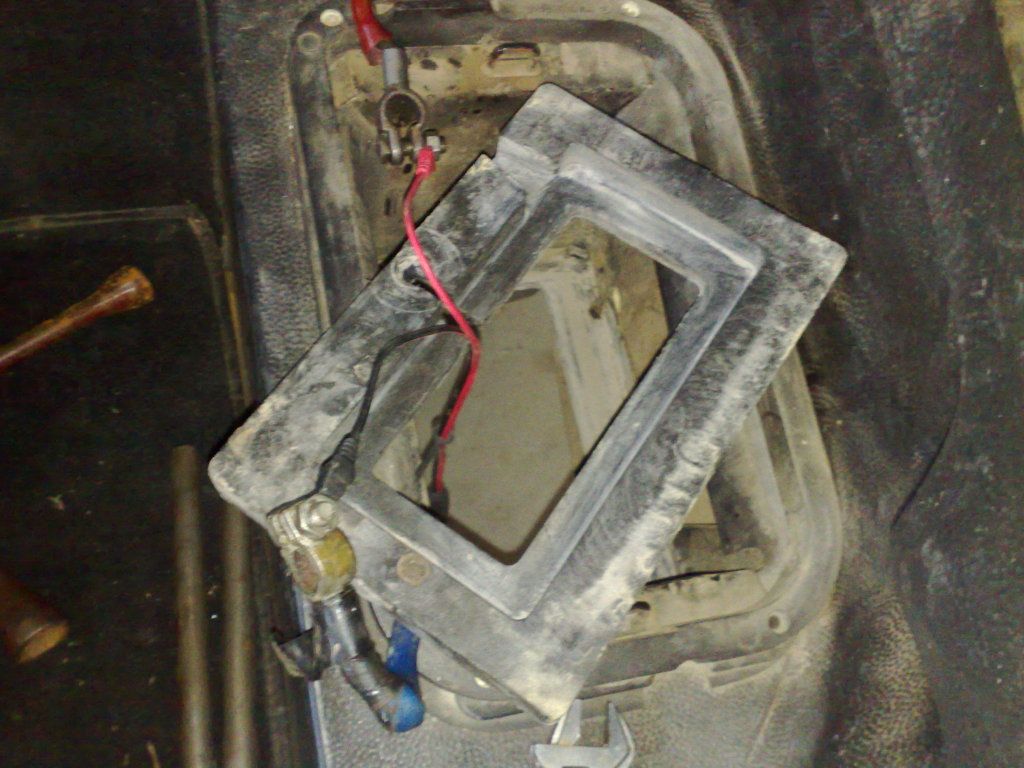
here's my battery tray. You can see where I've cut a groove for the leads.
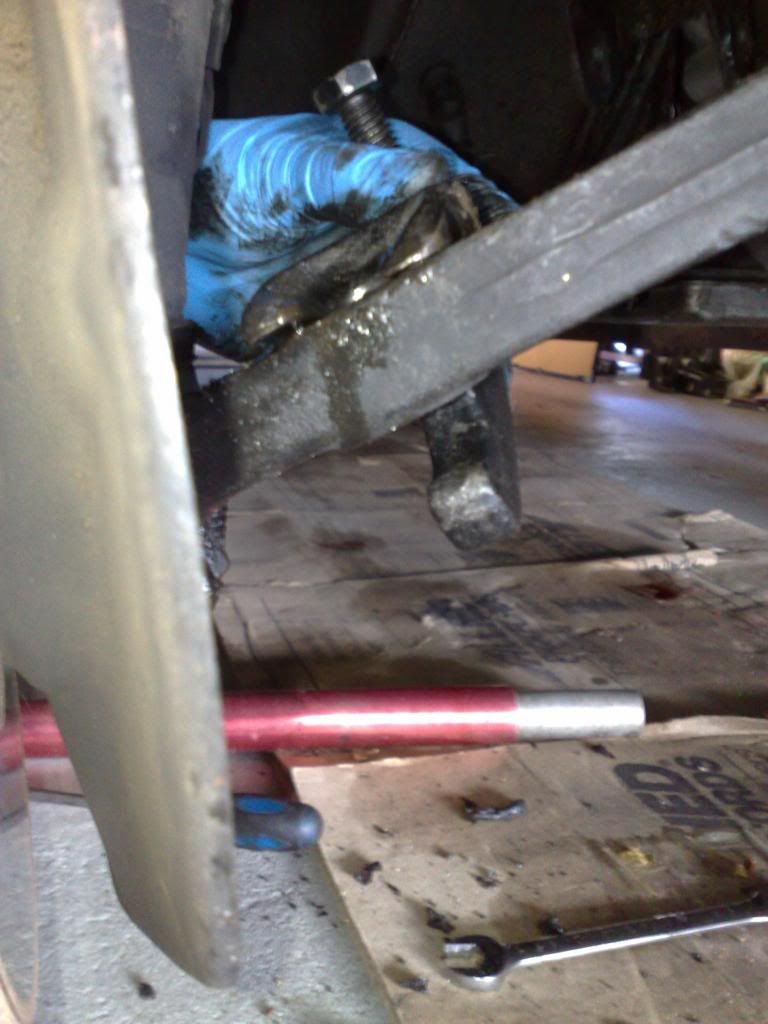
Anyhoo, front shock and bush time!
This was my way of doing it, I used part of a ball joint tool to get the pin in.
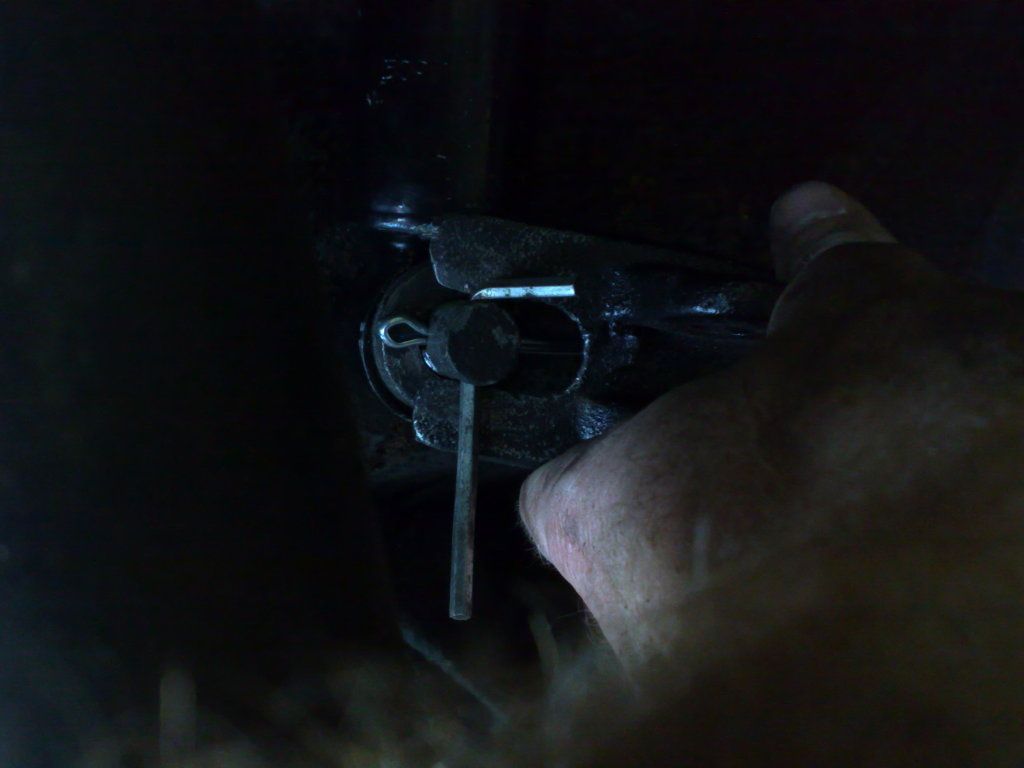
And yes, some knucklehead had used the wrong hole for one side, which explains the suspension noise over speed humps
First side took 2 hours, second side took 30 minutes.
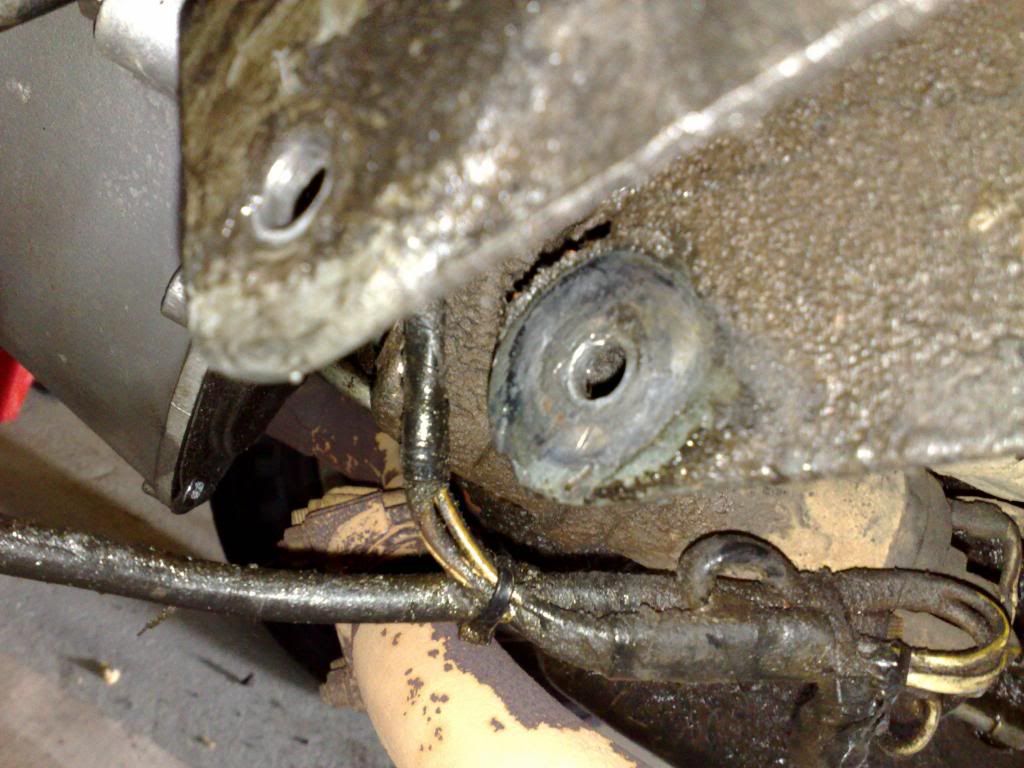
Next up will be replacing other shagged out bushes like this one
Anyhoo, front shock and bush time!
This was my way of doing it, I used part of a ball joint tool to get the pin in.
And yes, some knucklehead had used the wrong hole for one side, which explains the suspension noise over speed humps
First side took 2 hours, second side took 30 minutes.
Next up will be replacing other shagged out bushes like this one
testrider
Active Member
ewokracing said:First side took 2 hours, second side took 30 minutes.
Ain't that always the way!
Those lower front bushes should make a big difference to the car once you've replaced them. Mine failed when I was in the Alps a few years back (900miles from home) and it caused the front tyres to so scrub badly on the inside edges that I had to swap them on the the back so that I could get home.
ewokracing
Active Member
I used an allen key as I didn't have a drift or punch or steel rod that was thin enough. It did bend the allen key so use an old one lying about...
Anyone used poly bushes in the front end? I'm looking at the superflex site and I can't work out what one to order for the bushes numbered 534824 in the Rover workshop manual.
Anyone used poly bushes in the front end? I'm looking at the superflex site and I can't work out what one to order for the bushes numbered 534824 in the Rover workshop manual.
ewokracing
Active Member
Bit of a saga ahead.
Ordered bushes from SuperPro supplier here in Oz. Their supplier has stuffed them around, in turn I've been stuffed around. So basically I have one set of bushes when I ordered two sets. Decided to rip out the control arm on the drivers side anyway.
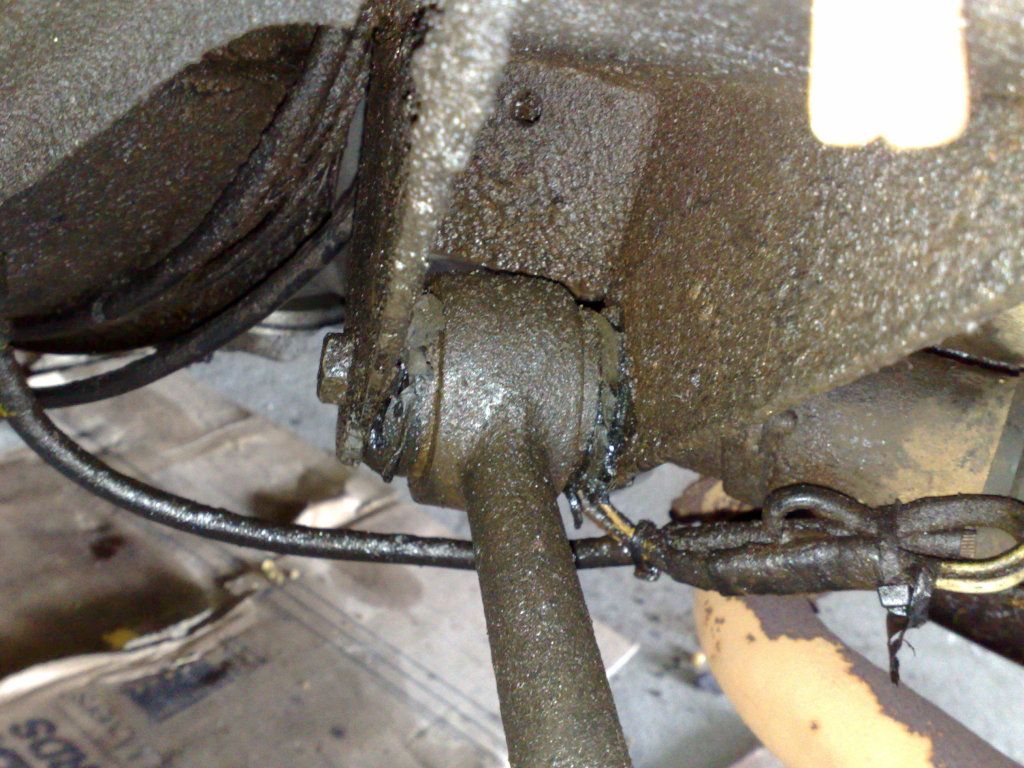
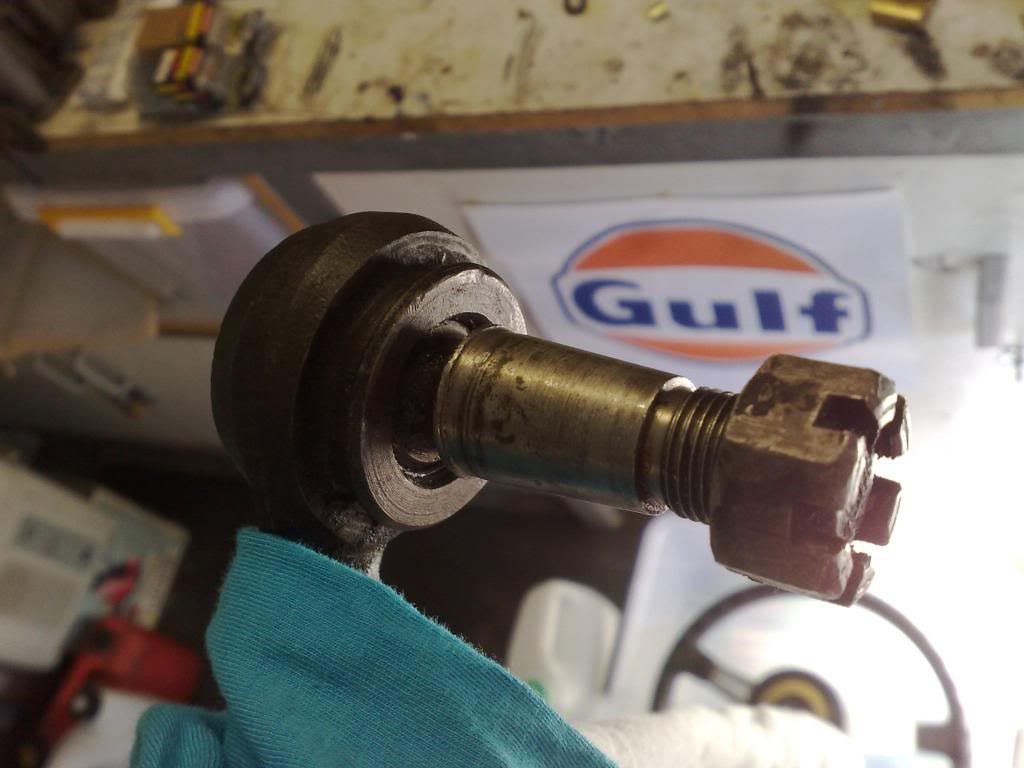
rubber boot on the ball joint was knackered
With a few things on at work, I haven't had a chance to make the ball joint tool yet, so I modded my existing ball joint tool and split the one ball joint this way
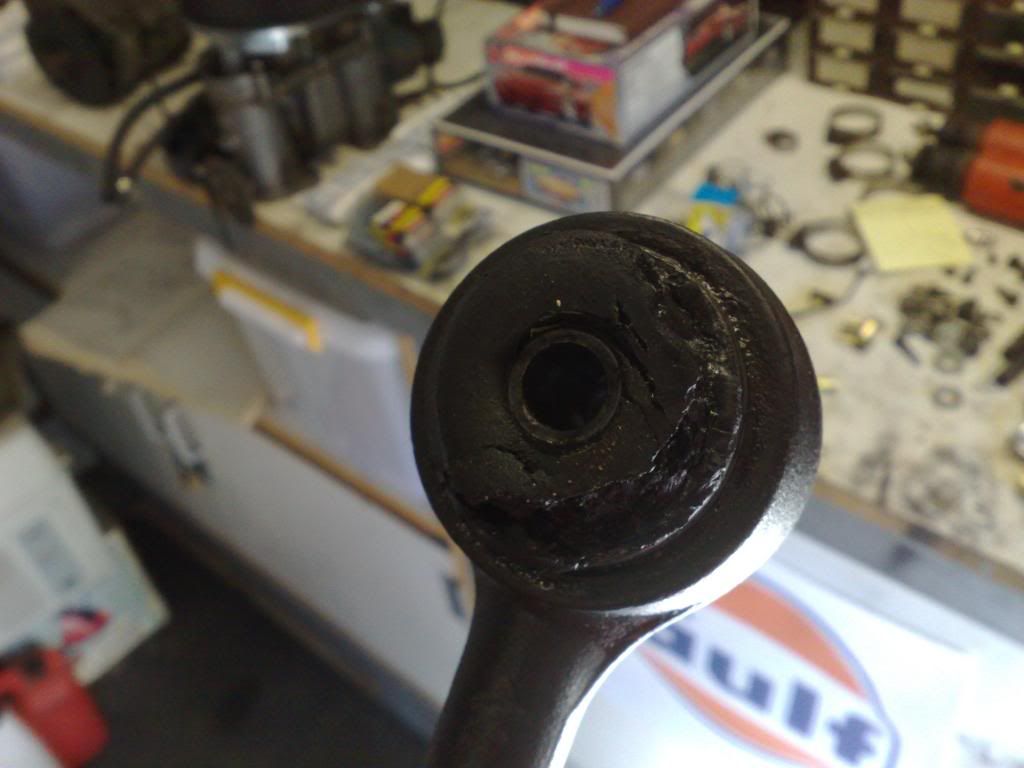
The control arm bush was completely shagged, but you can see where it was rubbing hard against the mounting points, ripping the rubber off (though being coated with engine oil didn't help either)
Dilemma.
Mine's a series II car so it has the non replaceable ball joints and the ball joint is stuffed. Do I
- go to the ball joint guy that I've heard about and see if they can replace it
- try and get two Series I control arms and have the ball joints replaced in them
- put a new rubber boot on it, refit it and just get the car through roadworthy and then think about the problem later down the track
- come up with a new custom control arm using heim joints (which won't pass roadworthy)
Ordered bushes from SuperPro supplier here in Oz. Their supplier has stuffed them around, in turn I've been stuffed around. So basically I have one set of bushes when I ordered two sets. Decided to rip out the control arm on the drivers side anyway.
rubber boot on the ball joint was knackered
With a few things on at work, I haven't had a chance to make the ball joint tool yet, so I modded my existing ball joint tool and split the one ball joint this way
The control arm bush was completely shagged, but you can see where it was rubbing hard against the mounting points, ripping the rubber off (though being coated with engine oil didn't help either)
Dilemma.
Mine's a series II car so it has the non replaceable ball joints and the ball joint is stuffed. Do I
- go to the ball joint guy that I've heard about and see if they can replace it
- try and get two Series I control arms and have the ball joints replaced in them
- put a new rubber boot on it, refit it and just get the car through roadworthy and then think about the problem later down the track
- come up with a new custom control arm using heim joints (which won't pass roadworthy)
Tor
Well-Known Member
Hi there,
My own bushes looked like that, at least the one nearest to the steering box, which had a its own little oil irrigation thing going on. If you have a pair of poly bushes, maybe they could go on one either side for the most destroyed ones you have, whether control arms or bottom links, while you wait for the remaining pair? That way you'll at least have some improvement and not throw the car's handling (further) out of balance.
From what I know the control arms are a straight swap, only the ball joint construction is different, and I would def look for S1 ones to service. If you can get your car roadworthy with the current ones and the play is minor, I know I might refit while sourcing replacements.
ewokracing
Active Member
Re: SI arms, thanks Tor, handy to know.
ewokracing
Active Member
^ re the S1 arms, I've spoken to someone here in AUs that has seen quite a few p6's, he said he's never seen a p6 with the removable balljoint control arm. Interesting.
Anyhoo. Started on the rear brake project last night. A place I thought was pretty good brake and clutch wise had the car for two months. They didn't touch it. I cracked the sads and brought it home and I'm going to tackle it myself
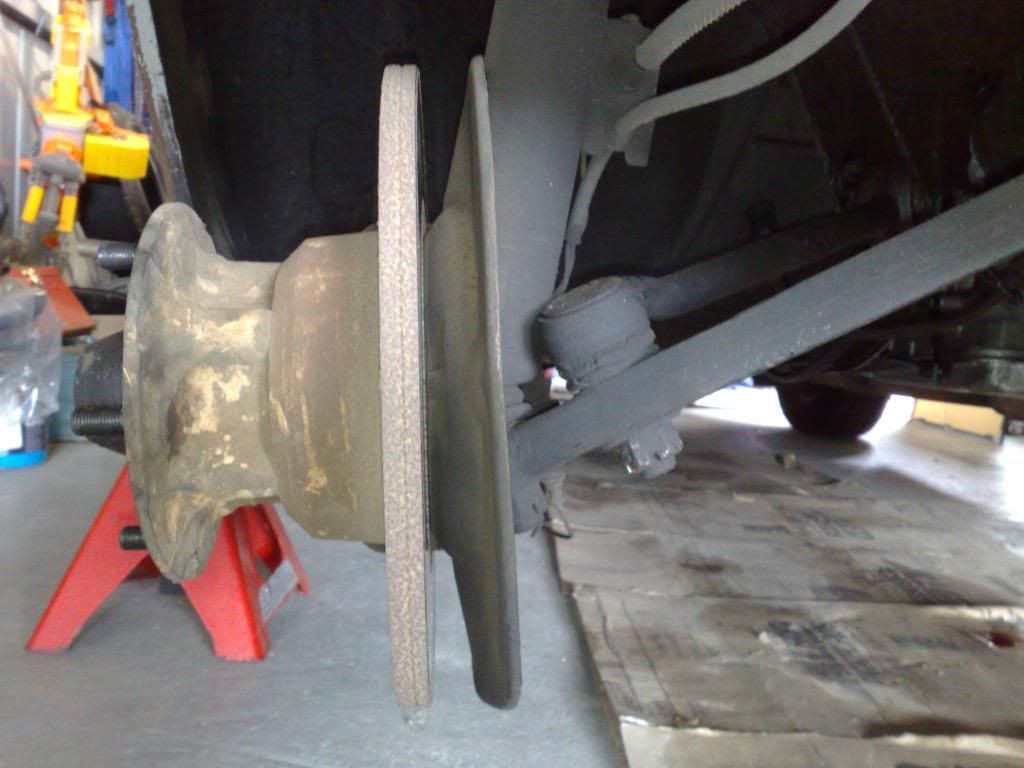
On the drivers side, everything looks fine.
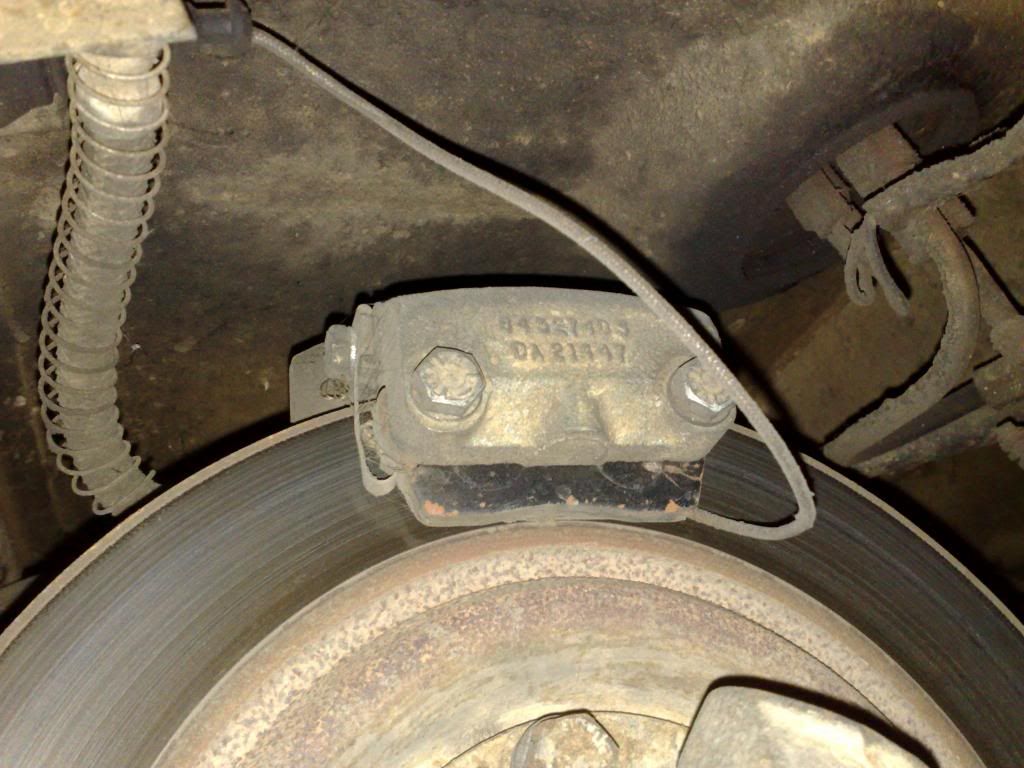
The pads even look like they are pretty close to new.

I'm going to use the "drop the diff" method, so car is jacked up, I'll also give the diff an oil change birthday and replace the flexible lines at the same time.
Because the brake fluid has soaked the pads on the passenger side, to keep things in sync, I'll probably change the drivers side pads anyway. I measured the disc thickness and both discs were 10mm thick which I think is within spec.
After the registration process I might get really enthusiastic and swap in a Jaguar Powerlok centre as a few other people have done. The other conversion I got told about was using a Valiant Galant diff.
Anyhoo. Started on the rear brake project last night. A place I thought was pretty good brake and clutch wise had the car for two months. They didn't touch it. I cracked the sads and brought it home and I'm going to tackle it myself
On the drivers side, everything looks fine.

The pads even look like they are pretty close to new.

I'm going to use the "drop the diff" method, so car is jacked up, I'll also give the diff an oil change birthday and replace the flexible lines at the same time.
Because the brake fluid has soaked the pads on the passenger side, to keep things in sync, I'll probably change the drivers side pads anyway. I measured the disc thickness and both discs were 10mm thick which I think is within spec.
After the registration process I might get really enthusiastic and swap in a Jaguar Powerlok centre as a few other people have done. The other conversion I got told about was using a Valiant Galant diff.
Hi Geoff,
The bolt locking tags are missing from beneath the half shaft-to-disk bolts. Be a good idea to source some before you do the brakes.
Don't forget to remove the bolt that retains the pinion extension case to the mount, prior to dropping the diff down.
Ron.
The bolt locking tags are missing from beneath the half shaft-to-disk bolts. Be a good idea to source some before you do the brakes.
Don't forget to remove the bolt that retains the pinion extension case to the mount, prior to dropping the diff down.
Ron.
ewokracing
Active Member
SydneyRoverP6B said:Hi Geoff,
The bolt locking tags are missing from beneath the half shaft-to-disk bolts. Be a good idea to source some before you do the brakes.
Don't forget to remove the bolt that retains the pinion extension case to the mount, prior to dropping the diff down.
Ron.
This is why I have you and Al on speed dial
Dave said:Definitely change the pads on both sides , that's important for balanced braking
yeah, good thinking.