My 2000TC 'Minstrel' needs a lot of TLC..

Hi Guy.
Sorry you can't see the pics. Here's a link to follow so you can hopefully see them. I have put pics back to where I put the scraper seals in the door. These are, I think, the photos you cannot see. If you cannot see any send me your email address and I'll email you a link to my Photobucket. Things going well with Minstrel at the moment. I managed to weld the centre part of the n/s sill yesterday below the doors. Will be adding photos later when I finish it today.
Cheers.....Steve
Rover 2000TC P6 Repairs by Restivo57
 
Hi guys.
I'm very pleased to say all 4 door scrapers were replaced without much bother. Had to do some corrosion repairs to the window frames on both rear doors. The seals are in place and doing the job nicely.
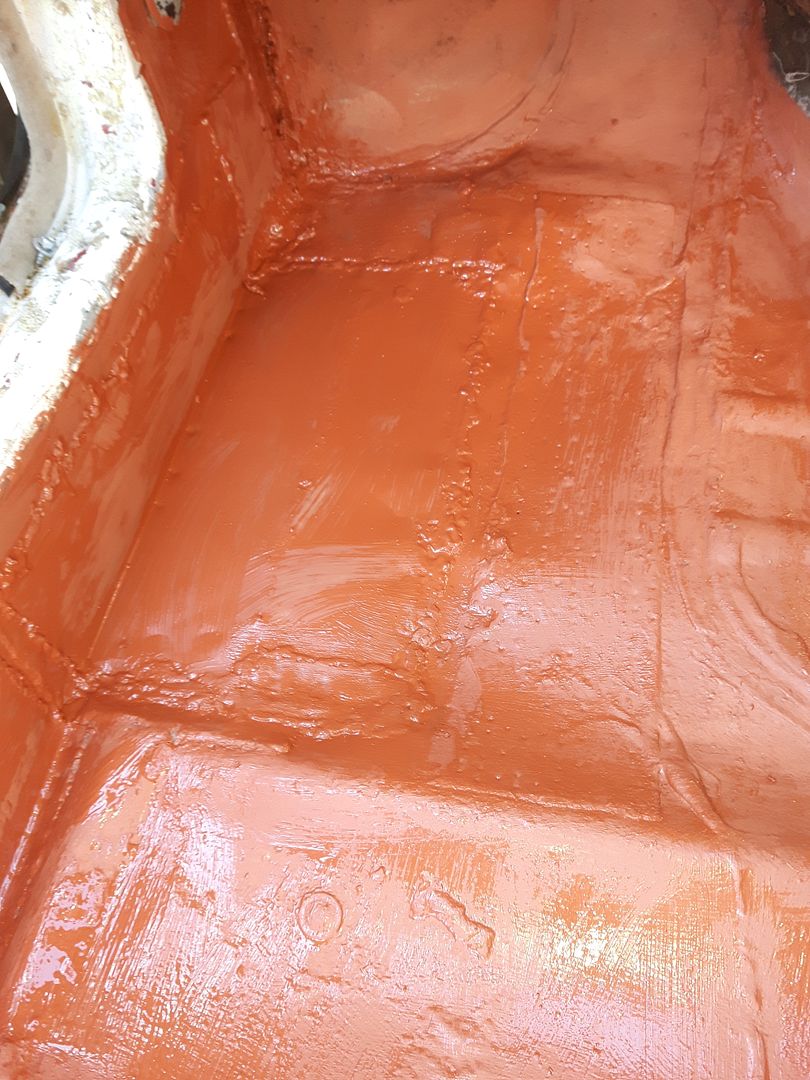
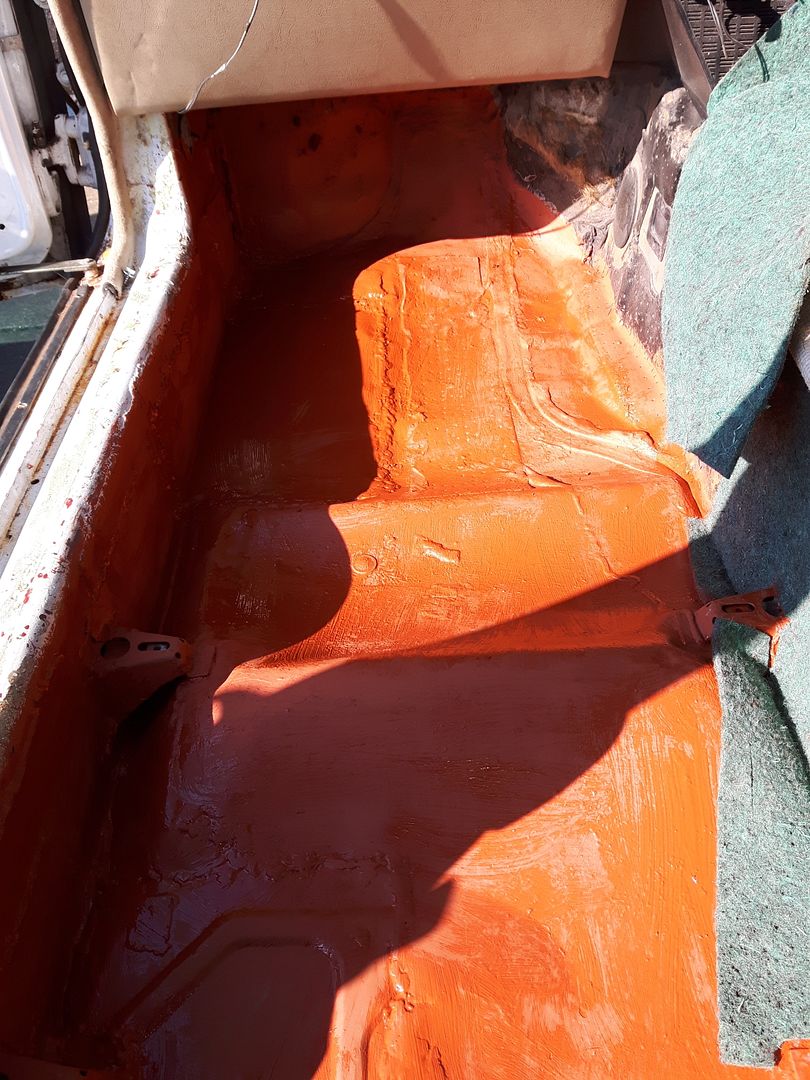
Very, very pleased with progress these last 3 or 4 days. As the weather has been great this week I have managed to basically get all the new n/s/f floor finished. The n/s interior is now completed and just waiting to have the sound-proofing and carpets replaced.


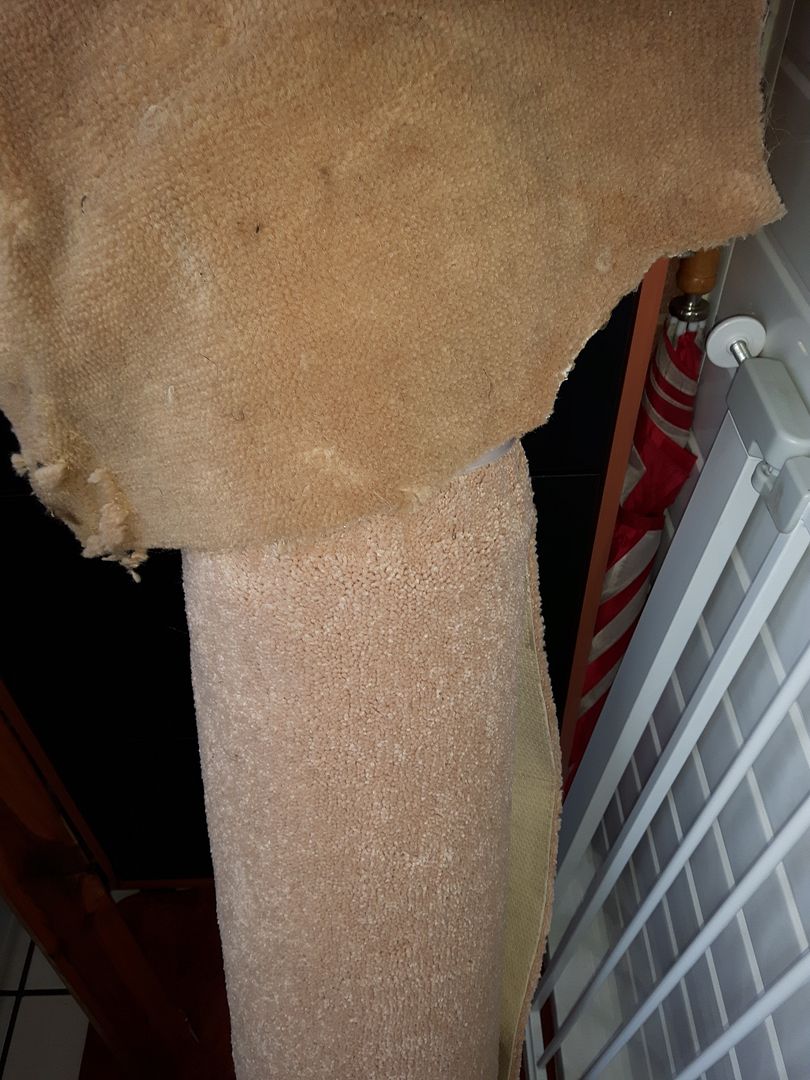
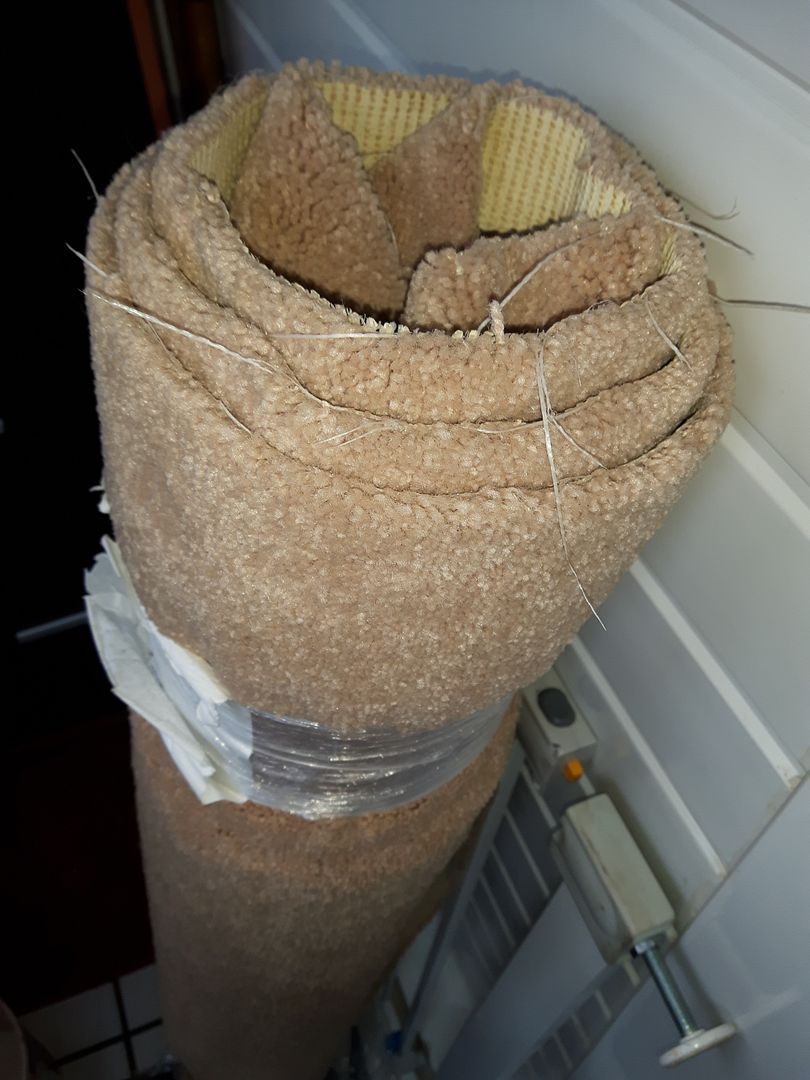
As luck would have it, I managed to pick up a small roll of carpet about 4ft x 8ft for £10 that is a just bit lighter than colour as was in the car. Unfortunately in removing some of the carpet to repair the floor and sill some of the original carpet was damaged. So I am going to use what I can of the original carpet on the sills to floor and seat to floor and use this new roll to cover the floor area with.


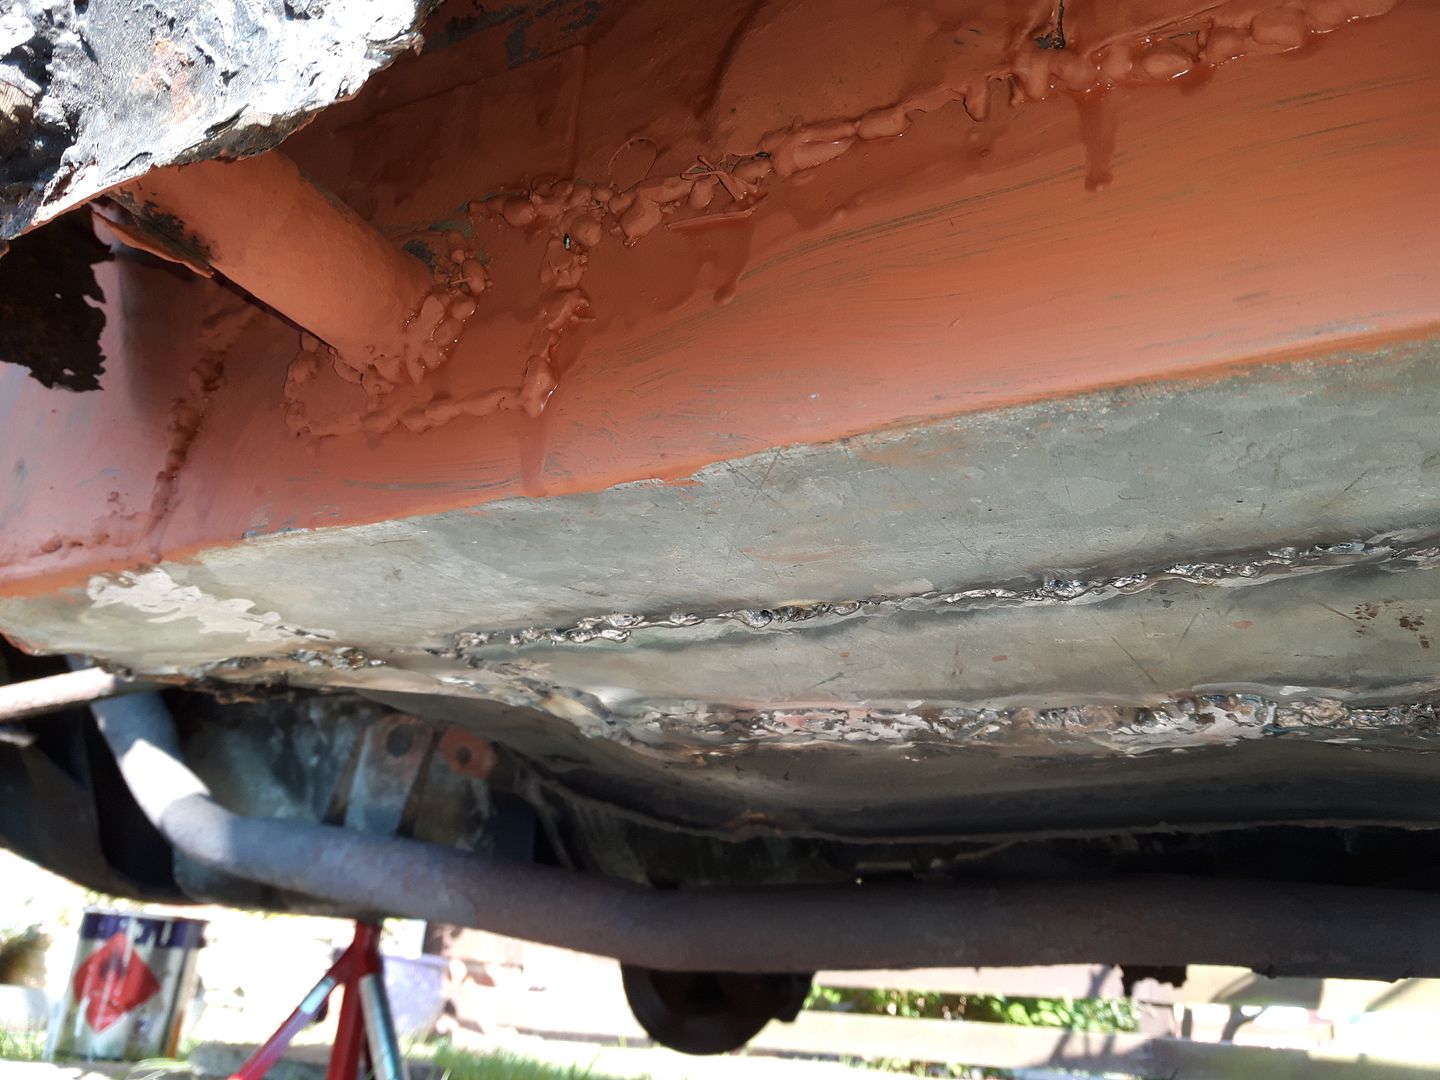
I have finished the inner and outer sill on the n/s/r and under the centre door post. I replaced and strengthened up the floor, sill to floor, front seat mounting points and the chassis with new plating all the way along the n/s from front to rear.


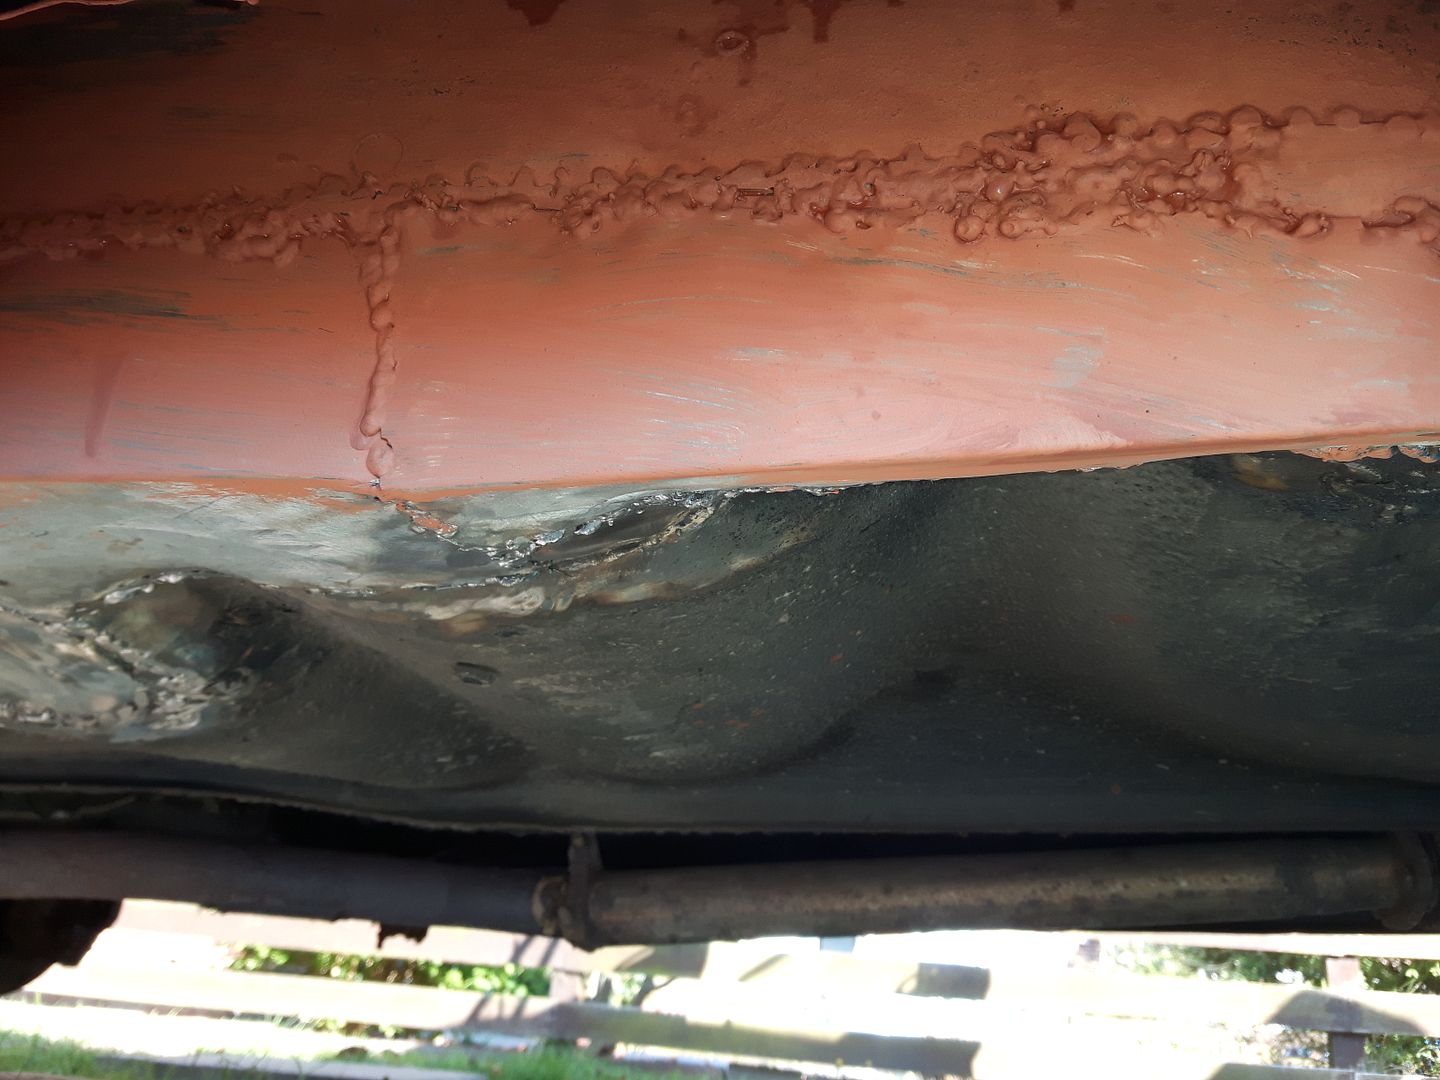
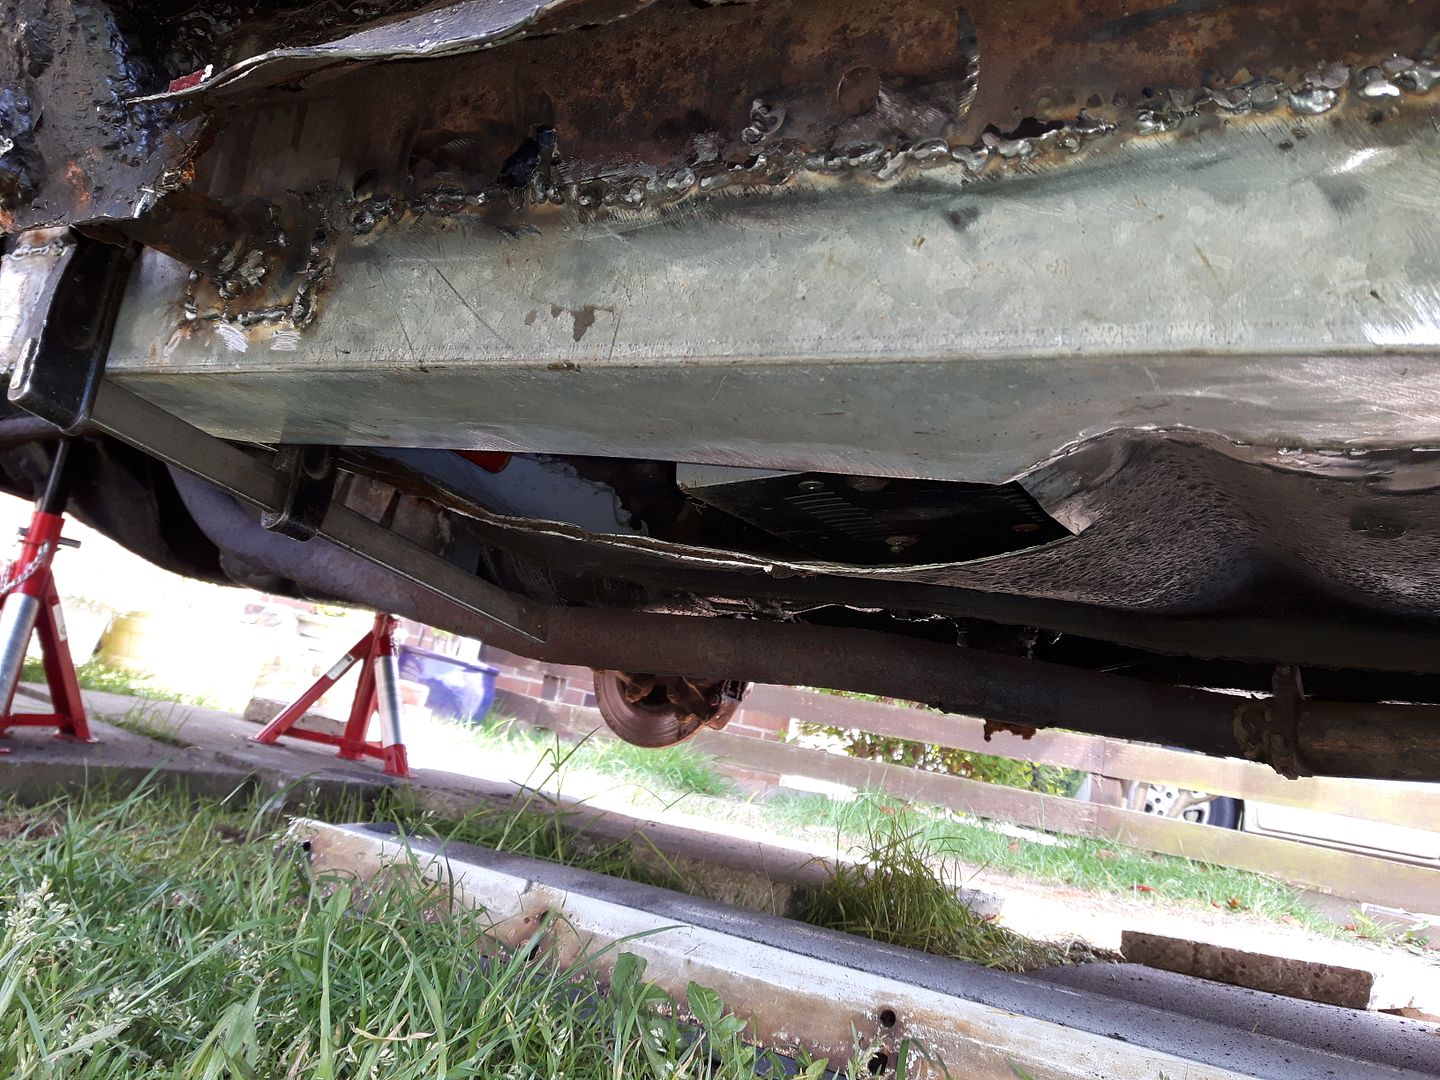
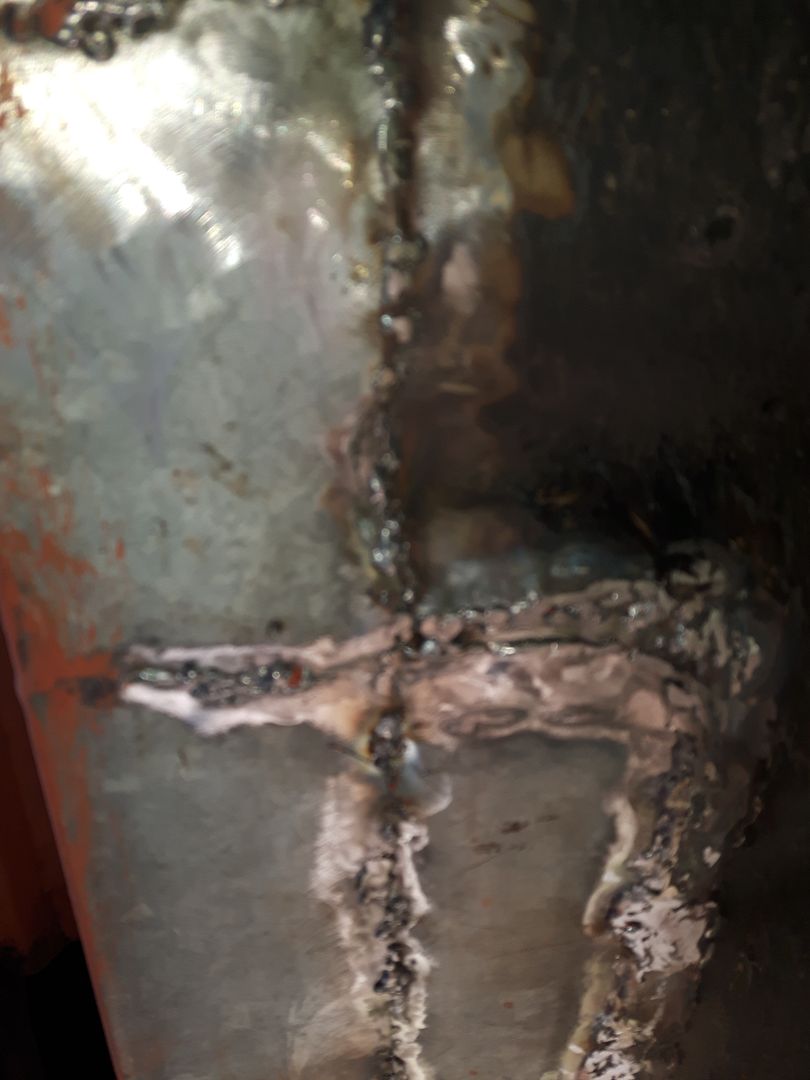
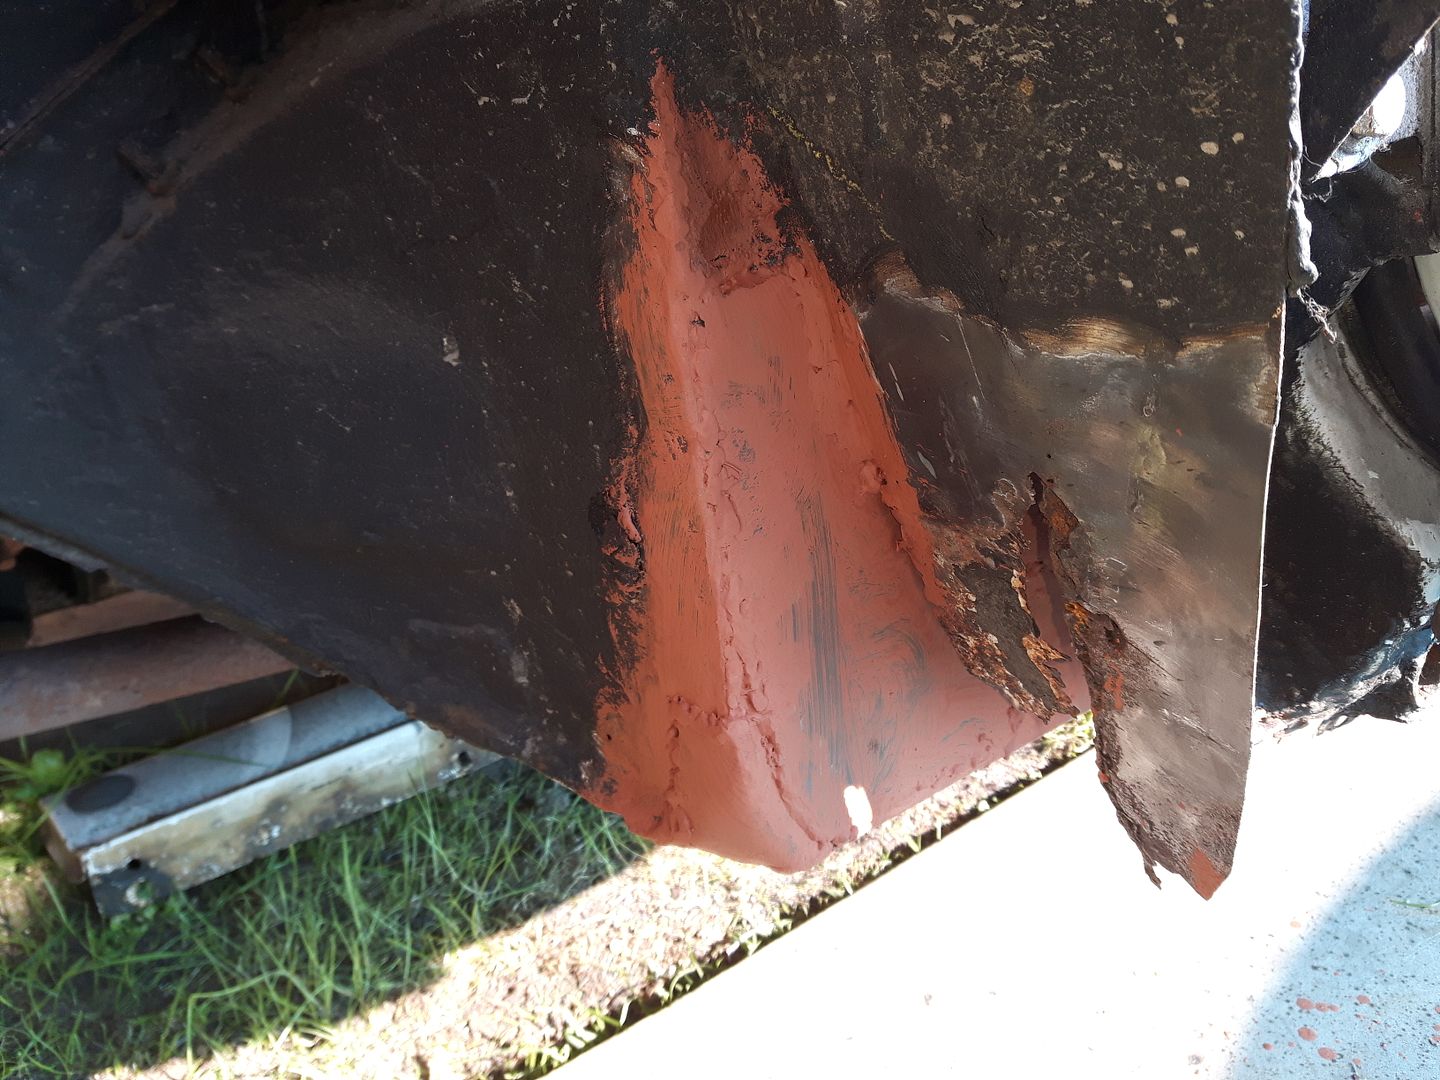
I have replaced the outer sill in 3 parts 1, not in 1 length as I had originally hoped to do. (1) From the r/n/s wheel arch to the centre door post. (2) The centre door post. (3) Centre door post to f/n/s wheel arch. I just have the outer sill on the n/s front wheel arch to centre door post to weld on. I have replaced the lower right hand side back wall of the front wheel arch with a 2mm plate in the shape of an offset triangle would be the best way to describe it and also the wheel arch end to sill has been renewed.


I also strengthened the f/n/s jacking point. Unlike the r/n/s jacking point, the front one did not need replacing.


All I have left to do on the near side now is finish welding the outer sill on and patch about 5 or 6 small holes on the inner wing behind the headlight and on the inner wing under the bonnet. The wing itself needs very little doing to it other than a bloody good clean and polish. So when I finish those little bits next week it will be on to the off side where I hope the corrosion is not as bad as the near side! (I live in hope.......Lol)
 
Hi all.
As I don't do any welding or grinding at weekends I thought I would make a start on the front wings. I took the n/s/f wing off the week before last to check for rust corrosion in the inner wing and behind the headlights and also to give me better access to repair the wheel to sill end. Unfortunately there are 4 or 5 areas where there are some small holes.
As it was a cold day here yesterday I took that wing into my conservatory, removed the sidelight/indicator and then went and found my rubbing down compound, wax & wash and wax polish. The sidelight/indicator needed a good clean and also as the cross heads were knackered on a couple of the lens holding screws, I had to drill them out. I used a 2mm drill rather than one the same size as the heads. I drilled to just below the head then using a small flat head screwdriver managed to break and remove the screw heads so the lens would come off. I then used a pair of mole grips to remove the shanks of the screws. After washing and cleaning the lens I gave the wing a good rub down with the compound first (Farecla 500) and the washed the wing. Then cleaned any rust patches and filled some small rust holes with P38. Pleased to say the n/s wing is in very good condition with very little rust. After the filler was set I waxed the wing. I will be sanding down the filled parts when I have the paint to respray both wings. Sorry to say I never took any photos of the n/s wing either before working on it or after. I was very pleased with the finish I got after waxing and polishing.
This morning I took the o/s/f wing off and after poking the inner wing with a small cross pien hammer only found a couple of small holes. So not as bad as the n/s. Taking the wing into my workshop, I first removed the sidelight/indicator lens. Fortunately all the lens holding screws were ok. I did have a problem with the self tapping screw that hold the unit to the wing. All of them were rusted and 2 of them weren't even holding in the wing! Having removed that unit I could have a good look at the wing itself. All around the sidelight/indicator was really bubbled up with rust. I got my small sanding mouse and my power file plugged in and proceeded to sand off all the rust bubbles. This wing is in terrible shape in comparison to the n/s wing. I am going to have to rebuild, the front of the wing where the sidelight fits, the lower front of the wing and also the bottom right hand side where it bolts to the bottom right of the wheel arch. The left hand side that bolts to the sill need repairing as well. I have had to make 4 new bolting brackets as the 2 lower ones on the n/s wing and the same 2 on the o/s wing were totally knackered. I have added some photos of the o/s wing that I took after I had cleaned the rust off.


Tomorrow it's back to the welding, weather permitting. All being well I should finish off all the welding on the n/s!
Thanks for reading........Steve :)
Quick update:
The above photos of the o/s wing can be ignored as it's many thanks to Mel (who sold me the car) for bringing the spare o/s front wing over as promised. It was a lot easier to repair than the one that was on the car, although a different colour white! I shall be updating the photos of the repairing of the wings when I have sorted them out. The n/s wing needed very little done to other than making new mounting brackets and a good clean and polish so there won't be photos for it. The o/s wing also needs the decals attached which I have here ready to put on today. In the meantime here are the 2 wings ready to go back on the ready for respraying sometime in the near future:
http://i1161.photobucket.com/albums/q508/Restivo57/Rover P6 2000TC/Rover 2000TC P6 Repairs/20160625_004529.jpg
(p.s. I may carry on repairing the original o/s wing at sometime as it will give me a spare.)
 
Last edited:
Good evening all.
I have now finished the n/e interior and sill completely. Today after doing the last bit of welding on the n/s sill I undersealed the underside and painted the n/s interior. I know some of you won't like what I used to paint the interior n/s. I had some part full tins of deck paint (ship's metal deck, not wooden deck) and after I mixed together what I had it turned out nearly turquoise. It is doing what I want it to. It won't been seen as it will be under the soundproofing and carpets.


I also cleaned up the n/s sill cover today. I cleaned all the rust bubbles that were on the side that bolts under the car. I repaired where a couple of the bolt holes had rusted away. I then primed it and undersealed the bottom edge.
Still cleaning and repairing the o/s/f wing. going to have to do a bit of welding on it to repair the front of it where the sidelight fits and the bottom front edge. More on that later.
Glad to say things going well on The Minstrel and looking good for my September on the road date.
Thanks for reading....Steve :)
 
Hi fellow Roverites.
Sorry to say I have been a bit lax in updating my progress report in the 5 weeks or so. I have completed all the welding work on the near side and have been doing other bits to the wings and sill covers. Later this week I will do a complete progress update with photos. Just wish to say a big thank you to Willy Ekerslyke (David) for his most grateful contribution of a windscreen lower support bar and fittings and his help regarding my engine. Also wish a big thanks to Kevin and Pilkie for their support and help. More to follow in a couple of days. Thanks again to everyone for their much needed help and input.
Let's keep the great British cars on the road!!
Steve
 
Good evening, all.
Thought it was about time I gave an updated progress report. Firstly, as I said last week, a very big thank you to David for the windscreen lower channel which I cleaned and fitted week over the weekend. I cleaned off any rust and painted it with rust killer then resprayed it black. I resprayed the fixing clamps silver and am now ready to fit the scuttle panel back which has been cleaned and polished. (photos to follow)

Part 1 of 2 reports:

While we had some good weather about 4 weeks ago I took the opportunity to lay some paving slabs on my front lawn to park The Minstrel on rather than have it sitting on the grass and eventually settling in ruts when the lawn was wet during the Autumn and Winter:
http://i1161.photobucket.com/albums/q508/Restivo57/Rover P6 2000TC/Rover 2000TC P6 Repairs/20160522_200614.jpg
http://i1161.photobucket.com/albums/q508/Restivo57/Rover P6 2000TC/Rover 2000TC P6 Repairs/20160601_215441.jpg

We had a couple of days of bad weather recently so as I couldn't get out to weld I thought I would clean up the front bumper panel. First I cleaned all the crap from the road off and got rid of the minor rust with rust killer. I undersealed the back of the panel after cleaning it up with a wire brush on a drill. After that was dry I started on the front. I sprayed the grill black. The bumper support holes I cleaned up and gave them a couple of coats of white enamel paint. This won't be seen as it is behind the rubber gaiters that go over the metal bumper support bars which I cleaned up and sprayed black. The 2 holes on the bottom of the panel (I still don't know why they are there!) I also gave them a clean with Rust Killer and a coat of enamel where the rust was:
http://i1161.photobucket.com/albums/q508/Restivo57/Rover P6 2000TC/Rover 2000TC P6 Repairs/20160629_101837.jpg
http://i1161.photobucket.com/albums/q508/Restivo57/Rover P6 2000TC/Rover 2000TC P6 Repairs/20160602_155625.jpg
http://i1161.photobucket.com/albums/q508/Restivo57/Rover P6 2000TC/Rover 2000TC P6 Repairs/20160602_155738.jpg
http://i1161.photobucket.com/albums/q508/Restivo57/Rover P6 2000TC/Rover 2000TC P6 Repairs/20160525_160508.jpg
http://i1161.photobucket.com/albums/q508/Restivo57/Rover P6 2000TC/Rover 2000TC P6 Repairs/IMG-20160526-WA0001.jpeg
http://i1161.photobucket.com/albums/q508/Restivo57/Rover P6 2000TC/Rover 2000TC P6 Repairs/20160525_160537_1.jpg

I cleaned and polished the front bumper and also cut out some new plastic door panel covers to go between the door and door cards:
http://i1161.photobucket.com/albums/q508/Restivo57/Rover P6 2000TC/Rover 2000TC P6 Repairs/20160522_200614.jpg
http://i1161.photobucket.com/albums/q508/Restivo57/Rover P6 2000TC/Rover 2000TC P6 Repairs/20160601_215441.jpg

I have also sprayed the sill covers with black Shutz Stone Chip after giving them a good anti-rust and coat of primer: http://i1161.photobucket.com/albums/q508/Restivo57/Rover P6 2000TC/Rover 2000TC P6 Repairs/20160617_135157.jpg

Getting back to the n/s front wing area which I have done over the last 3 or 4 weeks. This includes all of the following: both n/s and o/s inner wheel arch, the casing behind headlights, bumper support chassis, sill end cap and upper front wings underneath the bonnet. I cut out all the bad metal from the aforementioned areas, then cleaned and prepped it for new plating. I replated the sill end cap and the front of the wing behind the wing panel where the front of the wing bolts on with 2mm plating and the rest was replated with 1mm mild steel::
http://i1161.photobucket.com/albums/q508/Restivo57/Rover P6 2000TC/Rover 2000TC P6 Repairs/20160523_171622.jpg
http://i1161.photobucket.com/albums/q508/Restivo57/Rover P6 2000TC/Rover 2000TC P6 Repairs/20160523_171637.jpg
http://i1161.photobucket.com/albums/q508/Restivo57/Rover P6 2000TC/Rover 2000TC P6 Repairs/20160524_175619.jpg
http://i1161.photobucket.com/albums/q508/Restivo57/Rover P6 2000TC/Rover 2000TC P6 Repairs/20160524_175646.jpg
http://i1161.photobucket.com/albums/q508/Restivo57/Rover P6 2000TC/Rover 2000TC P6 Repairs/20160617_193406.jpg
http://i1161.photobucket.com/albums/q508/Restivo57/Rover P6 2000TC/Rover 2000TC P6 Repairs/20160609_180133.jpg
http://i1161.photobucket.com/albums/q508/Restivo57/Rover P6 2000TC/Rover 2000TC P6 Repairs/20160608_162701.jpg
http://i1161.photobucket.com/albums/q508/Restivo57/Rover P6 2000TC/Rover 2000TC P6 Repairs/20160609_140201.jpg
http://i1161.photobucket.com/albums/q508/Restivo57/Rover P6 2000TC/Rover 2000TC P6 Repairs/20160609_133222.jpg
http://i1161.photobucket.com/albums/q508/Restivo57/Rover P6 2000TC/Rover 2000TC P6 Repairs/20160609_140240.jpg
http://i1161.photobucket.com/albums/q508/Restivo57/Rover P6 2000TC/Rover 2000TC P6 Repairs/20160609_140230.jpg
 
Last edited:
That's some major work you're doing there Steve, keep up the good work :) Love the plate.

If you want your pictures to appear on the forum, just click in the box next to where it says, "IMG" - starts with [ U R L = h t t p etc without the gaps. Then just press ctrl and v to paste it into the thread.

This happens

[/QUOTE

Hi Quattro
Many thanks for the info. I'll certainly do that. I'll be glad when all the welding is finished and I won't have to worry about the weather! Thanks again, m8.....Steve :)
 
Part 2 of 2 reports.
The next job was to repair the o/s inner front wing underneath the bonnet. The n/s wasn't nearly as bad and only needed a small patch repairing. I had to remove the bonnet to get to a really bad patch beneath the bonnet hinge on the o/s. When I was cleaning the inner wing from hinge to front I was really surprised with what I found??:
http://i1161.photobucket.com/albums/q508/Restivo57/Rover P6 2000TC/Rover 2000TC P6 Repairs/20160606_131941.jpg

The wing had previously been repaired with strips of fibreglass that were only stuck on with the paint that was painted over it! I cleaned the rust out, ground the edges and replated with new plating. Then primed it and repainted it black:
http://i1161.photobucket.com/albums/q508/Restivo57/Rover P6 2000TC/Rover 2000TC P6 Repairs/20160606_171520.jpg
http://i1161.photobucket.com/albums/q508/Restivo57/Rover P6 2000TC/Rover 2000TC P6 Repairs/20160607_174741.jpg

The patch beneath the hinge was a little tricky as I didn't want to affect the hinge retaining holes:
http://i1161.photobucket.com/albums/q508/Restivo57/Rover P6 2000TC/Rover 2000TC P6 Repairs/20160524_175627.jpg
http://i1161.photobucket.com/albums/q508/Restivo57/Rover P6 2000TC/Rover 2000TC P6 Repairs/20160624_174200.jpg
http://i1161.photobucket.com/albums/q508/Restivo57/Rover P6 2000TC/Rover 2000TC P6 Repairs/20160624_174235.jpg

Last week I started on driver's footwell. What at first didn't look very much ended up being nearly as much as the near side front footwell!:
http://i1161.photobucket.com/albums/q508/Restivo57/Rover P6 2000TC/Rover 2000TC P6 Repairs/20160628_152958.jpg
http://i1161.photobucket.com/albums/q508/Restivo57/Rover P6 2000TC/Rover 2000TC P6 Repairs/20160628_153007.jpg

Yesterday I finished the replating the footwell, sill to floor from centre door post to front and restrengthened the driver's seat mountings but not taken photos yet. Today I cleaned and replated the area between the front o/s sill end cap and door. I replated and rebuilt the o/s/f jacking point. Again not taken photos. I will add them tomorrow. Over the next few days I should finish replating the centre post to sill end cap inner sill plating and the outer sill. I was hoping to get away with replacing the outer sill on the o/s but after seeing a small rust hole near the front of the sill I started poking the sill with a chipping hammer and ended up with a rust eaten hole about 6" long and about 1" wide. So that has to be replaced. I will probably end up replating the whole o/s sill as I am going to know the metal is good and strong afterwards.

My son Shane has very gratefully cleaned and resprayed the rocker box cover Anthracite Grey for me. I think he has made a brilliant job of it. Tell me what you think of it, please?: http://i1161.photobucket.com/albums/q508/Restivo57/Rover P6 2000TC/Rover 2000TC P6 Repairs/20160629_101837.jpg

I promise not to leave the next update so long. This is tiring typing all this out in one go!
More to follow soon.
Cheers and keep the Brit Classics on the road!
Steve :)
 
Well, you're obviously not kidding around. Good work!

Love the job Shane did on the rocker box, the 2000 rocker box is really pretty and it looks smashing in this grey. :)
 
Thanks Thijs.
I didn't fully realise how big a job this would be when I got the car. I was warned the welding was not for the faint-hearted, but I totally underestimated how much welding there really was to do! Thankfully I can now see a light at the end of the tunnel and am on the downward slope now. Get that finished I can then sort out the fiddly bits like servicing the engine and renewing the brake pads. Lol........Steve :)
 
Got to change engine description as The Minstrel was changed to a 2000SC before I had her and I am not going to be able to afford to change her back to a 2000TC anything like in the near future. So she is now The Minstrel (2000SC). Getting back to the project. I actually got out to do a few bits on Minstrel over the last week or so! I am not certain if I have said before that 3 of the 4 doors were not hanging right and wouldn't shut with a proper watertight seal. I recently found out this was because prior to me having it the car had at some time been lifted at the front jacking points after they had gone rotten. And consequently the weight of the engine and front of the car had dropped pulling the posts out of line. The front doors were especially affected by this as they had both dropped to the stage where adjusting the hinges up or down while on the car were no longer a viable option. First I took off the front passenger door. I took it down my workshop to do the work. I had to use an impact punch to remove the 6 bolts holding the the hinge plates to the door. I buggered the heads up on 3 of them! Once these were removed I found there were 2 x 1mm spacers behind each hinge plate. I cleaned these and the hinge plates up before replacing them. However, I did not replace them as they had come off. as I needed to basically make the door come up on the handle side I put 3 spacers on the bottom hinge using a little copper slip between them and none on the top. I took the door back to the car and fitted it. I had to adjust the 2 hinge pins to get the right height, etc. The door fitted lovely. It had moved back to where it should have been and closed with the mere gentle push rather than a very hard shove! I did notice that the door seal wasn't sealing at the top of the window frame due to it being flattened over time and so I knew it would still let water in. I had a long coil of 6mm clear plastic piping (God knows where I got that from!) and ran it all around the inside of the door seal. The door now fits with a perfect seal again! For the driver's door I basically done exactly the same (including buggering up 4 of the bolts with the impact punch!). Only this time there were only 3 spacers to start with on the door....2 top and 1 bottom. I cleaned the hinge plates and spacers and just replaced only 2 of the spacers. These I put on the bottom and none on the top. Fitted the door back on the car and adjusted the hinge pins accordingly. Again, job was a good 'un! Same as the n/s, the window frame wasn't making a very good seal so I done the same with that door as I had on the n/s front door. The rear doors weren't to badly out of line but the door seals were again flattened. I still had some piping left and ran that inside both rear door seals. Since I have done this we have had some pretty torrential rain on a couple of different days and I am pleased to say that I have found no water inside the car since apply the piping!

The Minstrel has been a problem to start to start since I got her, but last week capped it off. I went out Friday morning to start her as I needed to move her to put some more paving slabs down. Turned the key and got.....nothing! Dead bloody battery, even though it has been disconnected! Charged it up overnight. Put it back in Saturday afternoon. Turned the ignition and still no joy. Wasn't even firing. I first assumed no petrol and then thought I will take another direction first. So I first took the rotor arm off and cleaned it. Then tried again. She started after a few turns of the key. She started and spluttered for about 2 mins then said sod this and died! So I had a look at the carb. It was a bit damp underneath but whether that was to do with my current problem or if it was already like it, I don't know. I unscrewed the plunger out of the pot only to find out there was no oil in it and it was covered in something that can only be described as gungy milk! So I took the pot off and found the whole thing was black and full of bits of carbon inside including the piston and spring. I took it down my workshop. I blew all the carbon and crap out with my compressor on a lower setting and cleaned the whole thing up including the spring with some carb cleaner (never undone the needle as I didn't want to disturb the setting!). I put the pot and piston back on the carb in the engine. Then I took the plugs out 1 at a time. Everyone was black as soot! Obviously running very rich. So I cleaned them up and put them back for now. Going to give her a full service in the few weeks. I got in, turned the key........started after second turn! She was running very lumpy after the she came off choke. She was running at about 1050 - 1100 rpm. I thought that was bit high so I adjusted the idle mixture and the throttle screw. Now got her running at about 750 - 800 rpm. Running much better than before but really does need a full service. Possibly needs timing looking at as well.

About 3 weeks ago I started replacing the floor in the driver's footwell and also behind the front o/s sill endcap/wheel arch. I didn't managed to get to do anymore after that. Today I restarted on the welding. Working under the driver door I welded the plating I had replaced in the floor to the remains good part left of the inner sill and the underside of the car. I cut and prepped the channel I am going to use for the outer sill between the front door post and the centre post. I then spent a couple of hours just cleaning and prepping the underside that still needs a bit of plating. Cleaned and prepped the upper part of the old sill ready to weld the new one to. Looks like I may get away not having to replace the sill below the centre post as I cleaned most of it up today and found it pretty solid.

So all in all had a pretty good week of results on the car. Any comments or advice is most welcome. Sorry no photos taken today.
 
I thought mine was a marathon job... until I read this thread & saw how much hard work you've put in. I think I'd have given up by now.

You'll be looking forward to MOT time now!
 
Finished welding driver floor underneath the car yesterday. Got to take the driver seat out again today to strengthen the support mounts. Tacked the front outer sill on yesterday and will finish that off today. Also finish off the front sill end cap today so I can then get the o/s front wing back on. Doubt I'll get to start on the sill below o/s passenger door today. Hopefully under rear wheel arch will not need too much doing. All goes well, I should have all the welding finished this week. Will completely underseal all the new plating on the underside. Then it's just a case of getting the inside washed out and cleaned. Then cleaning the seats up and put it the carpets in. I have ordered the parts for the service. The only thing I can't get atm is the oil. Very pleased with my progress in this last week or so. Photo's later.
 
Didn't manage to get anything done today other than getting driver seat out and vacuuming it out. My son needed a hand to erect a shed on my daughter-in-law's allotment. Hopefully get on The Minstrel tomorrow.
 
Back
Top