

You are using an out of date browser. It may not display this or other websites correctly.
You should upgrade or use an alternative browser.
You should upgrade or use an alternative browser.
1967 2000TC - HOT
- Thread starter testrider
- Start date
testrider
Active Member
Yes, I bought two lengths of seal channel from Rover Classics. It only comes in straight sections so I had to make the curve around the D post by cutting slots and welding up the gaps.
I wasn't sure if I could get the welding torch close enough to the holes to plug weld it to the car, but it worked very well by leaving the welding wire out of the end of the torch a bit longer than normal.
I wasn't sure if I could get the welding torch close enough to the holes to plug weld it to the car, but it worked very well by leaving the welding wire out of the end of the torch a bit longer than normal.
adamhotrod
New Member
The standard of your work is coming on in leaps and bounds here Paul, I know how particular you are and I'm still impressed!
testrider
Active Member
A small milestone was achieved over the weekend......
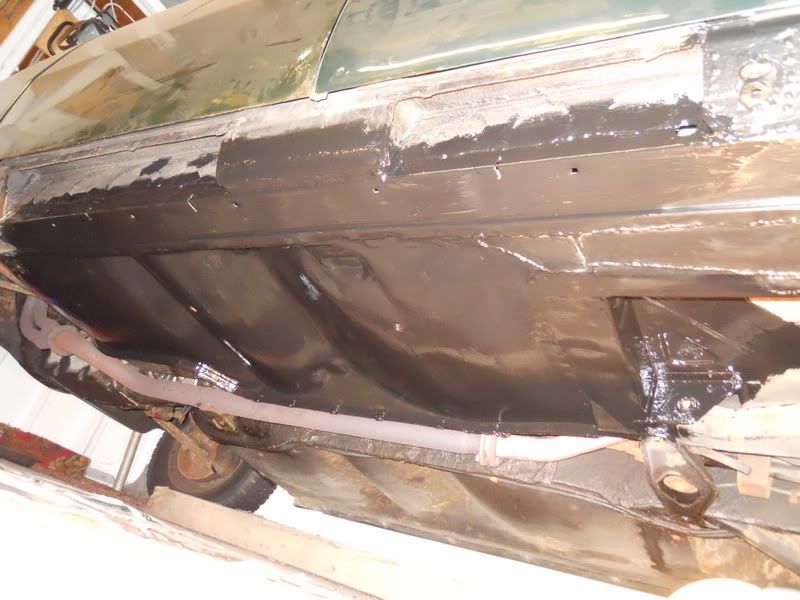
That's the first coat completed on the N/S floorpan and almost the end of scraping old underseal off this side - I've still got the small area directly above the silencer to finish complete with hole to repair and a small repair to the front jacking point. Then it's a second coat in one go front to rear, spin the car round and repeat on the other side!
That's the first coat completed on the N/S floorpan and almost the end of scraping old underseal off this side - I've still got the small area directly above the silencer to finish complete with hole to repair and a small repair to the front jacking point. Then it's a second coat in one go front to rear, spin the car round and repeat on the other side!
Phil Robson
Well-Known Member
As had been said above Paul, the quality of your work is excellent. It makes it a pleasure to see & read about it  .
.
.Dave3066
Well-Known Member
Looking good Paul.
Always satisfying to reach these little milestones in the project. You're standard of work is excellent so well done.
I've been reading the guide to panel forming on the RR forum so thanks for the steer on that.
Looking forward to seeing how the other side progresses
Dave
Always satisfying to reach these little milestones in the project. You're standard of work is excellent so well done.
I've been reading the guide to panel forming on the RR forum so thanks for the steer on that.
Looking forward to seeing how the other side progresses
Dave
happy days
Active Member
Looking at this makes me realise i have so much to learn, looks very good Paul
The Rovering Member
Well-Known Member
testrider said:Big HD8's yes.
Diaphragms? What do they do Bri?
Brian-Northampton said:TBH I've no idea of their true function but the diaphragm is part of the jet assembly and needs to be flexible and not torn/ripped/split.
They stop petrol pouring out of the carburetters. And as they are part of the jet assembly on the HD8's, they're expensive as I found out when I had to replace them on Bruiser.
testrider
Active Member
The Rovering Member said:testrider said:Big HD8's yes.
Diaphragms? What do they do Bri?Brian-Northampton said:TBH I've no idea of their true function but the diaphragm is part of the jet assembly and needs to be flexible and not torn/ripped/split.
They stop petrol pouring out of the carburetters. And as they are part of the jet assembly on the HD8's, they're expensive as I found out when I had to replace them on Bruiser.
I shall look forward to that then TRM, I think the parts are expensive because HD6 and HD8 carbs were on Jaguars and Austin Healeys at time too.
I've no idea if it's meant to have two or three silencers, the '67 WM that I have shows both types. It sounds ok as it is though.
Dave, the panel making thread on Retro Rides is very useful, I've learnt a lot from that and the other projects that TonyBMW does - he makes it look like sculpture rather than bodging old cars back together.
Mick, You could do a lot worse than have a read of the first few pages of this thread http://retrorides.proboards.com/index.c ... read=70135
And then these two:-
http://retrorides.proboards.com/index.c ... read=65793
http://retrorides.proboards.com/index.c ... ead=119596
We're all on a learning curve with this sort of thing, I only started welding just over a year ago and I get better and more ambitious every week. I fancy having a go at repairing the knackered rear decker panel at some point just to see if I can.
Don't even think about the carbs until there is something solid to drive! One job at a time! Progress looks excellent as ever!
You can buy carb bits from:
http://www.burlen.co.uk/
And
http://www.gowerlee.dircon.co.uk/index.html
Chris
You can buy carb bits from:
http://www.burlen.co.uk/
And
http://www.gowerlee.dircon.co.uk/index.html
Chris
testrider
Active Member
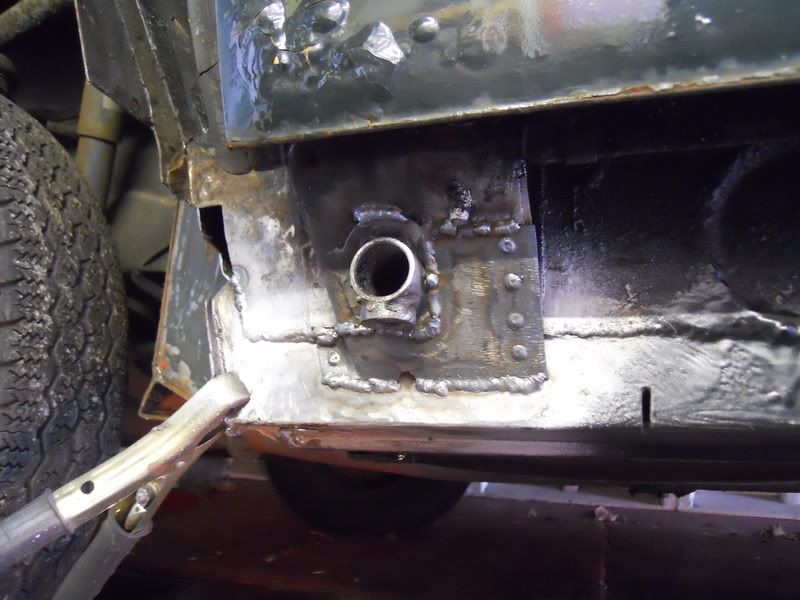
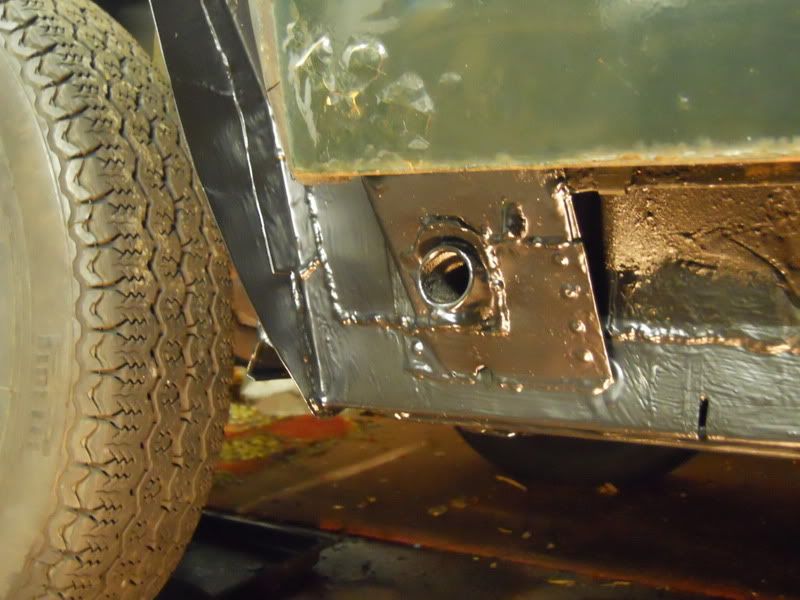
Although I've painted most of the nearside floorpan I hadn't compltely finished cleaning up the front jacking point. The underseal had ominous orange stains under the jacking tube so I lifted the front wing out of the way and began to clean it up.
That left me with this.
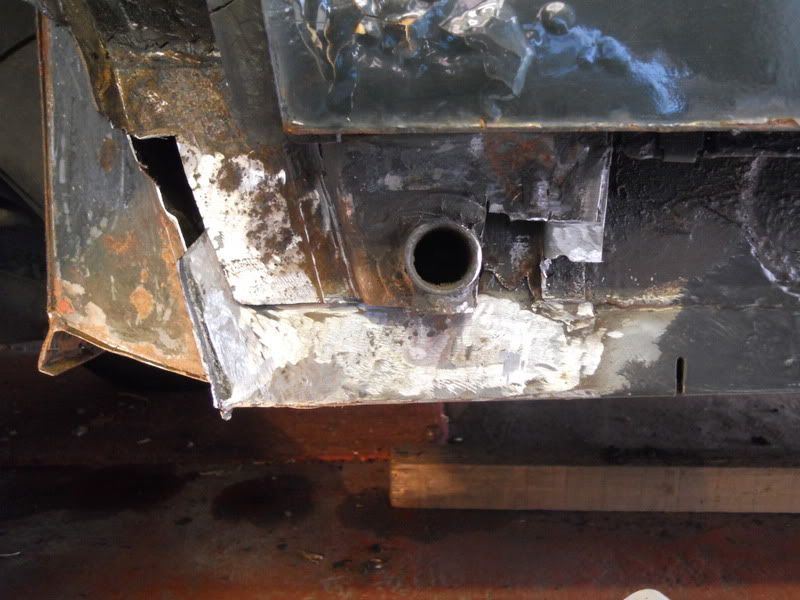
And this.
As you can see in the top picture the replacement sill section isn't attached to the upper section so I sorted that out first and made sure that the jacking tube was welded to it in the middle too.
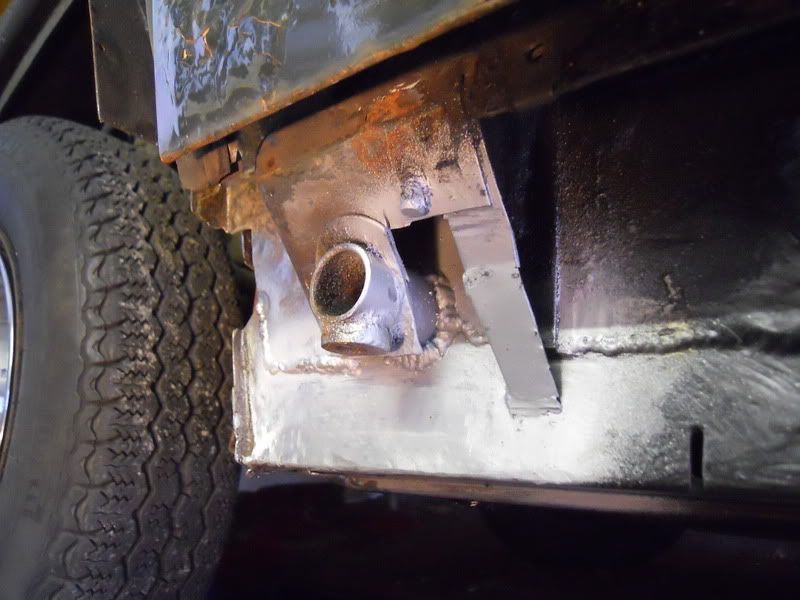
Then I made a plate to box it in out of some 2mm steel.
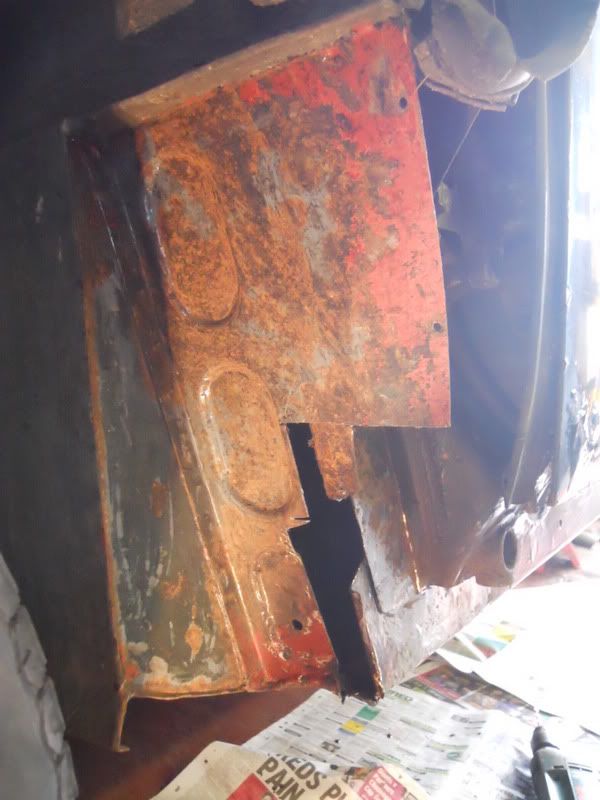
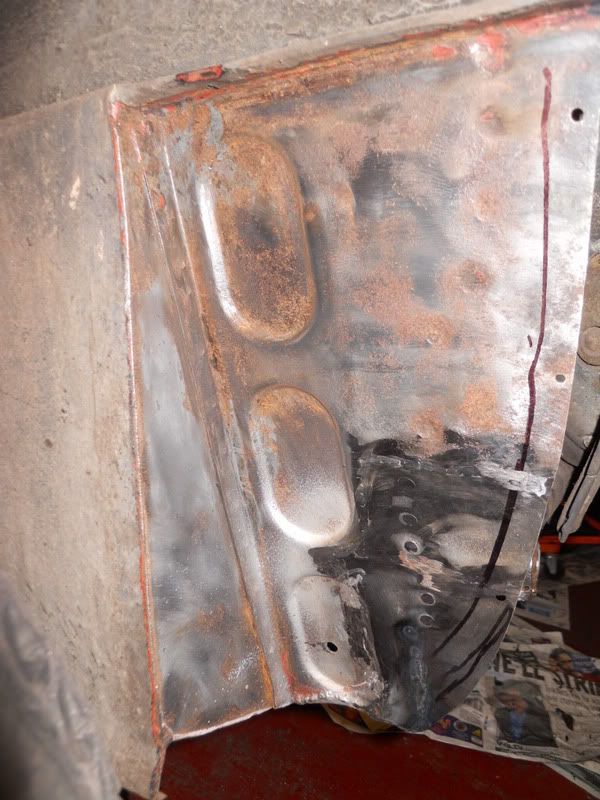
With the jacking point nice and strong I could make a section to replace the front splash panel.
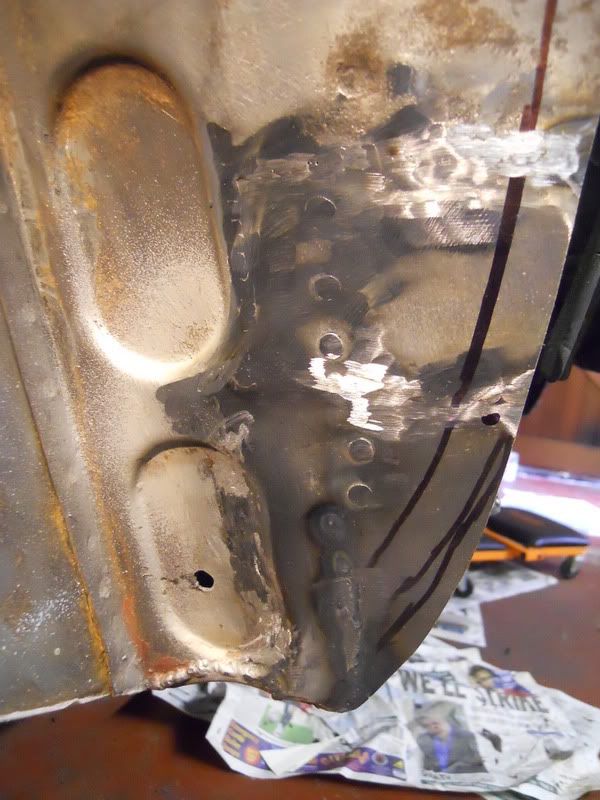
I actually did it in two pieces so that the section with the oval pressing wasn't too complicated to make.
I had lots of 'fun' welding this bit in as the old waxoyl inside the sill decide to set on fire every couple of minutes which had me frantically blowing through the injection hole to extinguish it.
There was no harm done though and it's now ready for paint.
That left me with this.
And this.
As you can see in the top picture the replacement sill section isn't attached to the upper section so I sorted that out first and made sure that the jacking tube was welded to it in the middle too.
Then I made a plate to box it in out of some 2mm steel.
With the jacking point nice and strong I could make a section to replace the front splash panel.
I actually did it in two pieces so that the section with the oval pressing wasn't too complicated to make.
I had lots of 'fun' welding this bit in as the old waxoyl inside the sill decide to set on fire every couple of minutes which had me frantically blowing through the injection hole to extinguish it.
There was no harm done though and it's now ready for paint.
testrider
Active Member
A small update on HOT.
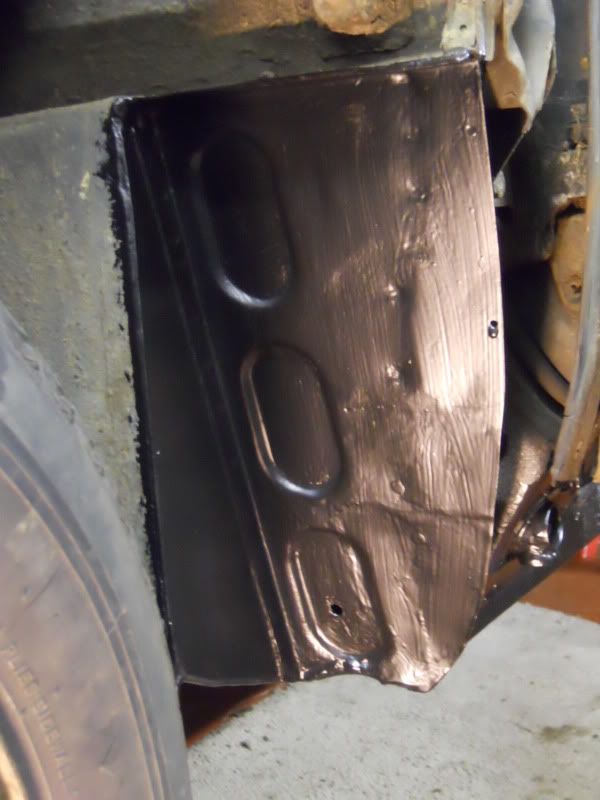
With the above front splash panel now solid I painted it with Epoxy Mastic 121. I'm going to leave the rest of the front wheel arch area for now as it looks in good condition.
The last section to sort out on the passenger side was the boot floor above the rear silencer. My Dad had a couple of hours spare and kindly offered to scrape of the old underseal for me and got it to this stage.
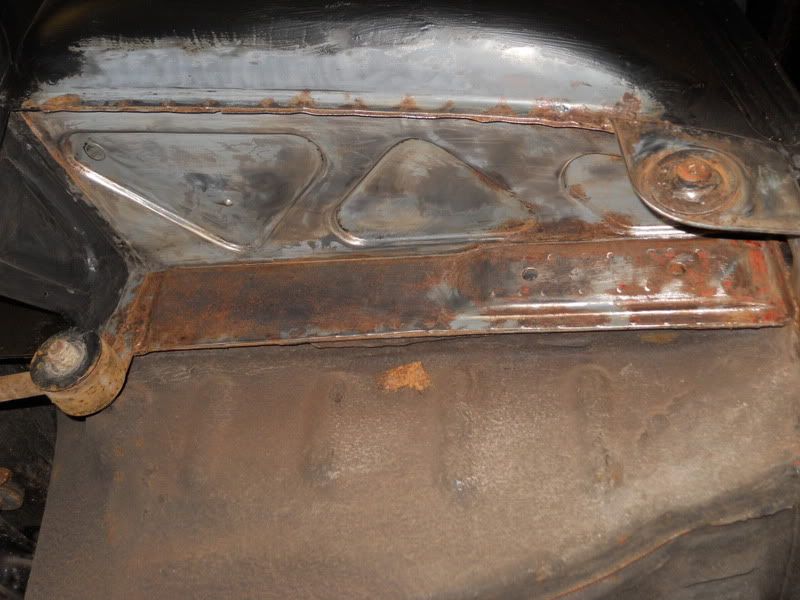
So all that was left to do was paint it.
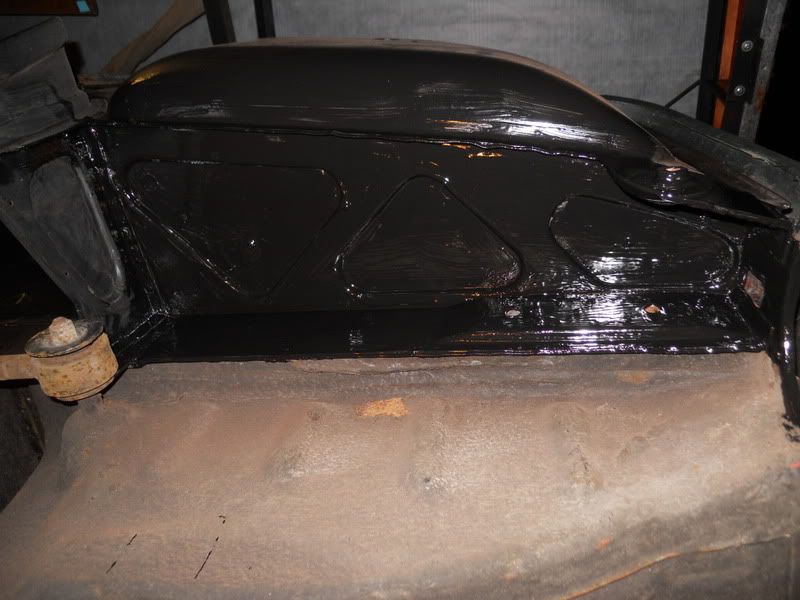
That means there's now one coat of paint on the whole passenger side floor pan and rear wheelarch area. I'll do the second coat in the next few days and then after Easter I'm going to put it back together and drive it using up the last 2 weeks on the MOT before moving on to the boot floor and drivers side sill and floor pan.
With the above front splash panel now solid I painted it with Epoxy Mastic 121. I'm going to leave the rest of the front wheel arch area for now as it looks in good condition.
The last section to sort out on the passenger side was the boot floor above the rear silencer. My Dad had a couple of hours spare and kindly offered to scrape of the old underseal for me and got it to this stage.
So all that was left to do was paint it.
That means there's now one coat of paint on the whole passenger side floor pan and rear wheelarch area. I'll do the second coat in the next few days and then after Easter I'm going to put it back together and drive it using up the last 2 weeks on the MOT before moving on to the boot floor and drivers side sill and floor pan.
Blimey, that's a neat job I bet you're pleased with that.
Are you going to weld up that little hole in the lower pressing of the splash panel?
I like the idea of putting it on the road to use up the MOT - I do stuff like that
Look forward to seeing it at a show later in the year
Richard
I bet you're pleased with that.Are you going to weld up that little hole in the lower pressing of the splash panel?
I like the idea of putting it on the road to use up the MOT - I do stuff like that
Look forward to seeing it at a show later in the year
Richard
testrider
Active Member
Thanks, I'm pretty chuffed how it's turning out, although the project's veering from a 'make it roadworthy' to fairly indepth rebuild now so I may as well keep going with it all.
I wasn't planning on welding it up, it was drilled by the PO for wax injection and there's a rubber bung to seal it off. It was handy for spotting and blowing out the fire inside the sill when I welded in the splash panel though. :shock:
quattro said:Are you going to weld up that little hole in the lower pressing of the splash panel?
I wasn't planning on welding it up, it was drilled by the PO for wax injection and there's a rubber bung to seal it off. It was handy for spotting and blowing out the fire inside the sill when I welded in the splash panel though. :shock:
Dave3066
Well-Known Member
You've gotta be pleased with that Paul. Looks good.
Running it for a couple of weeks before the MOT is a great idea. Helps to get to know the car prior to the test too and iron out any last minute bugs.
Rubber bung in that splash panel hole should do the trick. What would you use to put out the fire when welding if you didn't have that hole :roll:
Rubber bung and a bit more 121 over the top of that would even better
Dave
testrider
Active Member
It's still in the garage unfortunately, but I'm determined to get a drive in it this week before the MOT expires on Thursday (there's no chance of it passing at the moment).
Yesterday I refitted the splash seals and the rear wing, then lowered it off the axle stands so it was on 4 wheels for the first time in 4 months. After a bit of cranking to fill the float bowls it fired up and I left it to warm up whilst I refitted the sill cover. I started to check the lights - indicators, check - main beam flash, check, brake lights, check - side lights, not working and no headlamps either! I didn't get to the bottom of it at this point as I was extracted from the garage for my tea .
Looking through Lady Charlotte's thread Dave mentioned the sidelight switch could be faulty so I'll have a look at that this afternoon.
Dave3066
Well-Known Member
Paul if you reach under the sidelight switch and push on the switch's 2 lower spade connectors you might get the lights to come on. Flexing of these connectors is what was momentarily making and breaking the circuit on mine. The switch is a bugger to get out too as it's quite bulky and there's not a lot of room behind the panel to manoeuvre it out.
Dave
Dave