So Cal V8
Active Member
Paul,
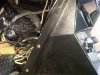
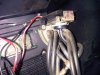
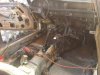
That's great advice. I am focusing on getting the engine out and trying to methodical so that reinstalling will be easier, the fire damage makes it a little harder. I have done little bits and pieces on the sills so that I know what I am looking at - I know back in the UK you all have to deal with how rotten these cars have become over time - it's a bit of a morale booster to find solid metal even though it's not relevant at the moment.
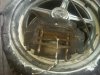
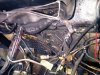
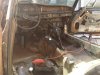
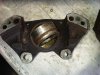
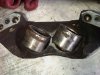
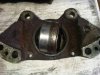
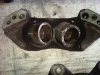
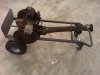
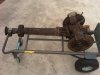
I have started stripping off the calipers - the front right came off easily enough once I actually read the manual I will get the others off over the next week or so.
I don't know about the front suspension yet as I may be getting the base unit sand blasted and it makes more sense to do bushings, etc. after that process. You are absolutely right about finding the jobs that build morale and keep me coming back.
I have several benchmarks out there - when I feel a bit beaten I take a look at the progress you and others have made. I would love to do a really classy job like keynsham but he has really set the standard high.
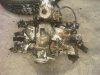
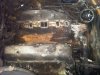
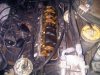
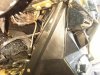
A few more pics...
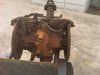
These have definitely seen better days - I have my fingers crossed that the internals are as good as the rockers and pushrods.
That's great advice. I am focusing on getting the engine out and trying to methodical so that reinstalling will be easier, the fire damage makes it a little harder. I have done little bits and pieces on the sills so that I know what I am looking at - I know back in the UK you all have to deal with how rotten these cars have become over time - it's a bit of a morale booster to find solid metal even though it's not relevant at the moment.
I have started stripping off the calipers - the front right came off easily enough once I actually read the manual
I will get the others off over the next week or so.I don't know about the front suspension yet as I may be getting the base unit sand blasted and it makes more sense to do bushings, etc. after that process. You are absolutely right about finding the jobs that build morale and keep me coming back.
I have several benchmarks out there - when I feel a bit beaten I take a look at the progress you and others have made. I would love to do a really classy job like keynsham but he has really set the standard high.
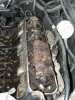
A few more pics...
These have definitely seen better days - I have my fingers crossed that the internals are as good as the rockers and pushrods.