Rob's long term Supercharging project

1396midget said:
after some epic lunch time googling (ooerr) over the last couple of days I reckon I'm going to stick with the Rover V8. Jag engine looks megacomplex to wire in and with not a straightforward gearbox option. I've done wiring for the K-midget and don;t want to have to fight that hard again. Standalone Megasquirt or similar looks a lot easier.

I wouldn't try to get the Jag engine running on it's original ecu. The whole car's networked so everything talks to everything else and it won't work on its own. Part of the reason for the difficulty in converting the Jag to a manual is the electronic box of tricks that's needed to convince the car it still has an auto box so it doesn't go into limp home mode. You wouldn't have any of these problem with the engine in a Rover on an aftermarket ecu or megasquirt. Arguably, it's easier to set up than converting the original RV8 to efi. With a modern engine, all the sensors are already in place. As for gearboxes, there's a couple of people selling bell housing conversions. Realm Engineering had one on their stand at the Jag spares day the other week.

Are there off the shelf kits to supercharge the Rover with a Rootes blower? I've seen some done using a centrifugal type blower, the belt driven turbo type.

Tom
 
If I was to commit to putting a supercharged v8 in something of mine I would only consider buying a complete running 4.0 or 4.6 Rover v8 if I was to stay Rover. You get the benefit of the crossbolt bottom end, better oil pump, larger crankshaft and big-end bearings, short timing cover with multi v belt and almost all required sensors already in place. The main issue seems to be finding a good one that hasn't been overheated causing liner issues, but some people have reported good results from dropping k-seal into them, or you spend the money and have the block tophat lined and be done with it.

You could build a megasquirt controlled engine and attach that to your lt77 and drop the pair in in one go, and sell the original 3.5 and bw35 as a complete running lump or seperately to get some money back. This would allow you to get the hang of the megasquirt, getting the n/a or off boost timing and fueling correct then add the boost at a later date only making tweaks for the on boost fuel and ignition.
 
I agree, that if you are going to use a Rover as base, then you must go for the later cross bolted bottom end. At risk of sounding spendthrift, I'd be inclined to see if funds could run to a new Coscast block to use the remainder of the internals in...

Chris
 
lol cheers fellas.

I had had it in my mind that this would be a relatively cheap operation. Silly me :wink: Bear in mind the car only cost me £1000. Hence the clinging to the 3.5....

I see there's some faffing about involved with the front nosey bits on a 4.6 or 4.0 to get it to fit in the P6. Not insurmountable, as our own antipodean larger engined friend knows.

I also realise that the bhp from a blown 3.5 is likely to be less than a straight 4.6.

No off the shelf kits for this game, but I'm not an off the shelf kit sort of bloke. Anything I do do to the 3.5 will be transferrable to the 4.6 (if that happens!)

I only want to go as much in power as the chassis will take. Experience from the K-series weekend in Wales with the MG shows that on a real road my 1.4 was just about as quick as a 202bhp 1.8, because he couldn't use his power as the car wouldn't let him.

I suspect with a blown 4.6 (though that would be :D :D :D ) I'd just be throwing bits of gearbox and diff out the back. Perhaps a longer long term idea that then :)

tends to be I go power, suspension, power, suspension (with a sprinkling of brakes throughout) as an upgrade path. I don't want to go further than is necessary for me to get my MORE POWER fix (at the moment, for example, the 1.4 in the K midget is just fine).

perhaps a blown 3.5 gets me there, perhaps the horsies released by a 5 speed does the job. But I'm partly in it for the challenge, so don't mind (for example) doing a blown 3.5 then swapping out it's underneathy parts for a 4.6, if I need more power or if it goes pop.

All my projects seem to have teething problems, hence the idea of doing it in a modular way - gearbox first, make sure that's working properly, then carry on with the next thing.

Mind, some of those 4.6 engines are cheap for what you get !!!!

One question is how big is that jaaaaag engine? It looks luvvery. I guess the issue will be with how wide the heads are.
 
1396midget said:
One question is how big is that jaaaaag engine? It looks luvvery. I guess the issue will be with how wide the heads are.

I can measure for you if you like.
 
I would guess that as you're trying to keep to a tight budget you'll most likely be usiing an Eaton M90 or M112, which come with a multi v pulley for a serpentine belt, which just happens to be standard fit on the 4.0 and 4.6. The interim 3.9 is also ideal with the serpentine belt, just with the potential of the extra loads you may as well get the variant with the strongest bottom end.

If you stick with the 3.5 single v belt you'll most likely depending on route you choose have to fabricate new pulleys and idlers adding to the cost, complexity, and time to do the conversion. With a serpentine belt you can fabricate the mounting brackets whilst the car is still on the road and driving, then when ready just fit a longer belt and off you go... :twisted:
 
One of the cheapest superchargers i've seen is a Toyota SC14 blower fitted to some Previas and Chasers and the like. A big brother version of the SC12 from the MR2 and Levin. Not sure how available they up your end of the world but down here they are worth about $350 (under 200 quid) In standard form they have a clutched pulley like an AC compressor so you could have it kick in at a certain throttle position or just have a dash switch for when the mood takes you.
I have seen them fitted to injected V8s in Discos/Rangies and mounted over the rocker cover. Not too sure how that would fit in a P6 but where there's a will... :wink:
 
:LOL: :LOL: Simon. Honestly :wink:

any cons with the bigger engines? I'm reading all about slipped liners and everything, though with a pinch of salt with experience of K series stories...

Looks like I'd need a short nosed engine with a filter housing that'll miss the P6 crossmember. Or a remote filter, again not too much of a problem, made my own for the Kmidget but might buy one if I was doing it again. It's leaky.

Looks like I can pick up a 4.0 or 4.6 for 500 squid-ish. That's pretty cheap as it goes, about the same as the parts to get the V8 through this MOT (needs a full on everything brake job (GAH!) due to PO doing 26 miles a year in it for the last 8 years). So funds are light, but enthusiasm is not!

Looking like you chaps are correct, the small journal (already 20 thou overbored) 3.5 may not be enough for the whole shebang. Hmm, I wonder what the most powerful road going P6 is? I could also get used to the FI and bigger engine and monster about like that for a bit as well. Presumably fixing a cracked liner job is a bit above an ambitious home mechanic?


eBay throws up eaton M112s for around the £200 mark sometimes, sometimes even with intercoolers from a jaaaaag.

looks like the P6 rad could go a little bit further forward if needed. And there 'might' be space for an intercooler in the V8 Jimmy hill section at the front. Doesn't block the rad then either as the bottom bit is auto fluid. I wonder if the standard V8 cooling system is up to it. I'd need more fans than the one little one that's on there at the moment though! Reckon I could get 2 on the engine side, either side of the water pump nose. There's a fair amount of space either side as well, in the heads area but categorically not in the block areas. It fits in well, that V8!

Tom there's absolutely no need to rush! :D
 
AlLL Rover V8's will accept the P6/SD1 short nose front cover etc. BUT if you convert from a later serpentine etc engine then, although the front cover set up bolts straight on, you do have to change the cam for a short nose compatible one. But then, whoever heard of a 2nd hand Rover V8 with all its cam lobes intact?

Chris
 
1396midget said:
I also realise that the bhp from a blown 3.5 is likely to be less than a straight 4.6.

Rob, I fully understand that you want a project and to see if you can make a supercharger work, but slotting a 4.6l engine in along with an LT77 gearbox will make for a very quick car using factory parts. You might even get away without a hike in the insurance premium as seen by sowen when he fitted the turbo to his engine.
 
I suspect that slotting the 4.6 with LT77 in has the potential to be enough of a project to keep me happy for some time!
 
well this morning it's freezing cold (1.5 degrees and windy) and snowing here in Yorkshire, I was going to go for a blast in the K-midget but it's too damn cold. So instead, I've spent the first half hour reading through Ron's thread, and now want a 4.6.

now to read the rest of it, and more researches into how to get it to fit.
 
On the other hand, it'd probably be better to fix the issues it has before shoehorning away. Also, the piggy bank is somewhat lighter after the latest wallet bashing session.

Here's some pics:

See anything wrong here?
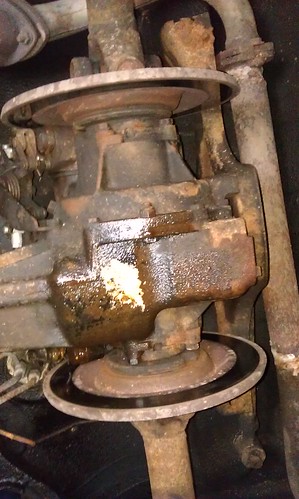

IMAG0449 by 1275midget, on Flickr

That is indeed brake fluid. So it's off with one of the rear calipers.

here's the offending item
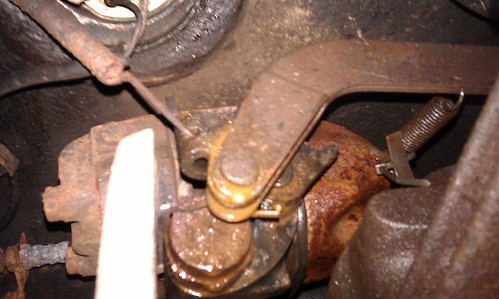

IMAG0453 by 1275midget, on Flickr

The rear calipers..... I had to take both of them off, as I couldn't get the link pipe undone because I don;t have enough joints in my arms to reach the brake union, and it was starting to do that turning round about to snap off thing, so both of them came off. Cleverly, with them both draped over the diff, there's just enough space to manoeuvre one out so the diff can stay bolted on. What's going on with those mad cap bolt things with the spring in them? That took some serious getting off. Both rear discs came off as well, to get that bolt off. Sigh.

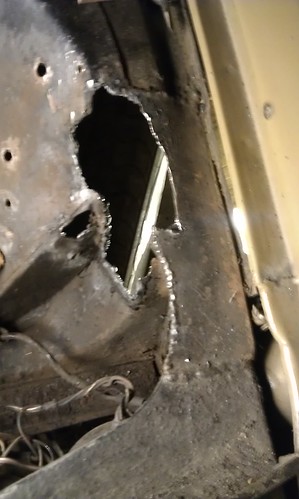
Meanwhile, at the front, dad has been poking at a pound coin sized rusty hole. It's gone in under a PO repair, (is it supposed to be double skinned here?). Anyway, this is now quite a big hole:
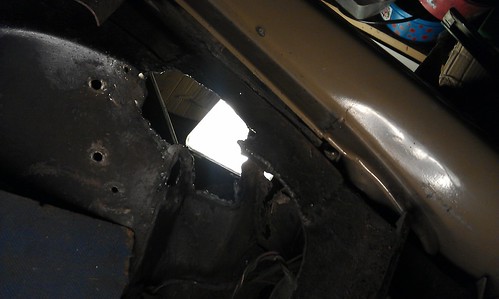

IMAG0454 by 1275midget, on Flickr


IMAG0455 by 1275midget, on Flickr

Back to the back!!

calipers off, and the leaky one is being disembowelled
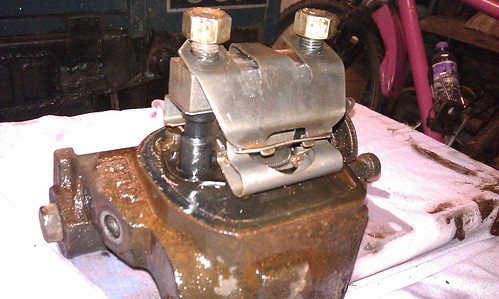

IMAG0456 by 1275midget, on Flickr

Nicely full of rusty greasy brake fluidy water.

This is what the springs are supposed to look like. I remembered doing the other one, and how much of a fight it was to get this right. so I took a picture
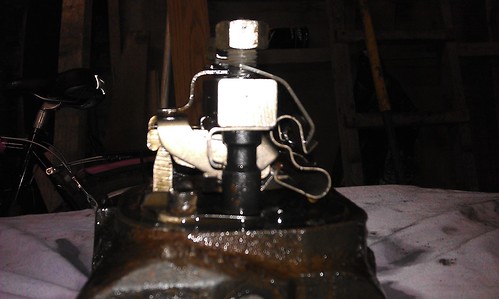

IMAG0459 by 1275midget, on Flickr

It's in bits!
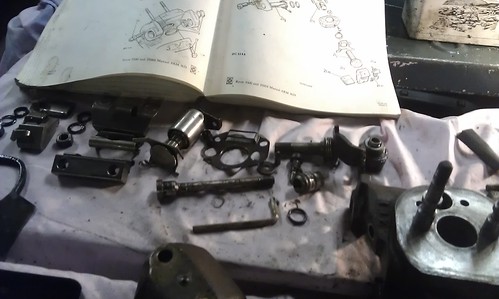

IMAG0462 by 1275midget, on Flickr

all came apart really easily, albeit slowly.

Bore doesn't look too bad
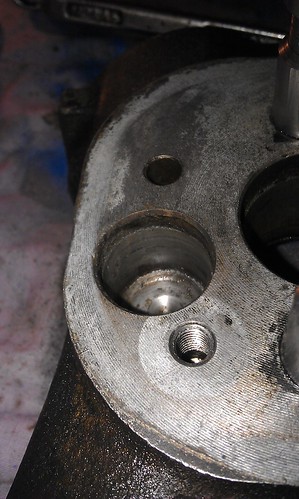

IMAG0464 by 1275midget, on Flickr

the seal was almost non existent. The caliper only leaked when there was no pressure on it. Strange. Anyway, it went back together in about half an hour, surprisingly enough

A comment from my sister on seeing this :
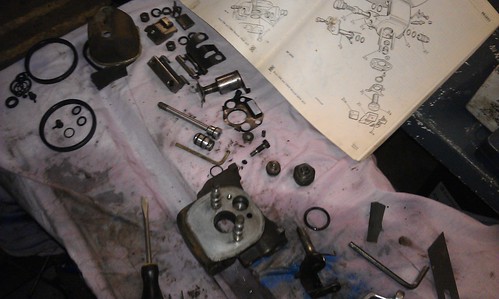
IMAG0469 by 1275midget, on Flickr

"Why's it not in order like in the picture?"
:shock: :LOL:

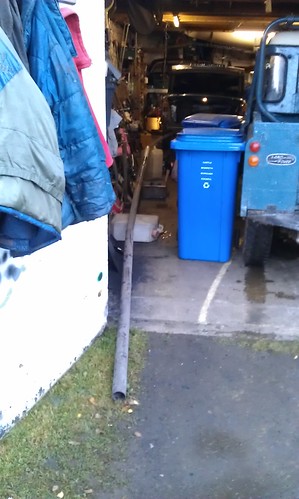
Next up, we built this:


IMAG0472 by 1275midget, on Flickr

which takes all of the V8 smell outside for the next job, refacing the rear discs. The outer pads had polished a section about half an inch wide in the middle of the disc, the rest was slightly corroded, but with no ridge wear on either side of the disc.

So the discs were individually bolted to the diff and I sat underneath (car on stands with the halfshafts disconnected) and polished the discs with a flap wheel and then 240 then 400 grit wetordry. They now look like the inside, lovely and polished.

Stick everything back on, disc runout is almost zero (certainly less than 7 thou) new pads and adjust everything up using the pad in and out system. Dropped a pad on my head, which hurt. Also nearly dropped a disc on my head but caught it. Went for the pad method over the disc method after that.

I can now stop dad turning the wheels using my hand on the handbrake actuator. So they should be much better, although 85lbft is a big torque for doing underneath.

Right, off to the front for some clonk hunting, disc (big wobble when passenger disc is heated up) caliper (split rubbers and de-chroming pistons) pads (for the new discs), and wheel bearing replacement, which were rumbly, and a top joint with a split gaiter that was nevertheless full of cold, horrible water...

Stage 1 complete
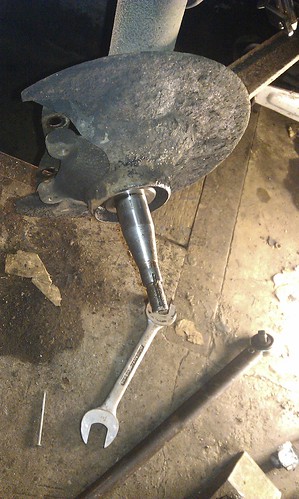
IMAG0476 by 1275midget, on Flickr

looked like the bearings might have been turning a little bit on the stub axle, I'll be putting them back on with a little bit of locktite.

Taking the disc off is easy. Then the bearing races were drifted out, first like this
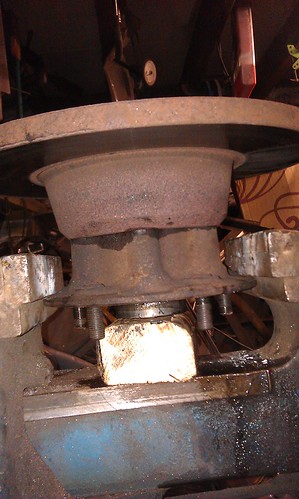

IMAG0479 by 1275midget, on Flickr

(with the disc off)

using a socket (15/16ths if you're interested) taking the small outer race outwards (towards where the wheel is)
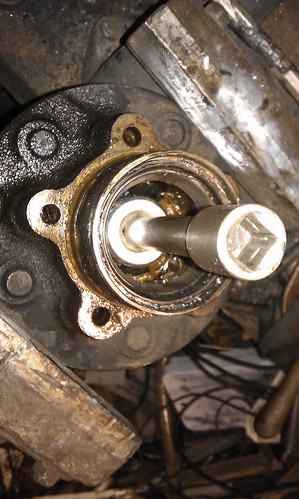

IMAG0480 by 1275midget, on Flickr

then the larger inner race with a suitable drift, using the cast in gaps in the hub.

Drift the new bearings in with the old bearing and a socket, (1 1/8 for the small end, and something bigger for the outer one (I used a mini hub nut socket)) this helps get the race in straight as they can crack if they go in wonky. Tap it home with a drift going all the way round to even it up, as the 'bearing drift' won't go all the way in without becoming part of the hub..
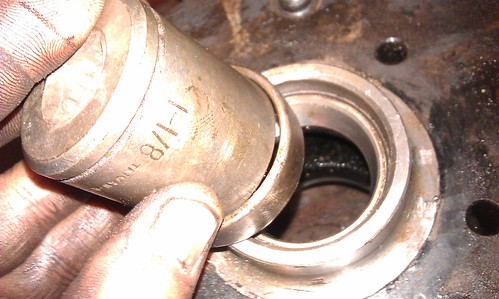

IMAG0482 by 1275midget, on Flickr

Next up, releasing the steering side rod, taper breakers abound!
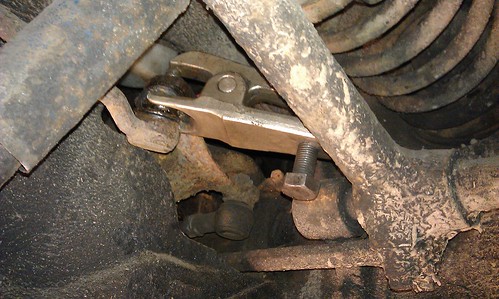

IMAG0483 by 1275midget, on Flickr

I worked out by the end of this shenanigans I'll have broken 6 tapers.

Top tip for doing the steering side rods: Undo both of the nuts before breaking one of the tapers. Trust me, it makes it a LOT easier. Also, with no steering lock, some ingenuity is required to stop the steering lock stop taking the brunt of my grunt:
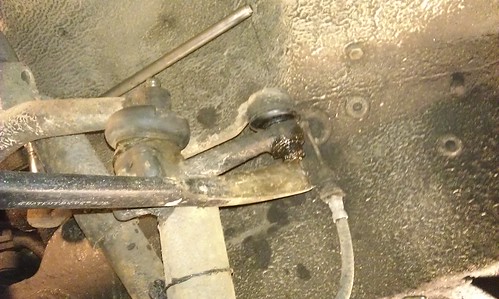

IMAG0487 by 1275midget, on Flickr

Unfortunately the PO had put all the split pins in from the outside, so no drifting them out. After I spent 2 hours fighting the one on the top joint, I gave up with the others. Bash them into the space in the nut with a suitable drift then hammer the socket on. Pull hard on the breaker bar and the split pin is sheared off and off comes the nut. The remains can be drifted out later on. I tried this first on a steering side rod that was obviously dead:
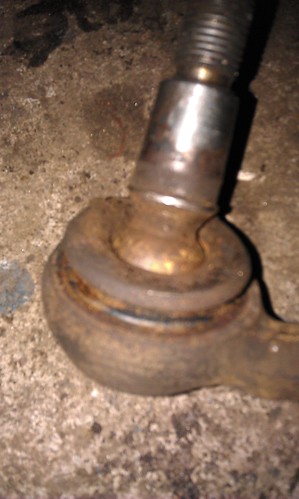

IMAG0485 by 1275midget, on Flickr

and despite my misgivings it has not injured the threads in the nut or on the taper. I'll be putting the split pins in the other way around when it goes back together.

Meanwhile, Dad's finished the welding now.
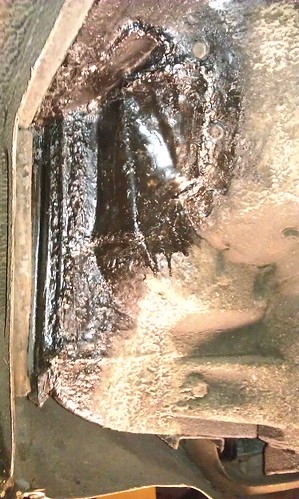

IMAG0484 by 1275midget, on Flickr

(that's from the inside)

He's also (while I was fighting the rear calipers) made this monster:
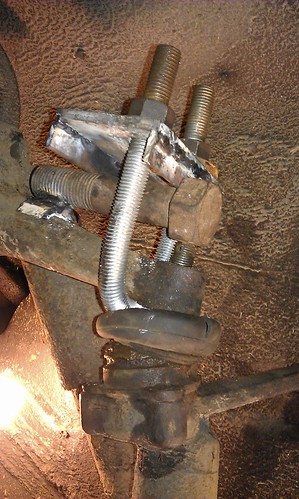

IMAG0490 by 1275midget, on Flickr

fwoar. With that tightened up as tight as we could physically get it (pretty dam tight, I'm not that small) it was not budging. Heated it up with the gas torch, applied a BFH then an even bigger BFH and still nothing.

I left it overnight under tension (with a pin in the split pin hole in case it went pop overnight so it wouldn't drop totally off) went to see it in the morning, and it was still on. So it got a battering with a cold chisel and BFH on the side of the joint below the rubber, and with an almighty bang it came apart. Phew.

Then the epic tool of strength was inverted and used to pop off the bottom taper, which was about a billion times easier.

This revealed possibly the most amusingly borked ball joint I've ever seen.
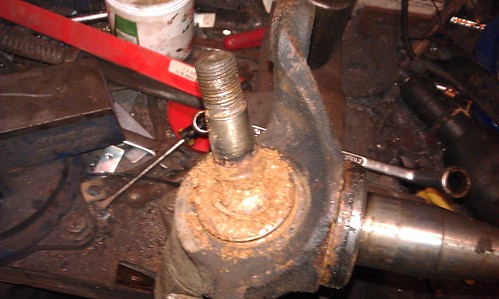

IMAG0492 by 1275midget, on Flickr

full of weird stuff, looked like flour and grease mix.
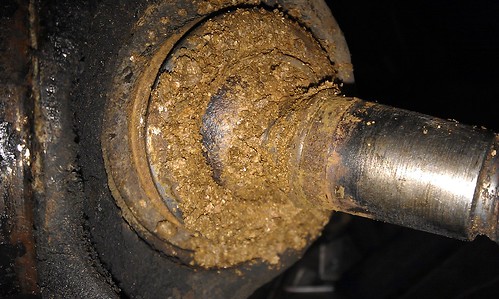

IMAG0495 by 1275midget, on Flickr

very odd. and with about a mm of vertical play, clearly it's had it. In the above pic you can see a little bit of white-ish plastic that looks suspiciously like someone's injected it onto the ball joint to take the play away.

I didn't have one (it's on its way now!) so that stopped play, also ran out of time. It took me 3 days to do the rear calipers. Yikes. 5 days almost solid work for 2 chaps, think of the labour cost! unless it's magic classic car rescue labour of course...

Dad's currently building the tool of strength mark 2 to take to bottom joint out of the strut.

List of bits is now up to:

Rear caliper seal kit - fitted
rear pads - fitted
steering side rod (on its way)
2 side rod gaiters (on their way)
bottom joint (on its way)
Top joint x2 (1 about to be fitted, 1 spare)
wheel bearing x2 (one fitted, one left)
front discs x2 (one fitted, one left)
front calipers x2 (need fitting)
front brake pipe x2 (need fitting)

cost of about 750 quid after I get the surcharge back from the calipers.
 
Hi Rob,

That is quite a list of repairs / replacements that you have been working through. All of the ball joints in their various forms left the factory with only a smear of grease applied, so when dirt is able to enter past the boot it makes for great grinding paste... :shock: Be sure to fill the boots of your new joints with a suitable grease like Castrol LMM, will increase their running life by at least twice if mine are anything to go by.

I am pleased that you have enjoyed reading "My Rover" thread. The 4.6 certainly transforms the Rover that is for sure, but be prepared to replace all the springs for stiffer items before then as the factory items are far too soft for the amount of power and torque that the big engine delivers, and that applies equally as to whether you opt for supercharging your 3.5 or a bigger engine.

Ron.
 
thanks for that Ron. My springs are starting to look a little old (the front ones, back ones look new) and I need to look at a bit of a lean as well, so that's handy to know.

I've got a great big pot of Castrol LM grease that'll be going in the gaiters as much as possible.

I think that the PO had a lot of work done on the car, but then has not used it for a long time, so all the rubbers have given up the ghost at the same time. The front calipers look like re-con or new ones, but the rubber is all old and dry. The 27 year old front tyres I took off follow the same vein.

Forgot to mention in the previous post, the pipe you can see above the rear diff is the my additional exhaust pipe that goes to the driver's side twin pipe.
 
1396midget wrote,...
Forgot to mention in the previous post, the pipe you can see above the rear diff is the my additional exhaust pipe that goes to the driver's side twin pipe.

A dual system... :) how does it sound compared to your original single system?

I thought about going down the dual system route too after I had the 4.6 installed, a muffler with a single inlet and twin outlets with the pipes routed in the same manner as what you have. My concern was and the primary reason why I opted not to proceed was what I perceived to be a loss of access to the rear caliper bleed screw. There is a minimum of space there originally and trying to slide your hand past an exhaust pipe which is in the way would I thought make a difficult situation even worse. Do you need to lower the exhaust in order to gain access to the bleed screw?

Ron.
 
it sounds really really good. Favours one pipe over the other slightly, but not too badly. The pipe is high enough up into that area to not bother me at all when bleeding the rears. If I'm honest we didn't think about the bleeding when we put it in!

The reason it's so high is it caught on the de dion if it was any lower with fatties in the back. I've checked boot temps after a blast then idle session and it was OK. I can easily take more pics if you or anyone else is interested, it wasn't too hard to build. And it definitely goes better over standard.
 
Back
Top