

You are using an out of date browser. It may not display this or other websites correctly.
You should upgrade or use an alternative browser.
You should upgrade or use an alternative browser.
Re: P6 project: BW35 to LT77 manual box swap: the verdict
- Thread starter DamianZ28
- Start date

adamhotrod
New Member
Re: P6 V8 project: Winter work/rust repair etc
Come on, Come on! We want to see the wheels on... Well I do at least!
Come on, Come on! We want to see the wheels on... Well I do at least!
DamianZ28
Active Member
Re: P6 V8 project: Winter work/rust repair etc
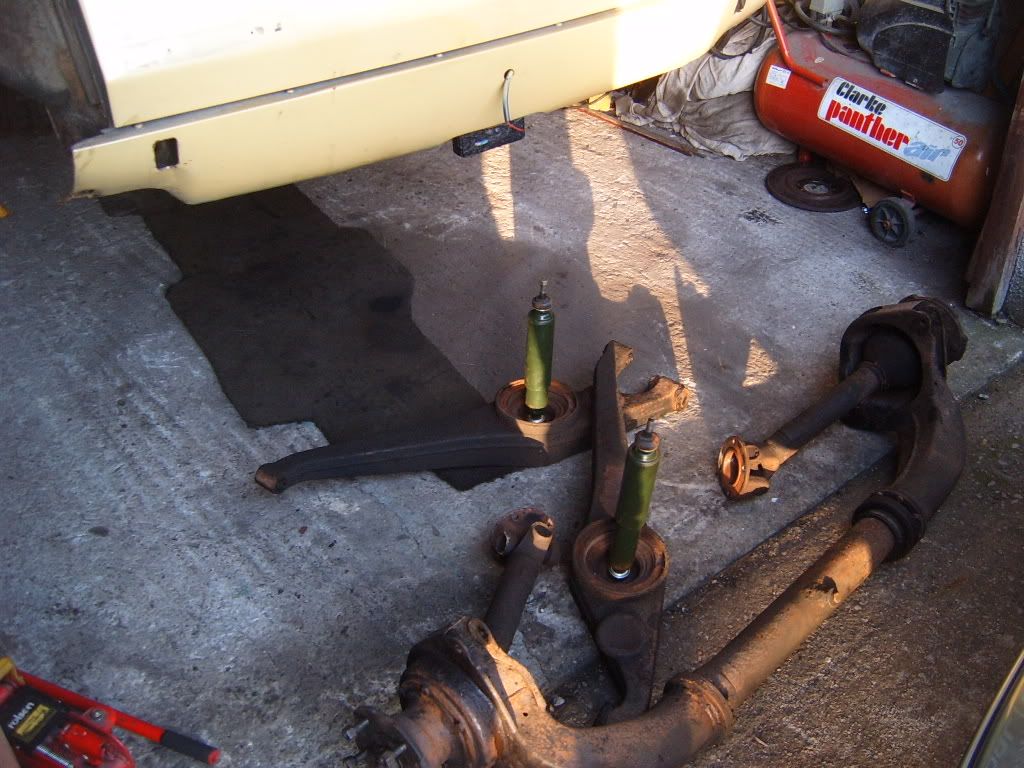
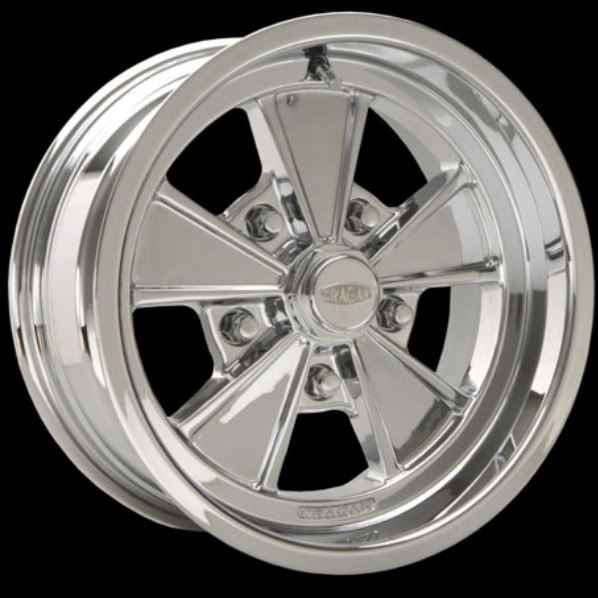
LOL, So do I , so do I") , They have been made so are now awaiting shipment from Cragar in the US to Doddington Raceways here in UK & then too me!!!! speaking to the chap at Raceways, he advised it has been a bit of nitemare for him, he has several customer orders with Cragar but his US contact over there in charge of the POs was taken ill & died suddenly! , so the orders have been delayed somewhat! Luckily I'm in no rush as now that I have pulled the rear of the apart. But its full steam ahead, well as much as I can grab free time to get it all welded, cleaned, painted & re-bushed!
, They have been made so are now awaiting shipment from Cragar in the US to Doddington Raceways here in UK & then too me!!!! speaking to the chap at Raceways, he advised it has been a bit of nitemare for him, he has several customer orders with Cragar but his US contact over there in charge of the POs was taken ill & died suddenly! , so the orders have been delayed somewhat! Luckily I'm in no rush as now that I have pulled the rear of the apart. But its full steam ahead, well as much as I can grab free time to get it all welded, cleaned, painted & re-bushed!
Hopefully get it there tonite & drop the diff down then thats all the rear stripped more or less!.
I hope to go back to work offshore again which 6 weeks on & 6 weeks off, so that 'll mean more time to do the car on break! oh & more money as it's tax free! just gotta convince the girlfriend it's a good thing! :?
LOL, So do I , so do I
, They have been made so are now awaiting shipment from Cragar in the US to Doddington Raceways here in UK & then too me!!!! speaking to the chap at Raceways, he advised it has been a bit of nitemare for him, he has several customer orders with Cragar but his US contact over there in charge of the POs was taken ill & died suddenly! , so the orders have been delayed somewhat! Luckily I'm in no rush as now that I have pulled the rear of the apart. But its full steam ahead, well as much as I can grab free time to get it all welded, cleaned, painted & re-bushed!Hopefully get it there tonite & drop the diff down then thats all the rear stripped more or less!.
I hope to go back to work offshore again which 6 weeks on & 6 weeks off, so that 'll mean more time to do the car on break! oh & more money as it's tax free! just gotta convince the girlfriend it's a good thing! :?
DamianZ28
Active Member
Re: P6 V8 project: Winter work/rust repair etc
Hi Chris,
Wheel size is 7x15" I think the overal width is 8".
The offset is 4" either side of the centre of the rim, I think the inner depth is less than the standard steel wheel but of course the potential nitemare is the outter width :? I was hopeing to fit 205/60/15 on the rear & 185~195/60/15 for the fronts. Hope that helps!
Thanks Damian
Re: P6 V8 project: Winter work/rust repair etc
Hi Damian.
The corect size rears to replicate the rolling radius of the standard tyres (so as to keep speedo accurate and not lower the overall gearing) is 205/65 X 15. No reason to use a smaller size on the front - the 205's will reduce your steering effort compared to the standard 185's and give you more secure braking as well. The steering effort effect is an oddity of the P6 - in normal circumstances bigger tyres would increase steering effort. The geometry of the front suspension is rather peculiar which contributes part. The rest seems to be due to reduced tyre roll off the rim. In any case 7" rims are a tad too wide to take 195's happily, I'd say 205's are the minimum acceptable width on that rim.
I'm afraid you didn't really answer the offset question. Zero offset is with the mating face of the wheel equidistant between the two outer faces of the wheel. The P6 requires an extremely unusual and large positive offset - ie the wheel set into the car, or put another way the mating face set out towards the outer edge. If the offset is exactly right (57mm positive) then the pinch point of the rear mudguard will just take 205's without modification. From the sound of it your wheels may well be zero offset. Unfortunately the Yanks use a different system which is feindishly complicated to calculate the offset from and wouldn't help us to work out where the wheel and tyre would lie in the mudguard.
If your wheels really are zero offset, sorting the D post will be quite a challenge! So a few tips to start. First off beware that the de dion axle has a variable track - that's what the de dion tube is there to allow. The drive shafts are fixed length, so as the car is jacked up the wheels move in towards the body, reducing the track. Likewise as you load up the rear of the car, either with people or by roll in a corner, the wheels move out, increasing the track. So you need to judge your clearances to the D post with the suspension fully compressed.
You shouldn't have any problems with clearance from the back of the tyre to the body or anything else. The pinch point is at the very bottom of the D post, the part of the body shell immediately behind the bottom rear corner of the door. It is completely acceptable to jack this point outwards by using a scissors or bottle jack horizontally between the back of the D post and the vertical face of the boot. You should be able to get 1" or perhaps a little more doing this. Next up, you will find that the D post is double skinned in theis area. Simply cut off the inner skin, turn it back and reweld it back to the outer skin much further forward. There's probably about another 1/2" to win from this. To go beyond this starts having major consequences. The rubber seal for the door aperture is located on the outer perimenter of the area of D post in question. This limits the amount you can push this area out and still get the back door to shut. Minor fettling of the door in situ with a "fitters knee" is possible but I doubt you'd get more than another 1/4".
My best guess is that you are going to need around 2 1/4" additional clearance, so everything is beginning to hinge on how accurately your base unit was put together in this area. They do vary a lot - this wasn't seen by Rover as a key dimension. Funnily enough the rear wing isn't an issue. By the time you've finished messing around, the front bottom corner will stick out, but just simply lean on it to get it back into line. Likewise it is just possble you might be a bit close at top centre of the wheel aperture. Just give it a bit of a pull!
None of this can be judged wih the wheel alone. You need to have a wheel with your chosen size of tyre on it. Until you are sure how things are going to turn out I'd recommend a scrap tyre!
If none of this gives you enough space then I'm afraid i must refer you to bodywork expert Simon Owen. He has tackled this on his car and you can have a read of the write up here: http://www.classicroverforum.com/viewtopic.php?f=21&t=5288&start=75
Chris
DamianZ28
Active Member
Re: P6 V8 project: Winter work/rust repair etc
Hi Chris,
Very good advise, especially on the operation of the De-dion tube. Its going to be tight!, I did find the details for the wheel dimensions from the cragar webb site: check this, third on down is my wheels ordered, part # 500P575042.
http://www.cragar.com/ProductView.aspx? ... =%3fc%3d15
Once I have all the suspension back together & can get a wheel & tyre on then I can see what needs to be cut & alterted, will bolt on the rear wing as well to get an idea of space..or lack of it, Have red Simons link before, amazing what he does! JAG IRS is brilliant idea!
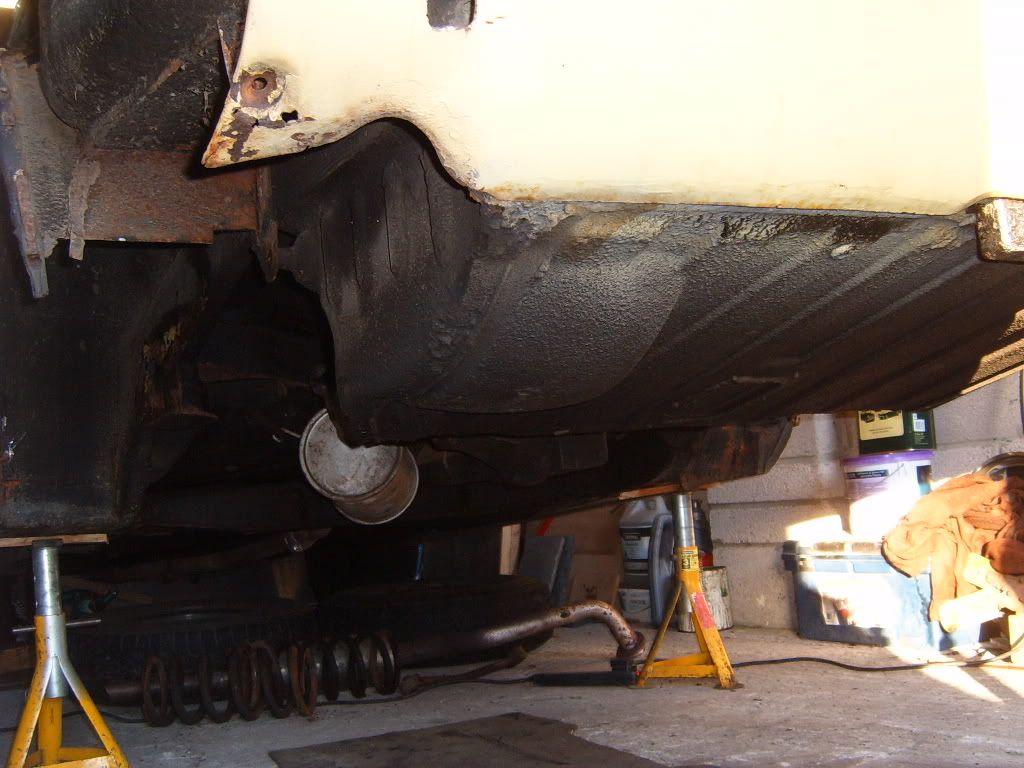
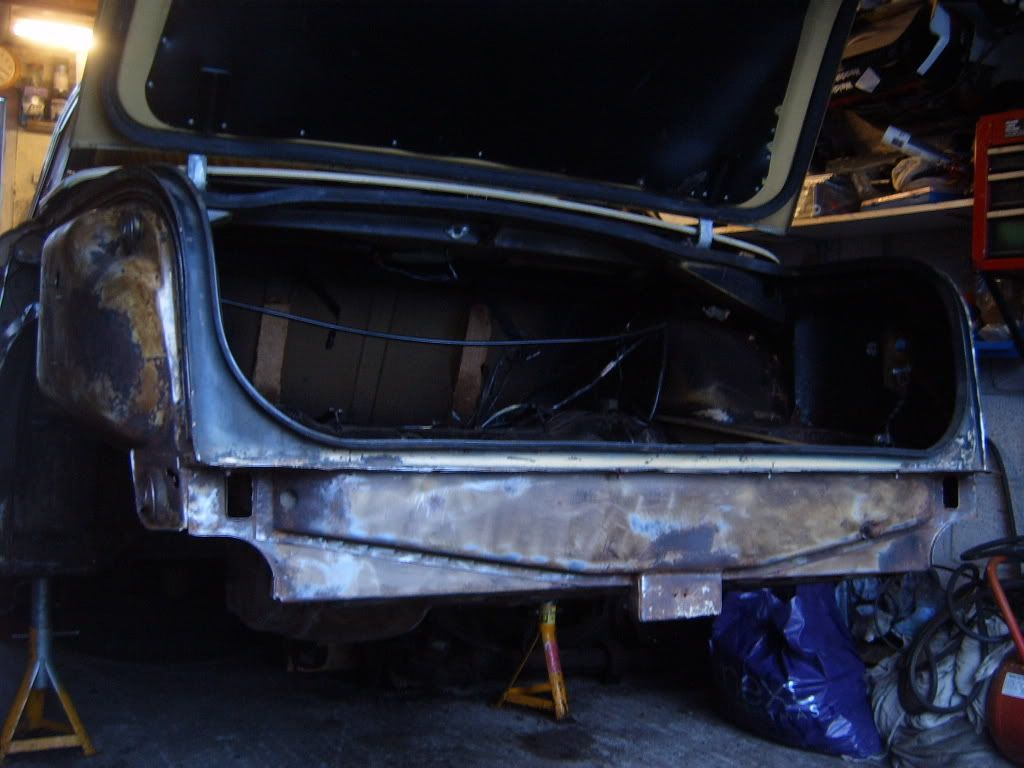
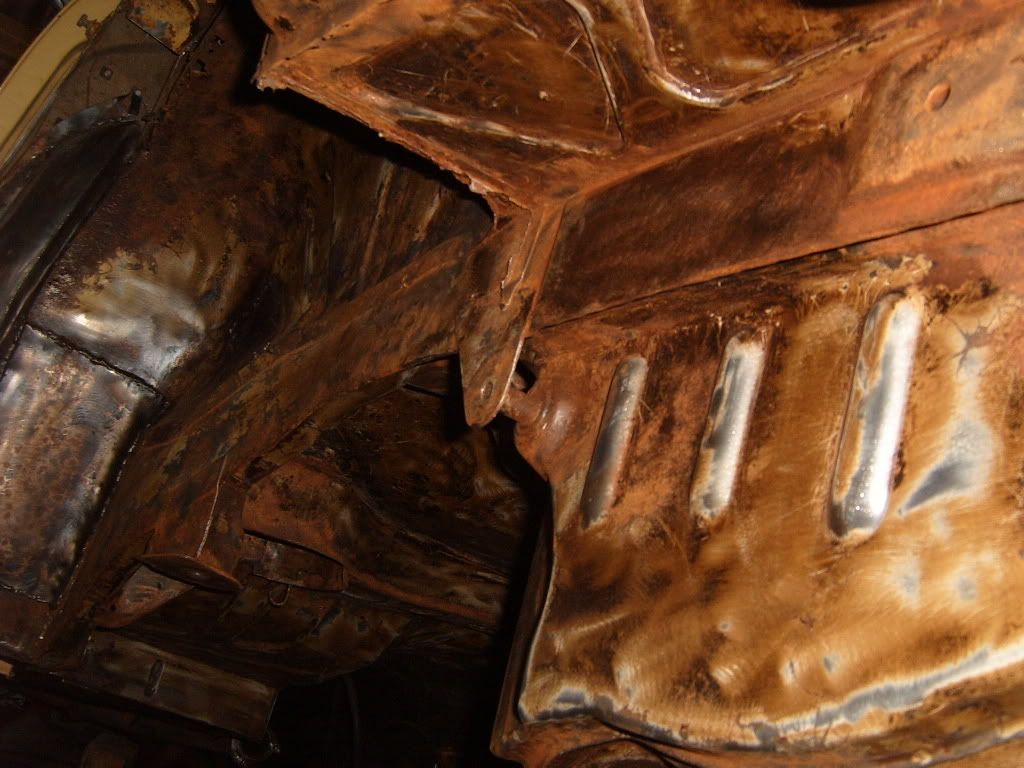
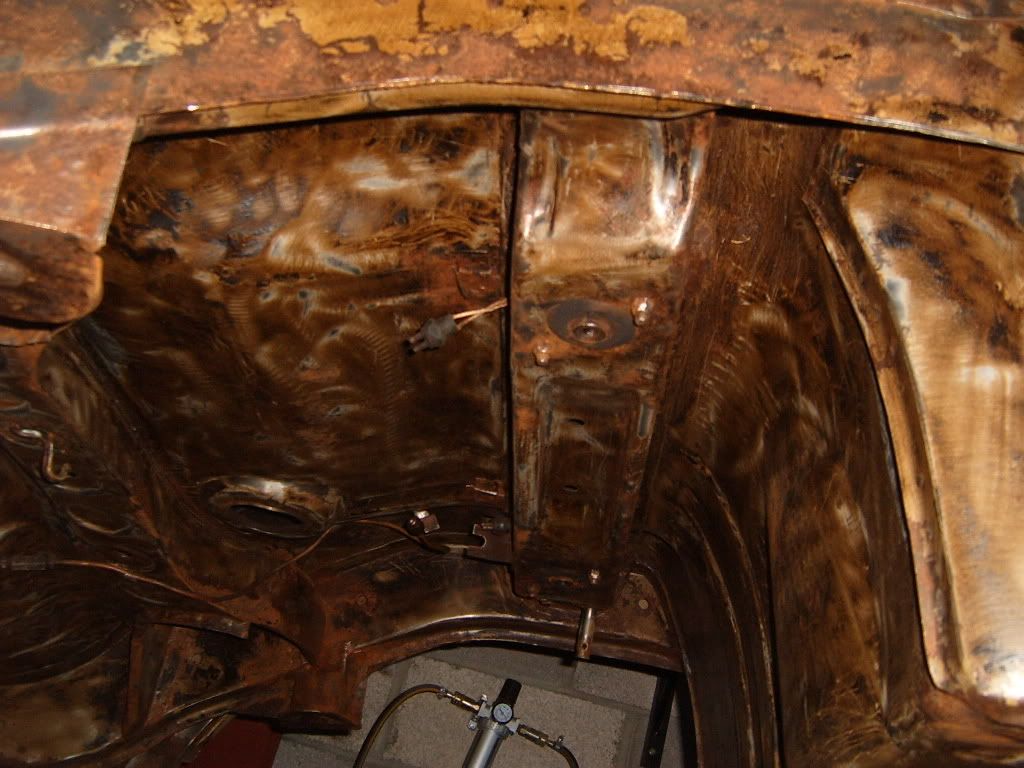
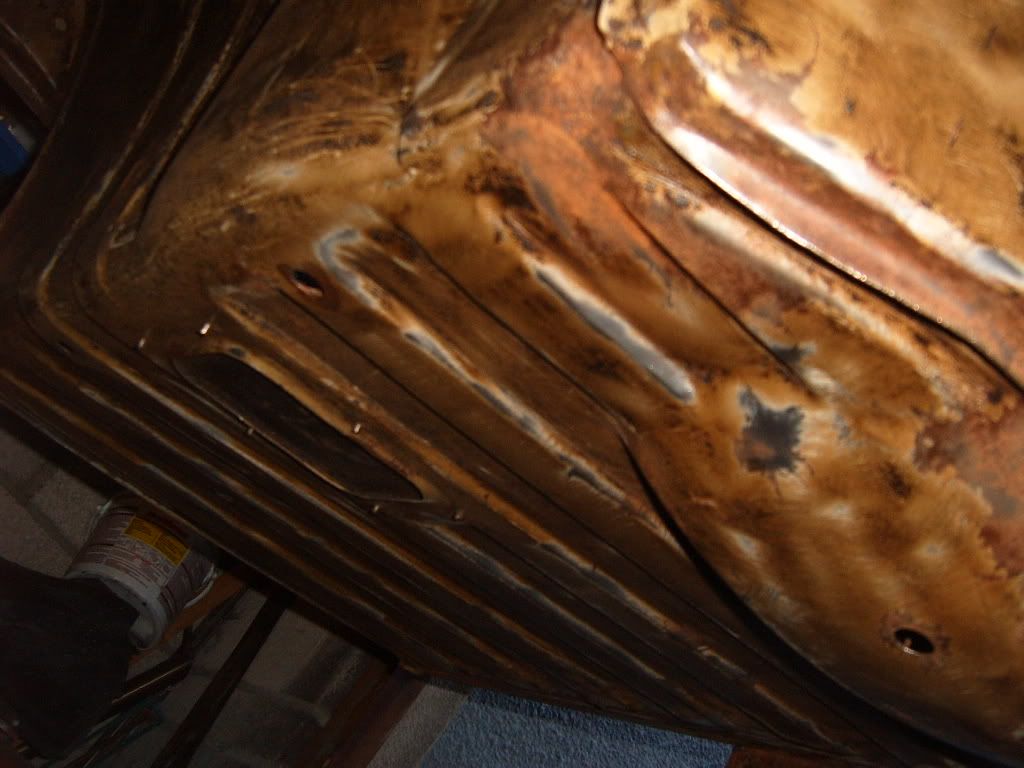
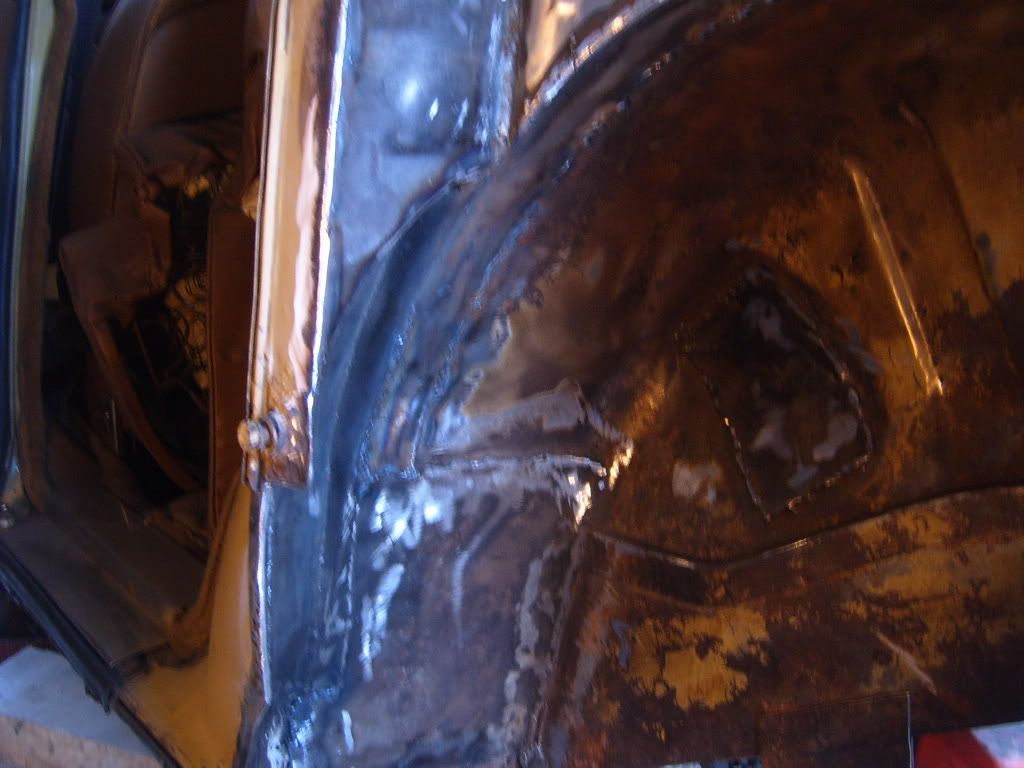
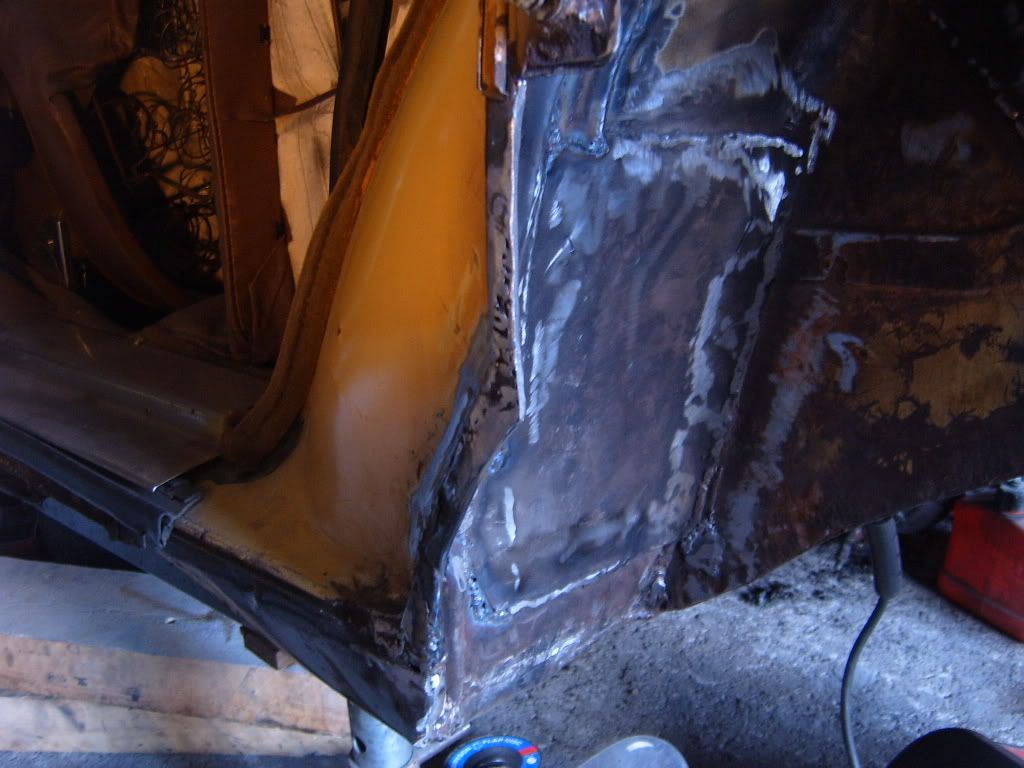
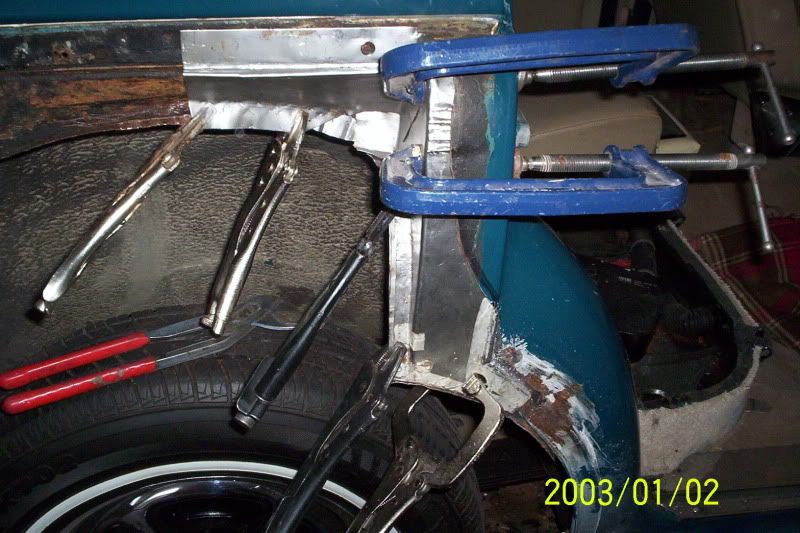
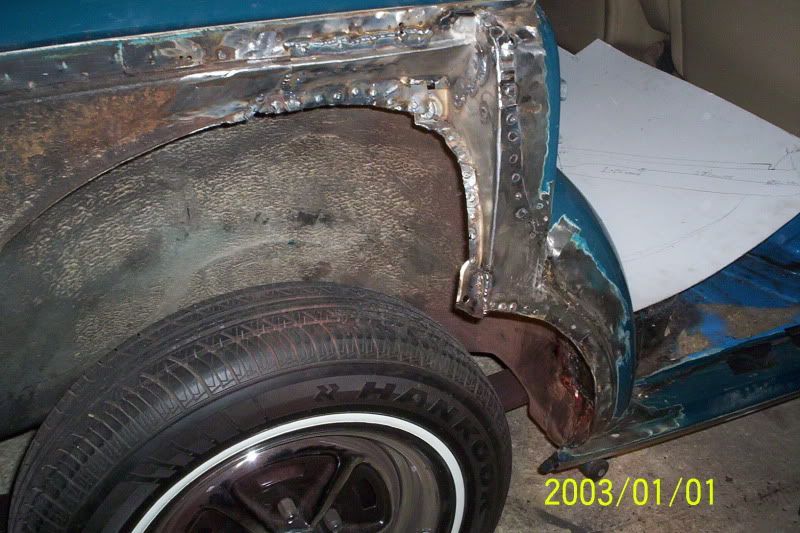
Spent two hrs underneath it last night with heat gun & 2" scaper removing all the old underseal, luckily its coming off very easly & so far is not as bad as I was dreading, still a very dirty job, takes more time to clean the garage floor & myself then the actual labour! If only I could pay myself! Still is very rewarding to see no more rust other than the top D-posts as per the pics.
Once again thanks for your input! much appreciated !
Hi Chris,
Very good advise, especially on the operation of the De-dion tube. Its going to be tight!, I did find the details for the wheel dimensions from the cragar webb site: check this, third on down is my wheels ordered, part # 500P575042.
http://www.cragar.com/ProductView.aspx? ... =%3fc%3d15
Once I have all the suspension back together & can get a wheel & tyre on then I can see what needs to be cut & alterted, will bolt on the rear wing as well to get an idea of space..or lack of it, Have red Simons link before, amazing what he does! JAG IRS is brilliant idea!
Spent two hrs underneath it last night with heat gun & 2" scaper removing all the old underseal, luckily its coming off very easly & so far is not as bad as I was dreading, still a very dirty job, takes more time to clean the garage floor & myself then the actual labour! If only I could pay myself! Still is very rewarding to see no more rust other than the top D-posts as per the pics.
Once again thanks for your input! much appreciated
!Re: P6 V8 project: Winter work/rust repair etc
Hi Damian
Reading the Cragar website, I think that gives you a positive offset of 4mm, which is better than nothing! I reckon the back spacing they quote is in inches (!!!) so ignore. So on the face of it you probably need 2 inches additional clearance to the D post, which could just be do-able without resorting to the Simon mod. Here's hoping!
I do hope I don't ever get to do the underseal stunt with Lucky!
Chris
testrider
Active Member
Re: P6 V8 project: Winter work/rust repair etc
You should think yourself lucky that use a 2" scraper Damian, when you get to the front you'll be down to a half inch chisel to get in the nooks and crannies and round the curves - worth it in the end though.
Can't wait to see you new wheels, hope they fit ok.
You should think yourself lucky that use a 2" scraper Damian, when you get to the front you'll be down to a half inch chisel to get in the nooks and crannies and round the curves - worth it in the end though.
Can't wait to see you new wheels, hope they fit ok.
DamianZ28
Active Member
Re: P6 V8 project: Winter work/rust repair etc
Hi Guys,
2",not too bad then,
I am eagerly awaiting for the delivery of my Cragars here at my work!, just these these alone will brighten up the faded various shades off baby poo almond & rust, with fresh paint in Monza Red then she'll shine like a diamond, hoepfully get some panels painted this year!
I think when the front inner arches are stripped then I'll reckon I'll find a few extra rust spots other then nasty welded patches already there, already chisled out a fare bit of ISOPON fibre glass filler!
Hopefully get it MOT'd for the spring & save next winter for engine out, bottem rebuild (TVR block would be great :twisted: ) and suspension rebuild, engine bay refurb etc!
la8ers dudes 8)
DamianZ28
Active Member
Re: P6 V8 project: Winter work/rust repair etc
Hi Rich, Yeah other than the rust on the D-Post's, its not too bad at all, have ordered new rear mud gaurds/splash panels & will also order new wing seals. Will spray the whole area in shutz black stone chip, the type that dries hard & not staying soft or sticky, will then go over it in a satin black, be half way there then! next to start clean up of all suspension components & fitting new poly bushes.
Hi Rich, Yeah other than the rust on the D-Post's, its not too bad at all, have ordered new rear mud gaurds/splash panels & will also order new wing seals. Will spray the whole area in shutz black stone chip, the type that dries hard & not staying soft or sticky, will then go over it in a satin black, be half way there then! next to start clean up of all suspension components & fitting new poly bushes.
Dave3066
Well-Known Member
Re: P6 V8 project: Winter work/rust repair etc
Looking good there Damian
You have been busy. It's such a messy, dusty job too. Despite the PPE the stuff gets everywhere. Major garage clean up once I'm finished doing mine.
I see you have some splash guards to replace too. I've just ordered mine from JRW along with the rubber seals too. Gotta start cutting that rot out tonight when I get home.
Dave
DamianZ28
Active Member
Re: P6 V8 project: Winter work/rust repair etc
Hi Dave,
Defo messy job but most rewarding, takes me longer to clean the garage floor than to do the car LOL, then its a making sure my old garage work clothes are free of sticky/oil mixed lumps of underseal, then shake it out form head, eyes & ears & then try not not to get any in my house, I have already managed to get two marks on my carpet..bugger! god knows how as by the time I have pre-clean down, im almost stripped of the old clothes scrubbing my hands in my kitchen sink thinking it'll all be worth it in the end! ..solution.. I need my own unit or a bigger house or a big double garage..actually all three would be great!..lotto win in my dreams!

truckdoctor
Member
Re: P6 V8 project: Winter work/rust repair etc
Hi folks, have been reading this post and found it interesting regarding the rusted areas on the p6 is very similar to that of the p5b I happen to be repairing. My intentions are to fit different wheels also ,and DamianZ28 mentions he has ordered his wheels, can I ask where from? I'm having difficulty locating a supplier as just like you my PCD is also 5x5. Northants tyres are the only company that I know that can help, but they come at a high price. Appologies for high jacking this thread
Hi folks, have been reading this post and found it interesting regarding the rusted areas on the p6 is very similar to that of the p5b I happen to be repairing. My intentions are to fit different wheels also ,and DamianZ28 mentions he has ordered his wheels, can I ask where from? I'm having difficulty locating a supplier as just like you my PCD is also 5x5. Northants tyres are the only company that I know that can help, but they come at a high price. Appologies for high jacking this thread