My '72 P6 V8 is back in use on UK roads and once again wearing its silver on black 'K' plates!

Re: The optimist

Phil Robson said:
How & why? :? :?

Because all of the air that the engine fan has to move is only moved by the fan being powered, and all that power is no longer available to actually drive the car. You never get something for nothing. If you rev the engine with the standard fan fitted take a note of just how much air it shifts.
 
Re: The optimist

I totally agree with the electric fan, I did a conversion on my 2.2tc and it quite a difference, also makes the engine quieter most of the time.

Would be nice for somebody to get rolling road plots with and without the standard fan, I'm guessing it will have more and more effect at the high rpm ranges.
 
Re: The optimist

On my car (v8) there is a kenlowe fitted and also the original fan is still fitted. I guess this means it makes sense for me to leave the original fan when i put everything back together? There were certainly no overheating problems...

Rich
 
Re: The optimist

Haven't made all that much progress of late. I've fitted new rubber bushes to the engine tie bar, and refurbished a NADA 'warm air collector' that fits over the drivers side exhaust manifold and feeds the NADA air filter canister. I've just had a new set of power steering hoses made up using the old ones as patterns, and retaining the threaded fittings. I'm waiting for my painter pal to return my refinished PAS fluid reservoir before I can fit it all back together and fill it up. I've obtained enough of the correct ATF to re-fill the BW35 autobox and refill the steering. Still haven't found anybody who can supply the same sort of plastic cable tie that was originally used to fix the wiring loom in the engine bay. Haven't made my mind up which aftermarket electric fan to fit or where. Hopefully the postman wil soon bring the next delivery of keenly-awaited parts with which to get the fuel plumbed in...
 
Re: The optimist

How about an update? Absolutely zero progress with my car lately... too much work, but not enough money my side :?

GW
 
Re: The optimist

:oops: :cry: Not an awful has happened since my last post, I'm embarassed to admit. I got the PAS reservoir back from the paintshop, nice'n'shiny (this time a Porsche black, whilst the engine bay is a Mercedes satin(ish) black, and most of the ancilliaries and engine bay fittings are a Ford black), and fitted it up to the inner wing.
I had wanted to schlepp the project car back across town to Classic Wheels, and finish assembling it there. Because the base unit is bare naked, bereft of panels and roof, but retaining the dashboard and electrics, I can't trailer it on a day when it might rain. Not easy to organise a car transport company to come and pick it up at short notice when the sun is shining! When I finally managed to overcome that logisitical nightmare the bloke turned up with his trailer, only to find that my garage landlord had totally blocked the entrance with a bloody great low-loader. Brilliant (not!). Put the kibbosh on my car actually going anywhere. Then I had a holiday, and since I got back the weather has either been wet, or either I or the transporter guy have been busy.
Now I've been offered a used two-poster car lift for €400,- sometime during November, when my mate takes delivery of his new lift. I have to dismantle the old one and organise transport to my lock-up, then install it there. If I can make that happen I'll be able to work on my project in my own garage, which will make fitting the exhaust, plumbing in the fuel system etc. a damn sight easier.
I still need an intact and fully functional vacuum thingamyjig for the NADA air filter box, the round cannister that actuates the flap in the 'snorkel' which mixes cold and warm air. I also need two more of the 'special bolts' (Part No. 610029, 3/8" UNC x 1 1/8" long) which attach the warm air collector to the driver side exhaust manifold.
I've now got just about everything to fit the electric fuel pump at the back of the car. I also need an 'L'-shape fitting, like the UK reserve tap fitted in the engine bay but only changing direction, without a choice of feed. Then I can route the fuel up from the tunnel with a flexible hose, retaining the reserve tap bracket, via the 'L'-fitting to a rubber-sleeved formed metal pipe across the bellhousing to the passenger side steering turret. I think this piece must've been made up by the previous owner of my organ donor car. He had drilled the rear face of the passenger side steering turret, and ran the petrol through this formed petal pipe, through the turret from behind, and out through the blanking plate, then along the chassis rail to the engine tie bar. The flexible hose along the chassis rail was protected from heat by a hand formed aluminium baffle over the chassis rail. I like the arrangement and want to duplicate it. It looks tidy, is as far away from the intake manifold and more importantly the hot exhaust manifold as is possible, and I only once had a fuel vapourisation problem on an extremely hot August day in a stationary traffic jam.
Meanwhile, I've been saving my pennies for a paintjob, and checking out and getting quotes from various paint and body shops. I only have to strip the bootlid and prepare the holes for individual R O V E R letters rather than the rectangular badge, and remove the rear window rubber from the decker panel. Other than that all my panels are ready to be sanded and refinished, pending... Every time I think I've got enough cash together some other pressing expenditure seems to get in the way. Right now I've got a sinking feeling that the dentist is about to deplete my paintjob fund quite heavily.
I've been stripping the organ donor of everything I might possibly want to retain for spare parts. If I get the two poster lift I'll be able to strip the running gear, keep the diff, short springs and AVO shocks, and finally weigh the base unit in for scrap. Yielding much needed space for refitting my refinished panels, I hope.
I sourced some front sidelights from ebay.de, but they turned out to be as corroded and useless as the three pairs of junk lights I already have. :x My first dispute with an ebay seller, whose description was far from the truth. I also scored a pair of really well preserved Winguard mirrors, at long last, for a mere €60,- incl. p+p. These normally fetch a far higher price on ebay.co.uk.
So there you have it, not much has happened, but I'm still plugging away, I've simply GOT to finish it soon... :!:
 
Re: The optimist

Keep up the good work! Having access to a decent garage will speed things up; I was able to drag the base unit along a concrete floor and load it onto a trailer myself for disposal once all the parts were stripped off of it

Shame about the front light holders, getting hard to find good ones, I'm sure someone on the forum would be able to help out with those

GW

citroends061024cq1.jpg
 
Re: The optimist

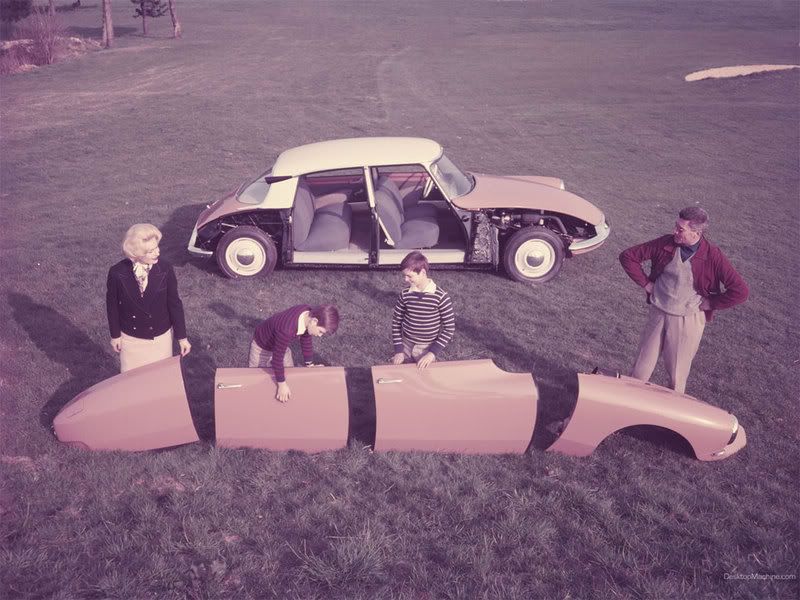
Ha! :LOL: That pic of the whole family dismantling their DS is great! Out of a catalogue, TokyoP6, or a family snap from your youth? :)
p6repair-68.jpg

Got a bit of time to get on with my project again, have made some progress now that it is at Classic Wheel. Nice to finally get some of my prepared bits'n'pieces out of their storage boxes and bolted back in place finally. Intake manifold and valve covers bolted in place, carbs on the top, P6 oil pressure sender swapped in place of SD-type sender, alternator bracket and alternator back on the motor, throttle linkage and bracketry back in. Underneath the electric fuel pump is in place at the back, opting finally for a home made bracket as depicted elsewhere on here instead of the NADA bracket I'd sourced. NADA reserve tap in place, with correct longer length reserve cable. Need to get a pinch bolt for that next.
More pics in due course as I get more done. Refurbished prop and exhaust to fit next...
 
Re: The optimist

That pic of the whole family dismantling their DS is great! Out of a catalogue, TokyoP6, or a family snap from your youth?

Ha! If I ever had a "youth" I don't remember it.... Good progress, will be amazing once it's finished; look forward to the pictures as your project comes along!

GW
 
Re: The optimist

Today I broke both a plastic petrol overspill pipe where it is held in place on the inlet manifold, and also the plastic petrol supply pipe between the two carbs. Brittle old plastic, didn't survive my clumsiness. :roll:
petrol-overspill-pipe.jpg

petrol-pipe-between-carbs.jpg

If anybody has got a replacement pair for me I'd be very grateful. :?:
 
Re: The optimist

I've found the time to get a bit more done on my project. I've been fortunate to have the help of proper mechanics at Classic Wheels Berlin, in fact no less than former pit crew for F1 Champ Sebastian Vettel from his formative years in Formula VW!
The electric fuel pump is finally all plumbed in beneath the back of the car, thanks again to the forum members whose helpful advice and vitally important photographs enabled us to get that sorted properly. I did source a NADA bracket for the pump but didn't want pop rivets chafing the underside of the petrol tank so opted for the self made 'Classic Rover Forum' bracket solution instead. Got the propshaft installed and hung the exhaust system, very little left to do underneath the car now. The flash of my camera has highlighted the areas on the crossmember and a few patches on the florrpan that need a bit of attention with some more black paint and underbody sealant! I am going to try and get it wired up and lubed up and started up before the year ends, starting again on Monday after Xmas...
p6repair-69.jpg

p6repair-70.jpg
 
Re: The optimist

Wonderful, I'm all choked up + not a little bit jealous, great progress + looks like you will end up owning one of the best P6B's in captivity....

Merry Christmas!

GW
 
Re: The optimist

Thanks for the seasonal good will and kind remarks chaps. Don't get all choked TokyoP6! I've still got a fair amount of work to do before I'm back on the road!
Today I was really hopeful I would be able to get some petrol pumping to the engine, maybe even get the motor started up before the year changes over, because I had set myself that much at least as an 'achievement target'. As I poured petrol into the tank it started to piss all over the garage floor. :cry: The petrol tank isn't sealed anymore. I suppose having been empty and out of use for a few years meant that the seal has dried out and given up the ghost. Natch. I've ordered a new one, and having taken this long to get only this far I can remain philosophical about missing self-set deadlines. I've got 8mm hard plastic fuel line under the car and up into the engine bay, then 10mm rubber fuel hose alongside the valve cover under the driver side carburettor and across the front of the intake manifold to the right SU (seen from in front). I would like to fit a fuel filter above the front of the intake just before the carb, but can't find one with nice chunky 10mm in and out fittings. I've been warned off using the glass and metal filter I had before, because they apparently come unstuck and spring a leak after X many years. Shame, as it would've fitted, and looks spangly. Original milky plastic Rover-approved AC Delco plastic filters also have smaller in and out pipes. Hengst clear plastic fuel filters are all 8mm, too small. Anybody got any idea what fuel filter I could use?
Let's hope we all finish our projects and get them out amongst the traffic in 2011!
 
Re: The optimist

Hello mrtask,

I dare say that your Rover is better than new, looks magnificent.. :D

Just a question on the fuel lines,...why did you choose to run a 10mm line within the engine bay as opposed to an 8mm?

Ron.
 
Re: The optimist

Happy New Year everybody!
Hi Ron. I did as I was advised by the chaps at Classic Wheels! Their senior mechanic suggested I fit 10mm rubber fuel hose over the 8mm plastic (nylon?) fuel line with a two inch overlap, and cinch it with a hose clamp. I didn't realise that fuel fittings are more commonly 8mm than 10mm.
Has anybody else had a bad experience with ProFlow glass and metal cleanable inline fuel filters? Mine looks okay to me, I'm tempted to ignore the advice against and use it...
 
Re: The optimist

Hi, 8mm and 10mm are more common on commercial vehicles. So try
them for filter units. I am not sure why you were advised to use 10mm
as it slows the fuel down giving it more chance to soak up heat and cause
known problems.

Colin
 
Re: The optimist

Hi Colin. I did discuss the well known 'vapour lock' issue with the guy who advised me to use the 10mm hose. Having just looked at the recent photo in ewokracing's thread "The inheritance. 1978 P6B" I like the tidy look of his filter hidden beneath the carb elbow, and I think I'll try and duplicate that.
I've just popped down to my lock-up to shovel loads of snow away, and extracted the rubber seal between the petrol tank and sender from out of my organ donor. It looks to be in fine condition. Do I need to use some sort of additional sealing compound to get my petrol tank properly sealed up?
 
Re: The optimist

Your projects coming along nicely now and your fuel line routing a reserve switch is much neater than mine. Good skills on the pump mount bracket too.

Where ever you put the filter, make sure it's held firm and that you can get to it easily.

I don't know if you should put any sealant on the bottom of the tank though.
 
Back
Top