

You are using an out of date browser. It may not display this or other websites correctly.
You should upgrade or use an alternative browser.
You should upgrade or use an alternative browser.
My 3500 V8 project.
- Thread starter Hans
- Start date
Ok i be carefull.
I have 1problem , i want today fit the roof inside but i don't remember how the wires from light route.
The big one with 2 wires i fitted to the front its OK
A small one i fitted to swith backdoor right , but the wire for the leftdoor back is to short.
Somebody pictures or drawing from the wires route ??????????
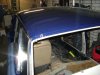

The body is painted complete , the doors , boot and bonnet , valances are painted inside and corners.
Now i assembled every thing complete and aline the parts the outside is now primered , when every thing is alined we started with "block the car " so every thing is beatifull flat and in line now whe have possibility for work it on a little bit when something isn't 100% inline and after that respray,paint the outside with the finishing paint.
Now i assembled every thing complete and aline the parts the outside is now primered , when every thing is alined we started with "block the car " so every thing is beatifull flat and in line now whe have possibility for work it on a little bit when something isn't 100% inline and after that respray,paint the outside with the finishing paint.
Oeff!! a really hard job, today spent at the bonnet, the lock works nice now but i have worked the holes to one side and not 100% happy yet but i little better than yesterday, also put shims at the left front door the 5/16 bolts from doorhinge at the body very thigten and drilled 6mm and after that with an hammer an allen key in the hole and loose the bolts but now i need new ones.
Hi , panels are fitted now , only change the 5/16 screws at the door hinges .
Today i cleaned the old carpet set with carpetcleaner and the rightside is acceptable but the leftside is very damaged its here driverside i called people here if the know a used leftside but its very hard to find this , so i was thinking maybe somebody who changed his carpet or broke a car maybe you have the leftside for sale because in your country it is the passengers side ? if you have please let me know.
Today i cleaned the old carpet set with carpetcleaner and the rightside is acceptable but the leftside is very damaged its here driverside i called people here if the know a used leftside but its very hard to find this , so i was thinking maybe somebody who changed his carpet or broke a car maybe you have the leftside for sale because in your country it is the passengers side ? if you have please let me know.
Hi ,it looks like more and more a car.
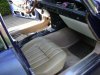
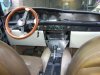
Finished the carpets now , original floor mats with special thanks to Mr McKenzie , and i buyed a carpet and cut by myself.
Now looking for front chair series 1 .Mine are damaged at the top from the sun.
Some pics you can see the result.
Regards Hans
Finished the carpets now , original floor mats with special thanks to Mr McKenzie , and i buyed a carpet and cut by myself.
Now looking for front chair series 1 .Mine are damaged at the top from the sun.
Some pics you can see the result.
Regards Hans
Attachments
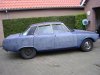
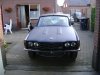
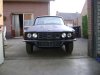
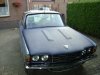
Hi , some pictures from my progression ")
Parts mounted on the car so when the car is sprayed i know everything fit well ( and nice to see it with parts on it)
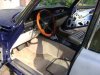
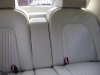
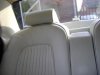
Recollor the rear seats from black to creme(beige).
Parts mounted on the car so when the car is sprayed i know everything fit well ( and nice to see it with parts on it)
Recollor the rear seats from black to creme(beige).
Attachments


rottenlungs
Member
Looking good Hans.
What colour are you going to paint her when she`s ready?
What colour are you going to paint her when she`s ready?