Getting there

Julian

Member
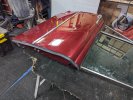
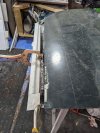
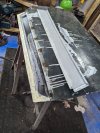
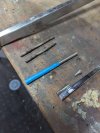
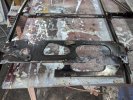
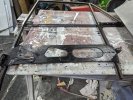
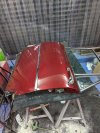
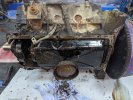
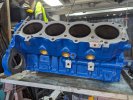
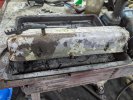
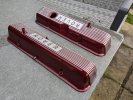
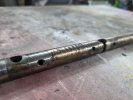
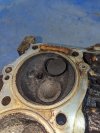
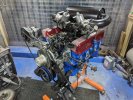
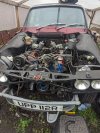
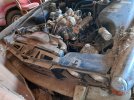
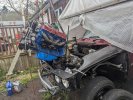
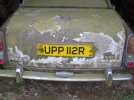
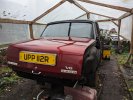
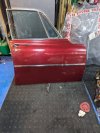
Getting a move on my project now that had been laid up since 1982 in an actual barn on a farm! (im sure a well known phrase for that), after a years break of working on it to build a good workshop that is warm in the winter and a good size, all main welding done, brakes done, running gear done bar engine and box, wings all done (bear metaled and painted), one door striped, welded, painted and fitted (3 more to go + bonnet). Interior to be done last once running and snagged.
 

Attachments

  • 4 Barn July 2021.jpg
    4 Barn July 2021.jpg
    405 KB · Views: 41
  • 20210710_102801.jpg
    20210710_102801.jpg
    732.3 KB · Views: 42
  • PXL_20231204_123444782.jpg
    PXL_20231204_123444782.jpg
    4.9 MB · Views: 44
  • PXL_20231203_170546256.jpg
    PXL_20231203_170546256.jpg
    3.5 MB · Views: 44
  • PXL_20231119_115319562.jpg
    PXL_20231119_115319562.jpg
    3.2 MB · Views: 41
Wow, that is a transformation, you've certainly managed to get the upper hand with that :)
 
Door No 2 done, had another 100mm re metaled at the bottom as appears to be the norm, lots of internal repairs. Fitting tomorrow and then onto No3 door,
 

Attachments

  • PXL_20231212_214132656.jpg
    PXL_20231212_214132656.jpg
    3.6 MB · Views: 36
  • PXL_20231206_093011140.jpg
    PXL_20231206_093011140.jpg
    3.2 MB · Views: 37
  • PXL_20231207_083844476.jpg
    PXL_20231207_083844476.jpg
    3.3 MB · Views: 33
  • PXL_20231208_101039528.jpg
    PXL_20231208_101039528.jpg
    2.8 MB · Views: 33
  • PXL_20231208_110308909.jpg
    PXL_20231208_110308909.jpg
    4.5 MB · Views: 32
  • PXL_20231208_152054505.jpg
    PXL_20231208_152054505.jpg
    4.2 MB · Views: 37
Excellent! Make sure you replace the glass 'buffer' that's meant to be on the pad in the middle. The pad is the same as the one on the top inside door plate, but you can put some foam on instead. It just stops the glass clattering when you close the door.... ;) - see my post #331 on this thread OCC 469 - restoring & running a "sharkstooth" 2000
Just seen your post, seems its exactly the same project and problems, re the glass buffer, i used felt strip, same as the stuff you put on the bottom of chair legs. also for corrosion control i used zinctec sheet steel for the metal work (had one 1mm sheet outside for a year and no rust!), grease on the inside of the folded joints, painted the inside of the door with a good wash of epoxy primer, seam sealer over the welds, followed by a good wax oil coating inside after paint (bet the bugger still rusts)
 
originally there is also some heavy sound deadener stuck to the inside of the outer panels on the doors. It turns the rattle on closing into the nice 'Chunk' you hear when closing the door.
 
Door No3 done, usual welding etc etc one to go. After working on 4 rear rover doors now, all had the 1/4 light lower pins corroded out! had to use some grey matter as well as made new pins, now all work fine, hope to get last door done by Christmas. (after tiding work shop as its degenerated in to a mess that looks like the kids bedrooms again)
 

Attachments

  • PXL_20231219_112711680.jpg
    PXL_20231219_112711680.jpg
    3.4 MB · Views: 12
More before and after pics of my ongoing project (1974 P6 3500 Auto), started on last major task "Engine", I will let you all to decide which pic is before and after. Plus also rocker shaft found broken inside a post and measured 0.9mm of total wear / difference between rocker & shaft on vertical vs horizontal. A valve seat was adrift and bent valve showing evidence it had been run like (bet this car sounded rough when it was last running back in 1982/3)
 

Attachments

  • PXL_20240114_113430945.jpg
    PXL_20240114_113430945.jpg
    3.9 MB · Views: 39
  • PXL_20240119_123907916.jpg
    PXL_20240119_123907916.jpg
    3.4 MB · Views: 40
  • PXL_20240123_131257763.jpg
    PXL_20240123_131257763.jpg
    3.8 MB · Views: 41
  • PXL_20240125_131846545.jpg
    PXL_20240125_131846545.jpg
    3.7 MB · Views: 41
  • PXL_20240125_133204435.jpg
    PXL_20240125_133204435.jpg
    2.3 MB · Views: 42
  • PXL_20240113_144012573.jpg
    PXL_20240113_144012573.jpg
    3.2 MB · Views: 43
Also noted, all bearing were standard size and very little wear, replacing all new shells anyway with no grinding, also bores were standard size and very good, just a bit of honing required.
 
That's the first broken rocker shaft I've seen on a V8, and the first dropped seat I've seen on one as well, so congratulations on your double hit.
 
A very nice job well done to recover this engine! I have seen a broken rocker shaft once, but it was on a Buick 300. I got a set of shafts and rockers from Island 4x4 - aftermarket but I will never wear them out.
 
well almost there with the engine, still need a few bits for it and some weather to fit it, noted this is a later 9.25CR engine.
 

Attachments

  • PXL_20240131_153845539.jpg
    PXL_20240131_153845539.jpg
    3.2 MB · Views: 32
IMHO 9.25cr is the nicest engine of them all - revs nicely, still has some low end torque. You will need a matching dizzy for the right advance , although 10.5CR curve is the same shape, just advances ~2 degrees.
 
Got engine in last week! surprisingly easy!!! found a carb fault on commissioning that I didn't pick up on carb strip down, now waiting for parts before test firing. (the long wait for post over the easter weekend) So going to go and have close look at my possible next project, a ford P100 pickup with a 2ltr pinto engine. stored since 1991, parked next to where my P6 was that I am restoring now. (the P6 was parked up in 1983 we believe, i.e. last tax expiry).
Attached some picks, before and after.
 

Attachments

  • PXL_20240319_134835287.jpg
    PXL_20240319_134835287.jpg
    3.9 MB · Views: 18
  • 20210723_131059.jpg
    20210723_131059.jpg
    302.3 KB · Views: 18
  • PXL_20240319_131953386.jpg
    PXL_20240319_131953386.jpg
    5 MB · Views: 18
I like a P100. A mate of mine has a Mk3 bakkie with a 2•8 V6 and auto box, and years back I worked with a bloke who had a p100S fitted with a rover v8
 
Back
Top