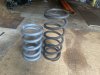
Well, it took three years. But the right hand diff output seal finally died and joined its partner in the bin! After putting it off for 3 (possibly 4 if honest!) months I finally not the bullet and turned up a new thrust collar using the drawings I made first time around.
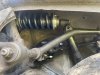
using the drawings I made first time around in steel. After the first time it was easy taking the diff side plate off. Remove bolts holding half axle to disc and output flange, disconnect the clevis pin for the hand brake linkage, and remove calliper pivot bolt. Once those are out of the way, drain the oil and unbolt the four bolts holding the diff side housing. Withdraw the outputs assembly.
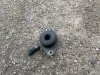
I tried for way too long the first time to press off the screen of thrust collar and ended up turning it off on the lathe. This time I just went straight to the lathe and turned the old collar down until it was paper thin. Then it just fell off.
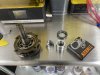
Next, press the output shaft out of the bearing (I replaced the bearing along with the seal). Then the bearing out of the housing.
A quick clean of the parts before I pressed on the new bearing, flip the housing over and tap in the new seal. I’m pleased to report the new bearing from Wins is a sealed Timkens job. I don’t want to do this job again for a while! Now the bearing and seal are in place I pressed the shaft into the bearing (while supporting the inner race so as not to damage it). Followed by the new thrust collar. The Rover manual states that you should see ‘at least’ 2 tons of resistance while pressing the collar in place. I’m pretty sure it was well above that! Reassuring that I’ve got the dimensions right. Finally, reassemble to car, for new pads (the old ones were VERY well lubricated with hypoid oil). Followed by snuggling up the pads by manually operating the handbrake lever on the calliper. When I finally had the car on the ground the handbrake was still high. I decided to try my luck with a test drive. Sure enough within a couple of miles the callipers had fully adjusted.
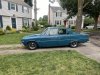
I had forgotten just how good the P6 brakes are! Almost a match for my 2008 Saab. It’s scary how a slowly deteriorating setup can fool you into thinking it was ok. It still felt better than most 60’s brake systems, now it feels decidedly modern.
Here’s my write up four years ago on the other side.
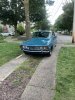
Getting back on the road