3500S with a difference

Bonnet scoop fitted.

A beast lays below!
ScoopHole.jpg


Scoop1.jpg

Scoop2.jpg

Scoop3.jpg

Scoop4.jpg


A bit of touching up with some orange over inner black bits, but to be fair does not notice unless you get down low and look up the scoop.

I hope this will let more air into the engin bay and aid cooling.
 
That is one sexy beast! normally I think the 3rd bonnet scoop that you see on US models looks very naf but the colour and the level of finish.....I love it.

Graeme
 
These are moulds taken from Series 2 Air Con cars available in the UK .... they simply fit where they touch, hence the seam sealer can be seen a bit underneath ... this will dull.

It was bought from Classeparts and Alan let me have it first to see if I liked it. I did so bought it and fitted it. A NADA bonnet would have looked wrong on a S2 3500S .... I think this looks in keeping ... above all it is functional, not for air con, but for cooling. Drove the car with hole in for a couple of days in hot sunshine and the temp remained cooler and at the traffic lights you could see the heat escaping.

Lets hope it works :?:

Next job is to paint up Plenum Chamber, Rockers, Y Piece and AFM. I am using the original grey used on original P6 lump. Will chemically clean, etch and paint grey. Wl then block back raised aluminium fins on rockers and plenum chamber and go down grades o give a high shine. Then lacquer the lot. This will brighten it right up under the bay. Engine was degreased and pressure washed, but not steamed. Had nowhere to keep it, so flopped it in o the quick. ALl good fun.
 
The colour of the car looks great, and the bonnet scoop is certainly the business.

Fuel injected engine, minilites,....Very nice indeed.

Ron.
 
Very, very nice! I've always liked the single bonnet scoop on the later bonnets. They look the business, and no doubt help keep things a bit cooler in the engine bay (not to mention a possible benefit to the air intake, well more with carbs anyway).

Great spec this P6. 8)
 
That looks really wicked mate! So do Alan's remanufactured scoops not have those odd little bits missing at the sides then? Or did you have to fill them with something? If so, what? I can't find a suitable photo to illustrate what I mean, but perhaps you know what I'm talking about TwinPlenum? Hold on, here we go;
LanceLaCerte-BH.jpg

What's actually the best filler to blend in those unsightly little holes, and the two small holes where the previous owner of my second hand scoop had presumably added a 'V8' badge to the top (! bet that looked naff !)
I'll be fitting a single NADA scoop as well, haven't gotten as far as actually marking and cutting the hole yet. You could actually probably save me a whole lot of bother if you were able to send me a paper template of the hole you cut and it's position on the bonnet. Perhaps you could post something like that to me? If you open the bonnet can you see the hole from underneath, seeing as how you've fitted the scoop already? I'll get some beer tokens to you for your trouble fella!
 
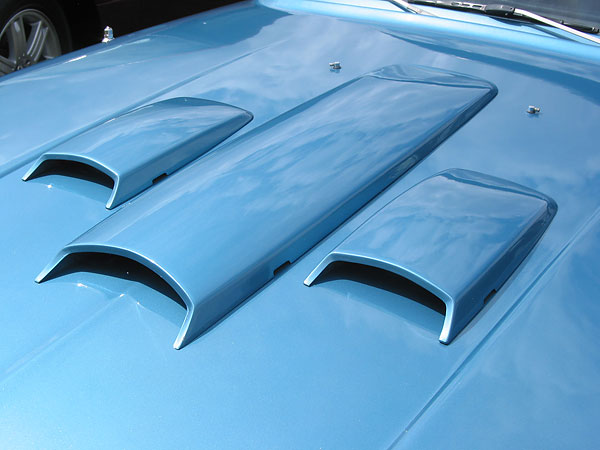
Alans scoop did not come with the holes in the side. I think they must be something to do with the louvres in the NADA bonnet.

If you wanted to fill them, simply use chopped strand (fibreglass bridge gap) and place filler over the stop. This is the stadard procedure with fibreglass repairs.

To cut the hole, you need to do the following.

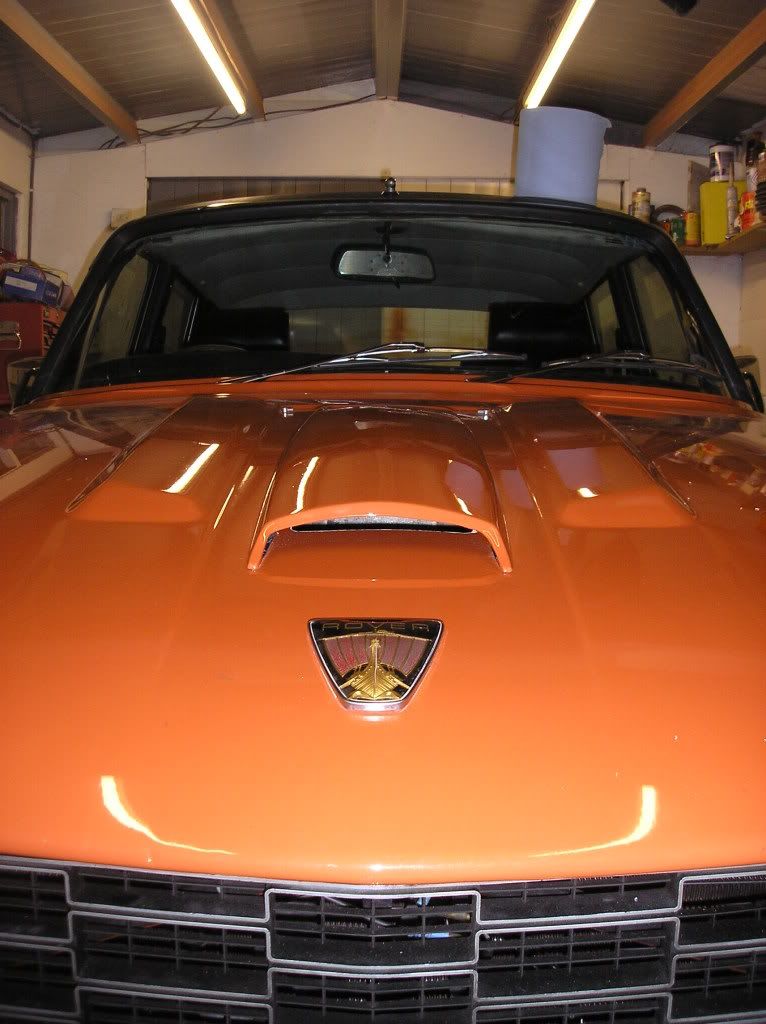
1) place th e scoop in position, measuring that it is in the correct position against the 2 original bonnet buldges.
2) Draw round the scoop with black marker.
3) Mask around the inside of the drawn template with 1" masking tape - keeping the tape as straight and neat as possible, especially around corners
4) Then draw around the inside of the masking tape with the balck marker in a neat and straight fashion (this is the line you will cut)
5) Remove the masking tape.
6) Using a cutting disk, cut a line at the top, bottom and both sides to give you space to get the air saw in.
7) Cut the hole with an air saw.
8) File down the edges.
9) Drill 6 holes either side of the cut where you will place you screws ------- making sure they are in the middle, as the recess on the scoop at the bottom is about an inch, which you will screw into.
10) PLace the scoop back in position, sticking it down with double sided number plate tape.
11)Drill up into scoop to make mark where you have to place drill holes in scoop.
12)Drill holes in scoop off of car.
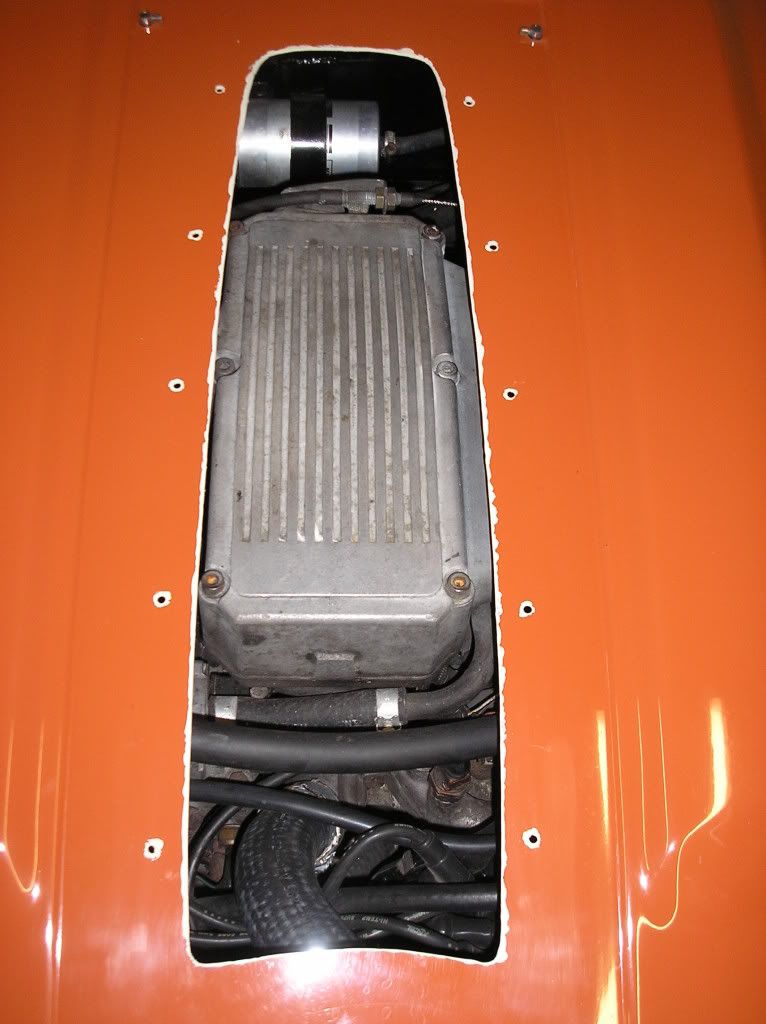
13) Paint edges you have cut and drilled on bonnet with etch primer to stop water getting into bonnet and lifting paint.
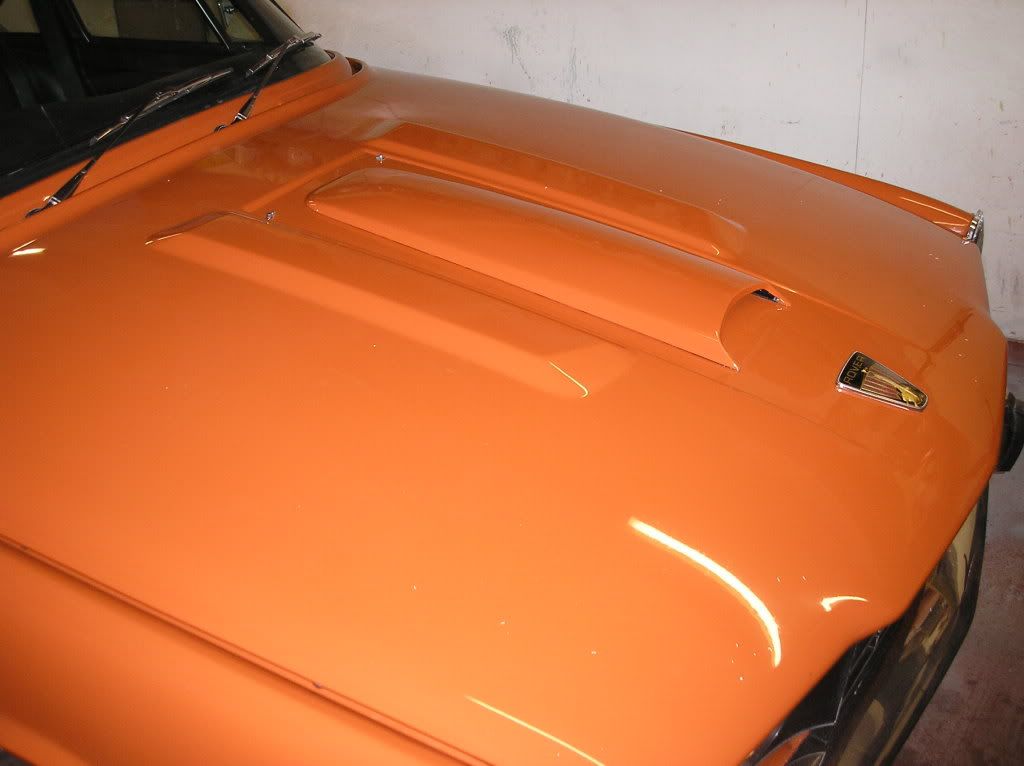
14) When scoop has been fully etch primed, primer filled and painted in body colour, and painted matt black underneath to match bonnet underside, place a very thin bead of seam sealer all the way around the outside of the scoop.
15) Place scoop in position, using small alan key or pop rivet, locate holes.
16) Screw the scoop down and clean off excess seam sealer.
17)Under the bonnet, paint the screws black and dust over wit h good quality matt black paint (MIPA in a can is fantastic)
Job done!
 
Looking good! The vents in the original scoops serve a very important purpose though. Just inside the mouth of the scoop is a 'V' shaped piece of right-angle plastic riveted to the bonnet that deflects rain water out of the vents in the sides of the scoops, also the hole on the NADA bonnets is a lot smaller- about 6 inches long and located about three quarters of the way down the scoop, just big enough to meet the air cleaner intake. I hope you dont have issues with rainwater running into your distributor. It might be worth making some sort of cover for it!
 
TwinPlenum3500S said:
During heavy storms at high motorway speeds I might stuff a big pair of underpants up it :)

Now there is a solution Wallace and Grommet would be proud off :shock:
 
TwinPlenum, thanks a lot for the How-To infos regarding fitting the middle scoop. Nice one. I showed this thread to the metalwork dude at Classic Wheels today and asked him if he had an air saw; he grinned and said no problem, he quite likes the look of the scoop, and after all that's nothing compared to what I've asked him to do when he has the time... flared rear arches on my P6 project to accomodate wider larger wheels, starting to widen already in the back doors! I'm inspired by the metal Sebring arches he's making from scratch for an MG B GT - see cwberlin.de/mgb-metalsebring.html.

KiwiRover, that's a very interesting piece of information. Have you got a photo or two of the little vertical rain lip(s?) you describe? Failing that, could you perhaps sketch it/them and upload your effort? I really don't fancy rainwater extinguishing my motor electronics whilst enjoying the lack of speed limits on the Autobahn, and would like to replicate the water baffle you mention.
 
OK Mrtask, happy to help. I dont want to hijack this thread so I have done a new post in the bodywork section with some photos. Also, it looks cool driving in heavy rain with the little streams trailling out the sides of the scoops! :wink:
 
Have added some Mag style centre caps onto minilites from American Racing.

Also a set of Police spoilers from Alan at Classeparts ... thinking to paint them wither body colour of matt black... too shiny

police2.jpg

police1.jpg

P6centrecaps2.jpg

p6centrecaps.jpg


Also having the original Viking logo as on 3500S made into adhesive stickers to fit centre caps ... local print firm has scanned them.
 
Do them body colour - after paying for them , you want them to be noticed

And no driving at illegal speeds to see if they make any difference !
 
Perish the thought ... I met with Alan at Classeparts today, wow what a yard, 20 P4's, 3 P5s a dozen 6Ps a couple of Sd1's and a spattering of BLMC motors in yard. A great morning spent with him and his mother. We talked tuning V8s and my little girl of just 3 ran around the yard with his 82 year old mum.

When it comes to buying spares, I urge you to use classeparts. A business like this is truely British. In 10 years time peolpe will laugh at you when you tell the about it, as if such a phenomena ever existed. There cannot be another business dedicated to P6s anywhere in the world. If restoring an modding Rovers were a popular sport, Claseparts would be in the premier league!!
 
Looking good fella! Like the center caps, very nice indeed, muscle car touch, do add a photo or two when you get the new decals on. Definitely paint the spoilers to match the body colour, looks way better, hard to tell that they're in fact an added extra when they are colour matched. At high speed they should improve handling. What are those tyres? Car or light truck tyres? That's the proper size the car came with fron new, right? Not easy to find a good quiet tyre in that size, what's your verdict on those Corsa tyres?
 
The contat details for Classeparts;

Classeparts Ltd

Address: 7a Plantation Road
Leighton Buzzard
Bedfordshire
LU7 3HJ
Telephone: 01525 382968

I reallly should have taken photos ... not been anywhere like it in years ... it was like stepping back in time 25 years.

Corsa tyres are fine .... I did not have much say in them, as I have a friend who works for a tyre fitters, I gave him the dimensions and that is what he got in.

Next on the agenda is engine work .... I have slightly weaping head gaskets (original tin ones). I will use that as a chance to strip the top end of the engine, paint up and thoroughly detail. Will have a mild road cam fitted, new lifters, timing chain etc...... then I simply must start on other projects that will brig some money in as opposed to the other way :LOL:

As for Centre caps, I have amother friend who runs an American car spares shop ....he ordered them in from the States ... they are "American Racing Mag Style" caps.
 
Back
Top