1970 Rover 3500 - EMF

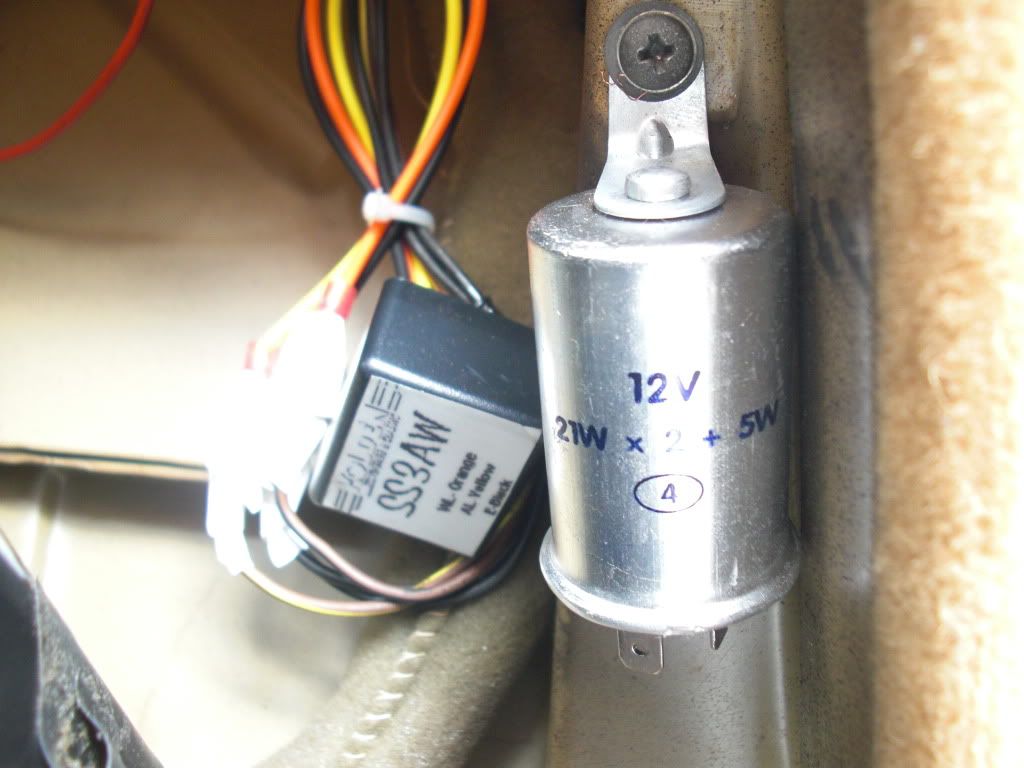
I've now pretty much completed refitting the engine bay and I spent most of Saturday cleaning the wiring loom and clipping it into place with the new genuine Land Rover cable ties - they fit perfectly and are just right for the job. I've painted lots of little brackets too, but you can't really see them in the photos and I just need some stainless bolts to finish it off now.

DSCN6483.jpg


DSCN6484.jpg


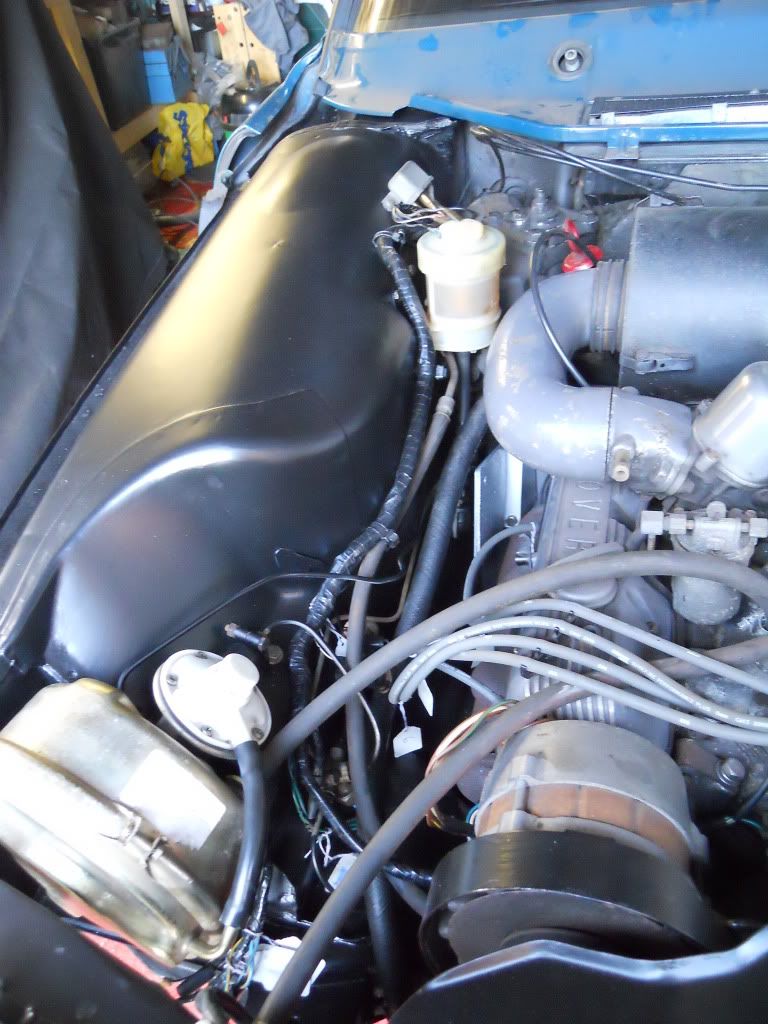
The engine needs a good clean and I still haven't got round to painting the rocker covers of inlet manifold yet, but the sun is shining and I want to drive it now. There was a good test of the Epoxy Mastic Paint on Saturday too when the one man bleed kit blocked and exploded off the bleed nipple spraying everywhere with brake fluid. I wiped it off quickly and it's not marked the paint at all - fantastic.

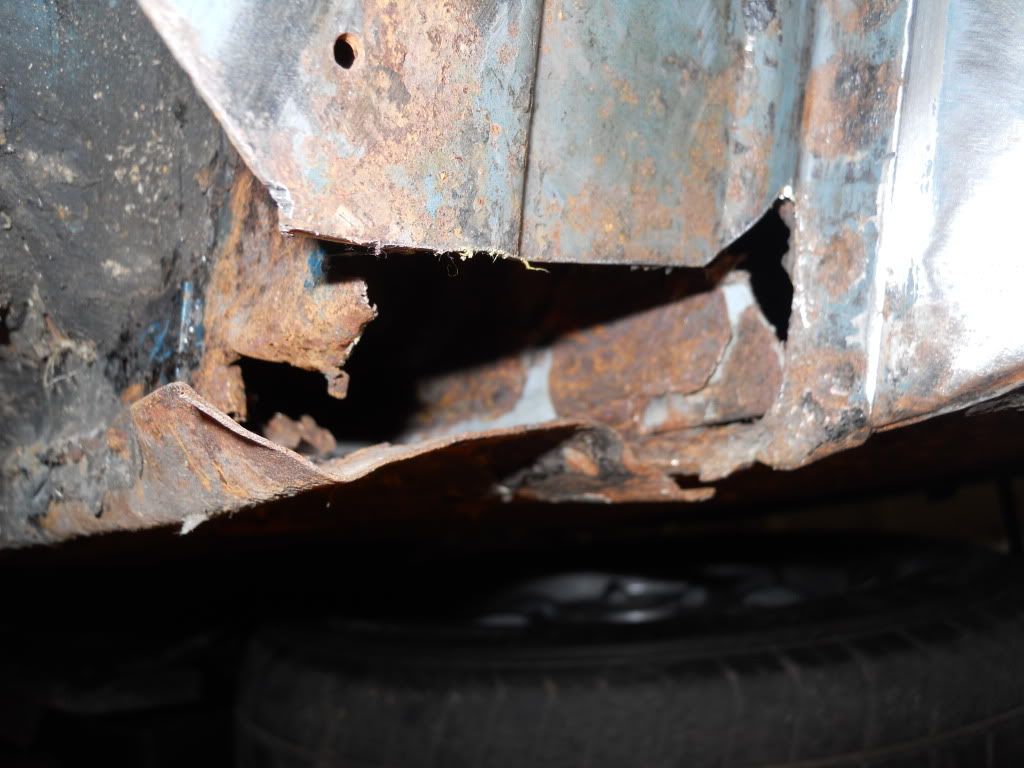
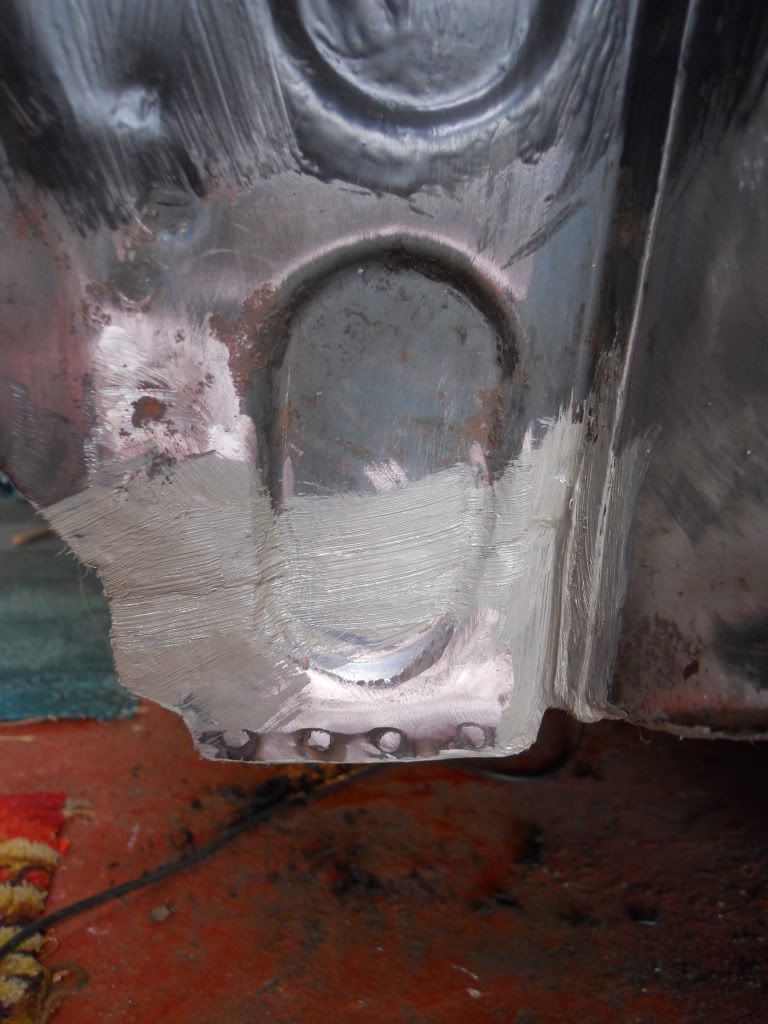
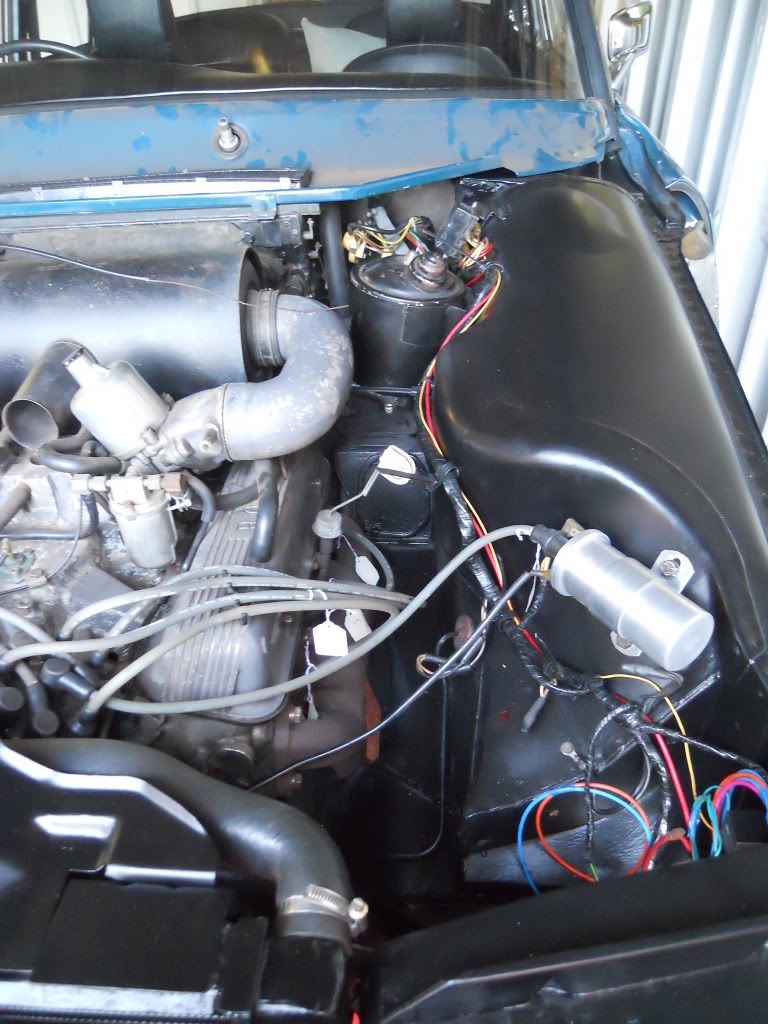
You may also have noticed that it's facing the other way in the garage. I got the brakes bled and the engine running on Sunday to spin it round so that I could open the drivers door and tackle the rusty hole at the bottom of the splash panel.

DSCN6481.jpg


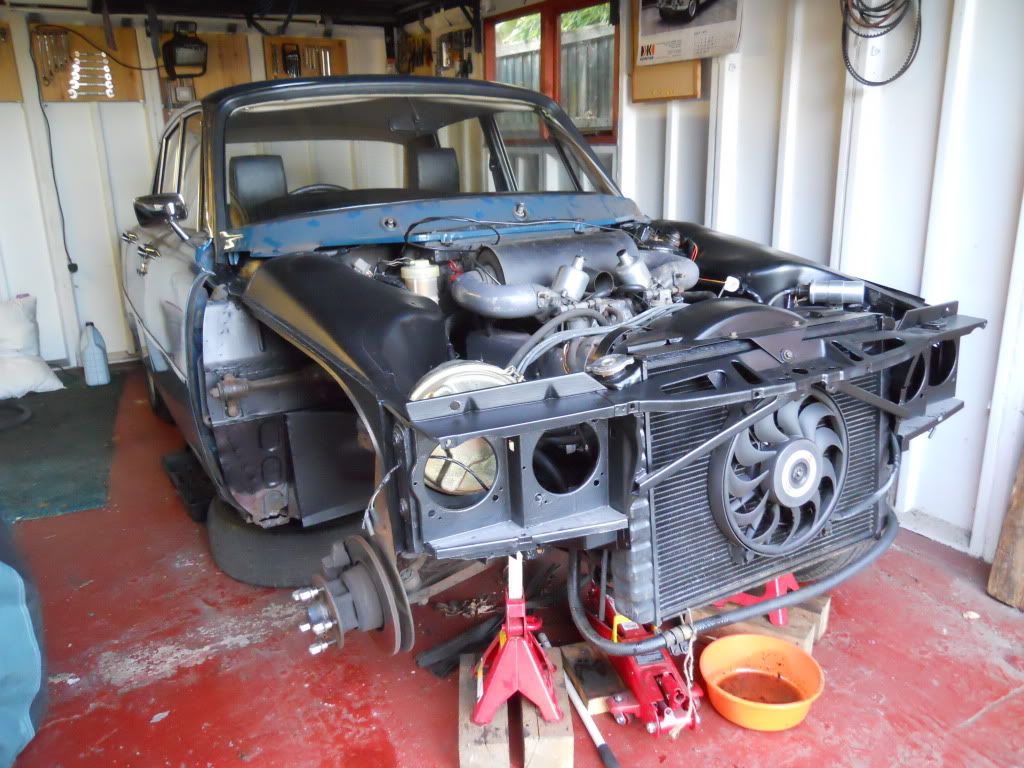
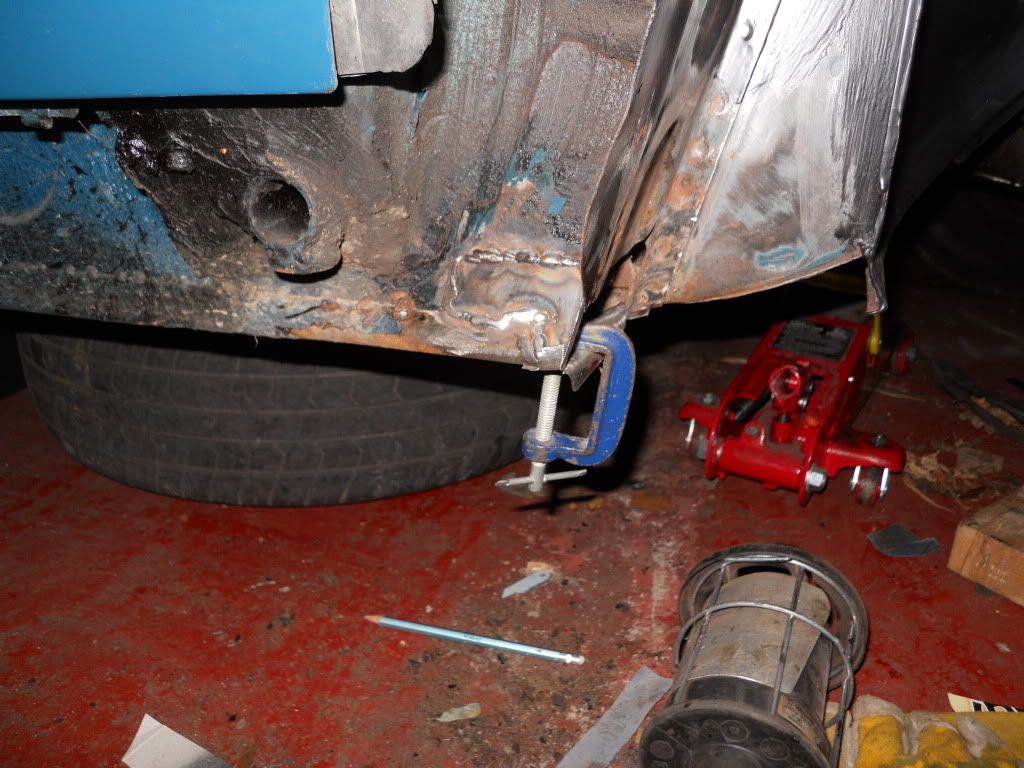
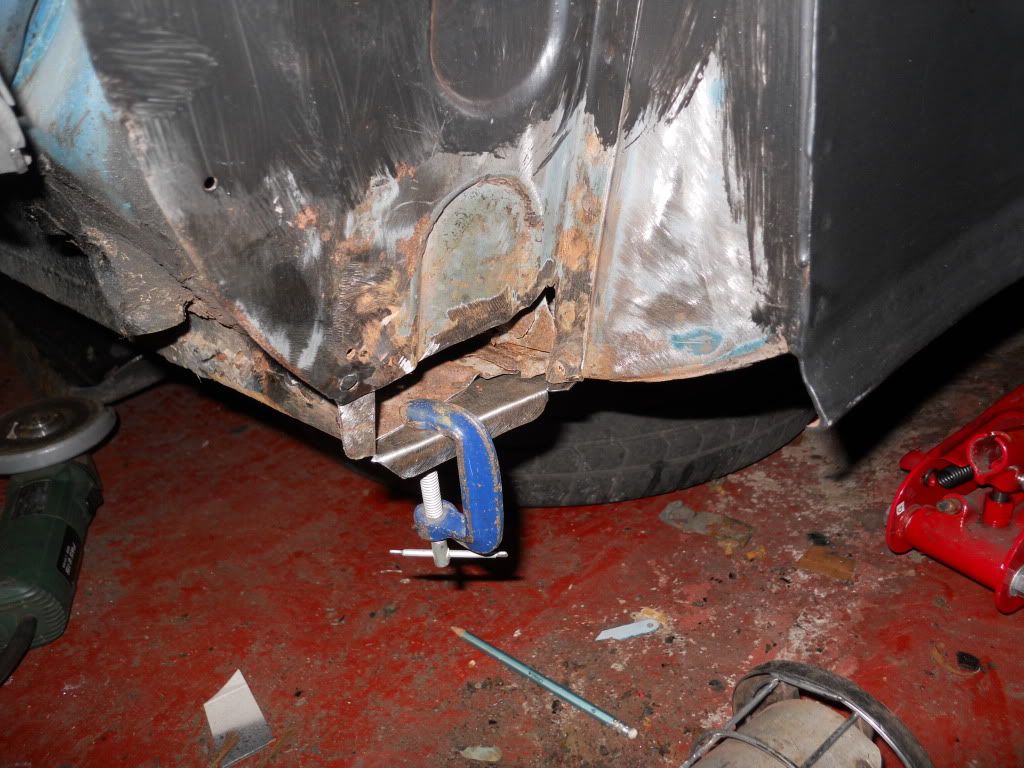
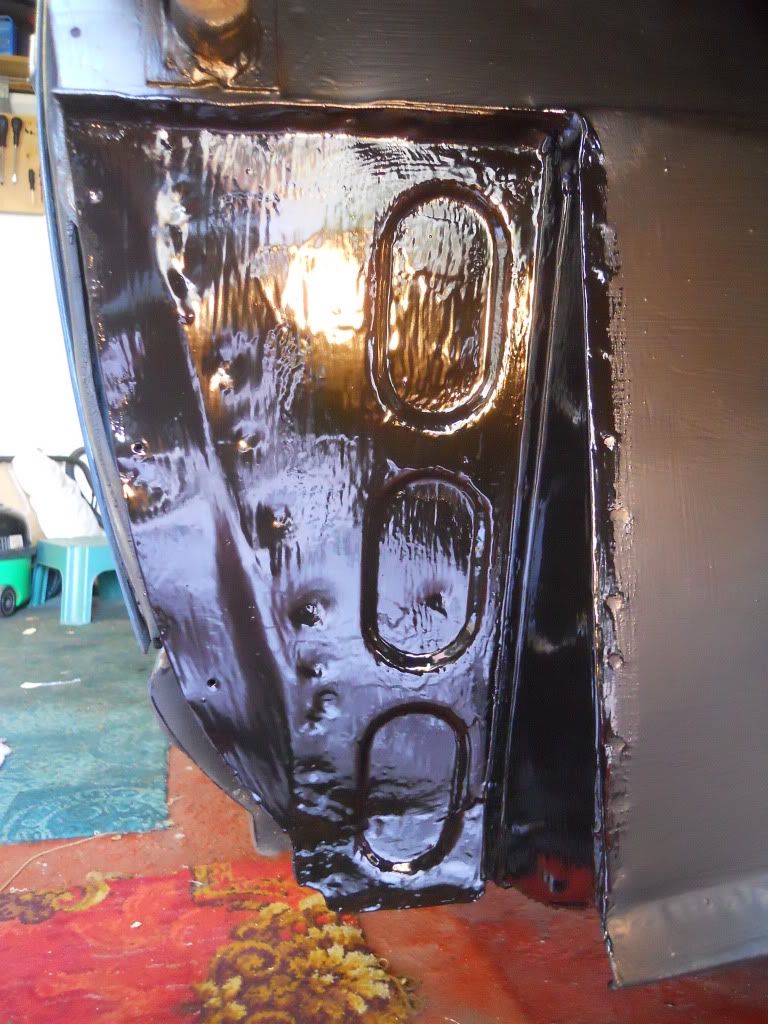
I'm aiming to get that done this week plus a couple of other bits and refit the panels in time for the MOT which is booked for next Tuesday - 1 week to go for that and 2 weeks until it goes to paint - action stations!!
 
I've been debating whether to go the epoxy mastic route, or just crack on with reassembling the engine so I can use the car again. Seeing how smart your engine bay looks, I'm now leaning towards the epoxy mastic job. It's definitely the better long term solution.
 
Looks can be deceiving Tom! I did paint inside the engine bay with Epoxy Mastic and it looked ok, but I wasn't happy with the brush strokes so I smoothed them down and sprayed normal satin black paint over the top to get a good cosmetic finish.

I'm 50/50 about whether I wasted my time painting the epxoy mastic on and then sanding it down or if I should have just sprayed the whole lot with ordinary paint in the first place. One benefit is that it's oil and grease resistant so if you spill brake fluid or something the paint doesn't shrivel up and fall off so on balance it's probably worth it.
 
testrider said:
Lots of things and photos to update on this when I'm not so busy, but for now IT'S MOT DAY!!!!!! :shock:

Wahoooooo

Best of luck, though I am sure it will sail through.

EMF is certainly looking good, looking of forward to seeing him at a show or two.

Richard
 
I'll hold fire on the wahhoos for another couple of hours Richard, but I know what you mean - it is exciting.
 
It passed!!! Waahhoo!

It did initially fail on a blown headlamp bulb - which I had already replaced yesterday!

More concerning is the Ignition light which is now on permanently although the ammeter is showing charge after starting up. Hopefully it's just the 3AW warning light relay that's faulty and all will be well. Where exactly should it be on a series 1 1/2 V8?
 
testrider said:
It passed!!! Waahhoo!

It did initially fail on a blown headlamp bulb - which I had already replaced yesterday!

More concerning is the Ignition light which is now on permanently although the ammeter is showing charge after starting up. Hopefully it's just the 3AW warning light relay that's faulty and all will be well. Where exactly should it be on a series 1 1/2 V8?

Hi Paul

Good news on MOT well done. I presume the 3AW isn't on the A post inside the driver's knee bin?

If it's not there then I've no idea where it is either.

Dave
 
I've just found it Dave, in the drivers side knee bin by the flasher relays. It's just a regular 5 pin relay (is it supposed to be?) so I swapped it for another but it made no difference.

I seem to be getting charge and there's 14.3V across the battery with all the lights on so I'll drive it a bit and see what happens.
 
Paul

It should be a 3 pin unit and they're usually round. I don't have a picture handy but I've replaced mine with an modern electronic version like this

updated: Just found a picture:

CIMG2849.jpg


Further update :)

If you want to do a bit of research this is very useful. However, I gave this some thought over a cuppa this morning and it's worth checking the sensing wire off the back of the alternator. The 11AC alternator has a sensing wire on the back, a single spade connector which should have around 7 volts on it when the engine is running. This wire goes to the 3AW to keep the ignition light off when the system is charging. If you have around 7 volts there then check at the other end of the wire where it connects to the 3AW in case you have a break somewhere. The connector on the back of the alternator is also very close to the rocker cover so worth checking it's not shorting against it. You've done a fair bit of work in the engine bay recently and had a big sheet thrown over the engine. It wouldn't take much to disturb this connection. Hope that helps.

Dave
 
Waahoooo indeed! Congratulations Paul....what a great feeling it is to be clutching that bit of paper!

Hope to see you and EMF (and Adam?) at Malvern on Sunday. :)

Cheers,
 
vaultsman said:
Waahoooo indeed! Congratulations Paul....what a great feeling it is to be clutching that bit of paper!

Hope to see you and EMF (and Adam?) at Malvern on Sunday. :)

Cheers,

I won't be able to make Malvern unfortunately, the parents have arranged a get family get together for Easter. I'll be at Beamish with Jinx and Paul though!
 
Thanks for the advice and photo Dave, I did read your alternator escapade froma couple of years back though so I don't want to jump the gun and swap the alternator yet. I have the same coloured wires for the 3AW as yours, but they are plugged into a normal 5 pin relay so I reckon I need to change this asap to make it right. I don't think that's what's causing the light to stay on though as it's been wired up like that for years. I'll check the AL wire for 7 volts later though and report back.

I did 90 miles in it yesterday and everything works fine so I'm fairly sure I don't have a charging problem and I'll be at Malvern on Sunday Stan. As well as removing all the wires in the engine bay I also removed the dashboard and instruments so that must be the source of the problem, although the ignition light wasn't on when I turned the car round 2 weeks ago.

Anyway, enough of witchcraft (electrics) and I'll fill you in with what I've been up to which amounted to going to work, sleeping and working on EMF in order to get it ready for this week, hence no updates on here!

I left you with a shot of the car spun round ready for repairing the O/S splash panel. There has been some fairly extensive bodging on the drivers side sill - basically plating over the rusty original sill and tack welding it into place. To make matters worse the plate was half an inch too short to reach the splash panel and had ben bent out of shape by some unruley use of a trolley jack at some point in it's past.

Here's how it looked to start off with.

DSCN6486.jpg


I bent it back into shape and filled in the side the made a patch to extend it to the correct length.

DSCN6487.jpg


DSCN6488.jpg


With that all in place I made this, which I'm particularly proud of.

DSCN6507.jpg


I found it really satisfying feeling the metal being gently forced into shape - I could get into this restoration lark!

Here it is in place.

DSCN6508.jpg


My plug welds along the bottom edge didn't quite work out as I didn't get the two surfaces close enough together so I clamped them with mole grips but they popped apart when they were released. I rebent the flanges and tacked the edges instead.

Also I slipped with the angle grinder so I lost some of the definition of the lower edge of the curve which was disappointing after spending 2 hours making it! Anyway it looks pretty good under the paint now.

DSCN6513.jpg


With that done by Saturday lunchtime I thought I could throw the panels back on and have it done by teatime - what a wally! First off I decided to refit the bonnet along with my newly refurbished hinges.

DSCN6512.jpg


I'll show you how I did them in another post. They work well though and look good too. With the bonnet in place I had to refit the headlamp bowls before the rest of the panels could go back on. I bought the correct sized pop rivets only to find that you can't rivet them in place without removing the bulb support rings and that would cock up the beam aim so I used some small screws with nuts and washers instead.

Then they would light up dispite the fact that I'd cleaned all the bullet connectors so I spent most of Sunday afternoon (yes, I was onto Sunday by now) faffing round with the wires and earthing points before giving up and collapsiing onto the sofa. On Monday I decide that work could be squeezed in around rebuilding the car and I replaced all the bullet connectors (and a main beam unit) and finally got them to work.

The wings and front valance went on OK and Jane came round to help refitt the grill, bumper and interior bits before the MOT on Tuesday morning.

Sorry for the long post and my rambling, just look at the pictures if you want. I really felt like the car was forced, screaming and kicking, to go back together and I'm pretty knackered now too. Had a great drive to our warehouse in the Peak District yesterday though so it's all worth it.

Last thing to add was my Christmas present from Jane.

DSCN6528.jpg


These MGB Rostyle wheel caps are just the right size to fit my Minilites and with 4 Rover emblems off eBay they look like this.

DSCN6518.jpg


I'm not sure about the Rover logo yet so I might change it, what do you reckon?
 
Nice repair on the splash panel. A lot better than I did :?

I can just imagine the well deserved feeling of satisfaction from that.

Not sure about the logos though - not P6, but then neither are mine for that matter.

Looking good there

Richard
 
testrider said:
With that all in place I made this, which I'm particularly proud of.

DSCN6507.jpg


I found it really satisfying feeling the metal being gently forced into shape - I could get into this restoration lark!

And well you should be (proud that is). A fine bit of panel work there, very impressive! It's very satisfying when it starts to take shape and the finished result looks very good, just like new....or better :D

testrider said:
DSCN6518.jpg


I'm not sure about the Rover logo yet so I might change it, what do you reckon?

Those logos do look good in full colour. Maybe a wider shot to see how they look against the rest of the car...... At the end of the day these little personal details are what make our cars....well ours :) . I'm sure if those caps had been an option with full colour logos back in the day people would've snapped them up. I have stainless tyre valve caps with Rover logos which I think look great.

Dave
 
Back
Top