1967 2000TC - HOT

Getting there Paul. You always run out of something at the most inopportune of moments.

testrider said:
I hope to get this bit and a floor section finished off this week.

That's what I keep telling myself too :D

Dave
 
Well I managed to get some gas after lunch today and had time to button that box section patch up properly so I'm quite chuffed.

DSCN7661.jpg


I'll start on the horizontal section to fill in the floor next if there's any more skiving to be done. :D
 
I've been slowly chipping away filling all the little (and not so little) holes in and I'm pleased with how it's coming along.

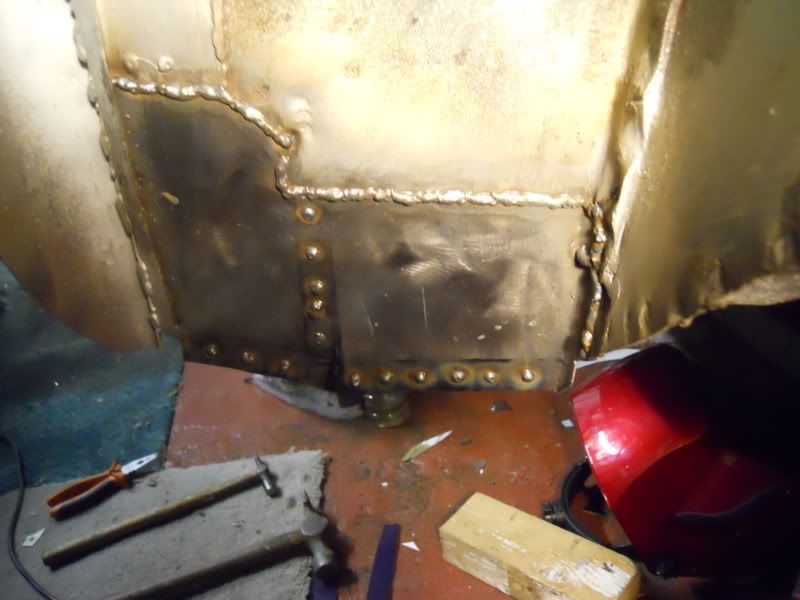
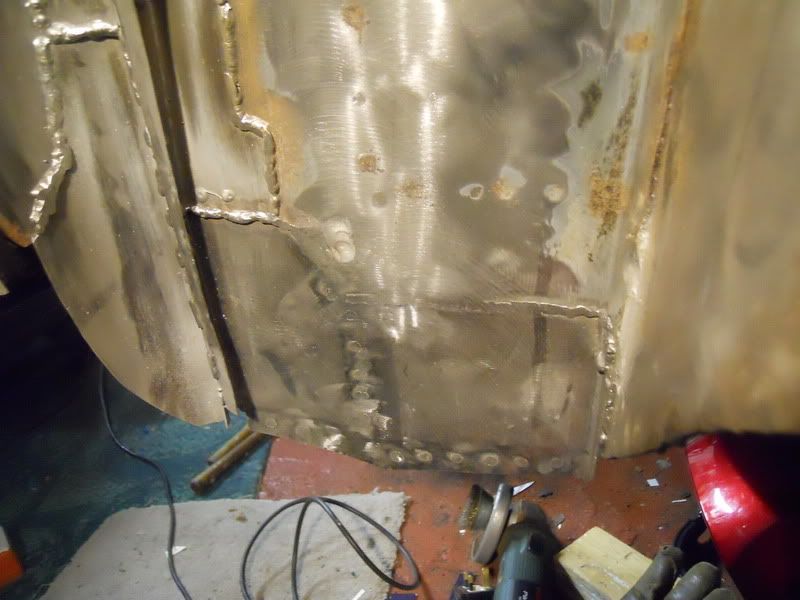
First up was the big hole in the floor. I though I could fill it with one panel but the forward part needed to be attached tot he internal box section that the rear seat base sits on so that went in first.

DSCN7664.jpg


Then I could fit the plate in for fill the rest of the hole.

DSCN7667.jpg


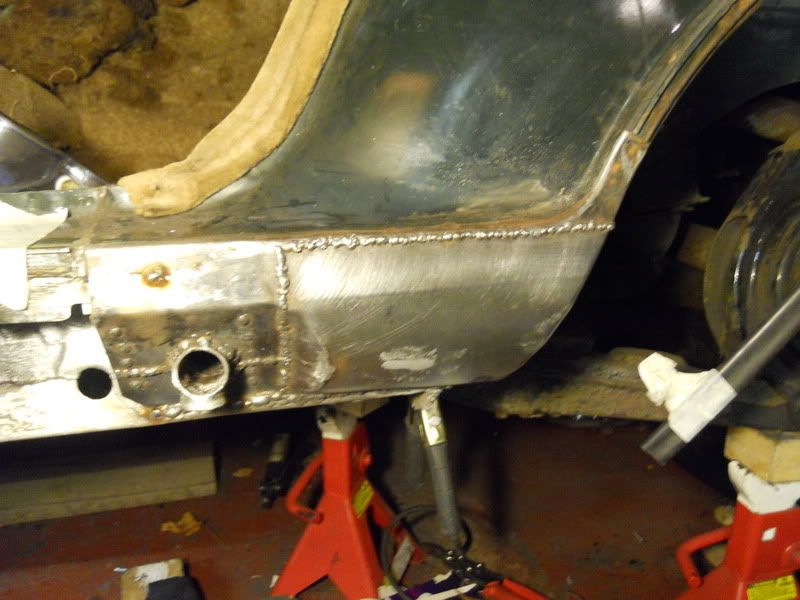
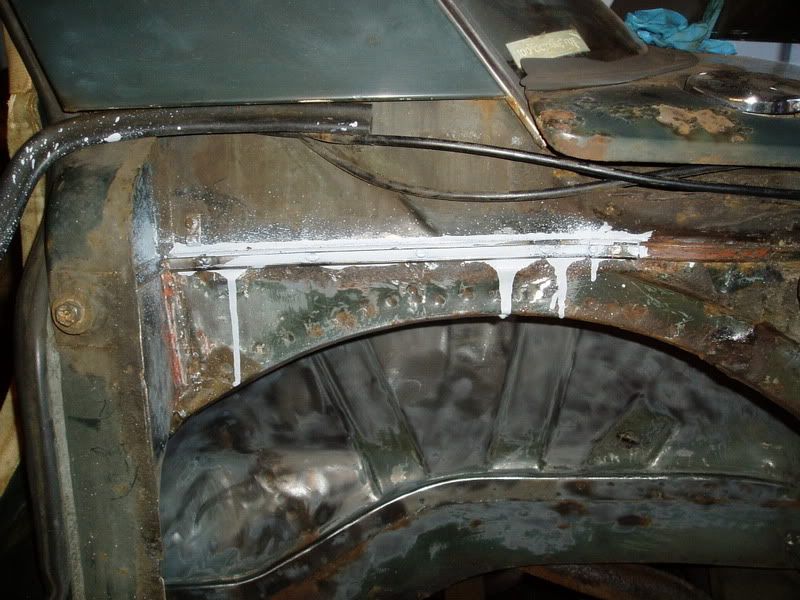
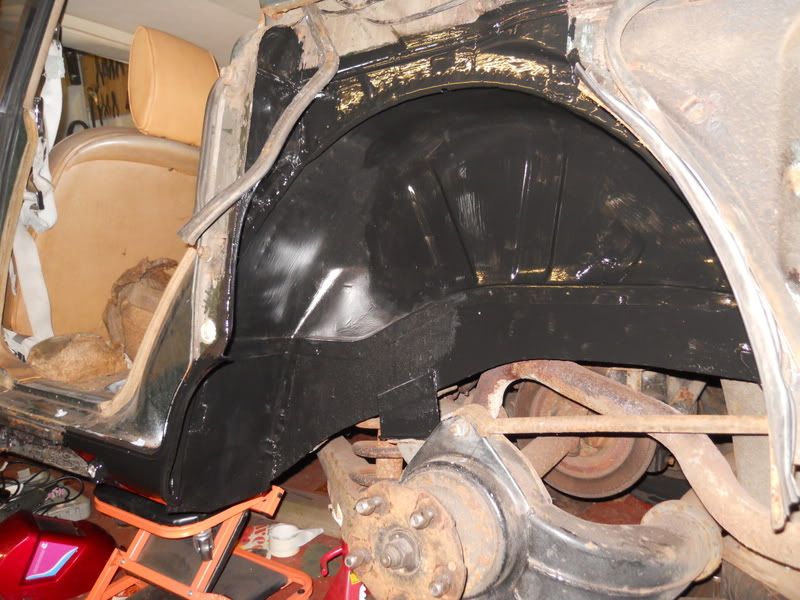
Once that was inplace it gave me the flange to plug weld the inner wheel arch to so that went in next.

DSCN7674.jpg


I decided to try butt welding this patch which meant that it could be smoothed off, nice and neat.

DSCN7676.jpg


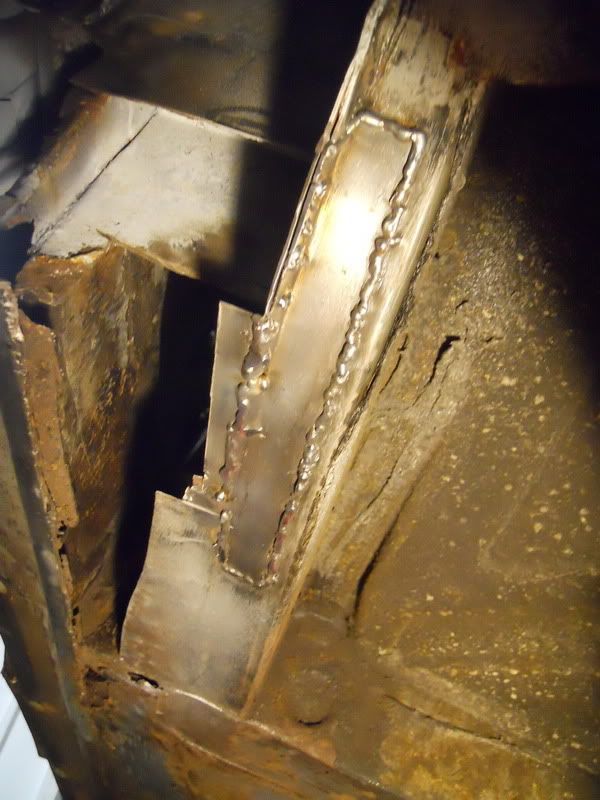
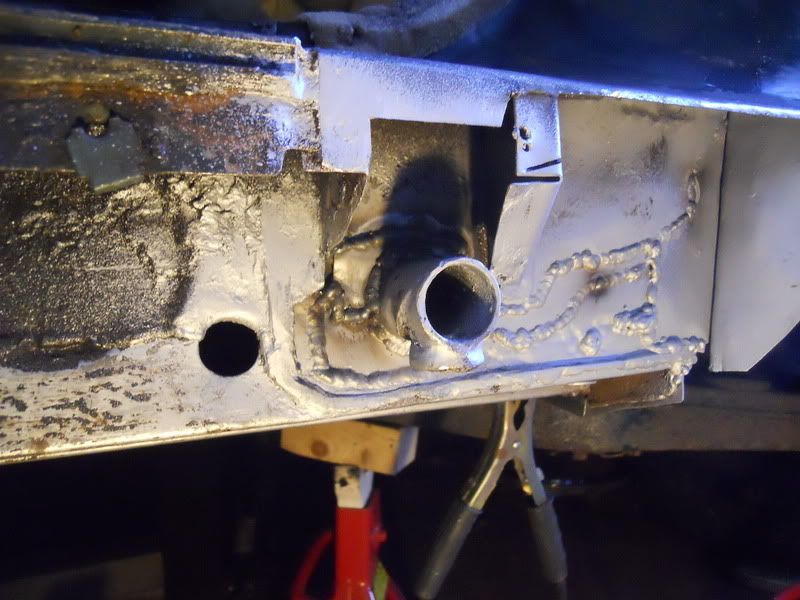
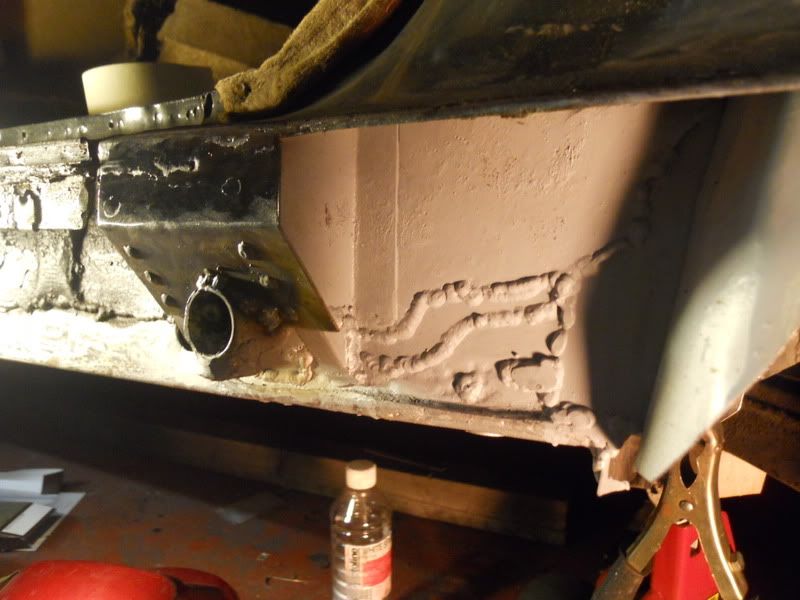
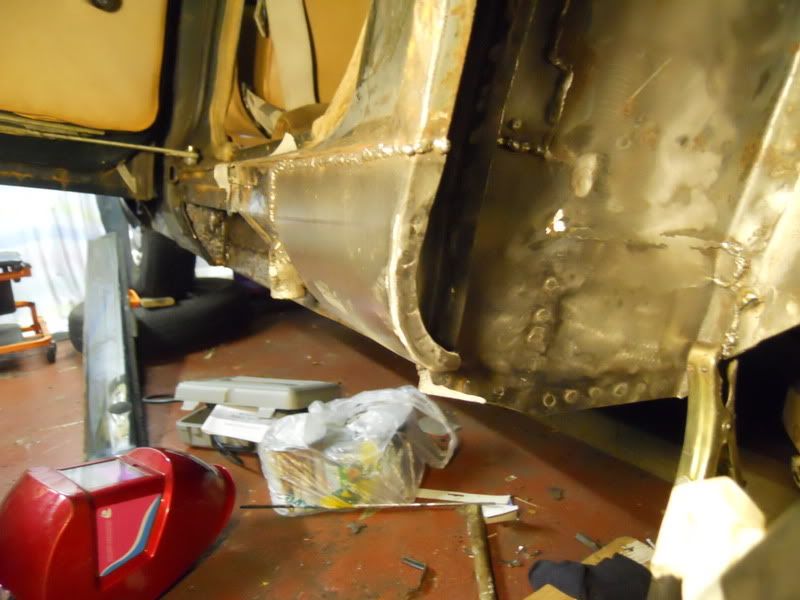
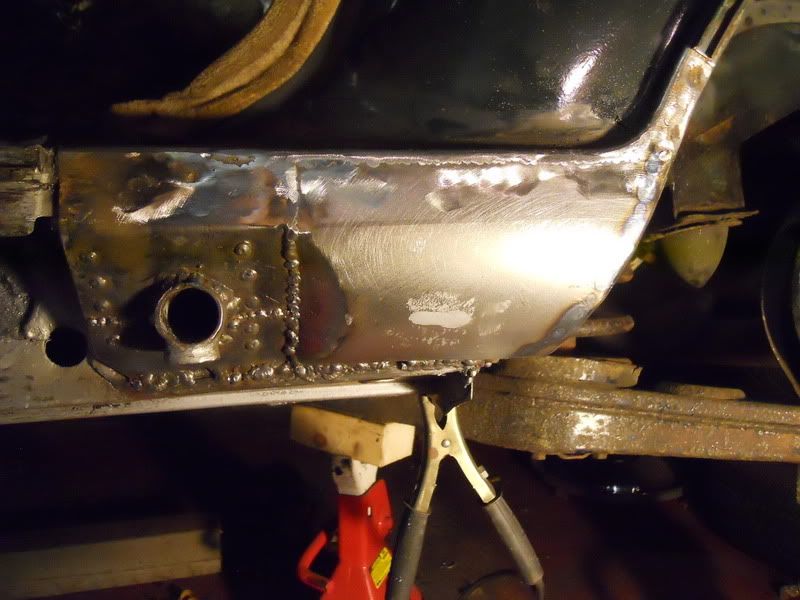
With the wheel arch and the end of the sill boxed in I could set to work rebuilding the jacking point. As per the discuccion on Dave3066's post I've added metal to the sill section and welded it to the jacking tube where previously there was a 3mm clearance gap.

DSCN7677.jpg


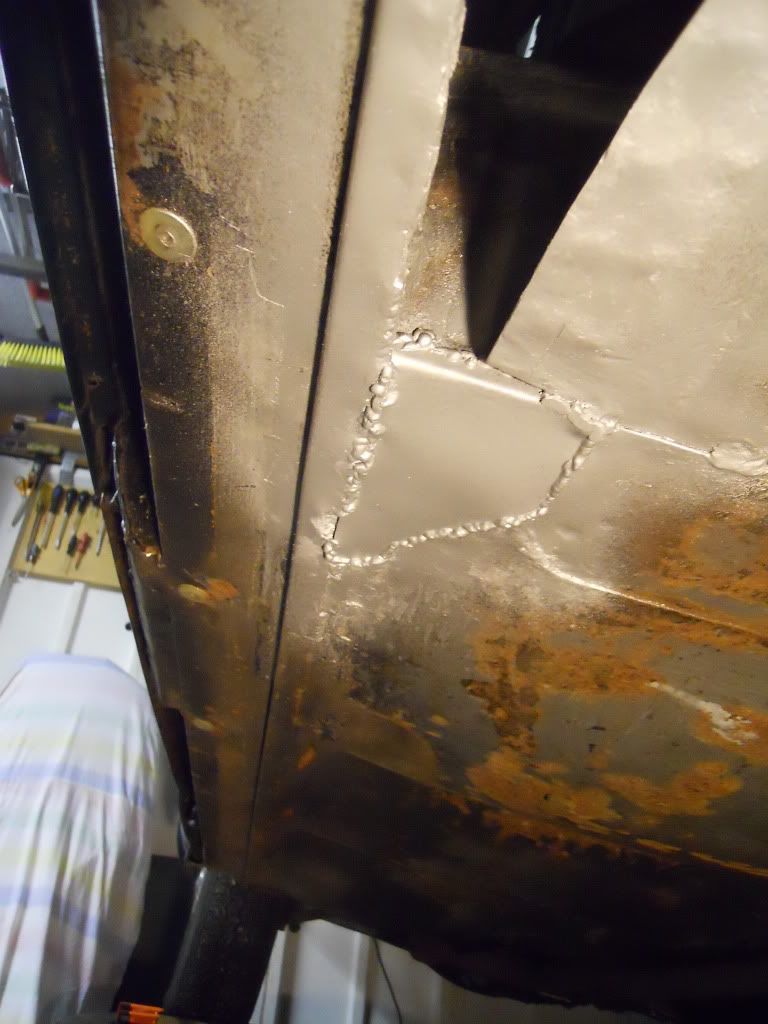
This immediately stiffened it up so I'm pleased with that. Before I could box in the outer end of the jacking tube I needed to rebuild the triangular stiffeners either side.

DSCN7681.jpg


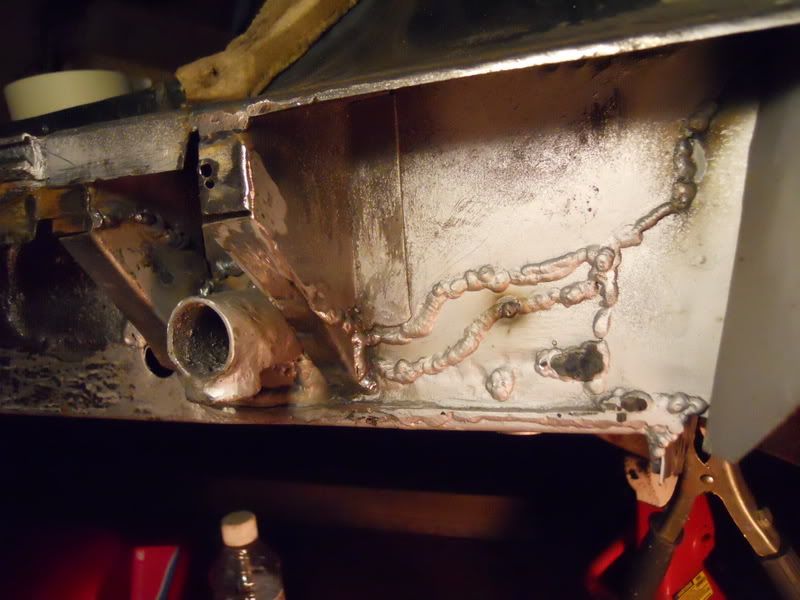
With those in place I used some 1.5mm plate to box in the jacking point.

DSCN7687.jpg


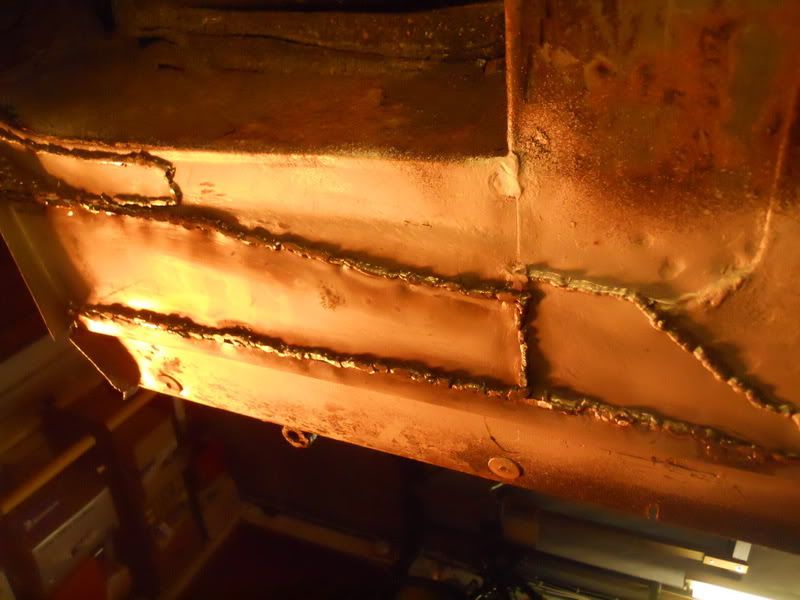
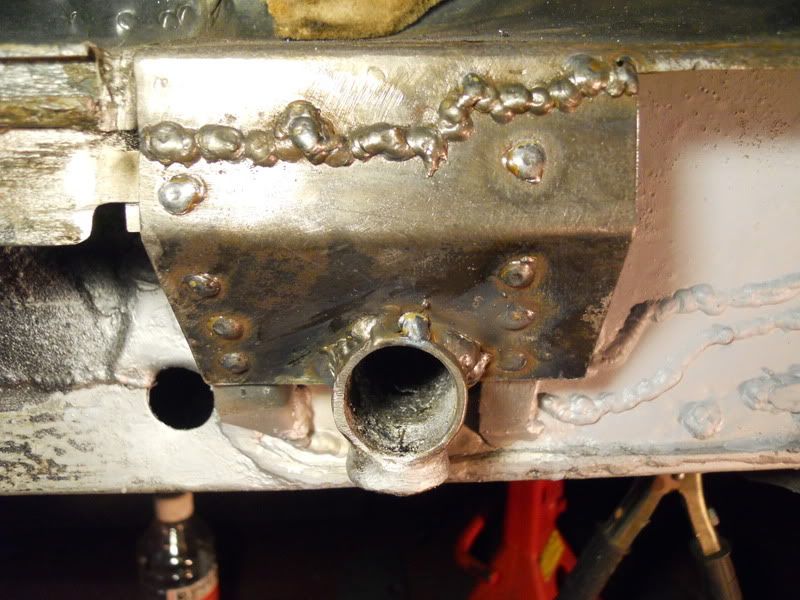
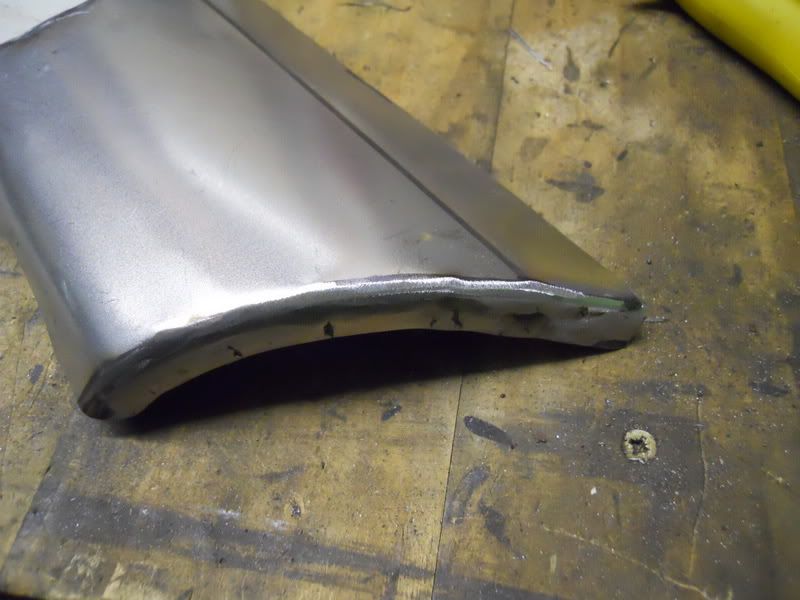
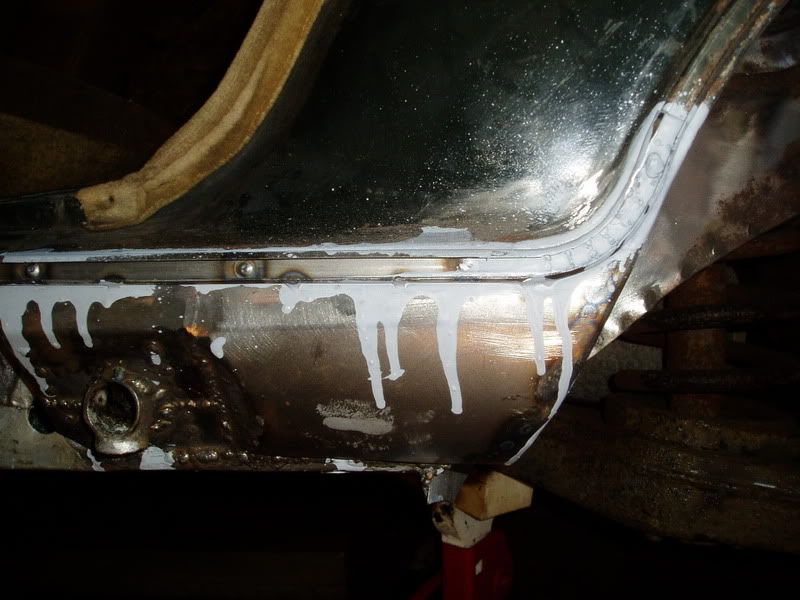
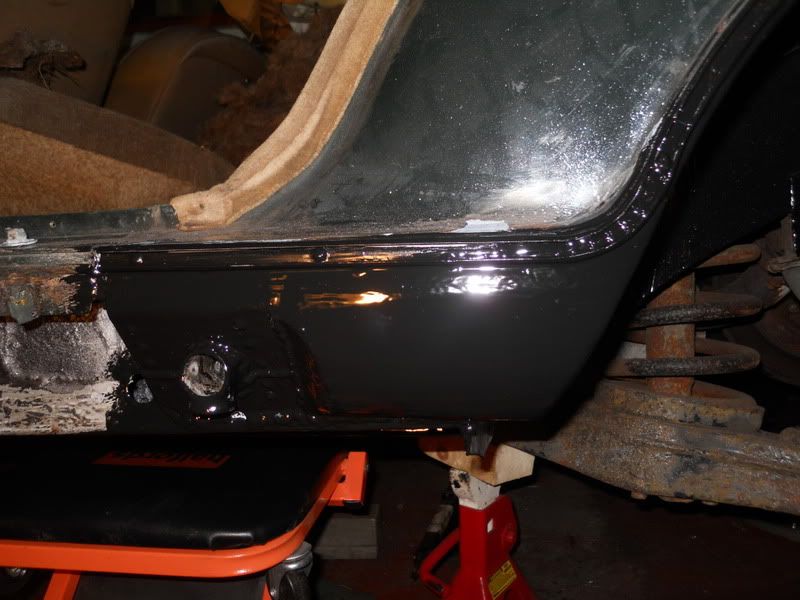
Butt welded and smoothed off again so that the seal retaining channel sits correctly.

DSCN7689.jpg


I'll add the lower section later this week, then I can start to figure out how the bottom lip of the D post curves round to meet the sill.
 
Nice neat work there Paul. The jacking tube work looks good and will hopefully be more effective than the factory option. How did you find welding the thinner metal to the jacking tube. The weld looks very neat.

You're zooming ahead of me now, I must find time to get back to Verity as she'll start sulking that I'm spending so much time on Lady C :roll:

Dave
 
rockdemon said:
Looking very nice indeed!

v8guy said:
Nice solid job as always Paul :)

Thanks guys. I have to admit that I am enjoying myself figuring out what shapes to make all these bit and which order they need to be fitted, if fact it would probably have been done by now if I didn't spend so long making various shapes and edges on the patches.

Dave, there was no problem welding on to the jacking tube other than access for the torch head. The middle section was regular 1mm plate so I welded it with my usual settings.

For the thicker plate on the outside, again access was difficult at the top of the mitre and you can't get the torch in quite close enough, but round the sides it was good. I went up a notch on the amps and the weld was good and hot.
 
Cracking job there Paul.

I take my hat off to people who can weld in the positions you obviously have to get into to do that.

Have you trial fit the outer sill yet?

Richard
 
I have trial fitted the sill cover and it fouls on the curved section that I put into the bottom of the wheelarch. However, I left that piece long on purpose so that it could be trimmed back to get the shape just right. Once the jacking point is boxed in that will be the next thing to do.

Welding the floor from underneath was hard and I had to hold the torch with my left hand so that I wasn't laying directly under the welding area. The metal's stuck in place though so I can't complain.
 
testrider said:
Welding the floor from underneath was hard

According to everything I've read (and that's quite a bit) on welding upside down, it should be no more difficult than vertical or right way up welding provided everything is set up properly and the conditions are ideal ie clean metal, good earth etc.

I remain to be convinced and believe it is a dark art reserved for only the most skilled of persons. That said I also think everyone should have a go just for the experience of dodging the falling blobs of steel :twisted:

Dave
 
Dave3066 said:
it should be no more difficult than vertical or right way up welding

:LOL: :LOL: :LOL:

I tried it quite a bit in my youth and found the worst bit was when a blob of molten steel or just a bit of spatter took off and landed on you, then rolled down your neck and settled in the hollow in the middle of your collar bones on your throat. It then tried to perform a tracheostomy with you wiggling about under a vehicle trying to stop it.

This brought on the thought, "This would be funny if it was happening to someone else :shock: ."

I think I'll stick to the right way up version :)

Richard
 
I hate those lingering ones that burn a hole in your sleeve and roll up your arm :twisted: :twisted:
Thankfully only happened the once :)
 
I've got a lovely welding scar about the size of a 20p about half way up my arm from a falling blob of weld.

It's all good fun though :LOL:
 
I've made some more progress on HOT recently.

Previously I'd finished the jacking point and was debating how to fill in the gap between the wheelarch and jacking point here.

DSCN7689.jpg


The lower half of the jacking point has been boxed in and I made this panel to fill in the above space.

DSCN7715.jpg


Butt welded into place.

DSCN7720.jpg


DSCN7722.jpg


And smoothed off so that I can refit the seal channel

DSCN7723.jpg


On another thread there was a discussion about how to curve the seal channel without it kinking. I chose to cut slots on the inside edge to get the curve I want.

DSCN7725.jpg


Once I've welded them up I need to figure out how to attach it to the D post. I'm not sure there's enough room in the slot to plug weld it in place - anyone got any other ideas?
 
Well I can confirm that it is possible to plug weld the seal channel to the car. It's quite delicate work welding up the slots to make the curve, but it's worked well and with the seal fitted you can't tell it's be replaced.

P2250001.jpg


I've sprayed etch primer in the gap behind the seal channel to try to prevent rust forming again.

The off cut left over from making the D post section was exactly the right length to replace a section over the wheel arch for the wing seal so that was welld in and primered too.

P2250004.jpg


I rounded the weekend out with a coat of Expoxy Mastic 121.

DSCN7780.jpg


DSCN7781.jpg


I'm really pleased with how this has turned out now, although I did find another small hole where the wheel arch meets the boot but I'd already mixed the paint so I didn't have time to repair it. I've not painted that section and I'll repair and paint this week.

I've got one more small hole to repair where the top link meets the boot floor and exhaust mount and I think that will be it for this side.
 
Thanks guys.

rockdemon said:
Very nicely done! The quality of your fabricatedpanel parts is really nice

I've quite enjoyed the challenge of making them and I had no idea I could actually do it. I picked lots of useful tips on fabrication from some of the projects on Retro Rides.
 
Back
Top