

You are using an out of date browser. It may not display this or other websites correctly.
You should upgrade or use an alternative browser.
You should upgrade or use an alternative browser.
Sparky's winter/spring/summer/autumn work
- Thread starter quattro
- Start date
keynsham1
Active Member
Does anyone know what the seals/washers are supposed to be on the banjo connector on the PAS pump? Mine leaks and I think it is this connection. I havethe orignal fibre washer and a copper washer against the pump housing but it still leaks. This is a low pressure side so an O ring might be needed? In the parts catalogue, the fiber washer is NLS and the other is just called 'seal for adaptor' which gives little away!
I'm not sure what the correct oem arrangement is, but, in today's world, I'd use a schnor washer (I think that's the correct term). That is a washer having a moulded in rubber seal on the inner diameter. Any hydraulic specialist should be able to supply, eg Hose Doctor or local equivalent that looks after earth moving equipment.
Chris
Chris
keynsham1 wrote,...
Hello keysham1,
I have an NOS seal kit for the PAS pump, and it is an 'O' ring. Being an annulus, the outer diameter is 20mm, the inner diameter is 16mm.
Ron.
Does anyone know what the seals/washers are supposed to be on the banjo connector on the PAS pump?
Hello keysham1,
I have an NOS seal kit for the PAS pump, and it is an 'O' ring. Being an annulus, the outer diameter is 20mm, the inner diameter is 16mm.
Ron.
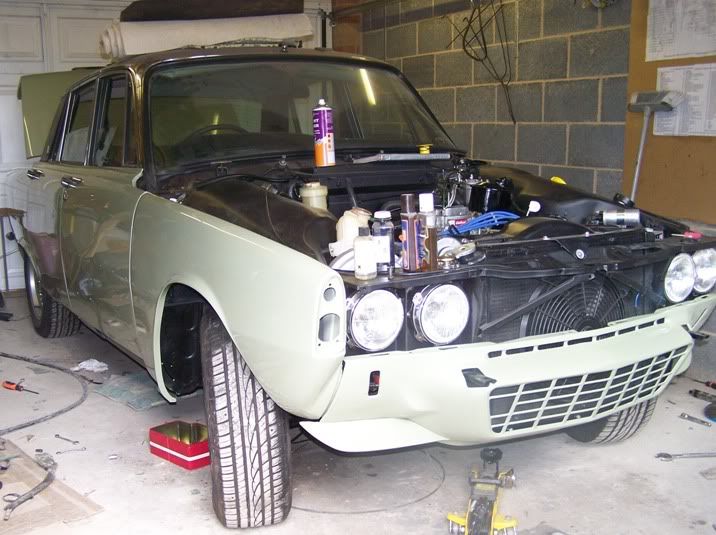
Just the one pic today 
I have been busy but haven't taken many pics, only those that I need to remember how the door goes back together
The original passenger door has been stripped, and the bits fitted to the new door that was supplied with Sparky. The original wasn't very good at all.
I have also connected the steering (that was fun :shock: ) fitted the drivers side knee bin but haven't as yet managed to get the damn thing to close :evil: , levelled up the rear decker panel and fitted the fuel cap and pipe, put a pint of petrol in the tank (Wasn't brave enough to just fill it up), cleaned up the pint of petrol that somehow managed to escape and wash the floor, finished the passenger door, fitted the drivers door and fettled a while getting it in the right place (not complete yet, although frame is in), fitted front wing to check the door will open without fouling it (It doesn't :evil: ), refitted boot carpets, fitted the driver seat runner and brought seats home.
Front seats are going to need a good clean and re-colour before fitting, so that is now on the list.
Things to do
Get kneebin to close
Finish fitting drivers door
Clean and recolour front seats, then fit them
Get car back on ramps and :-
Check all fuel pipes and sort leak
Reconnect fuel reserve cable
Torque up all suspension bolts
Check all electrics work
Fit passenger kneebin
Fit nearside front wing and bonnet
Fit both front calipers (have rebuilt one, but one of the new pistons had a fault so I am waiting for another one)
Bleed brakes
Tidy garage
Go for a drive
Richard
Had a bad week this week.
I managed to get the car back on the ramps and crawled underneath to tighten up the fuel lines. There are five rubber fuel hoses joining up the two feed pipes from the tank to the reserve tap, to a filter and then the facet fuel pump. I tightened up all ten fuel clips, poured more petrol in and it washed the floor again :shock: . Looking under the car, it appears that four on the fuel clips were just letting the petrol out :?:
I decided that the best plan was to replace the fuel lines. I got some 5/16" fuel hose from a local (to work) motor factor and asked for 10 clips. The fuel hose, in 1M lengths, came with 2 clips each and the only spare ones they had were jubilee clips. They volunteered to get the correct fuel clips and said they would be in the next day. Next day I collected them (15-17mm) although the ones with the fuel hoses were 14-16mm. I was told they would fit ok, I would just have to tighten them up a bit more. Did it work? did it heck as like :twisted: the OD of the fuel hose was 15mm and the clips did not tighten enough to keep it leak proof.
So, off to my local (to my house) car shop and they only had 11-13 and 15-17. They said they could not get 14-16mm but could get some 13-15 later that day. Work pressure prevented me to get away early to pick them up so Wendy went in Thursday morning to get them. They couldn't get 13-15, they could only get 14-16 :shock: I am starting to lose hair now, which is something that I cannot really afford to do. I said, "just get them", bearing in mind that these clips are the only thing preventing me from starting Sparky and letting him run.
I arrive to collect them at 5.00pm and am told that they can't get 14-16mm, and can only get 13-15mm :shock: This is Thursday afternoon and I discovered the leak on Saturday. So, finally after just too long, the fuel lines do not leak anymore and Sparky runs.

Just a couple of small leaks in the cooling system, everything else in the engine compartment works just fine. I bought an adjustable revotec fan controller a while ago and lost the wiring diagram. Wasn't difficult to work it though yep, it clicks in just when I want it to and blows air out the front of the car. Will have to reverse some wires :?
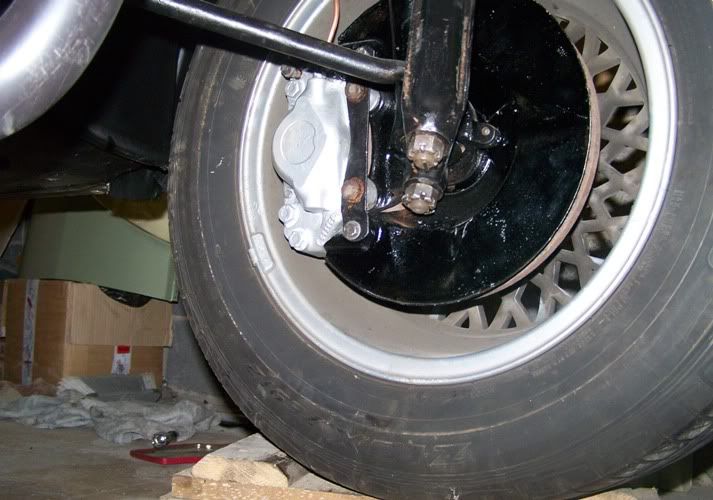
Hearing him run and rev up renewed some lost enthusiasm, so yesterday, I had the N/S front wheel off and fitted the now rebuilt caliper, brake pads, and plumbed it in. I torqued up the bottom ball joint, top ball joint, lower strut, and side steering rod, fitting split pins as required along the way.
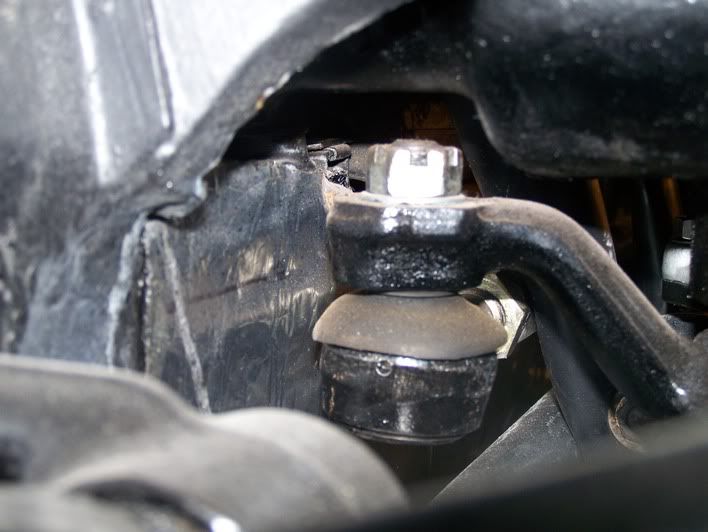
This was where one of those gut churning moments occurred. I had to ask myself why I had not fitted the split pins earlier when I noticed that I had not fitted them to the nuts on the track rod assembly :shock:
I am reasonably sure that torquing up the nuts on this would have been easier prior to fitting the engine, or at least the heater box. So most of the day later, I have a complete N/S front suspension, complete with brakes (just need bleeding), and complete with steering all torqued up and split pinned. I have also stripped down and cleaned the O/S caliper and painted it ready for rebuild today.
Just for a break from under there, I also managed to get the two left hand heater control rods fitted. There is no way that I could get a spanner on the bolts, so I used a screwdriver type socket drive (1/4") and an extension bar with a 5/16" socket and did them up from the other side, just guiding the socket in with my left hand. Was easy peasy that way
Oh well, off to the garage 8)
Richard
I managed to get the car back on the ramps and crawled underneath to tighten up the fuel lines. There are five rubber fuel hoses joining up the two feed pipes from the tank to the reserve tap, to a filter and then the facet fuel pump. I tightened up all ten fuel clips, poured more petrol in and it washed the floor again :shock: . Looking under the car, it appears that four on the fuel clips were just letting the petrol out :?:
I decided that the best plan was to replace the fuel lines. I got some 5/16" fuel hose from a local (to work) motor factor and asked for 10 clips. The fuel hose, in 1M lengths, came with 2 clips each and the only spare ones they had were jubilee clips. They volunteered to get the correct fuel clips and said they would be in the next day. Next day I collected them (15-17mm) although the ones with the fuel hoses were 14-16mm. I was told they would fit ok, I would just have to tighten them up a bit more. Did it work? did it heck as like :twisted: the OD of the fuel hose was 15mm and the clips did not tighten enough to keep it leak proof.
So, off to my local (to my house) car shop and they only had 11-13 and 15-17. They said they could not get 14-16mm but could get some 13-15 later that day. Work pressure prevented me to get away early to pick them up so Wendy went in Thursday morning to get them. They couldn't get 13-15, they could only get 14-16 :shock: I am starting to lose hair now, which is something that I cannot really afford to do. I said, "just get them", bearing in mind that these clips are the only thing preventing me from starting Sparky and letting him run.
I arrive to collect them at 5.00pm and am told that they can't get 14-16mm, and can only get 13-15mm :shock: This is Thursday afternoon and I discovered the leak on Saturday. So, finally after just too long, the fuel lines do not leak anymore and Sparky runs.
Just a couple of small leaks in the cooling system, everything else in the engine compartment works just fine. I bought an adjustable revotec fan controller a while ago and lost the wiring diagram. Wasn't difficult to work it though
yep, it clicks in just when I want it to and blows air out the front of the car. Will have to reverse some wires :? Hearing him run and rev up renewed some lost enthusiasm, so yesterday, I had the N/S front wheel off and fitted the now rebuilt caliper, brake pads, and plumbed it in. I torqued up the bottom ball joint, top ball joint, lower strut, and side steering rod, fitting split pins as required along the way.
This was where one of those gut churning moments occurred. I had to ask myself why I had not fitted the split pins earlier when I noticed that I had not fitted them to the nuts on the track rod assembly :shock:
I am reasonably sure that torquing up the nuts on this would have been easier prior to fitting the engine, or at least the heater box. So most of the day later, I have a complete N/S front suspension, complete with brakes (just need bleeding), and complete with steering all torqued up and split pinned. I have also stripped down and cleaned the O/S caliper and painted it ready for rebuild today.
Just for a break from under there, I also managed to get the two left hand heater control rods fitted. There is no way that I could get a spanner on the bolts, so I used a screwdriver type socket drive (1/4") and an extension bar with a 5/16" socket and did them up from the other side, just guiding the socket in with my left hand. Was easy peasy that way
Oh well, off to the garage 8)
Richard
mrtask
Well-Known Member
Look on the positive side, your garage floor must be exceptionally clean now after two petrol soakings. Which job do you reckon is the fiddlier of the two, putting the split pin into the inner ball joint beneath the power steering box arm with engine, heater etc. already installed, or those pesky heater control rods under the dash where the forks come through the firewall? Having cursed sufficiently through both these traumas, I'm undecided.
I reckon you'll be back on the road before me (not that difficult! :roll: ), looking good there!
Which job do you reckon is the fiddlier of the two, putting the split pin into the inner ball joint beneath the power steering box arm with engine, heater etc. already installed, or those pesky heater control rods under the dash where the forks come through the firewall? Having cursed sufficiently through both these traumas, I'm undecided.I reckon you'll be back on the road before me (not that difficult! :roll: ), looking good there!
V8P6B said:Blimey Rich, steady on!
Smell it? I can taste it!!
mrtask said:Which job do you reckon is the fiddlier of the two, putting the split pin into the inner ball joint beneath the power steering box arm with engine, heater etc. already installed, or those pesky heater control rods under the dash where the forks come through the firewall?!
I reckon the heater controls. They were nightmare, surely Rover could have thought of an easier way to do that bit :shock:
Right, been out in the garage and have managed to get the O/S caliper on, and plumbed in. I just had the lower ball joint nut to torque up and fit the split pin. Following yesterdays adventures with split pins, I was rather peeved the old split pin, or some of it anyway, still in the thread. Lying underneath the car trying to drill it out did make me wonder why I hadn't thought of doing it when i had the leg in the vice :roll:
Anyway, it's done now
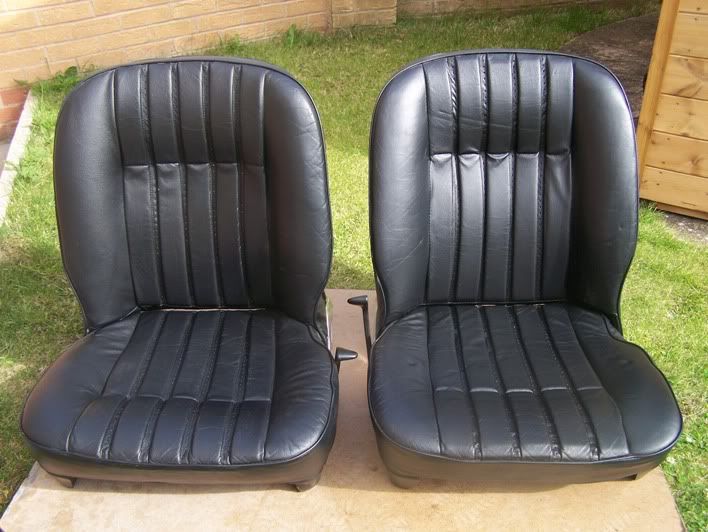
The front seats weren't too pretty - they look a lot better in the picture than they did in real life.
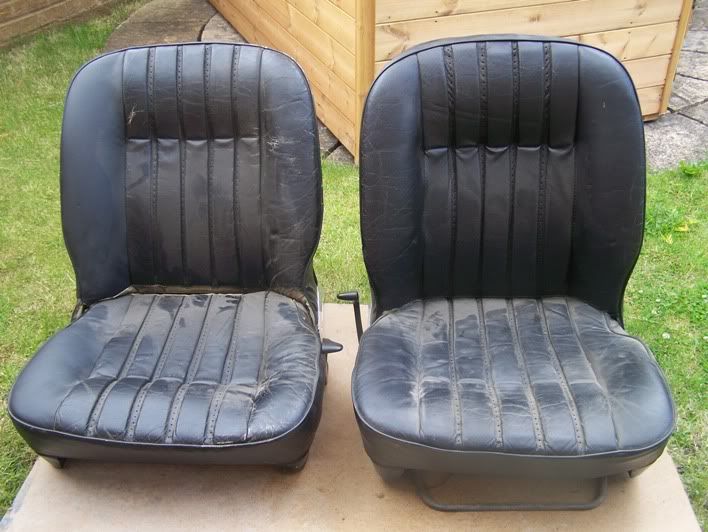
I spent around 4 hours cleaning them, treating them and painting them with Gliptone Liquid Leather. Quite pleased with the way they came out
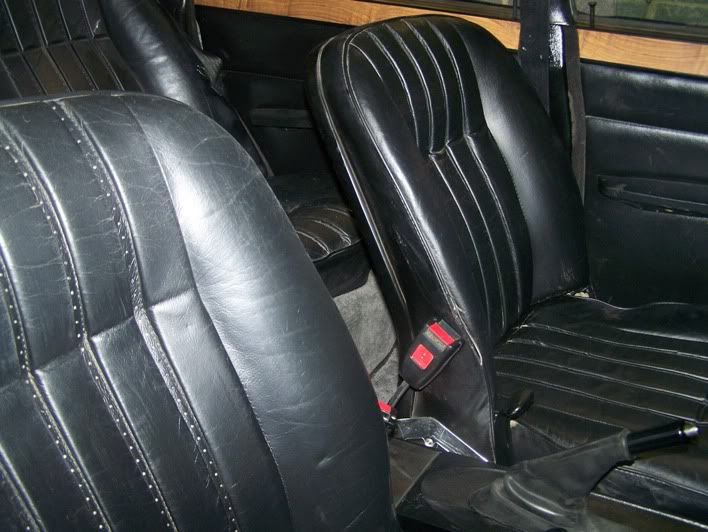
And even managed to get them in the car.
Just need to bleed the brakes and I can shift Sparky outside and get the garage cleaned up a bit
And book an MOT
Richard
GrimV8 said:Looks like I wont have anything to read soon :wink:
If I keep unearthing bal... erm mistakes like the split pin scenario, I could be here for a while yet :shock:
So today's job was to bleed the brakes and get Sparky out into the sunshine.
I started off by trying to attach my one handed universal brake bleeding kit (a bottle and a pipe with a split in it) to the rear bleed nipple. No way was that going to happen as the pipe was very small as the system depends on pumping the brakes with some pressure. I was only just able to get the pipe onto the front nipples, so no way was I going to get it on the rear one.
So, wait for Wendy to get up to pump the brake pedal.
I got one of the sills on, riveted the plate into the boot floor, drained the rad and hopefully sealed up the leaky top hose (there used to be a kenlowe type fan actuator in the top hose which has left a depression in it allowing to leak at the rad end), reversed the wiring on the fan, and pumped the tyres up ready 8)
Then the brake bleeding - started with the rear and managed to get a larger pipe on without too much trouble. It came off half way through and I am now covered in brake fluid - it doesn't do anything to your hair does it? Finished it off though and then did the N/S front and then the O/S.
Part way through the O/S the brake pedal developed a loud click on each depression. It would build up a small amount of pressure then drop about half an inch with this loud click :?:
The realisation slowly dawned on me that the push rod had become disconnected from the master cylinder. I thought that the circlip may have come out, so after a short while thinking about it, I took the master cylinder out. The washer (Push rod retainer) was missing :roll:
I am hoping 1/. I don't find any more silly mistakes which take hours to sort out, and 2/. I remember where I put my camera.
Anyway, although slightly disheartened, I now have a car with brakes, a clutch, one sill, and a water tight cooling system 8)
Richard
I have to say Rich, I'm really in awe at what you've achieved after what you've been through. I know (Adamhotrod) helped you out, seems, like an absolute top bloke, but you've done an awful lot yourself too. I am in awe of your work. Sparky is really looking much better than he originally left the showroom when new. I take my hat off to you Sir.. 8)
Cheers Tony
I was thinking that I was making a bit of a mess of it at the moment. Just when I get to seeing the end of the tunnel, it jumps back a few hundred yards.
It took me 2 hours to sort out that missing piece yesterday :twisted:
Never mind though, still hoping for a new MOT this month 8)
Richard
I was thinking that I was making a bit of a mess of it at the moment. Just when I get to seeing the end of the tunnel, it jumps back a few hundred yards.
It took me 2 hours to sort out that missing piece yesterday :twisted:
Never mind though, still hoping for a new MOT this month 8)
Richard
quattro said:Cheers Tony
It took me 2 hours to sort out that missing piece yesterday :twisted:
Richard
I know that one well! Been there, done that. I've been trying to find the odd bits of trim for ages. I still can't find the shortest side trim for the front wing on the passenger side. It's a mystery..
Hello Richard,
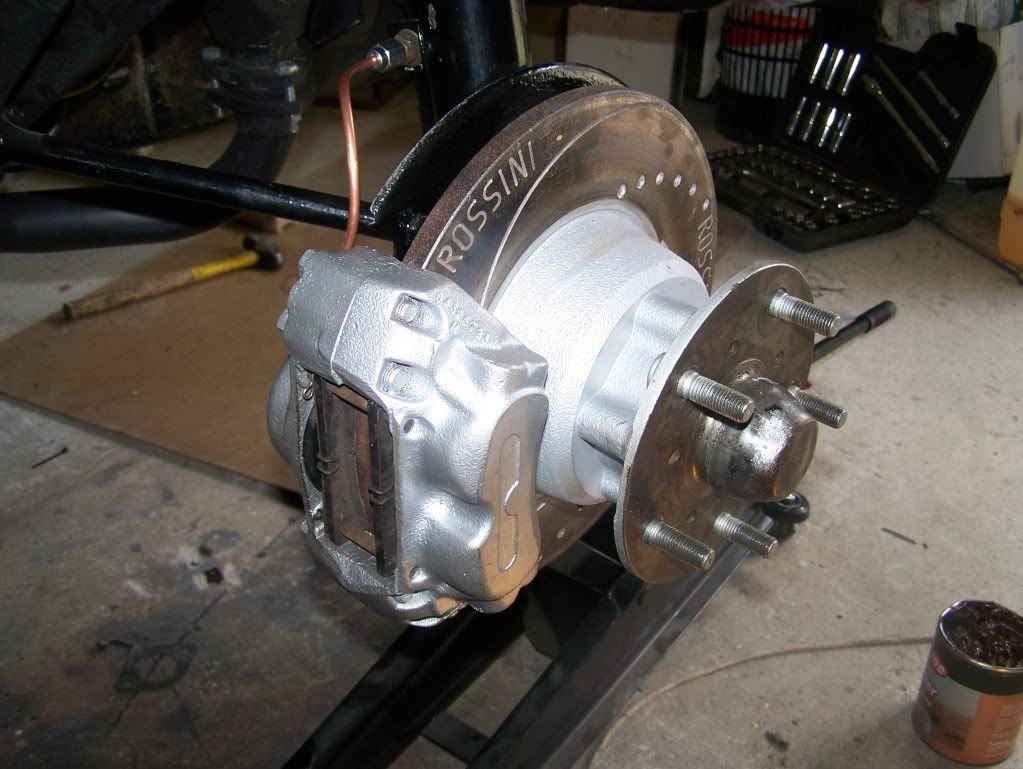
Your ventilated front discs look very nice... Are they a direct swap for the Rover items?
I can see that you have copper brake lines too. In some states in Australia, the use of copper brake lines is now illegal. It has to do with the increased possibility to line failure through work hardening so it is my understanding. I was talking to a fellow recently who has a 1952 series 1 Land Rover for sale. Prior to being able to have it re registered, all the copper brake lines had to be replaced with steel lines.
You are so close now, you must be super excited...
Ron.
Your ventilated front discs look very nice...
Are they a direct swap for the Rover items?I can see that you have copper brake lines too. In some states in Australia, the use of copper brake lines is now illegal. It has to do with the increased possibility to line failure through work hardening so it is my understanding. I was talking to a fellow recently who has a 1952 series 1 Land Rover for sale. Prior to being able to have it re registered, all the copper brake lines had to be replaced with steel lines.
You are so close now, you must be super excited...
Ron.
V8P6B said:quattro said:Cheers Tony
It took me 2 hours to sort out that missing piece yesterday :twisted:
Richard
I know that one well! Been there, done that. I've been trying to find the odd bits of trim for ages. I still can't find the shortest side trim for the front wing on the passenger side. It's a mystery..
You didn't rebuild the master cylinder with a piece missing though, then fit it, put the engine in, fit all the stuff that gets in the way, and bleed the brakes before you found out :evil: You gotta laugh though
I have a few small pieces still missing, like the little clips that hold the bonnet cable onto the wing, and the striker plate for the bonnet. I live in hope that they will turn up, or I will go and buy some somewhere.
SydneyRoverP6B said:Hello Richard,
Your ventilated front discs look very nice...
I can see that you have copper brake lines too. In some states in Australia, the use of copper brake lines is now illegal. It has to do with the increased possibility to line failure through work hardening so it is my understanding. I was talking to a fellow recently who has a 1952 series 1 Land Rover for sale. Prior to being able to have it re registered, all the copper brake lines had to be replaced with steel lines.
You are so close now, you must be super excited...
Ron.
Rossinnis are a straight swap as are the 'green stuff' pads in there. They are at present unobtainable though so I will have to revert to the standard ones when I wear them out.
I didn't know that about copper brake lines. It is usual over here to change to them as they don't rust away like the steel ones.
Excited? I am on the phone to the insurers in a mo, and will hopefully book the MOT soon as well.
It's about time LOL
Richard
webmaster
New Member
In terms of brake lines, copper-nickel (cunnifer) pipe is best, you get the anti corrosion properties of copper, but it doesn't suffer the work hardening / fracturing (although I've never actually heard of anybody suffering from this !)
Steel brakes lines are useless in the UK, they rust and fail, something I have actually seen.
Richard, don't get disheartened with these minor bugs, it's no more than I would expect when you've taken the whole car appart and put it back together. There's still bound to be something you've missed come MOT time.