Scarab the Rover..

After returning from a break abroad, I've been back at again today. Some pictures again of progress on fitting the front springs to the off side. I'm sure people have different ways of doing it but this way works for me.
1000005703.jpg

1000005704.jpg
Again using this spring compressor makes the job easy.

If got myself into a position where I've just got to sort the brake pad wiring, bleed the brakes and fit the wings, bumper and probably something else I'll find.


1000005705.jpg

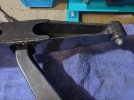
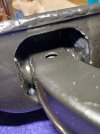
I'm just surprised at the gap that is between the disc and dust shield. Everything lines up fine, so without looking at another, I assume this is correct.
 
Seeing the top balljoint nut reminds me....I once saw an inner guard where the nut had been part way through it! I suspect the shocker fixings might have been damaged?
 
I've now got the car back on all 4 wheels. I jacked the front up so both wheels were off the floor and turned the steering from lock to lock. No play in the steering and an improvement. I haven’t road tested yet as I need to bleed the brakes.

Jacking up the rear and I've had a look. I can reach the bleed nipple OK. I may look to modify it so I can move the nipple in a better position.

When holding both discs together, I noticed a small amount of play. It's like the diff is moving when I grab the discs. I suspect it's these diff carrier bushes. I see there is 2 sizes. How will I know what size I need? I can't remove one at the moment.

Car is 1972 3500s
 
So with a spare couple of hours today, I investigated the "rocking' motion if I grab both discs and wiggle it. Diff bushes have far too much flex. Oh well, out they come then. So much fun....
1000005895.jpg
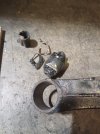
Yes they are toast. This is the nearside one. The other side is as bad. Tube in centre can be pushed out.
1000005885.jpg
Rather an easy job to remove when you have the right and safe equipment. Took me around 1.5 hours in total.
1000005894.jpg
1000005890.jpg

Measurements are I suspect the smaller sized bush which is 1.375" I believe. Its certainly not the bigger 1.7".

When removing the diff plate, its made getting to the rear caliper nipple a lot easier. I think I'm going to look at making a remote bleed point to make it easier. So hopefully next up will be bleeding the brakes time.

I have made a schoolboy error with the fluid resoviour though. I used fuel hose which has started "sweating " on the outside. Not good. So I have got some proper brake fluid hose now which is made of EPDM. I should have known better.....
 
Last edited:
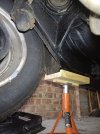
Forgot to mention, these ramps I purchased last year make getting underneath safe and I can lift it high for plenty of room.
1000005884.jpg
 
Little progress today. 2 rear diff bushes are in. "Her indoors sat in the boot and held the rachet whilst I laid under.

1000006229.jpg

1000006230.jpg

1000006231.jpg

Whilst I was looking at how to do the front diff bush, I had a look at the rear suspension bushes and they are a little worn. Oh dear. I wasn't expecting that but seeing as the front was bad it's no surprise. Maybe a job beyond me with the small space I have to work in.
1000006235.jpg

Well at least it's on all 4 wheels now.

Managed to sort the anti-roll bar now so that's fitted. Other job was to finish the brake pad wiring on the nearside. Now I've always had that red brake light on the dash. Now it has gone out. It only comes on when the handbrake is applied. Great result that.

So what's left is to fit the front wings. The seals are shot so I'll need them 1st. Fit the bumper and then test drive.

Then decide on what to do with the rear suspension bushes....
 
It doesn't look right, but that's the only way it will stay in place. You have to join the two ends together at that corner. If you don't get them cut and stuck right, the muck that gets thrown up by the front wheel will come up through the small gap and leave sand and grit on the front end of the inner wing.
 
I get that. Picture is of the old rubber. It fell off when I removed the wing and I didn't take note of how it was fitted. I've got some new rubber now and will cut it at and angle to leave it one piece. I'll but some dabs of glue on the new one so it stays put.
 
Small progress. Car has front end completed today with the wings and bumper fitted back on.
1000006772.jpg

So I think after major surgery to the front suspension and brakes, I need to road test it now. Maybe tomorrow.

Been exploring options on the rear suspension bushes. That's a bigger task than the front I think. I may attempt it myself as I've come a long way since I owned the car.
 
Test drove the car last weekend and it handles better and the brakes are a little better. Brakes will be alot better when the new discs and pads bed in. Just one puzzle, there is a slight grinding noise from underneath the car when pulling away. It's not the front wheel as I've jacked it up and spun the wheel. It's not the prop shaft as I've rotated it and there is no noise there. I'll be open to suggestions on that one.

Looking at the rear suspension, I thought I can do this so I've made a start. I've jacked up the rear, supported the body and then had a good look. As I've said before, every bush is worn. How this car ever past an MOT test the year before I bought it, is baffling.

1000007054.jpg

I've got the nearside shock, spring and rear suspension arm out. Every bolt again was seized. I'm struggling to remove the upper arm where it mounts to the body but ran out of light yesterday so will have another fight with it again.

1000007056.jpg

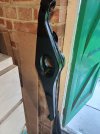
The bushes were a task to remove but I got there in the end. Clean up and a paint and then I'll fit new bushes.

1000007058.jpg
 
Its very satisfying work, esp when you get to feel what you've done. Ive never had the nous to photo log my work. Does make it easy for those that follow.
All those small tweaks make a huge difference in the end.
 
Yes I agree. I think than when you do the car yourself you not only guarantee you've done it and also you get to learn every inch of the car. Let's not forget I'd never worked on a P6 before when I bought it 12 months ago. I'm hopeful that it will be usable for easter when better weather arrives
 
Well I found how to remove the rear upper suspension arm now. I didn't know you got to it from inside the boot. We call it RTFM in my industry. (read the ****ing manual). I did exactly that.
 
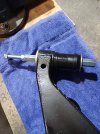
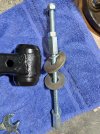
Slow progress but I've managed to finish one lower suspension arm. Here's my way of pushing the bushes in.

1000007108.jpg

1000007109.jpg

1000007111.jpg

I'm aware most people know how to do this but if it helps one person than that's good. Hopefully I'll be able to remove the other suspension arm and then the crossmember this coming weekend and have fun with the old bushes again.

Checked both rear shocks and one is knackered so I think it's best to change both.
 
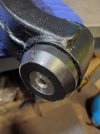
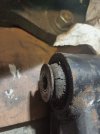
Hello all, I'm at the point where I need some advice. All the old bushes have been removed and the new poly ones fitted. Plenty of silicone grease applied. Picture of the old crossmember bushes.

20231216_130705.jpg

These were apparently fitted in 2016 according to the paperwork I got with the car. I very much doubt it.

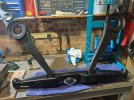
Anyway I have cleaned and painted all the suspension parts and have decided to fit the lower arms to the crossmember on my work bench. Is that the best way to do it? I can see that being difficult on the car. Bolts are all loose at the moment.

20231221_175148.jpg

Can someone please advise if this is the easiest way to refit it to the car please?
 
I would always attach the arms to the cross member prior to refitting it to the car, but don't torque any of them up tight until it all refitted and the car's weight is on its wheels.
 
Back
Top