

You are using an out of date browser. It may not display this or other websites correctly.
You should upgrade or use an alternative browser.
You should upgrade or use an alternative browser.
A 'gentle' rebuild of my 3500
- Thread starter Mikep
- Start date
Mikep
Active Member
Re: A 'gentle' rebuild of my 3500 - Back in the UK!
Thanks Dave, chuffed it made I back with no dramas, being an old car you never know even if it's in goo nick. Th funny thing with the temp is when the car is sat doing 60 mph to 70 mph it sits rock steady at the top of he green. Maybe I should just drive fast everywhere")
Really pleased its here, my Dad didnt really use it and there isn't much of a car scene where he lives. As far as the garage space is concerned I'm used to working on the cars outdoors but at least it has a clean dry home especially with the weather we have been having, I would of hated it to live on the drive.
DaveHerns said:Well done , you must be very pleased.Engine can't be running that hot to have done 430 miles .Might just be reading too high
Thanks Dave, chuffed it made I back with no dramas, being an old car you never know even if it's in goo nick. Th funny thing with the temp is when the car is sat doing 60 mph to 70 mph it sits rock steady at the top of he green. Maybe I should just drive fast everywhere
Dave3066 said:Plenty of room in that garage! It's amazing how well you can manage in a small garage when it's p*$$1ng down outside
Must be good to have the car home though.
Dave
Really pleased its here, my Dad didnt really use it and there isn't much of a car scene where he lives. As far as the garage space is concerned I'm used to working on the cars outdoors but at least it has a clean dry home especially with the weather we have been having, I would of hated it to live on the drive.
Mikep
Active Member
Re: A 'gentle' rebuild of my 3500 - MOT day
Well I took Rory (that's the name my little lad has given him) in for it's first MOT for three years this morning, I was a little apprehensive as my 2004 Corsa failed yesterday and this was bound to.
It did fail... But on emissions only The reading was 0.5% over and all it needs is the carbs balancing, which the garage is doing. A couple of minor advisories, bit of an exhaust blow in the centre joint, a couple if leaks (which I'm aware of), and some bolt locking tabs on the n/s front calliper not bent over. Only one other item was mentioned and that was excessive play in a steering arm, strictly a fail but he said that I should sort it out straight away, just don't tell the boss ironically enough the fail on my Corsa was a bald tyre due to a worn ball-joint on a steering arm!
Really chuffed with the result, now I can get my paperwork in to get the UK plates on it.
Well I took Rory (that's the name my little lad has given him) in for it's first MOT for three years this morning, I was a little apprehensive as my 2004 Corsa failed yesterday and this was bound to.
It did fail... But on emissions only
The reading was 0.5% over and all it needs is the carbs balancing, which the garage is doing. A couple of minor advisories, bit of an exhaust blow in the centre joint, a couple if leaks (which I'm aware of), and some bolt locking tabs on the n/s front calliper not bent over. Only one other item was mentioned and that was excessive play in a steering arm, strictly a fail but he said that I should sort it out straight away, just don't tell the boss ironically enough the fail on my Corsa was a bald tyre due to a worn ball-joint on a steering arm!Really chuffed with the result, now I can get my paperwork in to get the UK plates on it.
stina
New Member
Re: A 'gentle' rebuild of my 3500 - MOT day
Well done Mike , Didn't think they needed emissions for the mot , mine didn't but it's a couple of years older . Guess that must of come in for vehicles around that age . ( Take the air filters out for the test next year ) Happy motoring any way
Well done Mike , Didn't think they needed emissions for the mot , mine didn't but it's a couple of years older . Guess that must of come in for vehicles around that age . ( Take the air filters out for the test next year
) Happy motoring any way Dave3066
Well-Known Member
Re: A 'gentle' rebuild of my 3500 - MOT day
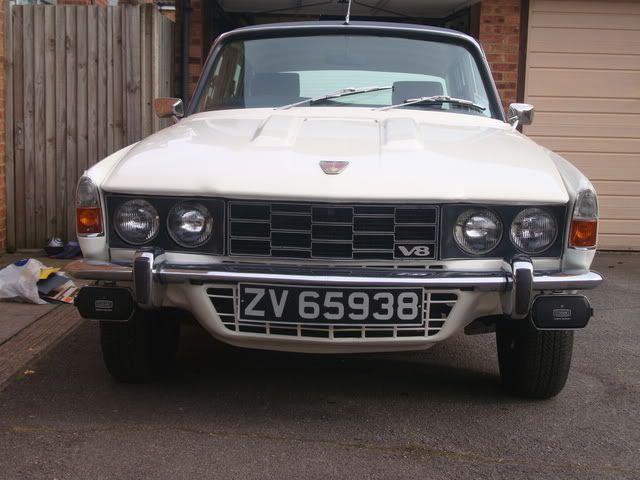
Yes, Mike's car is a '76 so just falls into the 4.5% for emissions. Not too bad though Mike. Soon be back out Rovering again. Good name too :wink:
Dave
stina said:Well done Mike , Didn't think they needed emissions for the mot , mine didn't but it's a couple of years older . Guess that must of come in for vehicles around that age . ( Take the air filters out for the test next year
Yes, Mike's car is a '76 so just falls into the 4.5% for emissions. Not too bad though Mike. Soon be back out Rovering again. Good name too :wink:
Dave
Mikep
Active Member
Re: A 'gentle' rebuild of my 3500 - MOT day
Really pleased with the outcome, a pleasant surprise. To get the emissions below the limits all the garage did was tweak and balance the carbs. I don profess to understand exactly what it means but a little tweak made quite a difference:
Before
CO Level - 4.99%, maximum allowed 4.5%
HC Level - 735 ppm, maximum allowed 1200 ppm
After
CO Level - 3.66%
HC Level - 456ppm
I would say quite a drop and I don't know if it's my imagination but it is a little smoother. Now I have the MOT I can now get down to the DVLA and sort out the registration and tax, hopefully in time for Petworth
Im also really plesaed as my thermostat turned up so lets hope that sorts out the hot running and these arrived as well
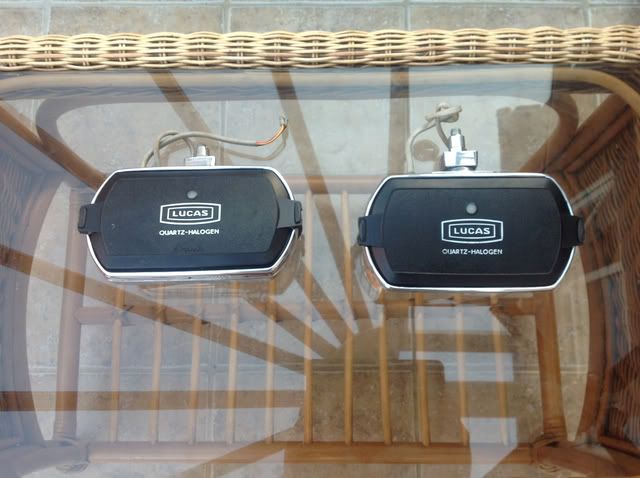
They look brand new, not one mark on them so once I get hold of some brackets they will be going straight onto the car.
Really pleased with the outcome, a pleasant surprise. To get the emissions below the limits all the garage did was tweak and balance the carbs. I don profess to understand exactly what it means but a little tweak made quite a difference:
Before
CO Level - 4.99%, maximum allowed 4.5%
HC Level - 735 ppm, maximum allowed 1200 ppm
After
CO Level - 3.66%
HC Level - 456ppm
I would say quite a drop and I don't know if it's my imagination but it is a little smoother. Now I have the MOT I can now get down to the DVLA and sort out the registration and tax, hopefully in time for Petworth
Im also really plesaed as my thermostat turned up so lets hope that sorts out the hot running and these arrived as well
They look brand new, not one mark on them so once I get hold of some brackets they will be going straight onto the car.
Mikep
Active Member
Now I have got the car back I have started to get stuck into all the little jobs that have been bugging me.
First one up was the rust on the N/S front wing. My Dad and I attempted a reapir when we bought the car but couldn't find the paint in Ireland so left it in primer but it didn't take long before the rust was coming back through. To be honest I we didn't go deep enough in getting rid of all the rust and when I had a closer look at the repair it was terrible to say the least.
The attempted repair :shock:
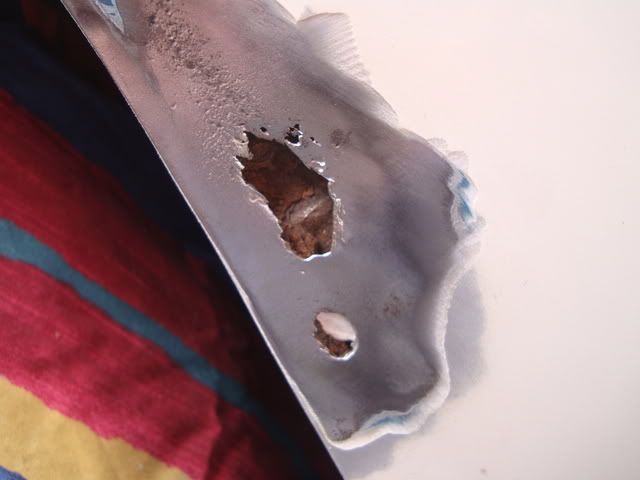
You can see the size of the hole. I dug out all the loose rust and liberally slopped rust remover inside. The rust did actually break through in places to the other side, and you can also see evidence of blue paint under the white so obviously not the original wing.
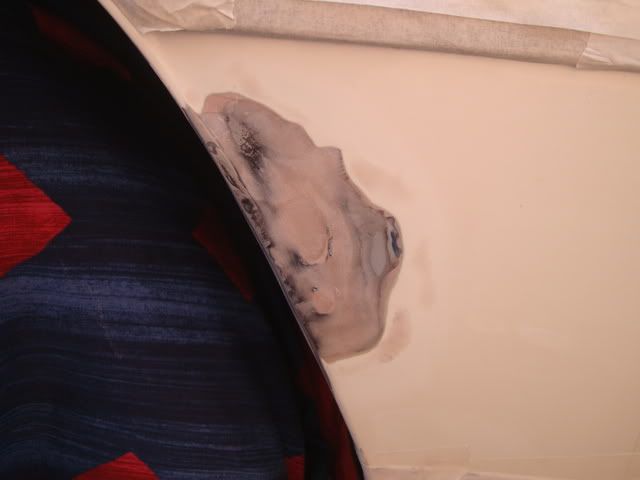
After many layers of filler the surface was sanded flat and smooth ready for primer. With the extent of the hole I know that I will need to have a professional repair done or replace the wing at a later date.

Also delievered with the brackets was a new steering side rod arm, the O/S one was flagged up in the MOT as having excessive play so fitting that will be another job to tackle.
Two layers of etch primer and two of normal primer and sanded smooth ready for paint.
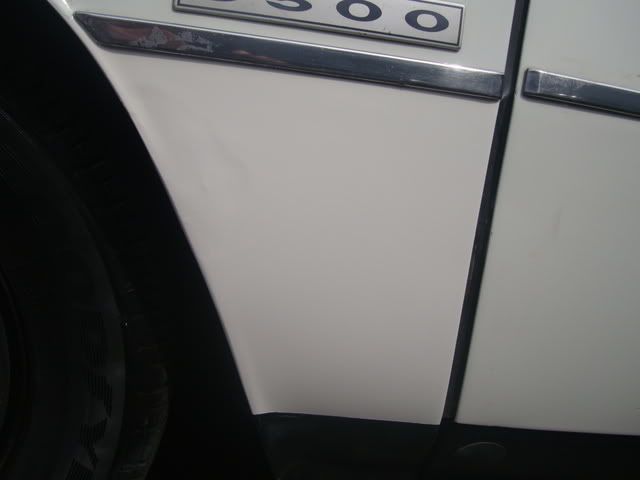
I had a local paint supplier mix up two aerosols of Pendelican White and the painting commenced. I lost count of how many layers I did, but I did use up a large can, the colour match is very good and I'm pleased with the results. Today I flatted back the paint with 1500 grit and I will leave it a couple of weeks to fully harden before I give it a polish. My only criticism is that I didn't fill enough of the bare metal area. The paint layers on the car were quite 'high' and didn't notice this really until the white started going on so when you catch it in the light it does look like a shallow dent , however at a glance it does look passable and much better than before.
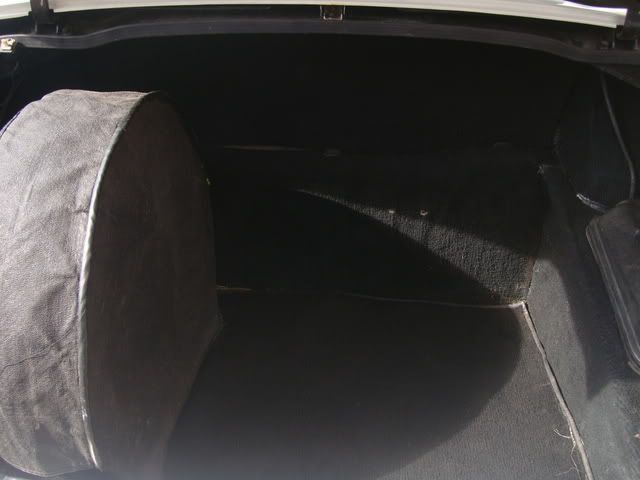
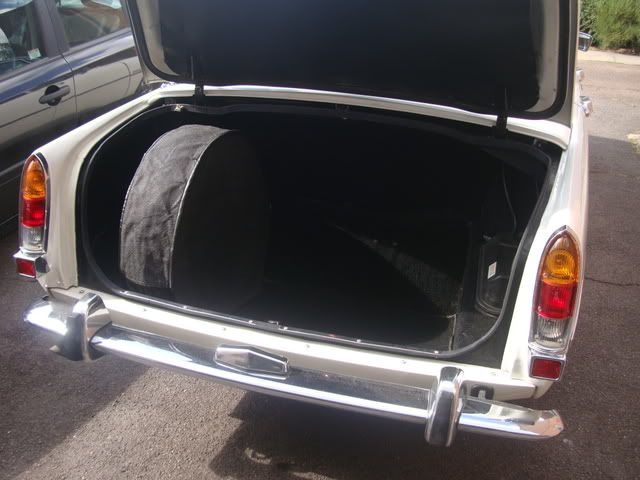
Also today I have started to tidy up the boot. As this is a Denovo car I have a complete boot carpet set which is in good need of a clean, once i removed it I gave the metal work a good clean and a once over with hardwearing stone chip paint.
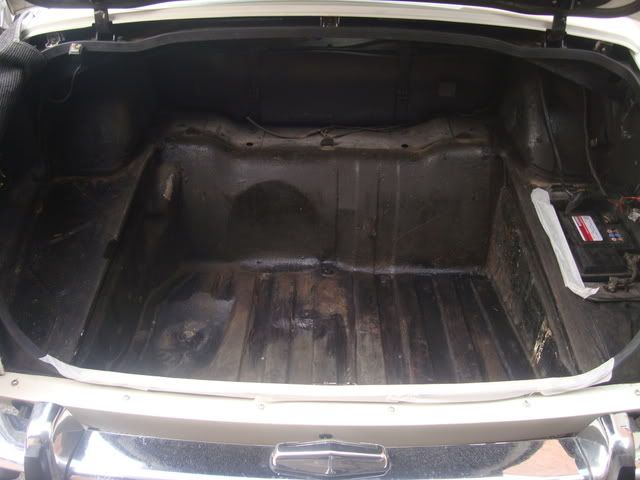
Before. Bits of surface rust evident.

After. The picture doesn't do it justice but now it looks a lot ceaner and the musty smell has been replaced by fresh paint smell. much better in my opinion. Now I have a clean boot to attach the carpet to.
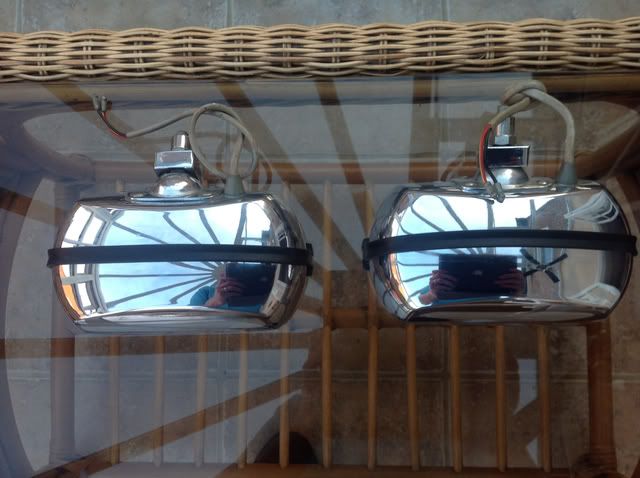
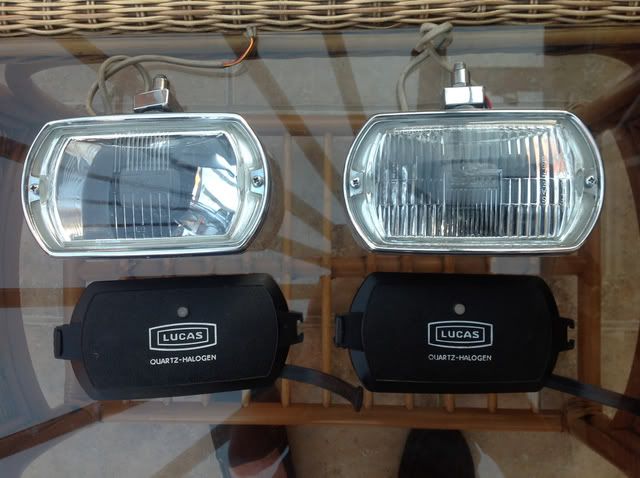
My brackets arrived for the Lucas Square 8's I bought off ebay, so I couldn't wait to fit them. I did temporarily wire them up and they work perfectly but I will permanently wire them up later as the old connector in the car aren't great. I also think they need some fine adjustment.
Also in the package that arrived today was a new steering side rod as this was flagged up in the MOT as having excessive wear, so another job to add to the list.
First one up was the rust on the N/S front wing. My Dad and I attempted a reapir when we bought the car but couldn't find the paint in Ireland so left it in primer but it didn't take long before the rust was coming back through. To be honest I we didn't go deep enough in getting rid of all the rust and when I had a closer look at the repair it was terrible to say the least.
The attempted repair :shock:
You can see the size of the hole. I dug out all the loose rust and liberally slopped rust remover inside. The rust did actually break through in places to the other side, and you can also see evidence of blue paint under the white so obviously not the original wing.
After many layers of filler the surface was sanded flat and smooth ready for primer. With the extent of the hole I know that I will need to have a professional repair done or replace the wing at a later date.
Also delievered with the brackets was a new steering side rod arm, the O/S one was flagged up in the MOT as having excessive play so fitting that will be another job to tackle.
Two layers of etch primer and two of normal primer and sanded smooth ready for paint.
I had a local paint supplier mix up two aerosols of Pendelican White and the painting commenced. I lost count of how many layers I did, but I did use up a large can, the colour match is very good and I'm pleased with the results. Today I flatted back the paint with 1500 grit and I will leave it a couple of weeks to fully harden before I give it a polish. My only criticism is that I didn't fill enough of the bare metal area. The paint layers on the car were quite 'high' and didn't notice this really until the white started going on so when you catch it in the light it does look like a shallow dent
, however at a glance it does look passable and much better than before.Also today I have started to tidy up the boot. As this is a Denovo car I have a complete boot carpet set which is in good need of a clean, once i removed it I gave the metal work a good clean and a once over with hardwearing stone chip paint.
Before. Bits of surface rust evident.
After. The picture doesn't do it justice but now it looks a lot ceaner and the musty smell has been replaced by fresh paint smell. much better in my opinion. Now I have a clean boot to attach the carpet to.
My brackets arrived for the Lucas Square 8's I bought off ebay, so I couldn't wait to fit them. I did temporarily wire them up and they work perfectly but I will permanently wire them up later as the old connector in the car aren't great. I also think they need some fine adjustment.
Also in the package that arrived today was a new steering side rod as this was flagged up in the MOT as having excessive wear, so another job to add to the list.
If your happy with the colour match, an easy way to improve from where you are now is to remove the stainless trim...mask at the half point, and mask the adjoining door, bottom and wheel well.
Sand and prep the area...put a skim coat of filler where you need it...sand real smooth.
Prime again.
Sand...Prime. Until repair is invisible.
Paint.
Finished
Sand and prep the area...put a skim coat of filler where you need it...sand real smooth.
Prime again.
Sand...Prime. Until repair is invisible.
Paint.
Finished
Mikep
Active Member
Thanks for the tips guys, bodywork is neither my strong point or favourite job but I'm pleased with the result.
Another busy day today fitting the O/S steering arm. Like all jobs that you think will take an hour or two always end up taking all day.
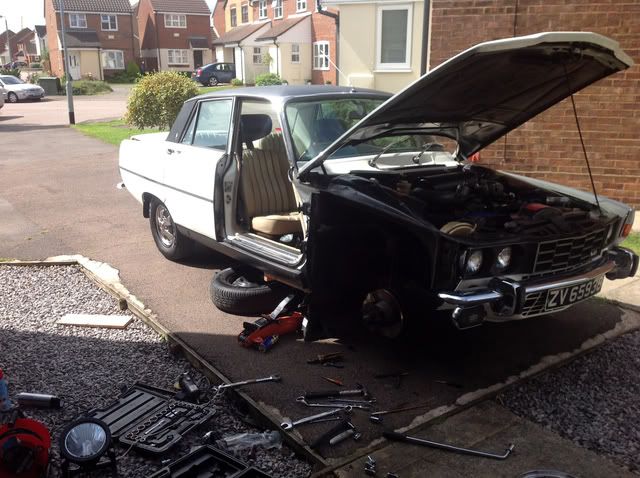
A dramatic shot for what shoud be a simple job. It started off ok, removed the front split pin and nut from the ball-joint, but when I tried to remove the split pin from the ball joint under the spring the tails just snapped off, no problem, just hook the eyelet of the pin and pull it out, hold on, it's sitting flush with the nut, it's ok just knock it through from the other side but unfortunately the position was so that the inner wing prevented me from tapping it through :evil: my next step is to usually get a socket/spanner on there and force the nut until it breaks the head of the split pin but there wasn't enough room to do this behind the wing!!
It may look over the top but because two of the wing bolts are near the door hinges I thought it easier to lift off the door to get to the bolts. Once he wing was off I could get my spanner onto the nut and feed a bigger one over this to get he leverage and hey presto one loose nut
Once I got to this stage I realised I couldn't find my ball-joint splitter :evil: Off to the shops to get one, but when I got home I found it was too small so back to the shop to get a bigger one!
Anyway from there on it went smoothly and I got everything back together. I haven't had a chance to road test it yet but i coukd notice more direct steering just turning the car round, the front ball-joint on the arm had a lot of slop in it so overall a good job done
Another busy day today fitting the O/S steering arm. Like all jobs that you think will take an hour or two always end up taking all day.
A dramatic shot for what shoud be a simple job. It started off ok, removed the front split pin and nut from the ball-joint, but when I tried to remove the split pin from the ball joint under the spring the tails just snapped off, no problem, just hook the eyelet of the pin and pull it out, hold on, it's sitting flush with the nut, it's ok just knock it through from the other side but unfortunately the position was so that the inner wing prevented me from tapping it through :evil: my next step is to usually get a socket/spanner on there and force the nut until it breaks the head of the split pin but there wasn't enough room to do this behind the wing!!
It may look over the top but because two of the wing bolts are near the door hinges I thought it easier to lift off the door to get to the bolts. Once he wing was off I could get my spanner onto the nut and feed a bigger one over this to get he leverage and hey presto one loose nut
Once I got to this stage I realised I couldn't find my ball-joint splitter :evil: Off to the shops to get one, but when I got home I found it was too small so back to the shop to get a bigger one!
Anyway from there on it went smoothly and I got everything back together. I haven't had a chance to road test it yet but i coukd notice more direct steering just turning the car round, the front ball-joint on the arm had a lot of slop in it so overall a good job done
Mikep
Active Member
billoddie said:Nice to see someone else has...
a) A top notch work space like me.
b) 1 hr jobs take the whole day.
Even though it was a beautiful day I thought sods law would intervene and it would bloody rain because I had the car in bits, but thankfully not. Don't you love working out in the elements
herts2000 said::shock: you could of borrowed my puller
I shall bear that in mind for next time
Mikep
Active Member
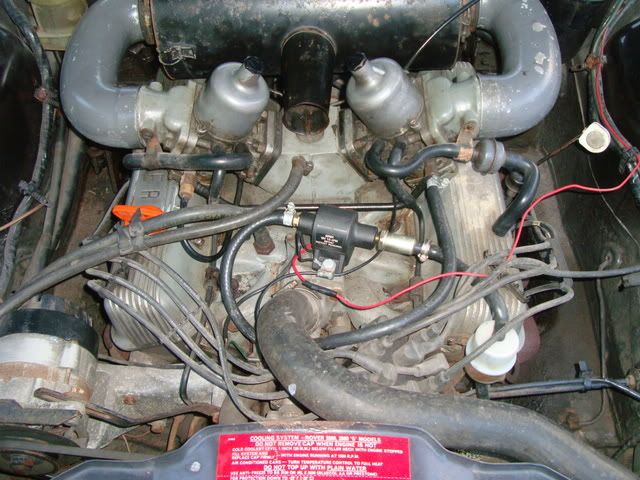
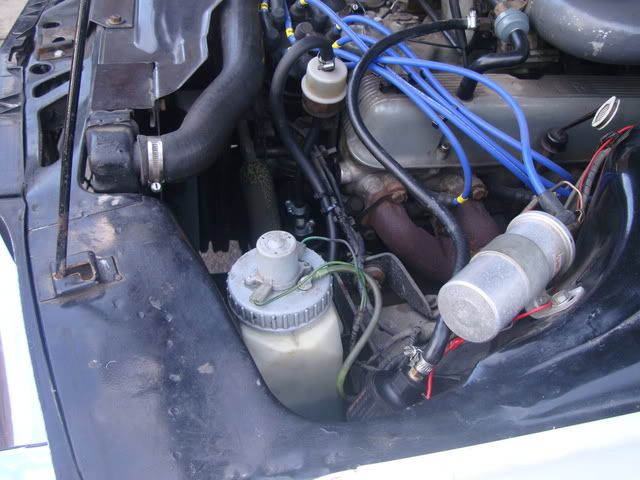
Since I got the Rover home its been non-stop. Firstly for those of you that havn't read my thread about my hot running issues I fitted a new thermostat and flushed and replaced the coolant as the needle was right at the top of the green and moves into the red when I'm in traffic. Unfortunately this hasn't really cured the problem so I have a new upgraded radiator on order so fingers crossed its radiator thats knackered.
Also last weekend I experienced fuel vapourisation for the first time, I dont think the 30 degree heat helped but I found the car struggling up hill and very reluctant to get above 2000 RPM, once I left the car to cool down it seemed OK. I know that these cars suffer from this problem But I don't think the location of the electric fuel pump helped, right on top of the inlet manifold! I must add that a previous owner fitted it here.
Before
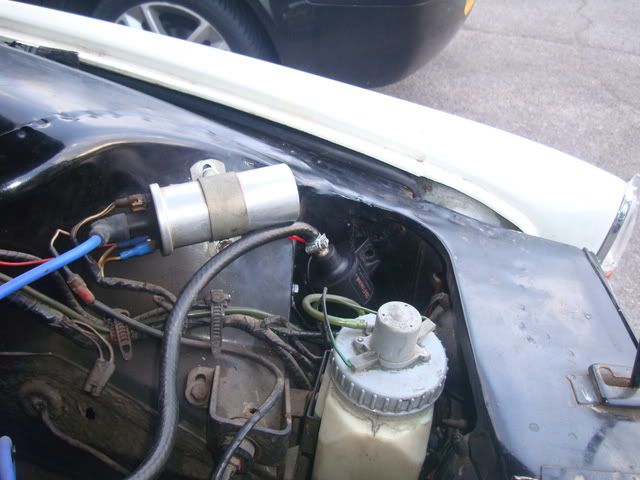
After. Hopefully now that its tucked down in front of the headlight it should reduce the chance of it overheating. One thing it is missing is an inertia switch which I shall be fitting soon.
I have also finished off cleaning and fitting the original boot carpet. Its a little threadbare in places but more than acdeptable.
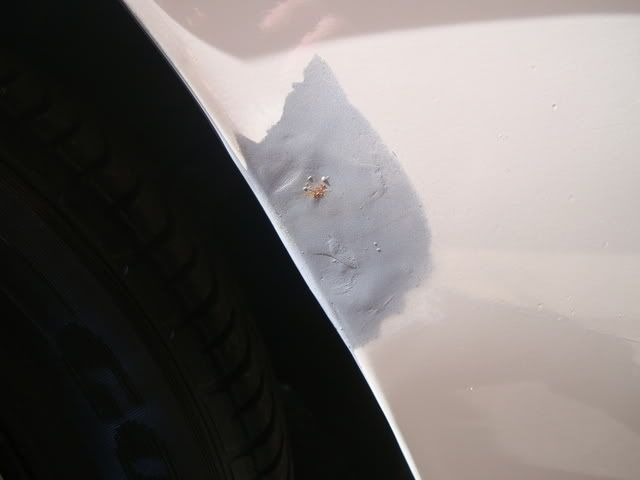
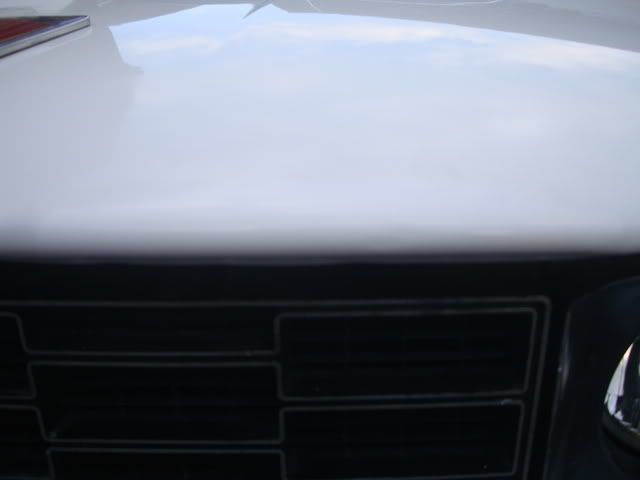
The only set back this week was when I forgot to put the bonnet down before I shut the garage door resulting in a one inch paint chip on the leading edge of the bonnet :shock: :twisted: :cry: I didnt take any pictures but spent that eveing sanding, filling and priming ready for paint. I am pleased with the final result and thankfully because its white you don't notice the slight colour mismatch. If you look really closely you may see a whiter section along the edge, this is the reair.
And to end on a positive note the DVLA have re-registered the car back in the UK from Ireland and have assigned its original number. New plates are on order and I should have them by next week in time for driving down to Petworth
Also last weekend I experienced fuel vapourisation for the first time, I dont think the 30 degree heat helped but I found the car struggling up hill and very reluctant to get above 2000 RPM, once I left the car to cool down it seemed OK. I know that these cars suffer from this problem But I don't think the location of the electric fuel pump helped, right on top of the inlet manifold! I must add that a previous owner fitted it here.
Before
After. Hopefully now that its tucked down in front of the headlight it should reduce the chance of it overheating. One thing it is missing is an inertia switch which I shall be fitting soon.
I have also finished off cleaning and fitting the original boot carpet. Its a little threadbare in places but more than acdeptable.
The only set back this week was when I forgot to put the bonnet down before I shut the garage door resulting in a one inch paint chip on the leading edge of the bonnet :shock: :twisted: :cry: I didnt take any pictures but spent that eveing sanding, filling and priming ready for paint. I am pleased with the final result and thankfully because its white you don't notice the slight colour mismatch. If you look really closely you may see a whiter section along the edge, this is the reair.
And to end on a positive note the DVLA have re-registered the car back in the UK from Ireland and have assigned its original number. New plates are on order and I should have them by next week in time for driving down to Petworth
Mikep
Active Member
harveyp6 said:It's difficult to understand the mindset of someone who fits an electric pump, presumably to get rid of fuel vapourisation problems, and then bolts it directly on top of the engine.......
I totally agree. To be honest it was always on the 'to do' list but as I hadn't experienced any problems other jobs took precedence
I actually download the fitting instructions and it specifically said the it should be fitted at a 45 degree angle to the horizontal on a vertical surface with the inlet at the bottom, as I have fitted it, and not on a flat surface as they had :roll: It wasn't much more work to fit it where I did; a longer bit of pipe to the inlet and one hole drilled for mounting!Demetris
Well-Known Member
harveyp6 said:It's difficult to understand the mindset of someone who fits an electric pump, presumably to get rid of fuel vapourisation problems, and then bolts it directly on top of the engine.......
Probably he heard that in order to cure the fuel vapourisation he has to fit an electric pump.(Full stop)
As we say over here, possessing half the knowledge is worse than being completely ignorant.