Heat Wrap.

The Rovering Member

Well-Known Member
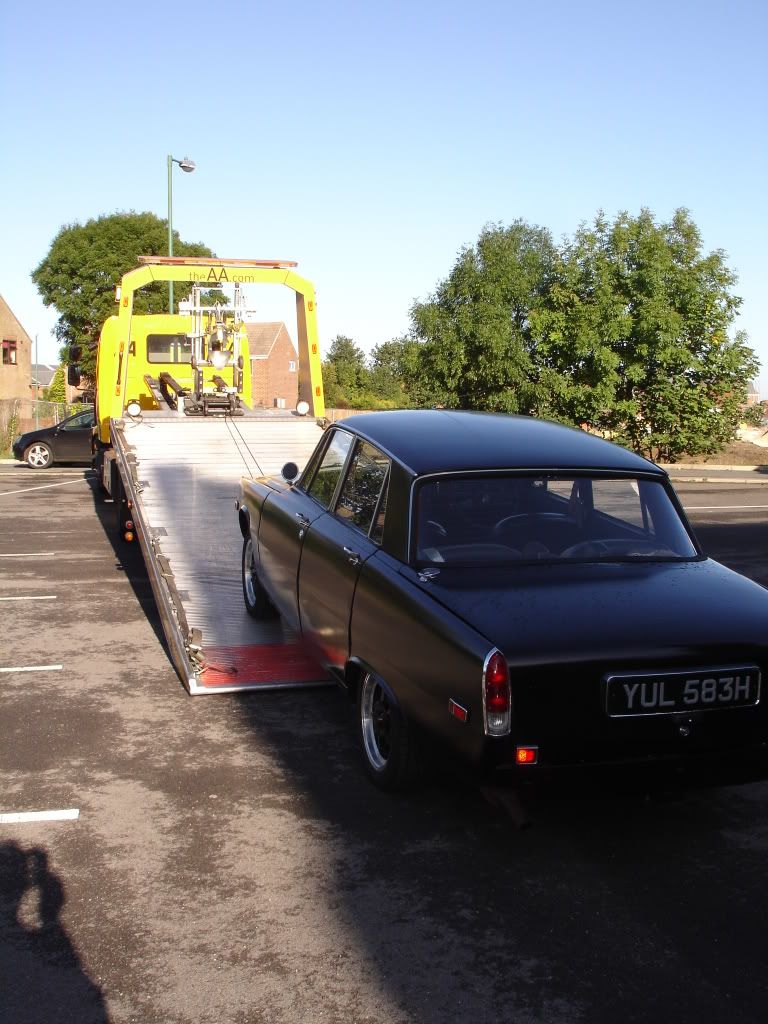
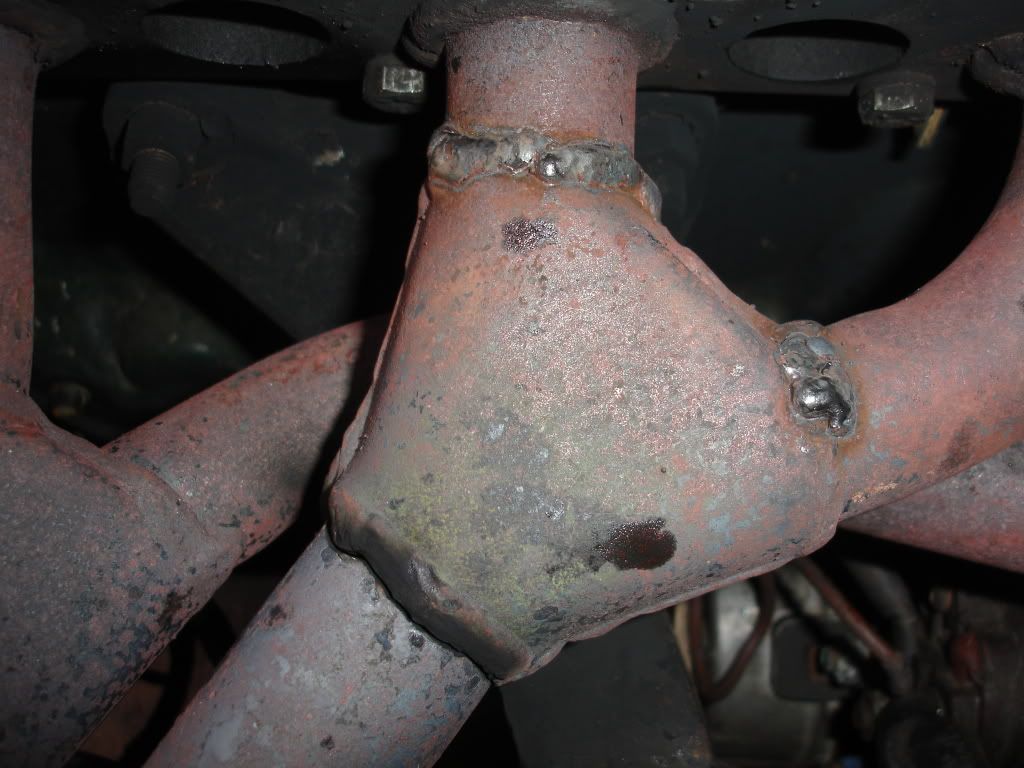
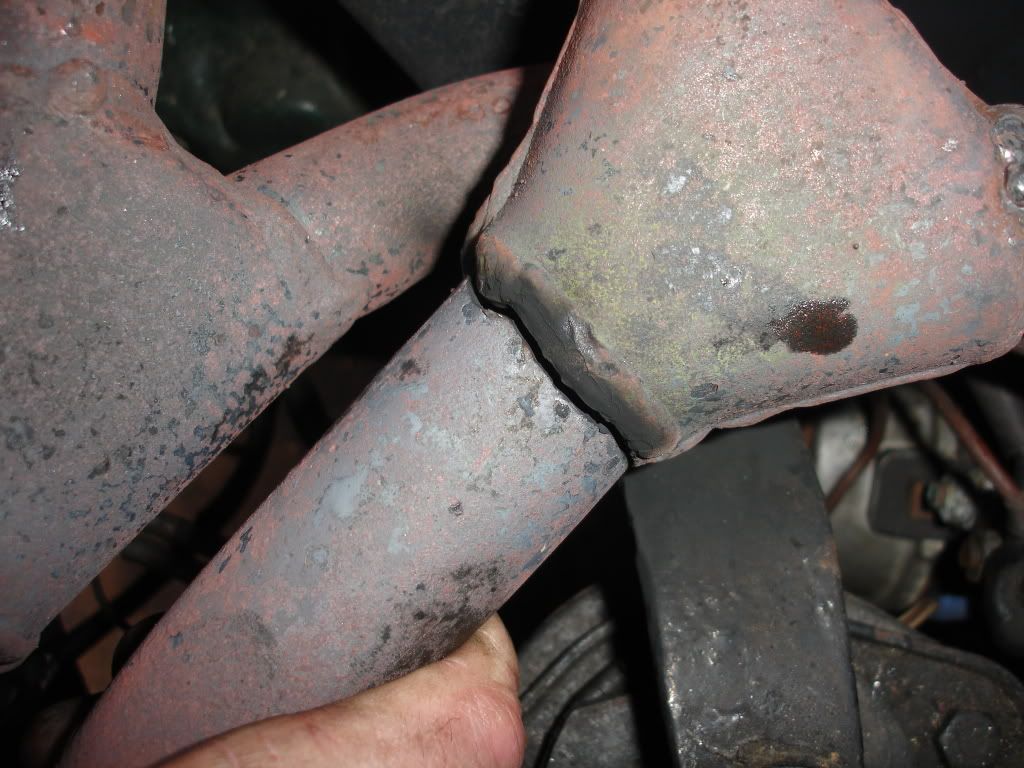
When I replaced Bruiser's cracked exhaust manifold I heat-wrapped the replacement. Subsequently this one also cracked & on removal of it followed by the wrap this is what it looked like:

DSC03289.jpg


DSC03290.jpg


DSC03291.jpg


DSC03292.jpg


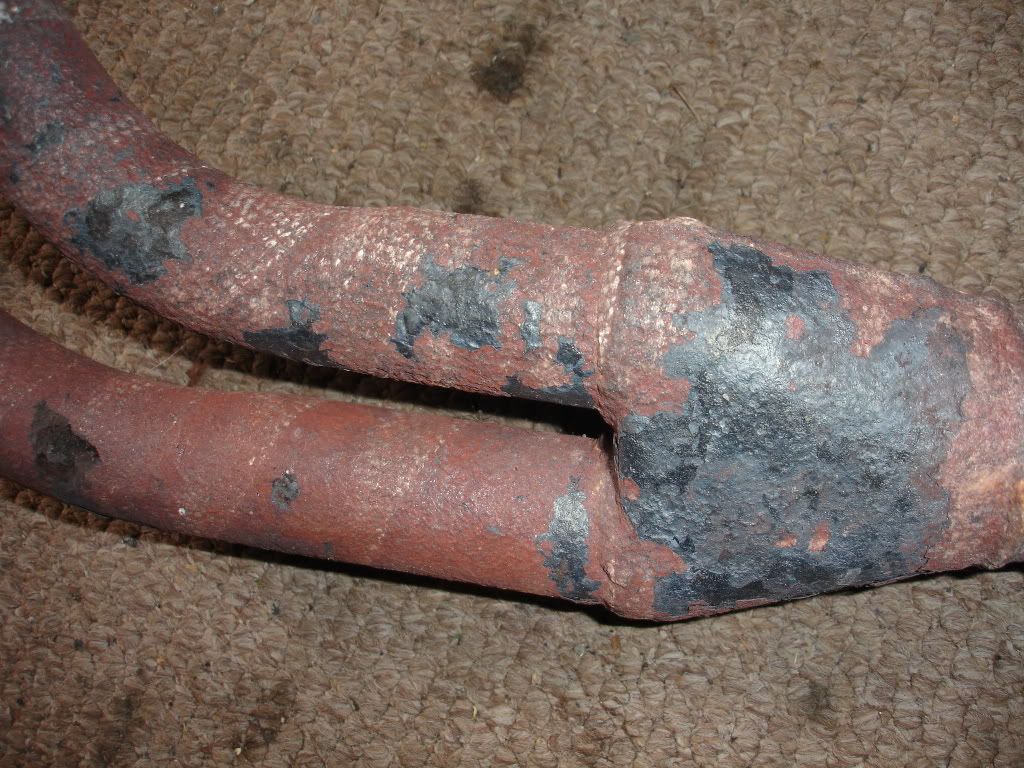
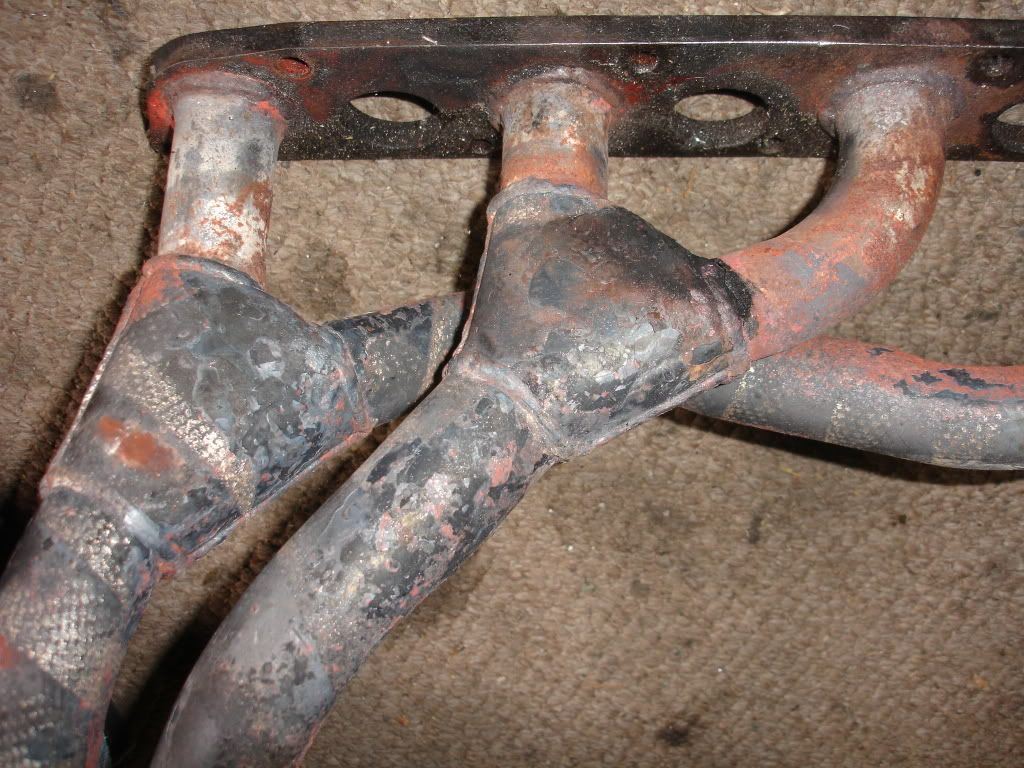
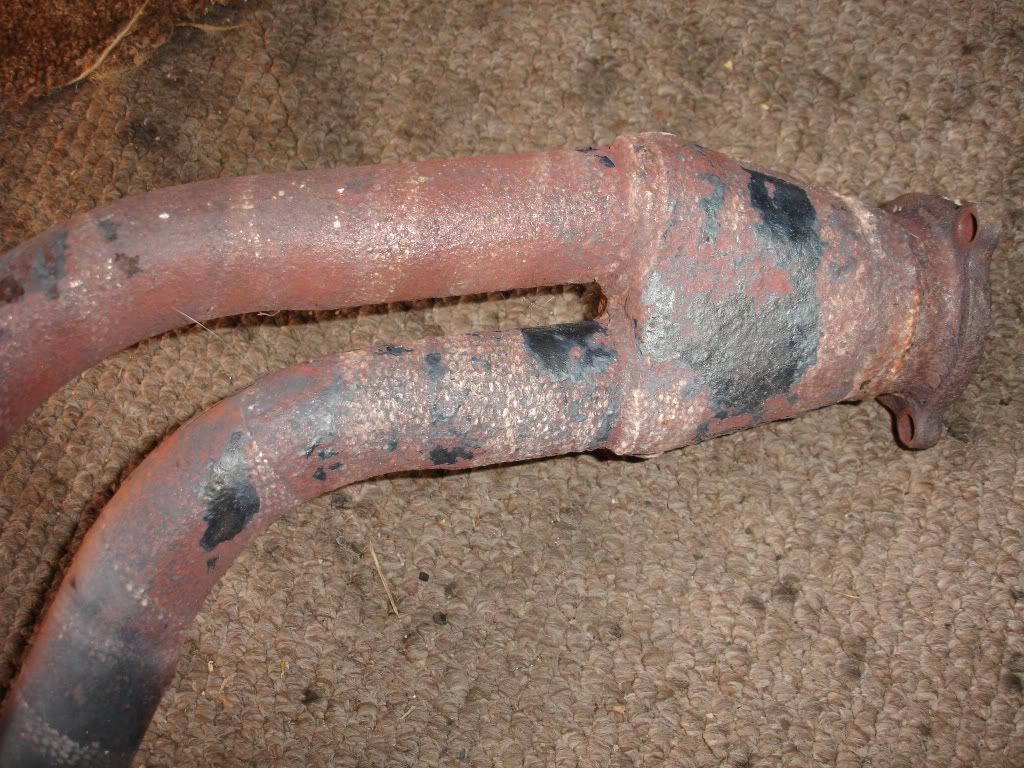
As you can see, the metal was deteriorating underneath the wrap quite quickly due to the heat. It had been on for about four months so not long at all. It's been mentioned on the forum in the past that this is what happens with the manifold wrapped so I thought anyone thinking of doing the same would be interested in seeing this.
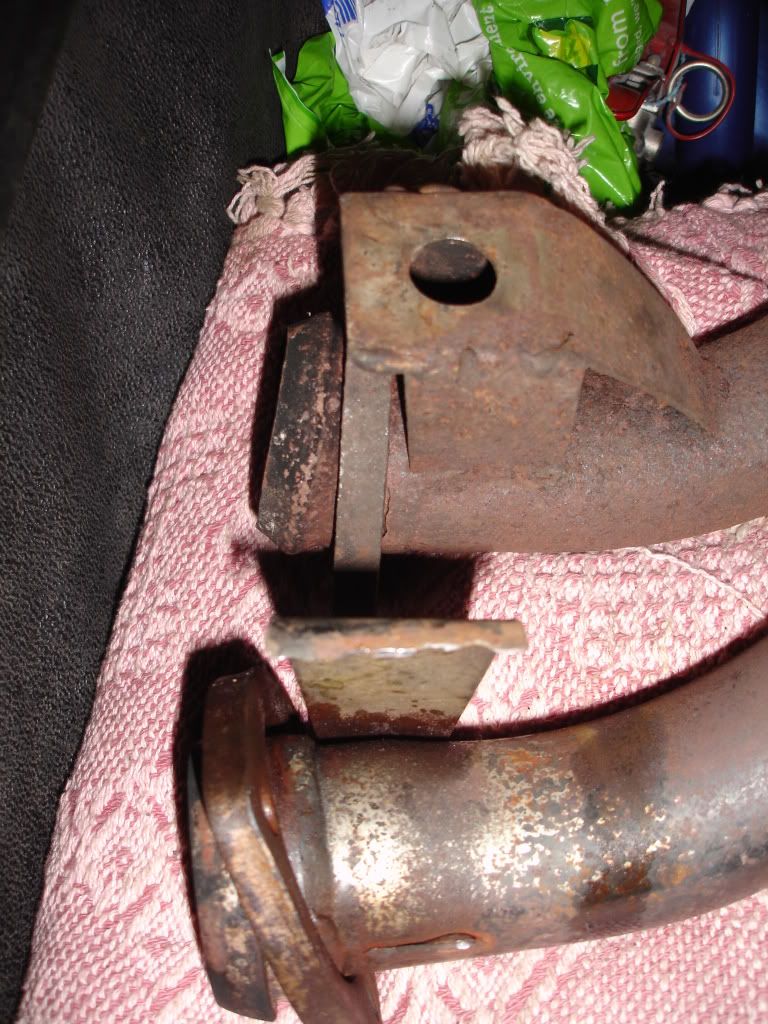
It is very good stuff, reducing the under-bonnet temperature considerably & you can actually touch the manifold (briefly) when the engine is running without instantly burning yourself but I haven't wrapped the manifold I've put on, partly due to the effect it's had on the one you can see & partly the expense which was a bit over £40, though it can be had cheaper (I went for Thermo-Tec). Re-using what came off would be difficult as it goes fairly brittle. I would re-wrap if I had a stainless manifold but on reflection mild steel is probably best left free to breathe in the long term.
Ceramic coating would be the expensive way to go.
 
I had some major problems with under bonnet heat due to the large stainless manifolds fitted to Sparky when I bought him.

I did wrap them to start with as well as making up heat shields, re-routing fuel lines, etc, but eventually I had to make the decision to either ceramic coat them or ditch them altogether.

With the first box blowing, the custom made y section too close to the side of the tunnel (melted the underseal and kept my feet warm), I had a complete large bore system made up out of stainless, the Y section ceramic coated on the outside, and the manifiolds coated inside and out.

Yes it was expensive (Don't tell the wife :shock: ) but it cured all Sparky's underbonnet heat problems.

manis.jpg
 
I'm not getting heat problems as such, I just thought I'd try the wrap while I had the manifold off. Stainless & Ceramic would be the way to go but I can't justify the cost. My cracking manifold problem was down to the exhaust support on the back of the gearbox being U/S which I rectified by changing the 'box's back plate. I now have problems with the rather flimsy front support bracket welded to the new intermediate pipe I recently fitted. It cracked before the rear support was back in use so I got it welded up & now it's cracked in another place neccessitating removal of the pipe to have a more substantial bracket welded on. Harvey tells me this is down to excessive loading on the fittings somwhere along the line (possibly the adjustable plate wich the front mount is on) which I'll deal with when a new support bracket is in place. For now I'll just hope this manifold stays solid although I have another repaired one standing by just in case.
 
Shame. I thought that may have helped dampen any vibes and been a good idea. The heat issue would have just been a bonus in this case :|
 
quattro said:
I had some major problems with under bonnet heat due to the large stainless manifolds fitted to Sparky when I bought him.

I did wrap them to start with as well as making up heat shields, re-routing fuel lines, etc, but eventually I had to make the decision to either ceramic coat them or ditch them altogether.

With the first box blowing, the custom made y section too close to the side of the tunnel (melted the underseal and kept my feet warm), I had a complete large bore system made up out of stainless, the Y section ceramic coated on the outside, and the manifiolds coated inside and out.

Yes it was expensive (Don't tell the wife :shock: ) but it cured all Sparky's underbonnet heat problems.

manis.jpg

How expensive? (you can leave the Zeros out so the wife wont know I will add them back in this end :LOL: )
and what difference did it make temperature wise?

PS wot a sparkly engine!!!

Graeme
 
As far as I'm aware, 2000TC and 2200TC manifolds are identical.

As expected TC manifold problems refuse to go away! Is there anyone out there had a stainless manifold made up who could tell us how it has got on cracking wise? Purpose of the question is to try and make a bit of progress distinguishing as to whether it is a material problem or a stress problem.

If material, then we can all go and buy a stainless manifold and consign the problem to history. If a stress issue, then we need someone to do a bit of R&D to devise alternative mounting points for both the manifold and the system behind it.

Chris
 
ghce said:
How expensive? (you can leave the Zeros out so the wife wont know I will add them back in this end :LOL: )
and what difference did it make temperature wise?

PS wot a sparkly engine!!!

Graeme

To have the two manifolds coated inside and out, and the front Y Section coated outside only was £32.00 plus vat

To have the Y section made, and the rest of the exhaust to the back including two straight through boxes in stainless was £40.00 plus vat.

£84.60 altogether :?

The heat diference is quite incredible, you can go for a drive then open the bonnet (engine still running) and put the back of your hand within an inch of the manifold and leave it there. The heat you feel is similar to that of a hot sunny day on your hand. Before coating, the heat from those thin walled stainless manis would have removed skin.

Car goes better as well, which would be down to the improved exhaust flow (Larger bore, straight through boxes) and the engine breathing in cooler air.

In summary, it is worth it IF you have a heat problem which is driving you nuts, but I wouldn't have paid out all of that money if I was not at my wits end with it.

ghce said:
PS wot a sparkly engine!!!Graeme

Just wait til it goes back in 8)

Just the one zero omitted :wink:
 
There was an article on ceramic coating in Practical Classics last month, they were quoting something like £130 to coat an MGB cast iron manifold.

Sounds like you got a good price for all the work done Richard.
 
Another cracked manifold:

Durham2010050.jpg


It's turning into a bit of a saga. This one gave way forty miles from Durham, curtailing our five day exploration of the area to the city itself which is very nice with some good pubs. There is also no charge to the battery which may be a result of the proximity of the alternator/loom to the heat.
I'll have a more substantial bracket fitted to the intermediate exhaust pipe & as previously stated, Harvey's opinion is that the problems are caused by too much loading on the fixing mounts & I'm in agreement as the intermediate & downpipe joint was a little difficult to line up. I'll need to spend some time getting the fitting just right on re-fitment though I think I'm going to get the replacement manifold gas-welded.
I also removed the spring mount for the carbs when I replaced the heavy old box filter with the SU items as a further weight-saving experiment. But the front carb seems to have a propensity to come loose without it, so I'll also refit that.
 
ajcb said:
Very interesting topic. Good luck

This looks like a nice manifold. It has recently gone on ebay.http://cgi.ebay.co.uk/Rover-2000-TC-Exh ... 2a0a20405b

It went for just over 100 pounds including postage. I put in a lowish bid and was going to go higher but had a better look at the photos and decided it didn't look quite right.

If anyone wants to think about remanufacturing them, I'd willingly pay 120 or so for decent quality.
 
The miscreant revealed:

Durham2010001.jpg


Durham2010002.jpg


As you can see the branch pipe has completely seperated from the junction on the opposite side to my friends repair. Seeing as this is the case I'll get him to weld this too as his MIG repairs do look nice & strong & not the weakest link.
You can also see the differing quality between the new & old pipe brackets so I'll let him decide whether to transfer the old bracket to the new pipe or to fabricate a new one:

Durham2010.jpg


And the charging fault is in the alternator itself, not the wiring so it could be heat-related or coincidental. My bet is with the former.
 
I've had HUC's (2200 auto) exhaust heat-wrapped for several years now - probably about 8000 miles, with no problems at all - and it did cut down on the under-bonnet heating (the vapour locking and general heat issues I suffered were due to several causes conspiring with each other). Certainly haven't had any corrosion issue with the front of the exhaust.

Cheers
Nick
 
The Rovering Member said:
The miscreant revealed:

Durham2010002.jpg

On the aircraft I work on, the exhausts crack just like that by the welded joins. This is usually after they get old, and once they've been welded once, they'll usually crack in another place as they begin to get pulled and stretched from a mixture of age and the welding repairs. The solution is usually to replace the exhaust with a new one $$$ or have someone put the exhaust on a jig to straighten it out and re-weld it.

Would it be possible to fit one of those flexible sections into the front pipe behind the manifold somewhere in the region of the gearbox to eliminate the rest of the exhaust system from pulling on the manifold? Maybe also worth welding in some fillets across some of the welded joins on the manifold itself (to make it crack somewhere else :LOL: )?
 
Mine has a flexi section immediately after the manifold. I would't recommend copying the way it's fitted though. It's a previous owner bodge, and has been welded (badly) into the end of the manifold. I'm on the lookout for a new manifold as I'm not sure I'll be able to clean the weld from mine when I fit a proper exhaust. I'm following this thread with interest, as I don't want to spend out a lot on new standard parts, only to have them crack. Anyone had a stainless manifold made, what do they cost?
 
Here's the flexi i fitted to my TC about one and a half year and lot's of thousands of miles ago.
It seems to be fine still, and keeps the exhaust crack free.
2264348380050033024S600x600Q85.jpg
 
I've used the flexi-pipe on our Morris Oxford (1800 bitsa-system :) ) though it's the ring section type. It does rust & isn't a permanent solution though I haven't used the woven type shown here. For the moment however I'm having this one welded up again & am going to spend a bit of time trying to make sure that the two pipes marry up exactly at the joint before I bolt them together, maybe opening up the mounting points to give a bit more adjustment & take the stress out of the system. My friend has the pipes & manifold to carry out the repairs/fabrication of new mounting bracket & I'm going to run the alternator down to JCR supplies (which as Harvey has mentioned is very local to us) & get some new innards for it.
Hopefully Bruiser should be terrorising the streets again in a week or so. :wink:
 
Gents

Just revisiting this thread as I'm trying to reduce the underbonnet temp of my own car. I know this is in the 4 pot section and my car is a V8 but the principle is the same (just twice as bad in the V8 :roll: ).

What sort of heat wrap would people recommend? I have standard cast iron exhaust manifolds on my car and I'm looking to wrap them. Demon Tweeks do separates and kits to wrap exhausts with and I wondered what other people had used. ie buy the wraps and clips separately or buy a kit? Also how much wrap would I need to do the manifolds and the front Y-section exhaust?

Dave
 
Hi Dave

I think experience has built up significantly since the last post here - there are a couple of other threads that cover this topic also. I'll try to summarise what I think we know so far (please correct me if I'm wrong chaps).

There are two fundamental routes to happiness under the bonnet of a P6. First is to stop the heat getting in there to start with - the exhaust insulation route. Second is to make sure the heat can get out easily once it's there.

So looking at insulation first.

Heat wrap is pretty universal, I don't think there's anything to choose between any of the suppliers. It is fragile though. I wouldn't expect it to stay intact for more than about a year, before it starts looking like a child's bandages after a good rough and tumble! Next problem is that it doesn't seem to be very kind to whatever it's wrapped around. It definitely promotes a very rapid corrosion of a TC manifold. I would imagine it might promote some early fracturing in important places, as well as corrosion, around a cast iron manifold. I'd therefore only use it around a fabricated stainless manifold.

The other solution is to ceramic coat either inside or outside or both. This is expensive, I think I'm right in guessing in the range £150 per manifold (Quattro?), but seems to work very well on a stainless manifold. I see no reason why it should't work equally well on a cast manifold.

The remaining factor in heating your exhaust manifold is the state of tune of your engine - if it's off song you can expect the manifolds to get much hotter than if it's running correctly.

Next on to getting rid of the heat.

There are two clear and established mods around to acieve this. The first is Rover's own - the three scoop NADA bonnet! The outer two scoops were there to let hot air out when standing (the worst situation). So any variation on a theme is going to help. Lucky has a bonnet in waiting fitted with vintage style pressed in rear facing louvres in approximately the same position as the side scoops. This was copied from the Rover P7 prototypes.

The second mod is also copied from Rover racing practice. That is to raise the rear of the bonnet slightly so that hot air can escape up over the windscreen.

Assuming these two solutions are a bit too radical, they do give clues as to how to tweak what you've got. First off make sure the sealing between the bonnet and slam panel is as good as you can get, so that all the air goes through the radiator. Then look at the adjustment of the bonnet hinges and make sure that the bonnet doesn't sit too tight to the inner wings - try and leave a gap for air to escape up the sides. And if you've got a saggy bonnet insulation mat, take action to try and secure it up away from the inner wings. Likewise try and strike a compromise between having the bonnet tight to the rubber seal around the heater intake and yet having some space to let air out at the outer ends. All this is adjusted by placing washers under the bonnet hinges to jack them up as appropriate or to move the bonnet forward slightly.

Sorry if that isn't exactly the response you'd hoped for, Dave!

Chris
 
Back
Top