1971 Rover 3500 'Hildegarde'

Re: Lil 2.0

Last minute dash and finishing touches


The Wizard of the Lake sent his apprentice to scour the realm in search of last moment replacement bits and pieces.

A seat rail for a front seat. The seat rail in the driver's seat of the donor vehicle was jammed solid - presumably as a result of the impact of the head-on collision.

A plastic centre console for the transmission tunnel.The console of the donor vehicle was snapped in two pieces

After sending out a panic email to the members of my local branch, someone came to the rescue, at least for the transmission bits.

I snapped a photo and sent it to the Wizard of the Lake.

FW: Auto by EthelRedThePetrolHead, on Flickr

His repsonse
ok , top to bottom

1 yes , if the nylon seat for the ball is ok
2 no , we have this already fitted
3 no , we have this
4 yes , same as item 1 if the nylon is ok
5 no, spent fag packet not required

still missing shift knob with press button !


$_12.JPG


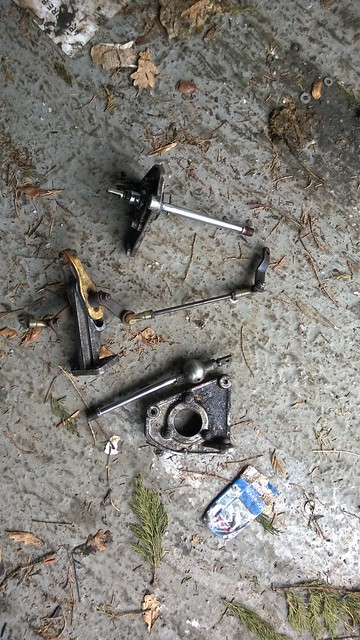
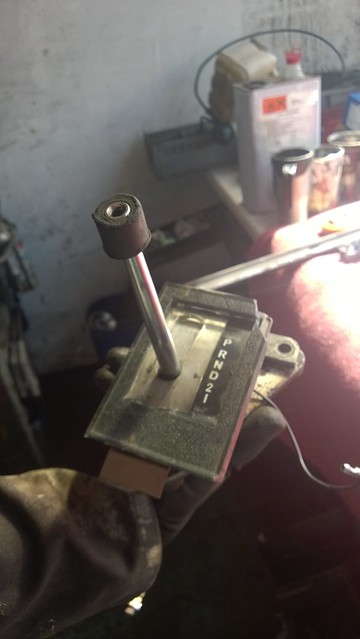
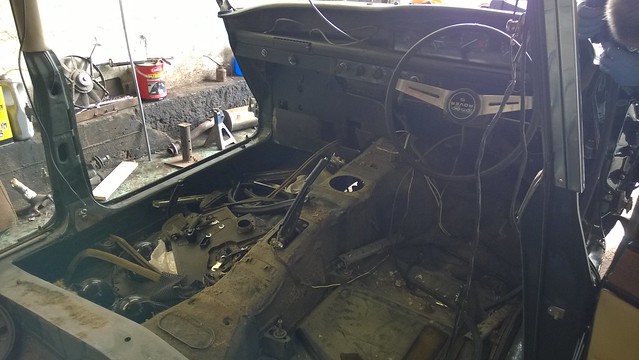
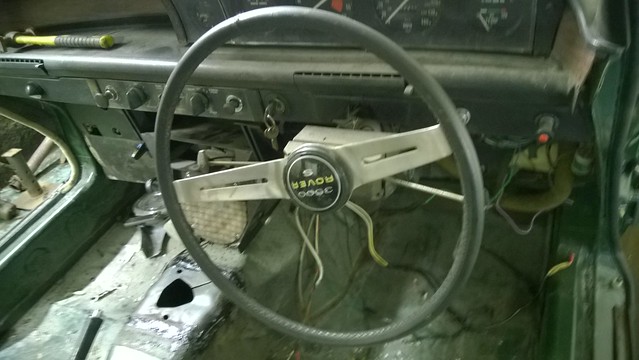
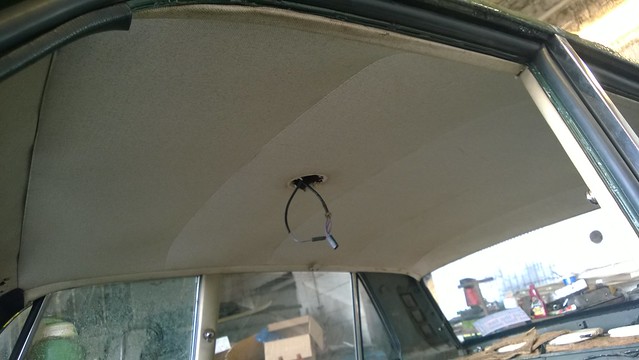
The only component we are now missing is the shift knob - the thread was destroyed on the original shift knob - you can see it still attached to the lever of the damaged unit below. The press button is like a little plastic top hat and will be somewhere in the carcass of the old car.

Crucially, the car will be able to be engaged in gear, even if it might be a bit hard on the thumb without the little plastic hat. I feel a Milliput kludge coming on here.

WP_20140509_005.jpg by EthelRedThePetrolHead, on Flickr

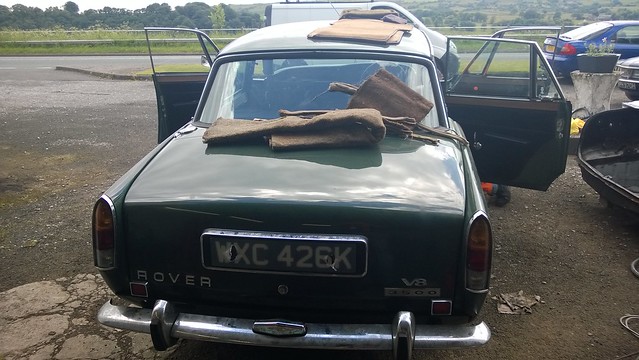
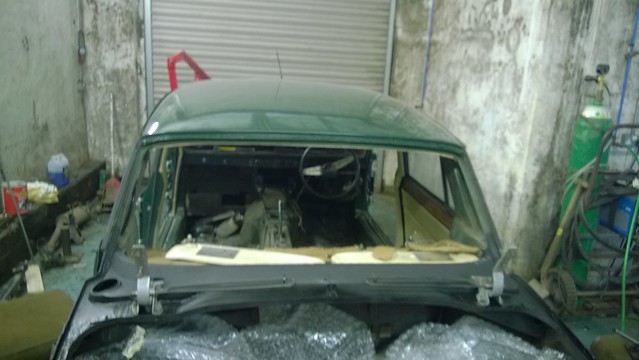
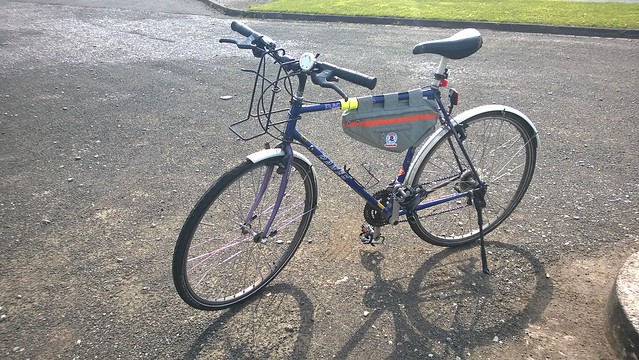
On Saturday we went to Wythenshawe and Sunday to Wolverhampton to see some old friends.


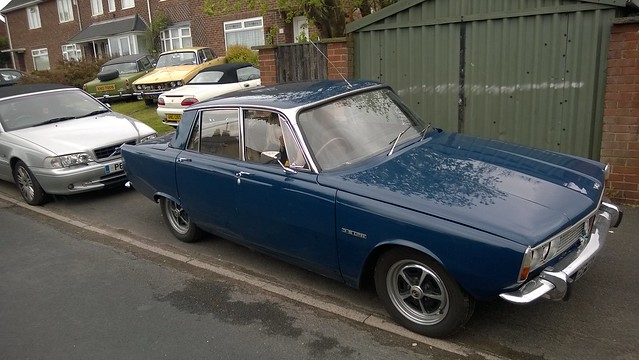
WP_20140511_003.jpg by EthelRedThePetrolHead, on Flickr

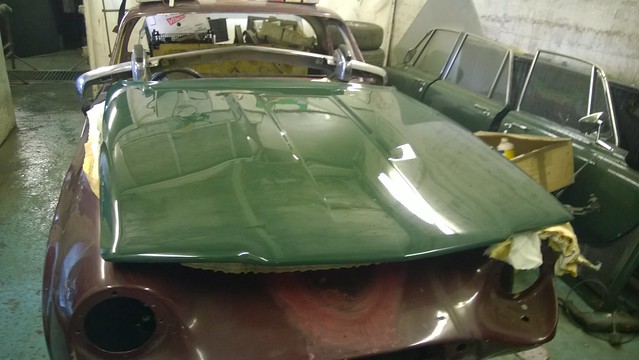
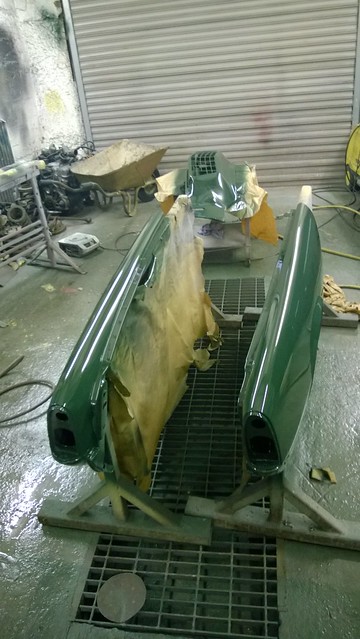
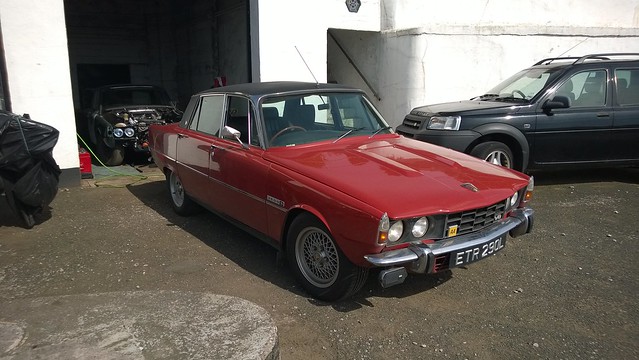
We then drove to Lake View to drop some bits to the somewhat beleagured Wizard. A seat rail. A centre console. A choice of selector levers, some new shock absorbers.

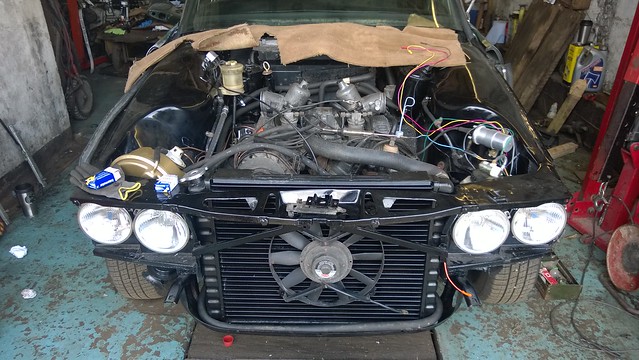
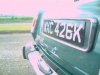
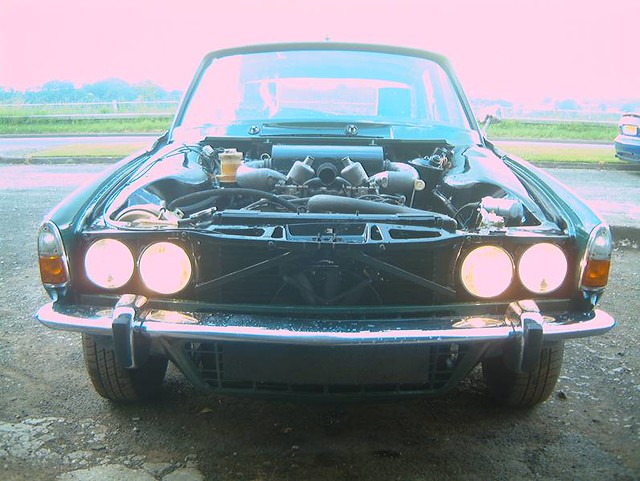
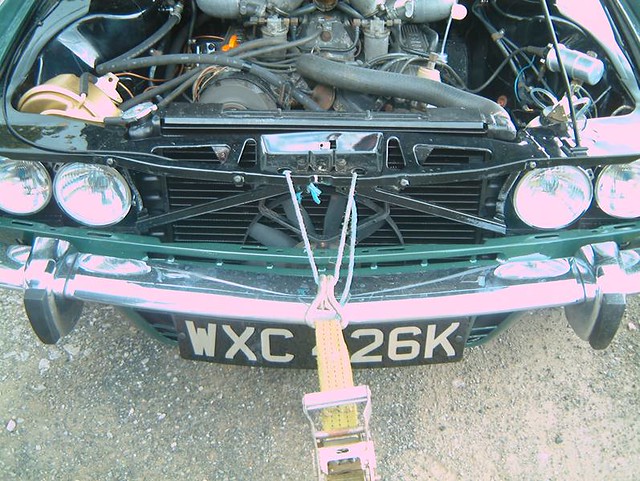
Lucky I turned up when I did - the green bonnet doesn't go on this car and that's my bumper there too!

WP_20140511_012.jpg by EthelRedThePetrolHead, on Flickr

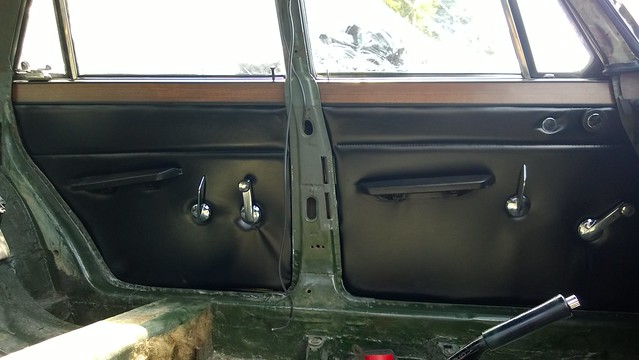
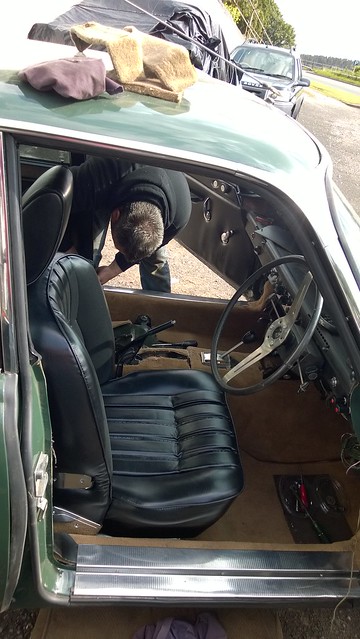
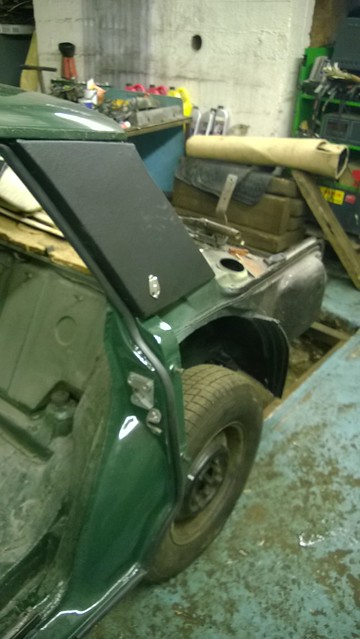
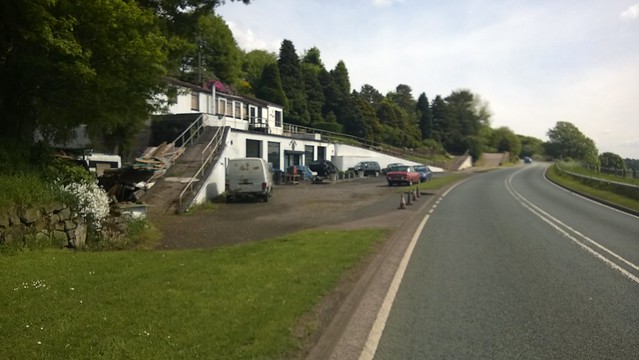
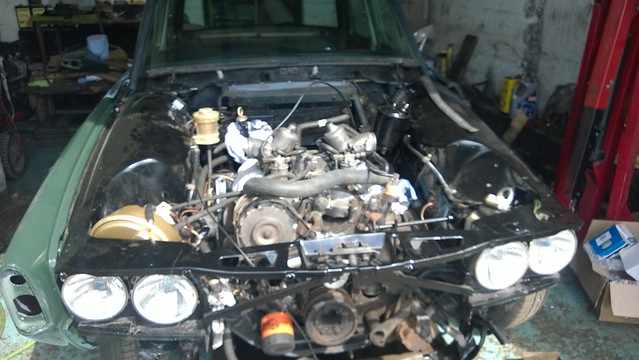
Notice the three doors along the garage wall - they all need attention before a light respray - the two front doors sustained damage in the collision and the rear door has an unrelated ding that will all need attention before a light respray - there is no need to go back to bare metal on these doors.

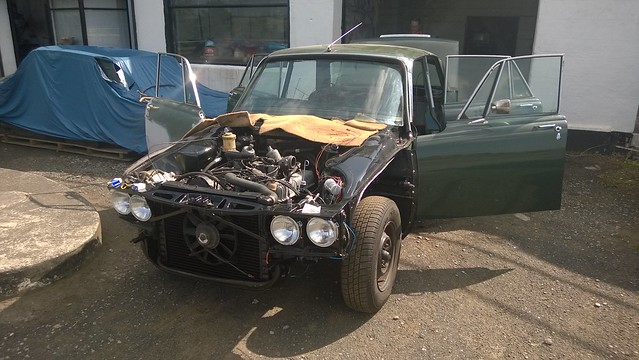
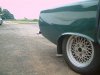
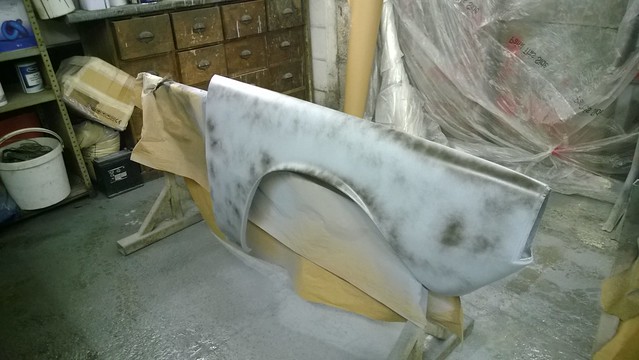
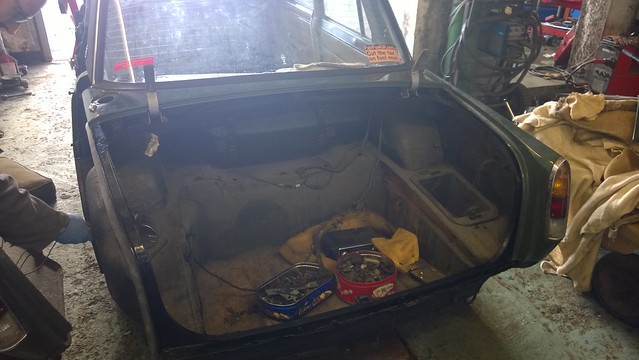
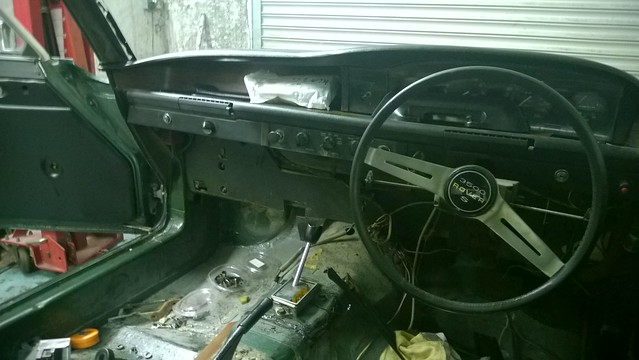
My quarter panels look rather good, even if one has got some dust on it since I painted them.

WP_20140511_010.jpg by EthelRedThePetrolHead, on Flickr

I'm glad I changed my mind about putting Series 2 quarter panels and I am glad I decided to spray the brown Hunstman panels black after a good hour of "Shall I Shan't I?"
 
Re: Lil 2.0

So near yet so far

It was a busy day at Lake View today - plenty of painting going on and for my part, I busied myself shining up the chrome, cleanining and degreasing various rubber seals

In primer by EthelRedThePetrolHead, on Flickr

O/S/F wing by EthelRedThePetrolHead, on Flickr

WP_20140513_014.jpg by EthelRedThePetrolHead, on Flickr

Around mid morning today I was told what I had been starting to suspect for the last week or so - this vehicle will not be ready for the Rover P6 Northern Rally on the 18th May.

There has been one little snag after another and the tipping point, at least from the Wizard's perspective, is the difficulty in getting panels that have been set for one car to hang properly on the car and line up correctly.

I don't want a bodged, half finished job - it isn't what I am paying for. I didn't commission this project to go to a car show - I did it to suit my long term motoring requirements.

Stamping my foot and/or burning rubber on the A523 won't get me the car any quicker or any better.

As for the show on the 18th, I have still have a choice of two rather nice V8s so making a whiny noise is hardly appropriate - first world problems when you only need to worry about such things. Some people are ill, others are hungry. I am happy and healthy and have two, nearly three cars that I used to daydream about at the back of class when I was a kid.

WP_20140509_014.jpg by EthelRedThePetrolHead, on Flickr

Never unready, red Ethel will probably get the nod over the newly bought and as yet anonymous blue Three Thousand Five.

As an aborted manual conversion, the transmission tunnel presented some unique technical difficulties for Tom, the Wizard of the Lake.

Fake S by EthelRedThePetrolHead, on Flickr

The previous owner had skillfully cut out the mounting for the automatic gear selector and replaced it with a neat circle for the manual gearstick - just in front of the handbrake on the transmission tunnel.


S that never was by EthelRedThePetrolHead, on Flickr

Tom then had to fabricate and install a replacement mounting for the automatic transmission, pictued above.

Headlining installed by EthelRedThePetrolHead, on Flickr

3500 by EthelRedThePetrolHead, on Flickr


Offside rear wing by EthelRedThePetrolHead, on Flickr

Two rear wings by EthelRedThePetrolHead, on Flickr
 
Re: Lil 2.0

No point in rushing it, I quite agree. All I have to do before the weekend jolly up North is paint the sill, refit a wing and the interior and I think that is plenty to get done. Oh, and go to work obviously.
 
Re: Lil 2.0

WP_20140521_072.jpg by EthelRedThePetrolHead, on Flickr

I cycled to Lake View to fetch Ethel today - she deserves better than being dumped by the A523 for the best part of a month.

WP_20140521_075.jpg by EthelRedThePetrolHead, on Flickr

The bike - 20 years old and by far my youngest vehicle, needs a full service.

WP_20140521_078.jpg by EthelRedThePetrolHead, on Flickr

A puff of air in the tyres and we were good to drive the 30 miles back home.

Lil 2.0 is now assembled. Headlights. The Xenons look very nice although I'll reserve judgement until I actually switch them on. Brakes bled. ATF fluid. Battery installed but isolated. Wiring loom connected.

WP_20140521_077.jpg by EthelRedThePetrolHead, on Flickr
 
Re: Lil 2.0

Fixtures and fittings

It's funny how things turn out. Like the car itself, this interior came very close to being junked as surplus to requirements - an eyesore - unwanted clutter.

Rover seat by EthelRedThePetrolHead, on Flickr

The seats were installed in the car when I bought it - I remember removing Ethel's rear seats so they could be taken direct from its previous home in Dudley to Manchester - dry storage space is very much at a premium at Lake View. The car itself was taken minus its interior to Lake View as a donor vehicle for the ill-fated Lil and the seats rested in my spare room.

When Lil was written off, it was my original intention to build a car using as much as possible of Lil's parts. As time has passed, the project has evolved from something that would have been highly customised and, ahem, different to a car that is much more like a stock Series 2 P6B with some hints of the Series 1 style.

At Easter, a Series One Three Thousand Five unexpectedly became available - this is the blue monster that has started appearing in my posts. This car, known as Helga, had a ratty Series 2 interior. Lil's interior, restored by me back in 2010, is an authentic match for this vehicle and it only took me a morning to swap the interiors.

Tom, the Wizard of the Lake had never seen the interior I bought from Dudley and he was enthusiastic when I finally brought it to Lake View. My decision to go with black vinyled quarter panels - standard issue on a Series 2 car - triggered a flurry of ideas from the esteemed Wizard, including the green tinted glass. He suggested that I could paint the interior black just as I had successully refreshed Lil's interior without his input.

When I reminded him that it took me nearly a fortnight to do Lil's interior with the tiny Airfix spraygun supplied with the kit, he told me I could use his professional spraying kit and do the work at Lake View. Bursting with pride, I ordered some black leather paint and some satin finish before remembering that these seats are not actually made of leather.

I sent a quick email to The Furniture Clinic.

I have a car interior that looks like leather but is actually fake – it is plastic that looks like leather – I think Rover called it “ambla”

Does the same kit that I used very successfully on a leather interior work with this material?

Back came the reply.


Hi Chris

As you are not dealing with full leather, you will have to create more adhesion as our products are designed for leather.

To do this you will also need to purchase our Adhesion promoter and Cross Linker X.

You need to mix 10% of cross linker x into the adhesion promoter for it to work to its full capability, see links.

You can also add 10% of the Cross Linker X into the leather finish (included in the kit) to make the finish much stronger and more durable.

To restore the colour of your leather you will need a leather colourant kit. The kit is a 4 stage process, starting with cleaning the leather down with the leather prep & alcohol cleaners.

This cleaning process will remove the old finish from the leather, indicated when you see colour rubbed off onto your cloth. This process (as it removes the finish) will also remove any minor creases & cracks from the leathers coating, making the surface softer and smoother.

Any severe cracking can be filled in using the Heavy Filler, Leather Binder or Flexifil if necessary.

You then proceed to sponge a coat of colour onto the leather, followed by a spray on coat (spraying equipment included) to give a nice even finish. You can either use one of our standard colours from the website or send a piece of leather into us for an exact colour match. If you’re just restoring specific parts of the leather then it is best to have us match the colour for you.

The colour is then sealed in with the super seal finish for a very strong long lasting finish, and you can then match the sheen exactly by applying either a matt, semi-matt, satin, semi-gloss or gloss finish afterwards.

You can either select a standard colour from our colour chart or if you want an exact match you can send a sample of the leather in to us and we can match this for a fee of £10 (there is no fee if you order the extra large kit).

If you are only colouring a small part of the leather we would recommend having the colour matched to ensure the restored area blends in with the rest of the leather.

The kit is available in four different sizes, small, medium, large & extra large.

To clean and protect your leather I would recommend the Care kit

Thankful that I had double checked, I ordered the two extra components.

WP_20140525_003.jpg by EthelRedThePetrolHead, on Flickr

When I arrived at Lake View, I found that the Wizard of the Lake had used up most of the black paint on the headlining and the door cards - the last time you saw these door cards they were tan coloured and about to be removed from Helga the Three Thousand Five.

WP_20140516_004.jpg by EthelRedThePetrolHead, on Flickr

While the Wizard of the Lake busied himself screwing on various bits and pieces to the new car, I adjourned to the paint spraying end of the garage to get to work on the seats.

WP_20140525_010.jpg by EthelRedThePetrolHead, on Flickr

We now have a transmission.

WP_20140525_006.jpg by EthelRedThePetrolHead, on Flickr

It turned out that someone had previously had a go at painting the rear seats but hadn't used a sealant - hence plenty of beige paint came off while the seats were being degreased with paint thinners - a substance more aggressive than panel wipe (meths) but much less aggressive than leather prep (acetone).

When it came to degreasing the front seats, the acetone turned out to be too aggressive for the surface and I decided not to risk having the front seats shrivel up like walnuts and used paint thinners as with the back seats.

Ready for use by EthelRedThePetrolHead, on Flickr

After degreasing, the seats are dried with a hairdrier - well two actualy - one in each hand to speed things up.

The panels are then sprayed with the cross linker / adhesion promoter as described above and dried with the hairdriers.

WP_20140525_013.jpg by EthelRedThePetrolHead, on Flickr

The panels are sprayed with the black colourant and dried immediately with the hairdriers. Again.

WP_20140525_014.jpg by EthelRedThePetrolHead, on Flickr

And again. The two hairdriers are working flat out.

WP_20140525_015.jpg by EthelRedThePetrolHead, on Flickr

After three or four coats of black paint, it is time for the satin finish. Rinse the spray gun out then repeat the process with the satin finish mixed with the cross linker and dry off.

Ready for use by EthelRedThePetrolHead, on Flickr

We were puzzled by mysterious white flakes which appearred on the surface of the painted panels - between us we realised that the hairdriers were taking in atomised satin finish, drying it and depositing it on the panels - when I do the front seats during the next few days I will ensure that the hairdriers are cleaned at intervals with the compressed air line.

WP_20140525_020.jpg by EthelRedThePetrolHead, on Flickr
 
Re: Lil 2.0

Great work on the seats. Cars is looking brilliant. Looking forward to seeing the progress.
 
Re: Lil 2.0

Coming along nicely! Seems like a lot of faffing about with the seats though. Do you not have 'Vinylkote' or something similar over there? Just clean the vinyl and spray a couple of coats with the aerosol. Job done.

Also, those gear indicator plates are available new from Scotts old auto rubber for $69.00 Australian. Repros I assume. Not sure how good they are but it's cheaper than a NOS one.
 
Re: Lil 2.0

Brabus said:
Great work on the seats. Cars is looking brilliant. Looking forward to seeing the progress.

Thank you.

KiwiRover said:
Coming along nicely! Seems like a lot of faffing about with the seats though.

If I were using a kit like this again I'd agree with you - I'd seriously lose the will to live.


airbrush.jpg


Using a professional spray gun makes very short work of it and I don' think I'd get a better finish with any other product.

Do you not have 'Vinylkote' or something similar over there? Just clean the vinyl and spray a couple of coats with the aerosol. Job done.

I'd not heard of this product but there seems to be a supplier based in Birmingham - I would consider this for future projects, including the quarter panels on this car - I used a vinyl paint from Halfords and in spite of reassurances on the tin, I have serious doubts as to whether this is going to endure.

Also, those gear indicator plates are available new from Scotts old auto rubber for $69.00 Australian. Repros I assume. Not sure how good they are but it's cheaper than a NOS one.

Thanks for the heads-up - I took a look but couldn't find it on their website - have you got the link?

:)
 
Re: Lil 2.0


WP_20140601_034.jpg by EthelRedThePetrolHead, on Flickr

To the eyes of a child, the idyllic scene at Lake View may look like something straight from the pages of an Enid Blyton novel.

Enid Blyton just doesn't cut it - sorry to shatter the dream but Timmy the dog got run over on the A523 long ago, cousin George went off the rails after this and ended up pinned down at a care home at Stafford.

There might well be an Aunt Fanny about the place but forget the picnics - no ginger beer, no lashings of boiled eggs at this joint.

Nope, forget Enid Blyton - Lake View is much darker, more like Roald Dahl and on a bad day, Lake View is pure Stephen King.


WP_20140601_031.jpg by EthelRedThePetrolHead, on Flickr

Anyway, enough literary allusions. The car is putting on weight very nicely - it must be fast approaching its kerb weight of 1303kg as the components accumulate.


Rover 3500 by EthelRedThePetrolHead, on Flickr

The seats will grace the interior of this car. Notice that the Wizard has converted the series 2 door cards and quarterlights back to how they originally were - they had been converted to Series 1 style by whoever put them in the blue Three Thousand Five. This sounds confusing but many components can be converted in this kind of fashion.


Black headlining by EthelRedThePetrolHead, on Flickr

I hope black headlining is totally unheard of in a Rover P6 so as to give the bores something to bore about when they bore up at the car shows.


Rover 3500 by EthelRedThePetrolHead, on Flickr

I presented myself at the garage today to finish off the seats.


Seat respray by EthelRedThePetrolHead, on Flickr

I was on hair dryer duty today - no reflections on my skills with the spray gun - the Wizard wanted a go and it is his garage, his kit.
Ready for a Rover by EthelRedThePetrolHead, on Flickr

He's quicker at it than me too.

There's one or two technical glitches to iron out, for instance it turns over in gear when it shouldn't. The inhibitor switch should prevent the car from turning over unless it is in Park or Neutral so this is a serious safety issue that needs to be addressed. We suspect this has something to do with the abandoned/aborted manual transmission conversion.


Sneak Preview by EthelRedThePetrolHead, on Flickr

I've been told to expect the car to have an MOT by the end of the week barring any more snags.
 
Re: Lil 2.0

Brabus said:
Taking shape nicely. Like the black head cloth.

Thanks. Very much a last moment change of plan - so much so that Tom/The Wizard/Aunt Fanny had actually fitted the unpainted headlining and the plain glass before he had the inspiration - and it was Tom's idea, not mine to go with green tinted glass and a black interior.

Headlining installed by EthelRedThePetrolHead, on Flickr

The car was at first going to make do with the Series 1 interior that has found the perfect home in my blue car - it was then going to have the ambla interior just cleaned up and put in the car - then we painted it black.
 
Re: Lil 2.0

She won't be visiting a test centre this week after all but after a hiatus of more than 20 years, this car can now start, stop, steer, brake and move about the yard under its own power.
 
Re: Lil 2.0

Not bad for a mechanic and an I.T. tech
This was Tom's verdict on our joint effort on the interior of the car.


WP_20140611_029.jpg by EthelRedThePetrolHead, on Flickr

The chrome trim is carefully removed from the scrapping seats, shined with Autosol and screwed to the resprayed seats.


WP_20140611_027.jpg by EthelRedThePetrolHead, on Flickr

I reckon Tom is right - not bad at all.

Progress is seemingly glacial but we now have the interior installed in the car. It has the correct numberplate. The rear bumper is fitted.


WP_20140611_032.jpg by EthelRedThePetrolHead, on Flickr

All the internal lights are being replaced with LEDs. As well as reducing the load on the wiring loom, the LEDs give a very pleasing glow.


WP_20140611_005.jpg by EthelRedThePetrolHead, on Flickr

One of those switches to the right of the steering wheel is for the rear windscreen defroster, the other is a manual override switch for the Kenlowe fan.


WP_20140611_035.jpg by EthelRedThePetrolHead, on Flickr

There is no fixed fan, only the Kenlowe fan with the thermostat set to 85 degrees. Tested and works.


WP_20140611_003.jpg by EthelRedThePetrolHead, on Flickr

The brown carpet is a legacy from the wrecked car - it is in good condition but it doesn't look quite right with the otherwise very black interior. I will either complete the blackness with some black carpets or go for some green carpets of a similar shade to the paintwork.


WP_20140611_008.jpg by EthelRedThePetrolHead, on Flickr


WP_20140611_042.jpg by EthelRedThePetrolHead, on Flickr

We need to paint the remaining panel, fit the seat belts, fit the wings, front panel and bonnet, front bumper, numberplate and then we can set off for the test centre.

There's bound to be some fettling required - for instance the shock absorbers are currently rock hard - think of a P6 in RS2000 mode - she might need slackening off a bit - the AVO shocks are highly adjustable.
 
Re: Lil 2.0

I think this old Rover is nervous about going back on the road after such a long layoff - I've just received an amusing couple of photos sent by The Wizard of the Lake that seem to underscore the recalcitrance of this reluctant Rover.

AAARRRRGH !!!!!!!!!!!!!!!!!!!!!!! what next ? bonnet now closes , opens on the catch and does not foul the wiper arms. Vehicle has just left for MOT.

FW: update by EthelRedThePetrolHead, on Flickr

This motor car has a defiant gleam about it.


FW: update by EthelRedThePetrolHead, on Flickr
 
Re: Lil 2.0

MOT/GVT Test Certificate Confirmation
The electronic MOT Test Certificate/GVT Test Certificate (if applicable) for the vehicle has been checked and accepted.

The car's last ever tax disc is on its way.
THIS IS AN AUTOMATED EMAIL - PLEASE DO NOT REPLY AS EMAILS RECEIVED AT THIS ADDRESS CANNOT BE RESPONDED TO.

Confirmation of Tax Disc Application

Thank you for using DVLA Vehicle Licensing Online (http://www.taxdisc.direct.gov.uk).
Your application for a new Tax Disc has been successful.

Reference Number: 9*** **** **** ***9
Vehicle Registration Mark: WXC426K
Application made on: 19/06/2014 16:39:54 Tax Disc Period: 12 months Tax Disc Duty: GBP 0.00

The Tax Disc and receipt should arrive in the post within 5 working days.
The tax disc will be sent in an unmarked envelope.

Please save or print this email confirmation.
The car is now road legal.
 
Back
Top