

WarrenL
Active Member
There are already a number of threads on the forum discussing the ZF 4HP22. However I've decided to start a new one which sticks to recording the process of preparing and installing a 4HP22 in a Rover P6B, for the future easy reference of all. I would like to keep this thread on course, but of course comments are very welcome. Obviously every conversion project is going to be a little different, but I hope that the steps I personally go through serve as a useful guide for anybody else who goes down this path. I must warn everybody that I am a complete novice feeling my way through this job, and I am writing this thread both from a novice's perspective, and for novices.
Firstly, a short recap. I have in my possession two ZFs: from a Discovery V8 and a BMW E34. The strategy is to use the bellhousing, torque converter and flex plate from the Disco box, and the tailpiece from the BMW, together with an appropriate selection of other bits to create a suitable gearbox for the P6B. I have already removed the Borg Warner from Brown Rover, so I start the thread at the point of stripping the two ZFs to see what I've got.
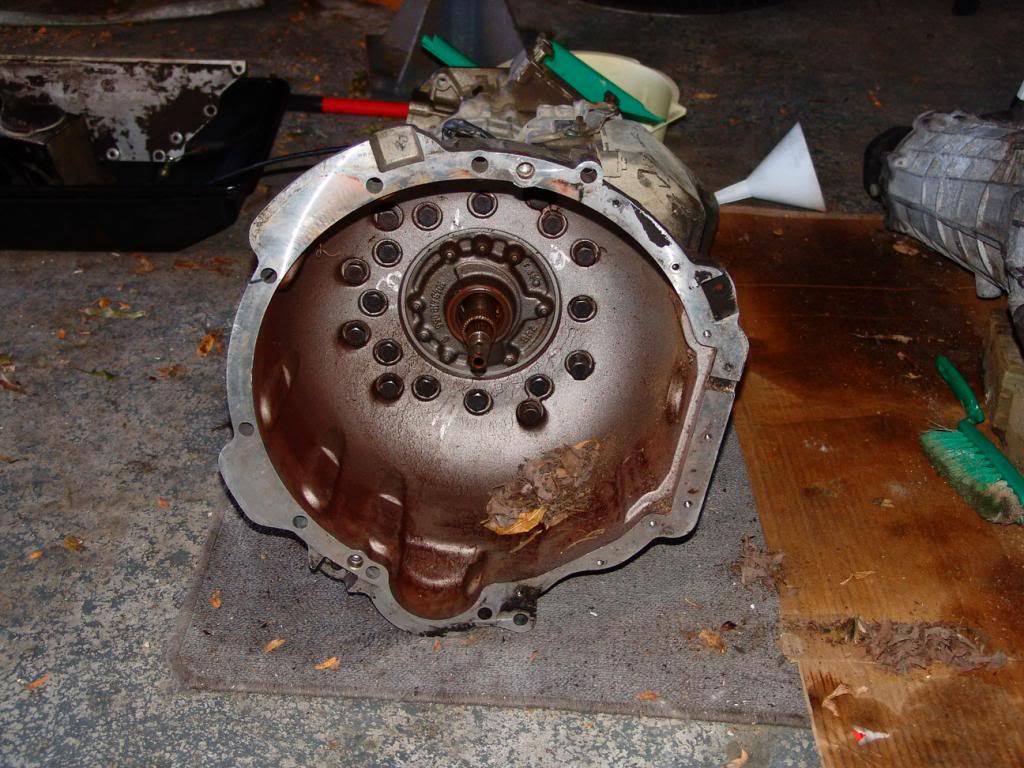
The first step today was to remove the bellhousing from each gearbox. Pictured is the Land Rover one, complete with optional extra leaves. To remove the bellhousing, all the bolts you can see in the photo must be removed. As a novice, I found this page useful - http://www.cowdery.org.uk/zf.php. Chris says to leave the pump (newbies: it's the bit between the bellhousing and gearbox proper) in place as you remove the bellhousing. I presume this is to stop the A clutch pack and associated gubbins from falling out, however once you've removed the bolts the pump readily pulls free with the bellhousing, despite your best efforts. This didn't appear to be a problem to me; just proceed slowly and carefully.
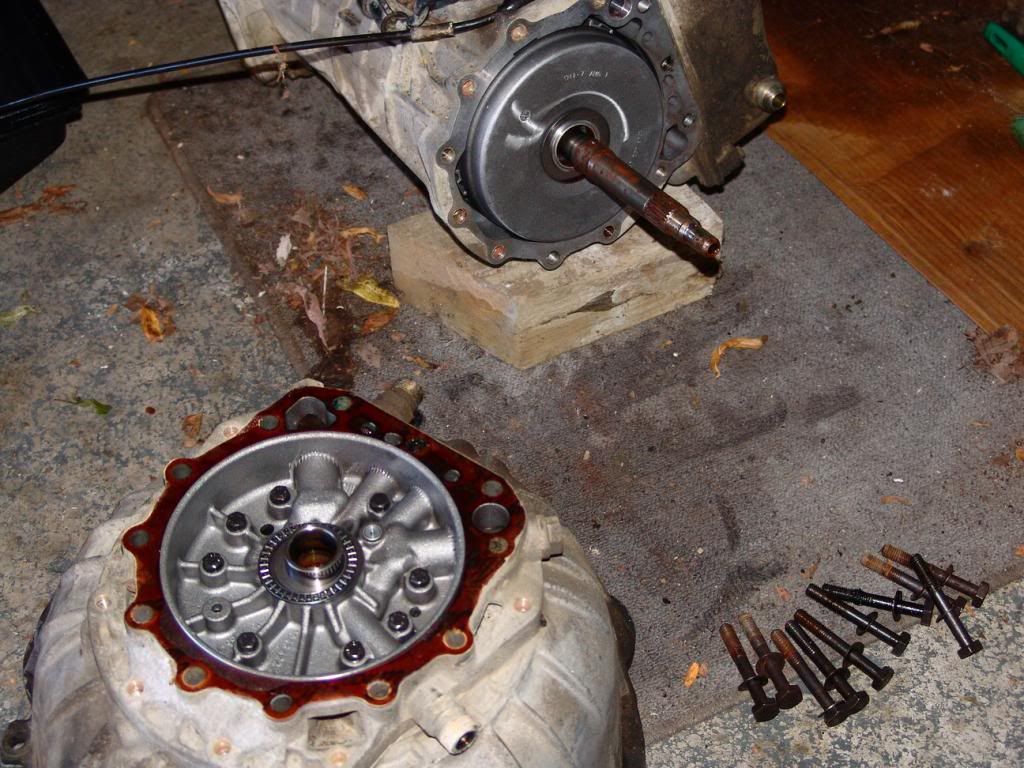
In the next photo, you can see the pump separated from the gearbox and still attached to the bellhousing, and the A clutch pack and input shaft poking out of the gearbox. Be careful here; the clutch pack and input shaft will easily pull out and you will end up with a small but confusing pile of gubbins on your workbench.
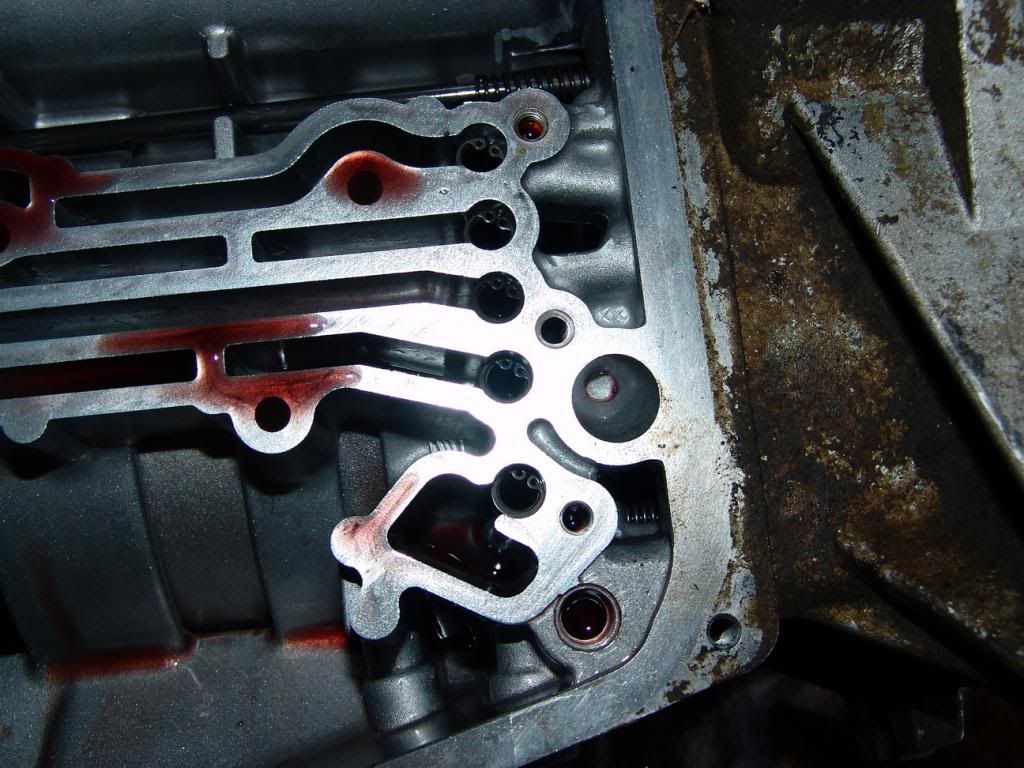
In the next photo, I have rolled the gearbox onto its side and removed the sump. First, the filter must be removed (3 torx screws), and then you can get to work removing the valve body. You will find yourself looking at a large and confusing array of torx screws. Some hold the valve body on to the gearbox, and some hold the valve body together. The former can be identified by their larger diameter heads. Remove all the larger diameter screws and the valve body will simply lift out of the gearbox.

Elsewhere we have discussed the fact that, unlike the Land Rover, the BMW box does not have an inhibitor switch installed. If a BMW box is to form the backbone of your conversion you needn't panic. With the valve body off it can be seen that the internal part of the selector lever (correct name, someone?) is the same on both boxes, and an appropriately skilled person could tap the boss to install the switch and retainer.
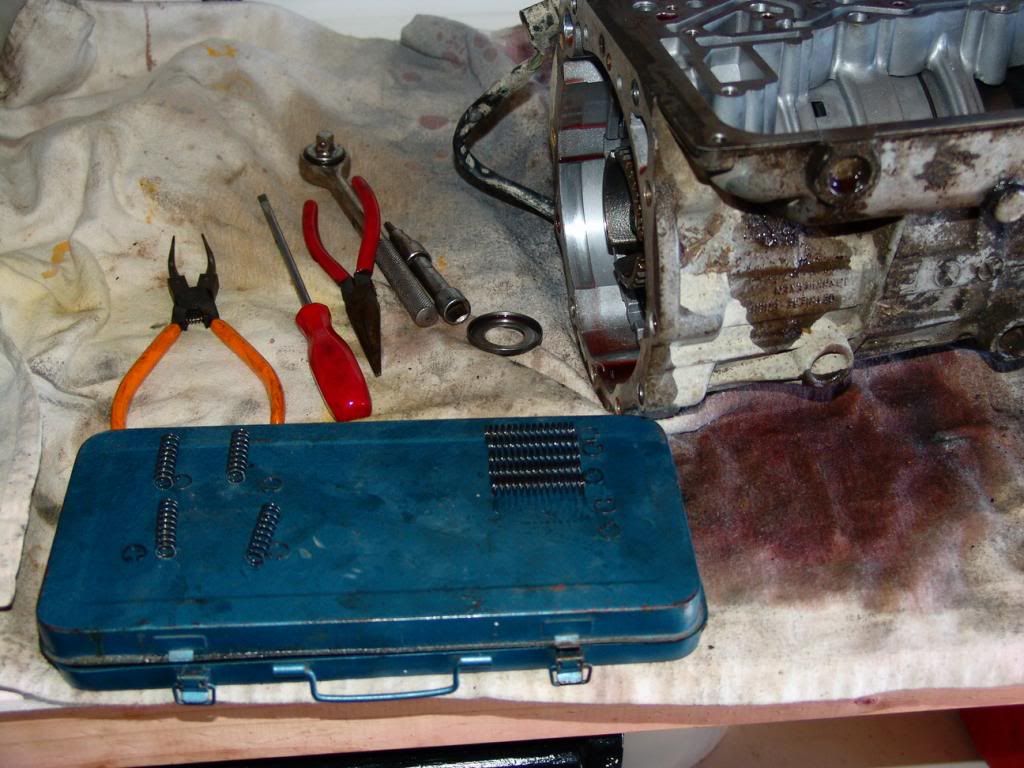
Because I intend to inspect and, if necessary, replace the clutch packs in my donor box, the next step involves removing the gearsets. If you look at Chris Cowdery's page (see link above), you will see that this isn't at all difficult. First, you must remove the circlips, springs and rubber washers that lurk in the galleries above the valve body. Without taking these out, the gearsets cannot be removed. When extracting them be aware that the springs are compressed, and if you are not careful you will have circlips describing graceful arcs over your head and vanishing into the dark corners of your garage, from which they shall never return.
In the next photo I have placed the springs on top of the socket set in positions relative to those they occupy in the gearbox. Four short ones toward the front, five long ones toward the rear. I'm sure this is important, so take note.
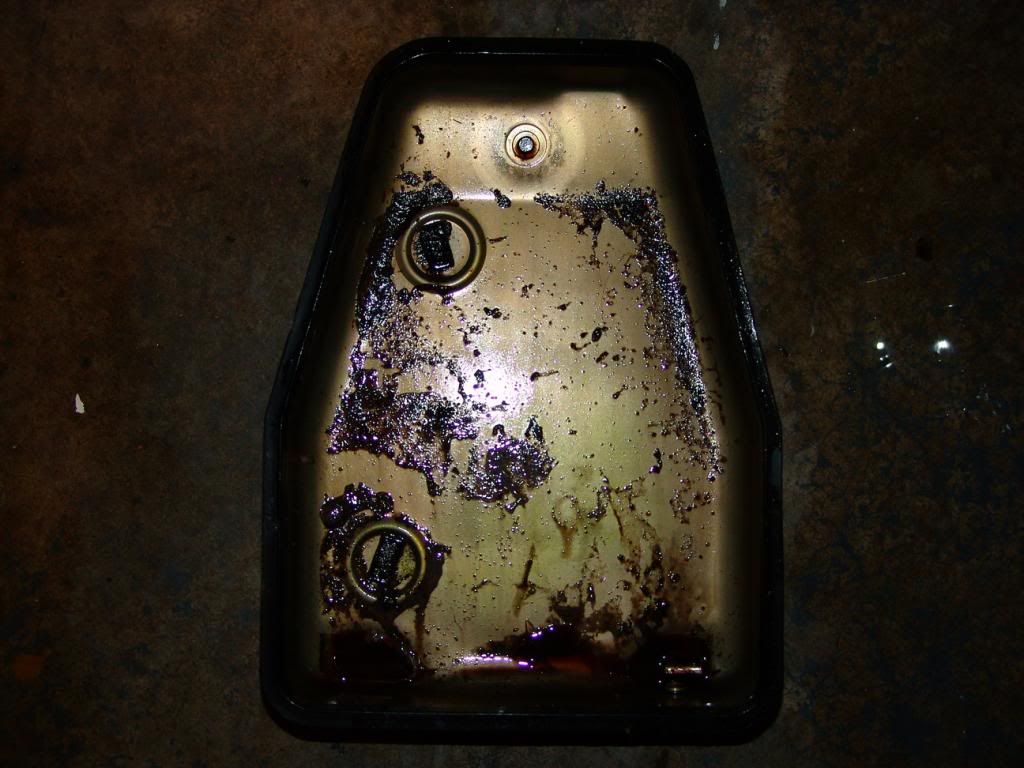
In my next dispatch I will describe how to remove the little rubber washers, however first I must figure out how to do it myself. Member eightofthem apparently has a secret method to achieve this, so I'm off to PM him. For now, I'll leave you with this photo of the contents of the BMW box's sump. The BMW was a 120,000 km car, and the Disco had done just on 200,000 kms, but the Disco's sump was as clean as a whistle, and the Beemer's looked like this:
Firstly, a short recap. I have in my possession two ZFs: from a Discovery V8 and a BMW E34. The strategy is to use the bellhousing, torque converter and flex plate from the Disco box, and the tailpiece from the BMW, together with an appropriate selection of other bits to create a suitable gearbox for the P6B. I have already removed the Borg Warner from Brown Rover, so I start the thread at the point of stripping the two ZFs to see what I've got.
The first step today was to remove the bellhousing from each gearbox. Pictured is the Land Rover one, complete with optional extra leaves. To remove the bellhousing, all the bolts you can see in the photo must be removed. As a novice, I found this page useful - http://www.cowdery.org.uk/zf.php. Chris says to leave the pump (newbies: it's the bit between the bellhousing and gearbox proper) in place as you remove the bellhousing. I presume this is to stop the A clutch pack and associated gubbins from falling out, however once you've removed the bolts the pump readily pulls free with the bellhousing, despite your best efforts. This didn't appear to be a problem to me; just proceed slowly and carefully.

In the next photo, you can see the pump separated from the gearbox and still attached to the bellhousing, and the A clutch pack and input shaft poking out of the gearbox. Be careful here; the clutch pack and input shaft will easily pull out and you will end up with a small but confusing pile of gubbins on your workbench.

In the next photo, I have rolled the gearbox onto its side and removed the sump. First, the filter must be removed (3 torx screws), and then you can get to work removing the valve body. You will find yourself looking at a large and confusing array of torx screws. Some hold the valve body on to the gearbox, and some hold the valve body together. The former can be identified by their larger diameter heads. Remove all the larger diameter screws and the valve body will simply lift out of the gearbox.

Elsewhere we have discussed the fact that, unlike the Land Rover, the BMW box does not have an inhibitor switch installed. If a BMW box is to form the backbone of your conversion you needn't panic. With the valve body off it can be seen that the internal part of the selector lever (correct name, someone?) is the same on both boxes, and an appropriately skilled person could tap the boss to install the switch and retainer.
Because I intend to inspect and, if necessary, replace the clutch packs in my donor box, the next step involves removing the gearsets. If you look at Chris Cowdery's page (see link above), you will see that this isn't at all difficult. First, you must remove the circlips, springs and rubber washers that lurk in the galleries above the valve body. Without taking these out, the gearsets cannot be removed. When extracting them be aware that the springs are compressed, and if you are not careful you will have circlips describing graceful arcs over your head and vanishing into the dark corners of your garage, from which they shall never return.

In the next photo I have placed the springs on top of the socket set in positions relative to those they occupy in the gearbox. Four short ones toward the front, five long ones toward the rear. I'm sure this is important, so take note.

In my next dispatch I will describe how to remove the little rubber washers, however first I must figure out how to do it myself. Member eightofthem apparently has a secret method to achieve this, so I'm off to PM him. For now, I'll leave you with this photo of the contents of the BMW box's sump. The BMW was a 120,000 km car, and the Disco had done just on 200,000 kms, but the Disco's sump was as clean as a whistle, and the Beemer's looked like this:

")


