You are using an out of date browser. It may not display this or other websites correctly.
You should upgrade or use an alternative browser.
You should upgrade or use an alternative browser.
Wood Door Cappings - Any good?
- Thread starter Brian-Northampton
- Start date
grifterkid
Member
Going by one of the posts above you can still enquire about different wood finishes at Formice themselves... http://www.formica.com/en/uk
It would certainly be worth contacting them to see what they can do (if anything) as it could open up a wide range of options for P6 owners wanting to change the 'wood' in their cars.
It would certainly be worth contacting them to see what they can do (if anything) as it could open up a wide range of options for P6 owners wanting to change the 'wood' in their cars.
I think its actually a bit of a shame to throw out the formica, its part of the period character of the car.
You need to take it in context, formica was seen as modern, clean and durable unlike that old-fashioned wood like your granny's sideboard which will fade, peel and look knackered over time. It was to compliment to the safety and technology features of the car, the lightweight seats and ergonomic controls. Rather like today with wood once again seen as passé and people cover things in carbon fibre as a "premium" finish, whereas nobody would dream of covering anything in raw glassfibre which can be woven in exactly the same pattern.
Things look different looking from 2014 of course, although real, branded formica is still really a premium product, most of the furniture of the time and office fittings were not genuine formica, despite what people called it, merely nobrand laminate.
drabbers
Active Member
I agree ref Formica being suited to the cars character - it is almost a sixties minimalist take on real wood veneers common on most British luxury cars from this era. I have owned several jags from the sixties and there is a lot of upkeep on the veneered finishes !
That said I am considering replacing my rosewood trims as they are faded - either using 'new' Formica or possibly filming existing with 3M wood grain product.
Mark
That said I am considering replacing my rosewood trims as they are faded - either using 'new' Formica or possibly filming existing with 3M wood grain product.
Mark
drabbers
Active Member
I agree ref Formica being suited to the cars character - it is almost a sixties minimalist take on real wood veneers common on most British luxury cars from this era. I have owned several jags from the sixties and there is a lot of upkeep on the veneered finishes !
That said I am considering replacing my rosewood trims as they are faded - either using 'new' Formica or possibly filming existing with 3M DI - NOC wood grain product.
Mark
That said I am considering replacing my rosewood trims as they are faded - either using 'new' Formica or possibly filming existing with 3M DI - NOC wood grain product.
Mark
sagegreen
Member
Yes, i think the same about the FORMICA, it was new, trendy to produce things witch plastic and pvc. Furniture like transparent space age chairs and lamps..... but, I would prefer real wood. Is there some person or company who is making the door capings / dashboard inserts in wood)Don't know why they changed - but it was long before the Leyland and then BL takeovers! I suspect Formica was modern and trendy at the time. Perhaps the intention was always to use Formica but they hadn't quite got it right for the early production cars, so used wood instead?
I always thought they would have looked much better with a complete wood cap (ie missing out the black plastic/nylon thing that the formica clips into) on the lines of the contemporary Triumph 2000 or as per the finisher on the P5 Coupe (which has similar window frames).
Chris
Edited By chrisyork on 1212687994
colnerov
Well-Known Member
Hi, That would be a cabinet maker using wood veneer. Depending on the thickness it could be layered up, however veneer is usually glued into place which would be problematic because they need to be slid in and out to access the fixings of the plastic door capping. Another issue if it's a natural product and its reaction to changes in humidity and temperature. Which all of this is probably why they went for Formica, it's much more stable.
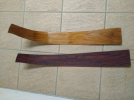
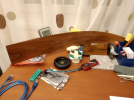
My effort in 0.8mm alumium sheet and some walnut veneer off ebay: Needs LOTS of epoxy glue and a lot of clamps.... I'm no cabinet maker. Bend it when the epoxy is hardened but not fully cured and obviously don't varnish it until after you bend it. If you bend it too soon, it will lift. Bend it too late and the epoxy glue will crack and the veneer lift.Yes, i think the same about the FORMICA, it was new, trendy to produce things witch plastic and pvc. Furniture like transparent space age chairs and lamps..... but, I would prefer real wood. Is there some person or company who is making the door capings / dashboard inserts in wood)
All you need is a jigsaw and a sharp knife.
As stated it's actually a BAD idea. If you get any water at all through your windows, capillary action will cause it to move up the plastic retainer and in not much time, the veneer will lift and stain.
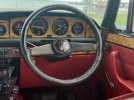
The best idea is to have the originals hydro-dipped to a pattern of your liking and lacquer that, you are unlikely to notice the difference. If it's good for a £200k build by Retro Power, it's good enough for most uses. There is another cool advantage of this. If you have the "wood" rim wheel, you can have that done in the same pattern.


Last edited:
sagegreen
Member
Hello Peter,My effort in 0.8mm alumium sheet and some walnut veneer off ebay: Needs LOTS of epoxy glue and a lot of clamps.... I'm no cabinet maker. Bend it when the epoxy is hardened but not fully cured and obviously don't varnish it until after you bend it. If you bend it too soon, it will lift. Bend it too late and the epoxy glue will crack and the veneer lift.
All you need is a jigsaw and a sharp knife.
As stated it's actually a BAD idea. If you get any water at all through your windows, capillary action will cause it to move up the plastic retainer and in not much time, the veneer will lift and stain.
The best idea is to have the originals hydro-dipped to a pattern of your liking and lacquer that, you are unlikely to notice the difference. If it's good for a £200k build by Retro Power, it's good enough for most uses. There is another cool advantage of this. If you have the "wood" rim wheel, you can have that done in the same pattern.
View attachment 24664
View attachment 24663
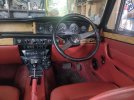
View attachment 24665
vielen Dank und thank you very much for the precise explanation and the photos.
the veneers look absolute wonderful. Really a very good work. How much time did take it to do it?
The idea of water dipping is also a great alternative I'll will think about it.
thanks a lot
kind regards
Richard
Sure like the vacuum bag we all have at home, right?You might find vacuum bagging would clamp the veneer to the aluminium substrate easier than conventional clamps.
Hello Peter,
vielen Dank und thank you very much for the precise explanation and the photos.
the veneers look absolute wonderful. Really a very good work. How much time did take it to do it?
The idea of water dipping is also a great alternative I'll will think about it.
thanks a lot
kind regards
Richard
Well, not long really. Maybe an hour to clamp, draw around and cut the aluminium. another hour to glue and ,clamp the veneer and a the same again to carefully trim the veneer - the aluminium backing becoming its own template.. You use paper masking tape on the edges when cutting to stop the veneer splitting. And literally a surgical scalpel to cut. It took 3 attempts to do the dash piece by experimentation - never did this before. I got veneer lifting - you need a lot of epoxy! When you clamping the piece, you need to wrap it in grease-proof oven paper otherwise it'll stick permanently to whatever piece of wood you are clamping it with as the glue will ooze out the sides!
The time is in the lacquering (well polyurethane, anyway). There's 6 coats, flatting 600 between coats. then 1200, 2000 and 3000 to finish. The flat side pieces are far easier to do than the dashboard piece as you can use a flatting block. You need a week or so for the final polish to make sure it is fully cured.
TBH if I did it again I'd go lighter with the lacquer and retain bit of the grain. They actually look better now than the pictures because I didn't stain them and the UV has made them darker, redder and with more defined pattern over time.
sdibbers
Well-Known Member
@PeterZRH no need to be snippySure like the vacuum bag we all have at home, right?
£10 from Amazon. Meant for clothes, but will work with a regular vacuum cleaner. Probably cheaper than getting a number of clamps. https://www.amazon.co.uk/EcoNour-Transparent-Compression-Beddings-Reusable/dp/B0C789P299/ref=sxin_23_sbv_search_btf?content-id=amzn1.sym.abc7936a-4c2f-4d58-b579-fd5f44041cb9:amzn1.sym.abc7936a-4c2f-4d58-b579-fd5f44041cb9&crid=QBSYIAN1EPT3&cv_ct_cx=vacuum+bag&keywords=vacuum+bag&pd_rd_i=B0C789P299&pd_rd_r=227952a7-f1cb-49d3-b96b-7fc48f1171d9&pd_rd_w=Xu7sd&pd_rd_wg=NiEco&pf_rd_p=abc7936a-4c2f-4d58-b579-fd5f44041cb9&pf_rd_r=69ZD45SRPWY4ABMXYQXN&qid=1707438812&sbo=RZvfv//HxDF+O5021pAnSA==&sprefix=vacuum+bag,aps,82&sr=1-1-1c478570-4379-4ea8-a792-2a17f33dfdd3
Can you really get enough vacuum with that?@PeterZRH no need to be snippy.
£10 from Amazon. Meant for clothes, but will work with a regular vacuum cleaner. Probably cheaper than getting a number of clamps. https://www.amazon.co.uk/EcoNour-Transparent-Compression-Beddings-Reusable/dp/B0C789P299/ref=sxin_23_sbv_search_btf?content-id=amzn1.sym.abc7936a-4c2f-4d58-b579-fd5f44041cb9:amzn1.sym.abc7936a-4c2f-4d58-b579-fd5f44041cb9&crid=QBSYIAN1EPT3&cv_ct_cx=vacuum+bag&keywords=vacuum+bag&pd_rd_i=B0C789P299&pd_rd_r=227952a7-f1cb-49d3-b96b-7fc48f1171d9&pd_rd_w=Xu7sd&pd_rd_wg=NiEco&pf_rd_p=abc7936a-4c2f-4d58-b579-fd5f44041cb9&pf_rd_r=69ZD45SRPWY4ABMXYQXN&qid=1707438812&sbo=RZvfv//HxDF+O5021pAnSA==&sprefix=vacuum+bag,aps,82&sr=1-1-1c478570-4379-4ea8-a792-2a17f33dfdd3
sdibbers
Well-Known Member
Even a partial vacuum will give you 10 lbs (5.5kg) a square inch, more than enough. Max vacuum is ~14 psi. You’ll be surprised. Added plus that it’s an even pressure so less chance of denting the aluminium substrate.Can you really get enough vacuum with that?
I like that.Im about to split the community.
Ive never liked the formica.
At least if I get tired of it - it will peel off.


