Replacing speedo cable.

Greetings All and New Year's Tidings,

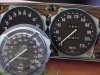
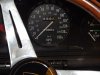
Would someone be so kind as to post a step by step guide to removing/replacing a speedo cable on Winston (1976 S2 V8 with round guages).
The needle has started to "bounce" so I assume the cable is buckled.
I have purchased a new one but have no idea where to start.
I know that the gearbox end is accessed through the left hand side of the transmission tunnel and the dash end has to be removed from the angle drive.
My question is this... Are there any other mounting points, clips etc that hold the cable in place??
Can you attach one end of the new cable to the old one and just pull it through??

All advice greatly appreciated.

RT.
 
Hello RT,

I have not yet had the enjoyment of removing the complete speedo cable, outer casing and all. I have removed the inner cable though and it is quite a fiddle especially with the limited access behind the instruments. Unless the cable has had some sort of misadventure, it won't normally kink on its own, so your wandering speedo needle may well be down to the speedo instrument itself. Having it serviced by an instrument technician is most worthwhile as any worn parts will be replaced with the result that your speedo will be as good as new.

Ron.
 
I replaced my series 1 cable and angle drives - I think you need to remove all the bits and ascertain which bits are ok and which are for the bin. There were no extra clips - just a straight run up from the gearbox through into behind the radio and up into the back of the speedo angle drive.(that's the most awkward bit!)

You may find your cable spins freely and it's the angle drive at one end or the other which has failed...

Rich.
 
Update... Update... Update... Update...

Thanks chaps.

Today I bit the bullet and went at it!!
Perhaps my experience today may help others with this job. This is the way I did it and it seems to have done the trick.

First of all access is a pig, especially at the instrument panel. So what I did first was trace the cable visually and by feel. This gave me an idea of the path it takes.
It was ascertained that the following had to be removed: Dash pad, driver's side glove box, speaker cover. Believe me, removing these makes the job a doddle.

Dash pad: Loosen instrument panel and pull forward, remove windscreen pillar covers, reach under dash pad and remove the 4x retaining nuts and washers (Two are easy but two more are a bit of a fiddle behind the instrument cluster, use the right size spanner and lots of patience). Carefully pull dash pad away from the windscreen.

Glove box: Remove 2x bolts at bottom of lid and loosen retaining strap. Remove lid.

Speaker grill: Loosen 2x screws and pull away from console.

Now lift the carpet on the pasenger side of the transmission tunnell. Near the gearstick you will find a big rubber grommet (I belive this was a screw in plate on earlier models), remove this to provide access to speedo cable at transmission. Loosen cable at this end and then at the insrument cluster.

Slowly feed cable down from behind the instrument cluster and gradually remove from the hole in the transmission tunnel. NB: The old cable will be filthy so clean as you go or cover carpets and upholstery. As I neared the end I taped the end of the new cable to the old one and pulled it through. This saved on fiddling about and trying to feed it through on its own.

Once cable is in position thoroughly clean the angle drive threads and attach the cable to the transmission. Then feed the other end up behind the instruments, making sure to follow the path of the old one. Attach the cable to the speedo. This is made so much easier with the dash pad removed, no more slashed wrists as you squeeze your hands in behind the instruments.

Once the cable is in place and tightened up then fit the rubber grommets to the body (both the small one on the cable and the large one on the transmission tunnel). Then everything can be put back in place in the order in which it was removed.

I hope that I have covered everything and that this is of some assistance to those needing to do the job. I cannot stress enough the importance of removing the above mentioned components. It will save you time, skin, blood and fines for vulgar language within earshot of the neighbours!!

Tally Ho!!!

RT.
 
Excellent. Could only be bettered with pictures (sorry, I'm a visual learner these days).

Kinda hoping I don't have to do this and it's just the odometer that is dead on my car.
 
Gentlemen,

Not wishing to hijack this post but right angled drives cropped up, where can I get both ends. I'm told that if the gearbox end breaks its because of the speedo end so want to replace both.

Martin P
 
Greetings again all,
For those who have followed this thread you will know that I was suffering from needle bounce on the speedo.
I replaced the angle drive and fitted a new cable with the result that the problem was eliminated..... almost.
I was left with this slight, annoying "tic" (the speedo, not me :wink: ). It began to irritate me as I was always catching it from the corner of my eye.
Then the odometer started to play up. Eg: I would go for a ten KM drive and the dial would only register five. Over the next few weeks it has got worse, sometimes not working at all. Now the car has only 57k odd original KMs on it and I want to keep that as accurate as possible

Using my sharpened senses of intuition and skills of deduction and knowing that the cable and angle drive were new I came to the conclusion that the only suspect left was... Colonel Mustard, in the pantry with a French loaf!!! Or maybe the speedo unit itself :oops: .

I managed to source a brand new unit through E-bay with only 3 miles on the clock. I would assume that the 3 miles are from the testing process as the unit has never been fitted. Anyhoo...
I swapped the old for new and took the car out for a test run....
RESULT!!! The speedo is now as smooth as Fred Astaire covered in axle grease! No more bumps, bounces, tics or tremors.

If any one else is having speedo issues I cannot recommend highly enough the replacing of the unit itself. It cost no more than paying someone to rebuild it and in theory should last another 35 years.


Happy Roads!!

RT.
 

Attachments

  • New and old..jpg
    New and old..jpg
    202.3 KB · Views: 854
  • And fitted..jpg
    And fitted..jpg
    157.2 KB · Views: 853
Back
Top