new loom

hi all what is involved in replacing the entire wiring look on a 3500s. ie what needs removing so u can get to where things pass through etc etc
many thanks
coop
 
The worst thing would be the dash and parcel shelf, and if you fitted every part, next most difficult I'd say would be the headlining, but compared to other cars, the Rover one is easy.
 
My existing wiring loom is such a hodge podge of wires and bodges some stuff has been added on top and other stuff has been added then half removed with wires just cut and taped. Some times the only way I can find the wire am looking for is to start at the fuse box and trace my way through the entire circuit. If it was u and u had minimal knowlage and skill would u replace the loom or would u leave alone and keep having to trace wiring.
coop
 
I'd say I do have limited experience of electrical work and wiring, but I'd replace it rather than trying to trace and rectify other peoples bodges.
 
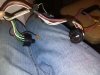
If you're replacing the dash harness, make sure you have the right one for your car, there are quite a few variations. With regards removing & replacing, it's not a bad job if you're methodical. Remove the instrument cluster, glove boxes & centre console, that should be enough stuff removed to let you do it.
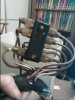
If you're replacing the body harness, remove the rear seats & to make life easier, the drivers seat, then lift out the carpet & peel back the sill carpet.
 
The only major difference on 3500S looms, is whether they have an 11ACR or 18ACR alternator. 3500 auto looms are the same, you need to match the model year ideally.
 
Just remembered, the wiring for the rev counter is different between early & late series 2 V8's, the change possibly coinciding with the change of alternators.
Oh & the loom from a suffix 'A' 3500 auto is no use at all.
 
If you are doing the entire loom, engine bay & trunk included and the car is not stripped down, I would guess 30 hours for the interior, and another 10 or 15 for the ends of the car.

Yours
Vern
 
ok I got the loom having been assured that it will fit. same chassis suffix everything. however I have a few bits I have no clue what they are and nothing seems to match the poor diagram I have in my Haynes.

for starters what are these bits?


many thanks
coop
 

Attachments

  • rsz_img_20150603_230040.jpg
    rsz_img_20150603_230040.jpg
    91.1 KB · Views: 284
  • rsz_img_20150603_230058.jpg
    rsz_img_20150603_230058.jpg
    85.9 KB · Views: 283
The second pic is the multiplugs that fit on to the back of the instrument cluster. The first one you'd have to turn it over for me to get a better idea.
 
Back
Top