ghce
Well-Known Member
Today was the day, I could no longer resist the new bar leaning on the garage wall, distracting my every thought of work income and customer responsibility.
Ignoring the factories service manuals assertion that this could be removed and refitted with out removal of the either the passenger or drivers side front wing I proceeded to lift the car on my Trolley Jack at the front cross member and chocked under the sills with an assortment of crap that was laying on my garage floor as I had tossed my perfectly new axle stands out a couple of years ago.
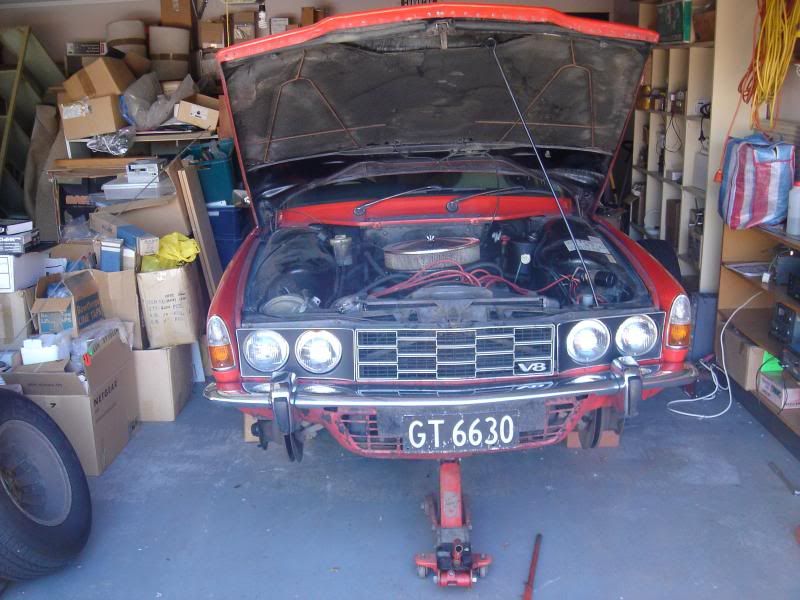
Did some one say clay bricks :shock:
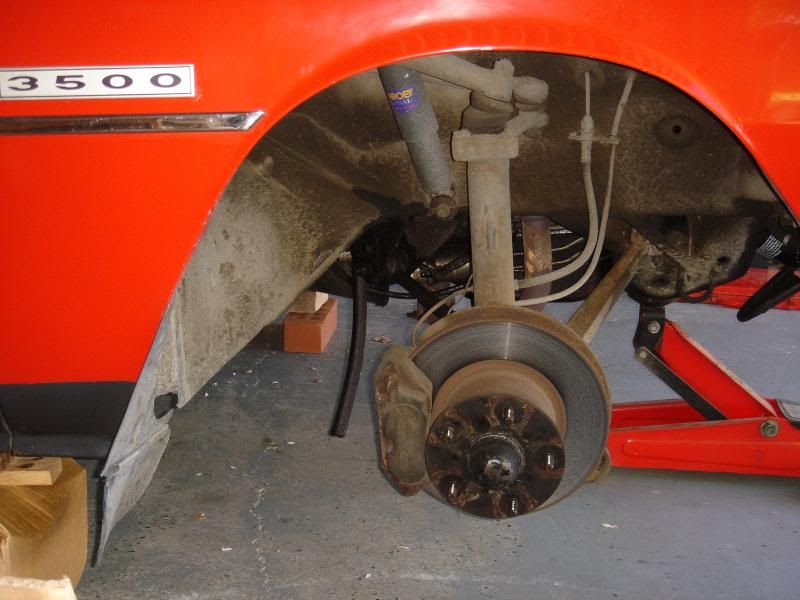
Road wheels removed I now had access to the attachment points of the front wing, firstly removing the top 1/2 inch bolt located by the bonnet hinge after having marked the peripheral edge of the mounting bracket with a felt marker pen so that I could get the same spot back when refitting the panel. Next to remove was the 2 forward 1/2 inch bolts that are directly behind the front light cluster inside the wing these were then followed by the 2 7/16 inch bolts washes and clamping bracket that attache the lower edge of the wing to the front valance, please not all of these bolts have flat and spring washes from the factory. Two screws, Philips head, are located under the sill and attach to the rear bottom of the wing via a riveted plate, these need removal and also have large flat washes on then.
It is important that before you remove the wing that you isolate the chances of damaging the paint work on the rear edge of the front bumper, I slid several pairs of sock over the bumper to this affect.
You are now ready to remove the wing, first in the process is to slide the wing forward to release it from it's locating dowel located lower mid the rear edge of the wing, it can be fairly tight!
Once accomplished you will need to remove the 3 wires that go to the park and indicator lights by unplugging the bullet connectors then you can move the wing somewhere safe.
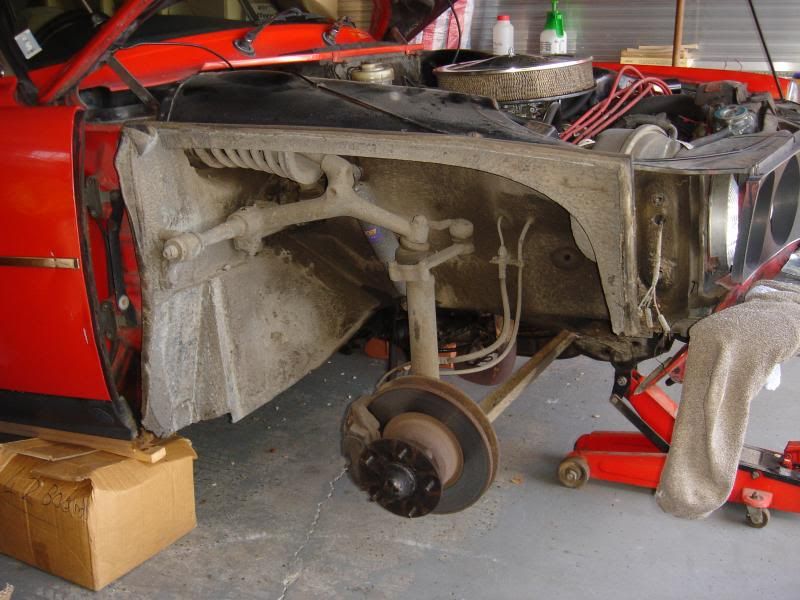
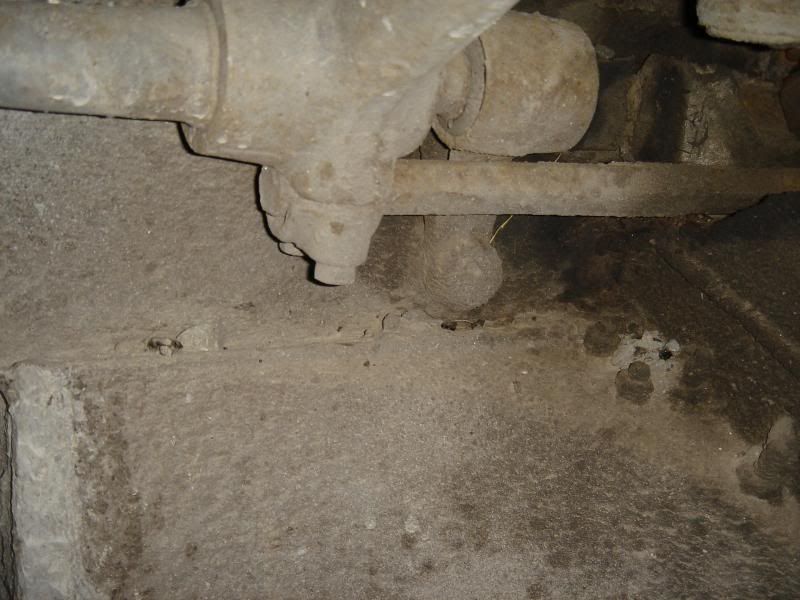
sorry about the bad shot
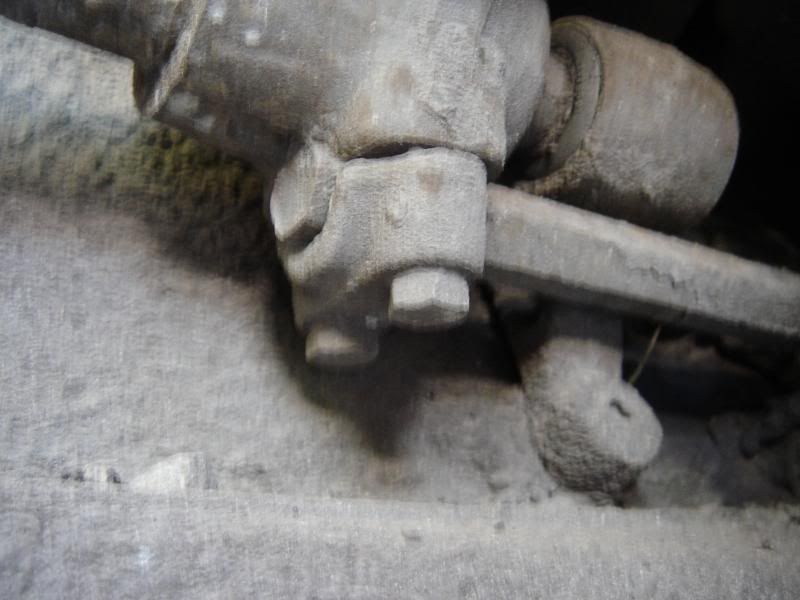
Now every thing is very very straight forward, simply unbolt the 4 1/2 inch bolts that retain the ARB mounting caps, good luck getting a socket in there, I couldn't and so used a long ring spanner, these bolts have spring washers but no flat washers, withdraw the the old ARB.
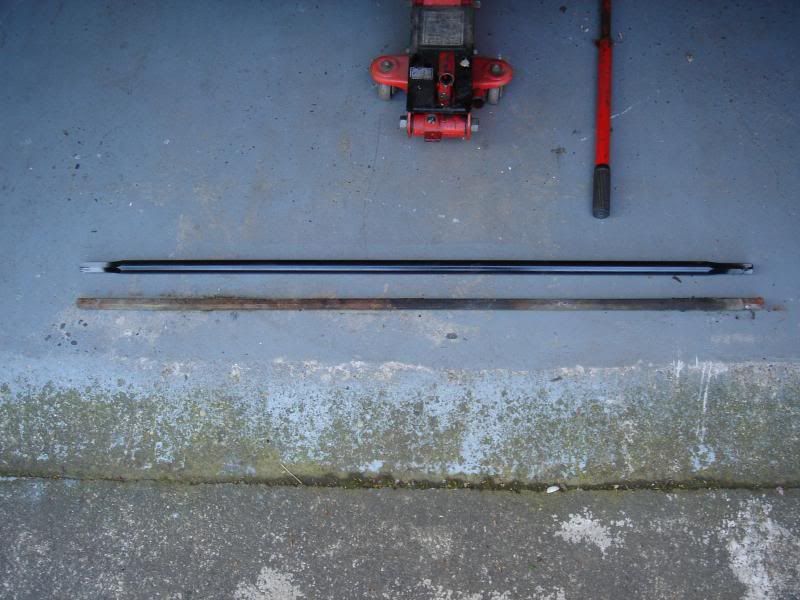
It is essential that when you refit the new ARB bar that the mating surfaces of all the components are very clean so a good wire brushing of the caps and mounting point and also your new ARB bar to remove any debris to stop any looseness or fretting.
Installation of the new ARB is easy, just slide the new one in and refit caps making sure you progressively wind the bolts up in staged way, the service manual says 30 ft/lbs is the required torque, not easy to guess if you only have a ring spanner as I mentioned getting a socket on these suckers is not easy unless you have a crows foot attachment.
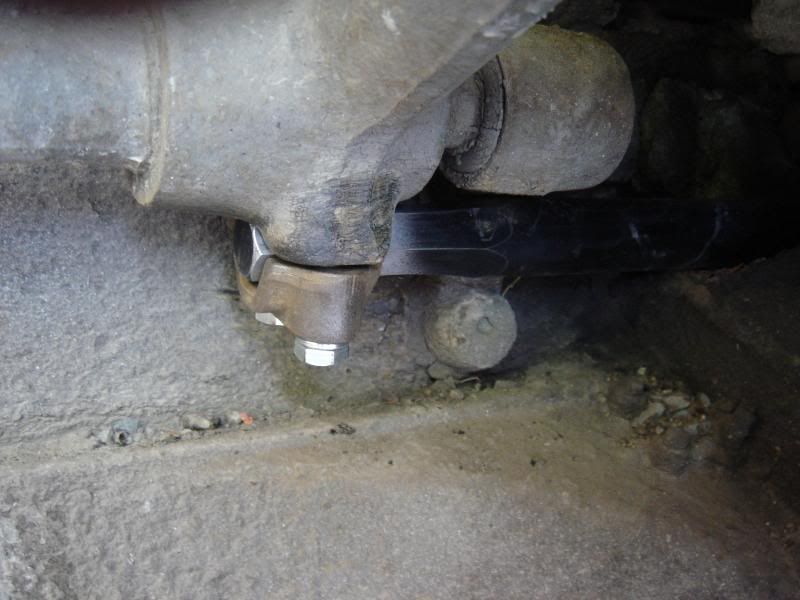
Refitting the wing is the reverse of removal accept you will swear and curse trying to get the 2 front 1/2 inch bolts back in, one way to alleviate the problem is to insert a stubby screw driver or similar thick shanked bar into one of the two bolt holes to try and locate for the other one, still took me a considerable time and lots of swearing at the production development team at sollihul.
Once the road wheels were refitted I took the car for a test drive only to find all my favorite high speed roundabouts were all clogged with the start of peak hour traffic however with about 20 minutes of round town lower speed roundabouts I can say that the excursion of body roll is less by a noticeable degree however I can't really say its such an improvement at this stage until I can go thru my favourite 100 KMH high speed roundabouts when the traffic clears.
Mal Clarke of By'Gone Autos has said it is essential to recheck the tightness of the ARB mounting bolts after about 100 KM's
More later when the road traffic dies away.
Graeme
Ignoring the factories service manuals assertion that this could be removed and refitted with out removal of the either the passenger or drivers side front wing I proceeded to lift the car on my Trolley Jack at the front cross member and chocked under the sills with an assortment of crap that was laying on my garage floor as I had tossed my perfectly new axle stands out a couple of years ago.

Did some one say clay bricks :shock:

Road wheels removed I now had access to the attachment points of the front wing, firstly removing the top 1/2 inch bolt located by the bonnet hinge after having marked the peripheral edge of the mounting bracket with a felt marker pen so that I could get the same spot back when refitting the panel. Next to remove was the 2 forward 1/2 inch bolts that are directly behind the front light cluster inside the wing these were then followed by the 2 7/16 inch bolts washes and clamping bracket that attache the lower edge of the wing to the front valance, please not all of these bolts have flat and spring washes from the factory. Two screws, Philips head, are located under the sill and attach to the rear bottom of the wing via a riveted plate, these need removal and also have large flat washes on then.
It is important that before you remove the wing that you isolate the chances of damaging the paint work on the rear edge of the front bumper, I slid several pairs of sock over the bumper to this affect.
You are now ready to remove the wing, first in the process is to slide the wing forward to release it from it's locating dowel located lower mid the rear edge of the wing, it can be fairly tight!
Once accomplished you will need to remove the 3 wires that go to the park and indicator lights by unplugging the bullet connectors then you can move the wing somewhere safe.


sorry about the bad shot

Now every thing is very very straight forward, simply unbolt the 4 1/2 inch bolts that retain the ARB mounting caps, good luck getting a socket in there, I couldn't and so used a long ring spanner, these bolts have spring washers but no flat washers, withdraw the the old ARB.

It is essential that when you refit the new ARB bar that the mating surfaces of all the components are very clean so a good wire brushing of the caps and mounting point and also your new ARB bar to remove any debris to stop any looseness or fretting.
Installation of the new ARB is easy, just slide the new one in and refit caps making sure you progressively wind the bolts up in staged way, the service manual says 30 ft/lbs is the required torque, not easy to guess if you only have a ring spanner as I mentioned getting a socket on these suckers is not easy unless you have a crows foot attachment.

Refitting the wing is the reverse of removal accept you will swear and curse trying to get the 2 front 1/2 inch bolts back in, one way to alleviate the problem is to insert a stubby screw driver or similar thick shanked bar into one of the two bolt holes to try and locate for the other one, still took me a considerable time and lots of swearing at the production development team at sollihul.
Once the road wheels were refitted I took the car for a test drive only to find all my favorite high speed roundabouts were all clogged with the start of peak hour traffic however with about 20 minutes of round town lower speed roundabouts I can say that the excursion of body roll is less by a noticeable degree however I can't really say its such an improvement at this stage until I can go thru my favourite 100 KMH high speed roundabouts when the traffic clears.
Mal Clarke of By'Gone Autos has said it is essential to recheck the tightness of the ARB mounting bolts after about 100 KM's
More later when the road traffic dies away.
Graeme

