

You are using an out of date browser. It may not display this or other websites correctly.
You should upgrade or use an alternative browser.
You should upgrade or use an alternative browser.
Rover P6 4.6 V8 Road/Race car.
- Thread starter RoverAlex
- Start date
unstable load
Well-Known Member
That's almost the same colour as my Land Rover. It will look very good, IMO.RoverAlex said:Been thinking about paint. I want to keep it green but it won't be Lunar Grey (green according to DVLA). I was thinking something along the lines of this:

RoverAlex
Active Member
I am quite keen on Nato Olive Satin. We'll see...it might end up with whatever I find in the shed.
Fibreglass arches already purchased. I was going to do front and rear but now I've seen them on (well, getting my kids to hold them in place I think I'll just do the rears.
When it stops raining I'll get some work done!
Fibreglass arches already purchased. I was going to do front and rear but now I've seen them on (well, getting my kids to hold them in place I think I'll just do the rears.
When it stops raining I'll get some work done!
Willy Eckerslyke
Well-Known Member
Just remember that it looks darker when wet, which might not matter to you, but something to be aware of.RoverAlex said:I am quite keen on Nato Olive Satin.
The Rovering Member
Well-Known Member
No no no! That colour is becoming far too popular now. :wink: 
Stick with a nice khaki.
Stick with a nice khaki.
The Rovering Member
Well-Known Member
symes said:Actually Khaki or green is more common
Let's keep it that way....... :twisted:
RoverAlex
Active Member
A few bits and bobs done today - fitted a fuel pump regulator but that will need some PTFE to seal up. Fitted carb socks then started to have a go at the electrics.
Things I got working: Passenger side indicator lights (they flash, but slowly). Reverse lights. All main front lights apart from one blown sealed beam). Passenger side indicators work but do not flash.
Things not working: Brake lights. Side lights front passenger side or rear light passenger side. Lamps themselves are fine as they work fine on the other side and manual earthing does not help. Washer motor whirs but doesn't do anything - I will fit a universal Lucas item. I could really do with having someone to hand that knows electrics on these cars - I don't fancy unravelling loom tape and tracing back wires!
chris_v888
Member
nice keep up the good work looks good apart from the rear arches look forwod to see what you do to them and i know how you feel doing it outside at home lol but the tea is better im still trying to get my capri painted for larst 2 years got my p6 to be my daly drive so i could get on with the capri and im just spending all my money on the p6 as it one thing arfter another with it now no reverse but the good lads on hear have reminded me of things ive forgot????????????? keep up the good work
RoverAlex
Active Member
Thanks Chris I hope you get there with your project. Hmm I reckon Tea is better when someone else makes it regardless of where you are.
Spent more time trying to solve electrical woes but stopped as I thought it is better to move onto something I can do rather than getting stressed. So first easy job fit the carb socks over the trumpets. I am going to copy the scoop idea as per Mr Owen to give them a bit more fresh air.

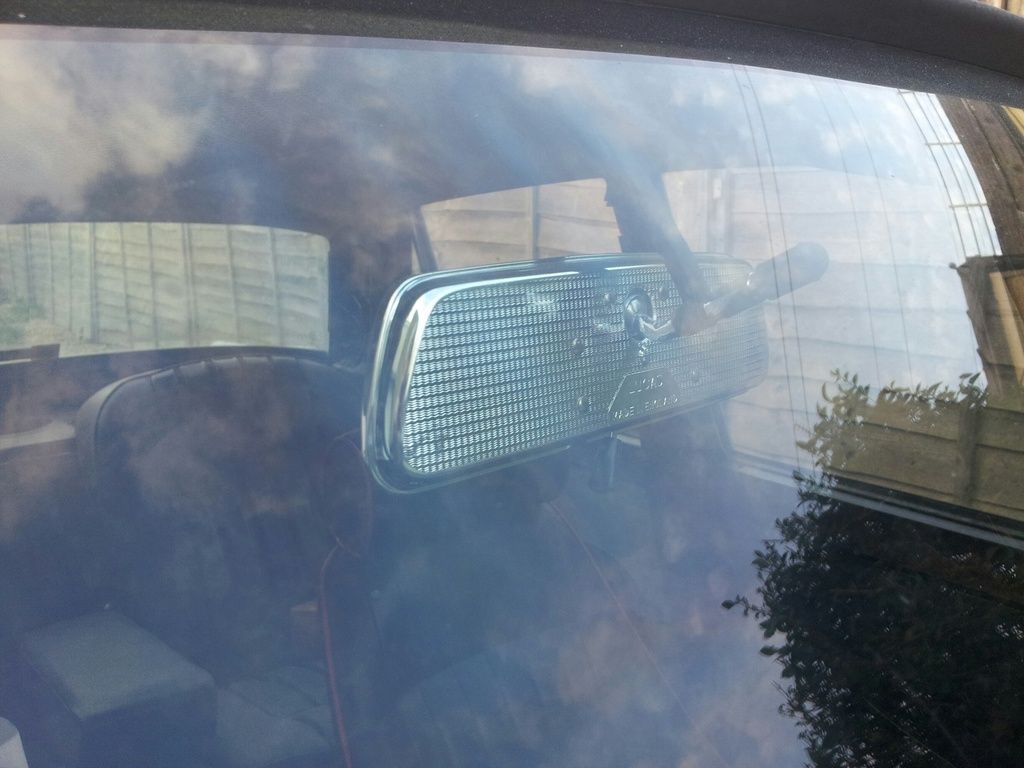
Second easy job fit a NOS rear view mirror as mine is missing:
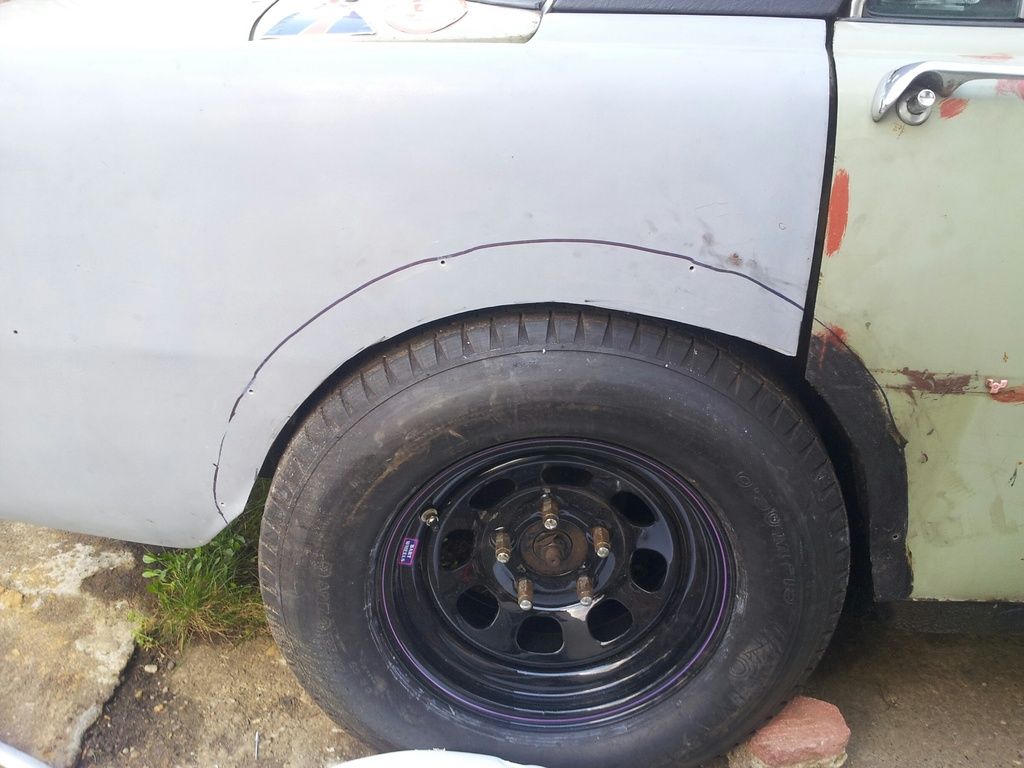
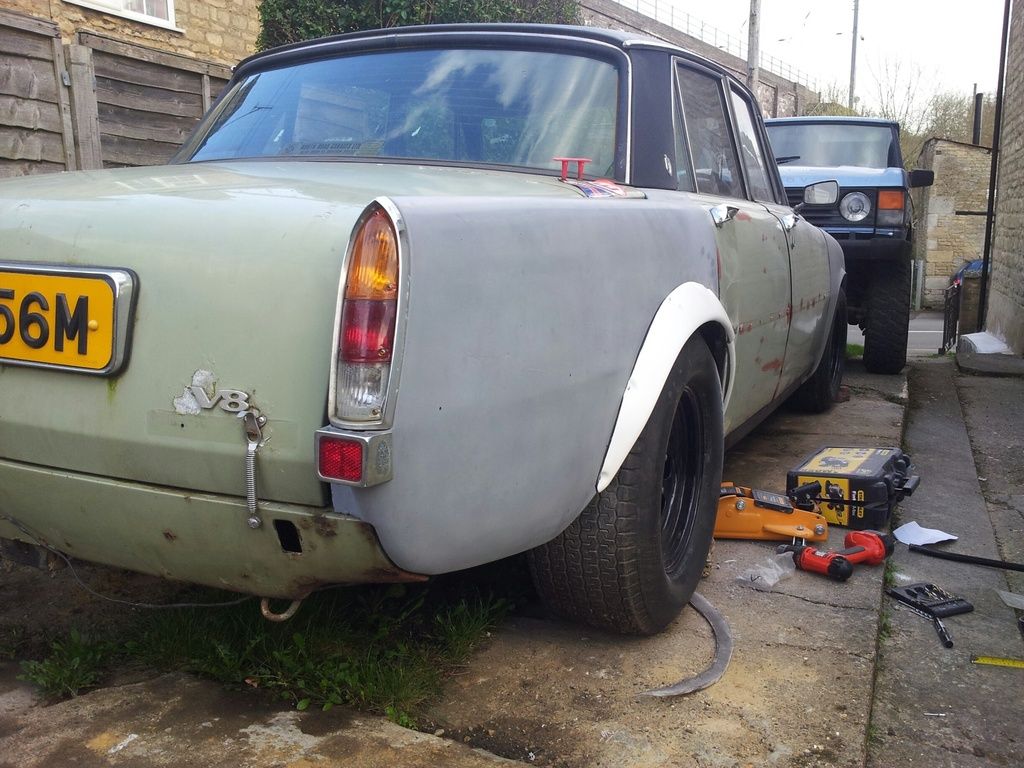
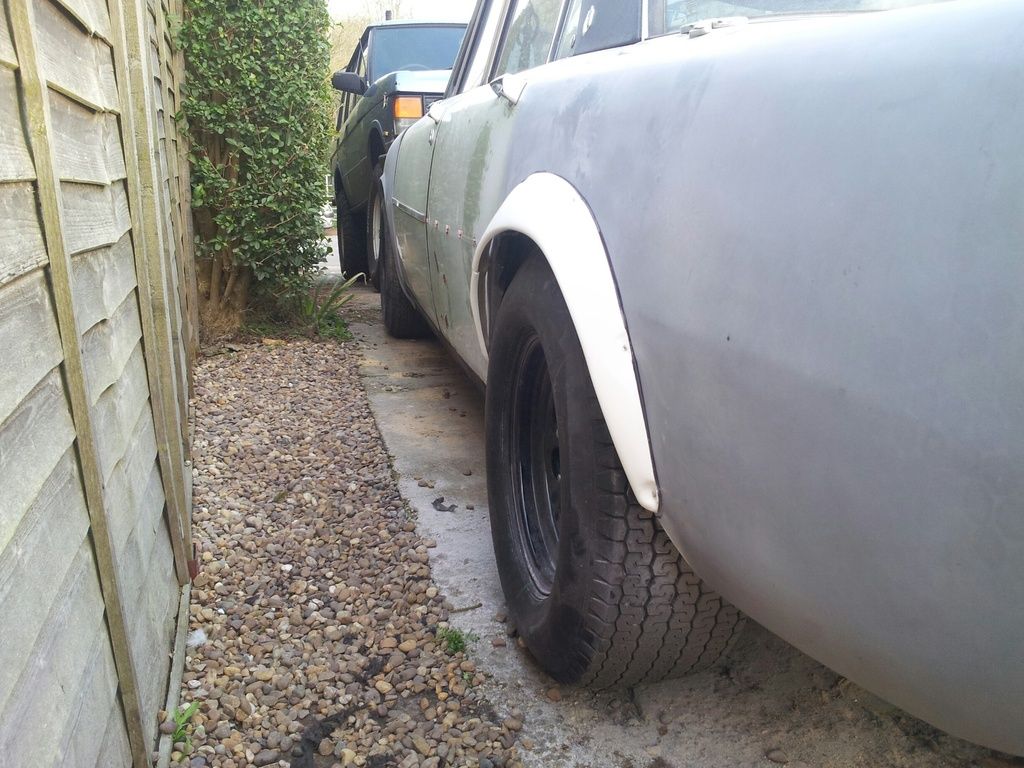
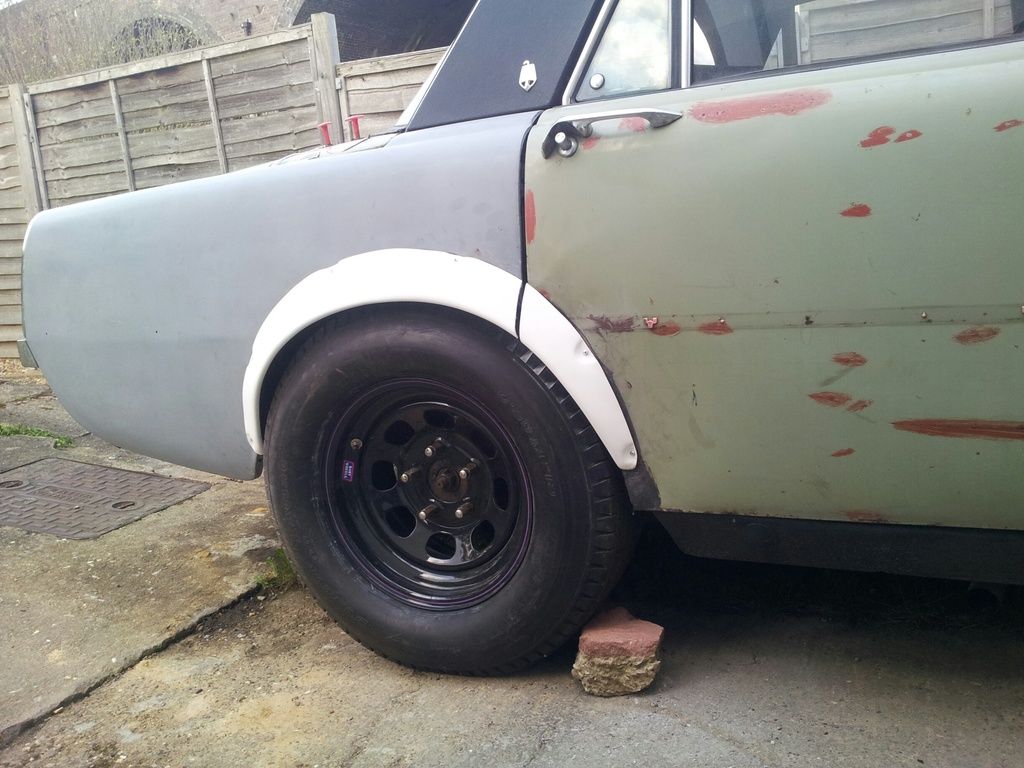
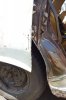
Then onto the arches. It will not win any bodywork awards but it does the job just fine. Used generic 2" arch extensions. Bought four in case I messed it up the first time round or keep them as spares. The line here is of the outside of the new arch, not the cut line. But a fair amount more material was cut off than shows in this pic.
A few rivets and job done. The interesting part was making both sides roughly the same had to use fixed points of the car rather than panels as those are a bit skew-whiff.
Spent more time trying to solve electrical woes but stopped as I thought it is better to move onto something I can do rather than getting stressed. So first easy job fit the carb socks over the trumpets. I am going to copy the scoop idea as per Mr Owen to give them a bit more fresh air.
Second easy job fit a NOS rear view mirror as mine is missing:
Then onto the arches. It will not win any bodywork awards but it does the job just fine. Used generic 2" arch extensions. Bought four in case I messed it up the first time round or keep them as spares. The line here is of the outside of the new arch, not the cut line. But a fair amount more material was cut off than shows in this pic.
A few rivets and job done. The interesting part was making both sides roughly the same had to use fixed points of the car rather than panels as those are a bit skew-whiff.
Baron von Marlon
Member
I like the wheel arch treatment. Did you have to do much to the base unit and the bottom of the doors to get the wheels and tyres to fit? If so, would you mind posting a few pictures of what you've done, please?
RoverAlex
Active Member
There was a fair amount of corrosion on the edge to the sill on the inner wings - so that was lobbed off anyway and then recessed back a bit and then attached to the sills so they were less intrusive in the wheel area (I hope that makes sense). The doors were then whacked at the bottom with a big sledge hammer until they were in the right place - I think you can just about make it out in the pics. Because the door has moved out a fair way at the bottom there is a fair old gap to the cabin but I will sort that somehow. At some point when I have the rear wheels off I'll take a few pictures to show the work.
RoverAlex
Active Member
So been getting there with the electrics. Lots of earths cleaned, wires replaced, new brake light switch and I only have a few things to go. Need to replace a bulb on the dash for the indicator (I'm hoping it's the bulb), fit a rear number plate light and I am there.
Put it through a pre-MOT to find out how much needs doing, and other than electrical bits it needs a nylock or a split pin on one of the ball joints, a bit of corrosion sorting out, brake lines securing, washers fixing, a front number plate (I have it kicking around somewhere) and that is about it. I am quite happy with that.
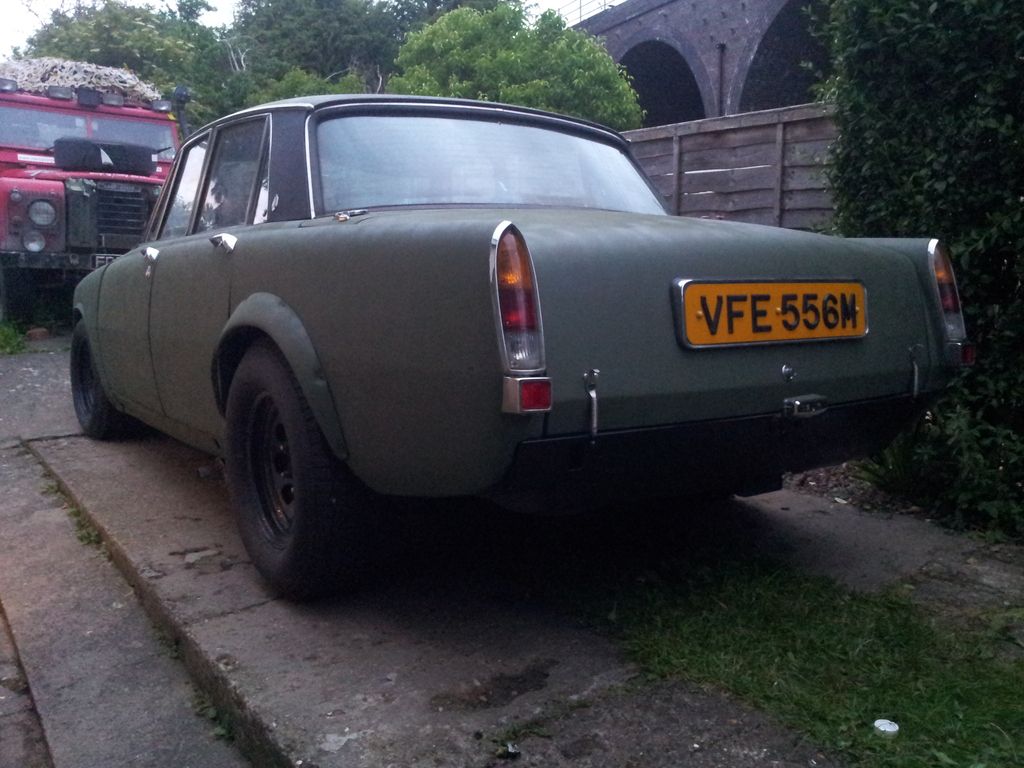
As for the exhaust I have fitted an extra silencer on one of the side exits to bring it in line with the sill. In time (money and getting it on the road pending) I would like to invest in a full system made up by someone reputable (thanks to those who gave helpful suggestions on the Facebook group). I have ordered a silencer for the other side...it's not quiet...but it has certainly taken off some of the harshness. Video here: https://youtu.be/z6kENSZWPGQ
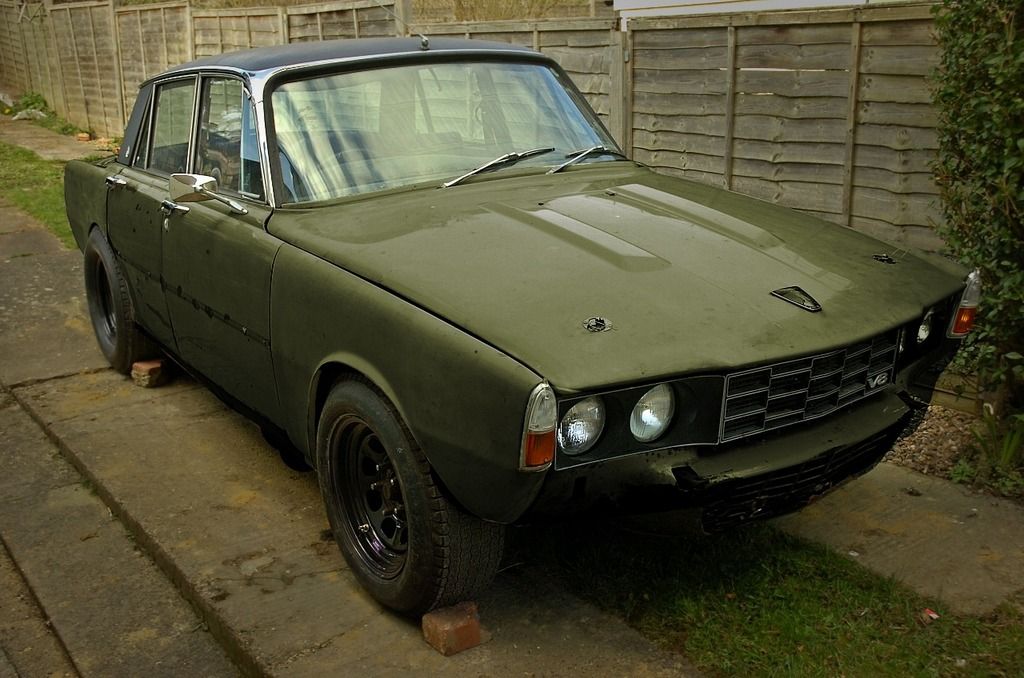
I've also got some paint. The plan is to wire brush down the crusty bits and spray with Zinc 182. There is some corrosion on the bonnet and boot so have got some acid etch primer (the paint has flaked off exposing naked metal). I have had given to me a big box of green paint which I plan to use as a base coat - it's metallic and my car will not be metallic - is there a problem spraying matt paint over the top of this if I wet sand it back after it's dried? Or is that a bad idea? The final paint colour has been chosen, partly because it was on special offer at 2 EUR a can- RAL6031 Army Forest Green Matt. A quick mock-up (ignore the shiney bits):
Put it through a pre-MOT to find out how much needs doing, and other than electrical bits it needs a nylock or a split pin on one of the ball joints, a bit of corrosion sorting out, brake lines securing, washers fixing, a front number plate (I have it kicking around somewhere) and that is about it. I am quite happy with that.
As for the exhaust I have fitted an extra silencer on one of the side exits to bring it in line with the sill. In time (money and getting it on the road pending) I would like to invest in a full system made up by someone reputable (thanks to those who gave helpful suggestions on the Facebook group). I have ordered a silencer for the other side...it's not quiet...but it has certainly taken off some of the harshness. Video here: https://youtu.be/z6kENSZWPGQ
I've also got some paint. The plan is to wire brush down the crusty bits and spray with Zinc 182. There is some corrosion on the bonnet and boot so have got some acid etch primer (the paint has flaked off exposing naked metal). I have had given to me a big box of green paint which I plan to use as a base coat - it's metallic and my car will not be metallic - is there a problem spraying matt paint over the top of this if I wet sand it back after it's dried? Or is that a bad idea? The final paint colour has been chosen, partly because it was on special offer at 2 EUR a can- RAL6031 Army Forest Green Matt. A quick mock-up (ignore the shiney bits):
RoverAlex
Active Member
The P6 is now on the road. Need to get it to a rolling road/tuners to get it set up right (7MPG but without the power to match isn't great)
Put some paint on. Almost no prep other than grinding the crusty bits off, Zinc 182 on the exposed steel and etch primer on the aluminium. It was never going to be a good job with dents, scratches, bumps all over the place - I just wanted it one colour. Money permitting in the future it would be nice to get it done properly, but for now a rattle can job will do.
Put some paint on. Almost no prep other than grinding the crusty bits off, Zinc 182 on the exposed steel and etch primer on the aluminium. It was never going to be a good job with dents, scratches, bumps all over the place - I just wanted it one colour. Money permitting in the future it would be nice to get it done properly, but for now a rattle can job will do.
Hi Alex,
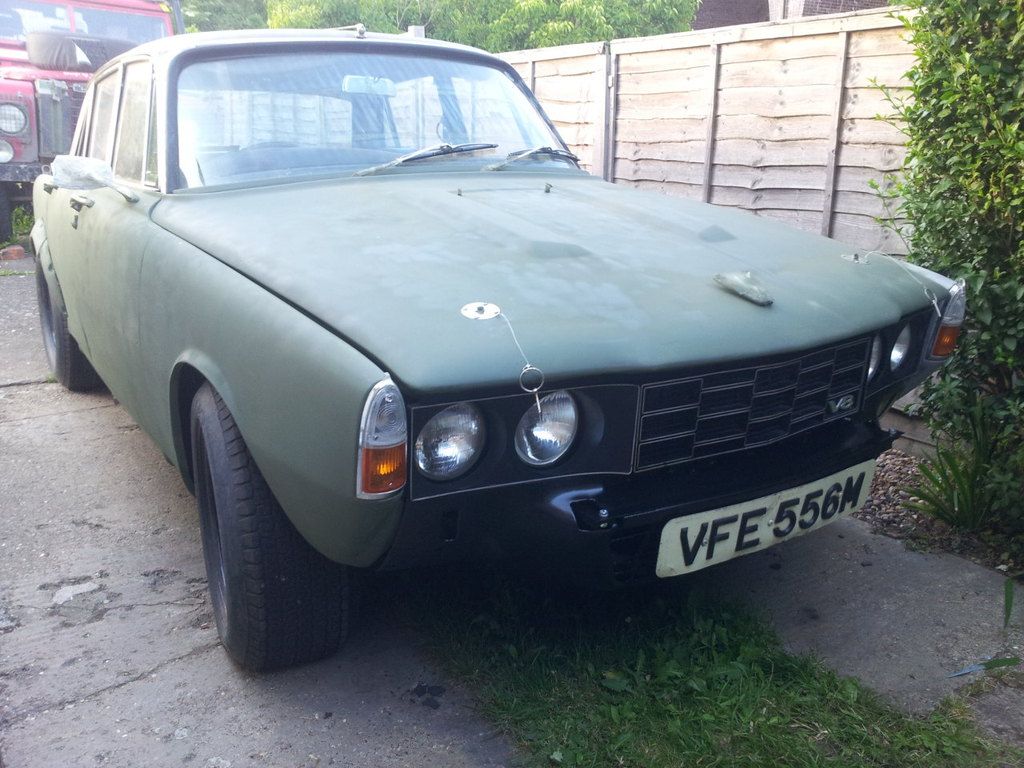
Your Rover is looking very purposeful! You have done quite a bit of work remodelling the D Post.
Those wheels look interesting. Can I ask what brand they are and what are their specifications, i.e backspace, offset etc.
Ron.
Your Rover is looking very purposeful! You have done quite a bit of work remodelling the D Post.
Those wheels look interesting. Can I ask what brand they are and what are their specifications, i.e backspace, offset etc.
Ron.

RoverAlex
Active Member
SydneyRoverP6B said:Hi Alex,
Your Rover is looking very purposeful! You have done quite a bit of work remodelling the D Post.
Those wheels look interesting. Can I ask what brand they are and what are their specifications, i.e backspace, offset etc.
Ron.
Hello. They were imported from america - they are 8" wide made by "Bart Wheels". I'll have to dig out the paperwork to get the offset and backspace. You can pretty much order whatever width, stuff pattern and offset you like. I measured it up and it all worked out OK.
Alex
RoverAlex wrote,...
Great, thanks Alex.
Ron.
Hello. They were imported from america - they are 8" wide made by "Bart Wheels". I'll have to dig out the paperwork to get the offset and backspace. You can pretty much order whatever width, stuff pattern and offset you like. I measured it up and it all worked out OK.
Great, thanks Alex.
Ron.