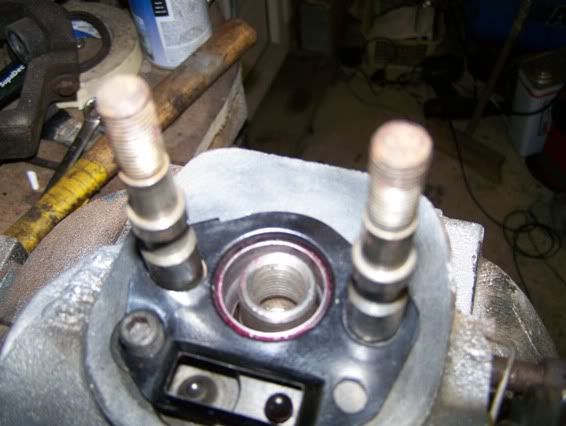
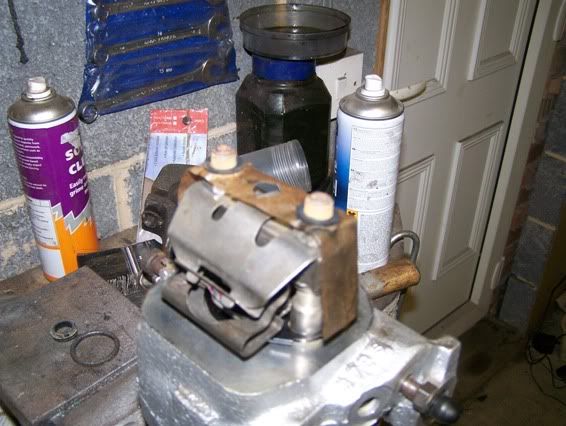
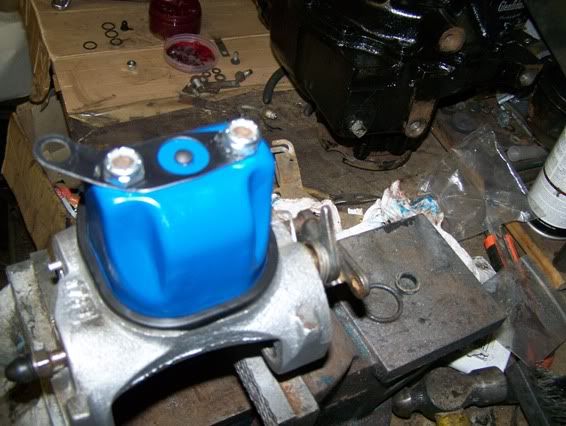
rear caliper overhaul

Ah, brings back memories....mine were full of filthy black brake fluid, about a cup full in each side, so you got off lightly here I think and if you don't have an air line you use a bicycle pump to get the hydraulic pistons out. :wink:

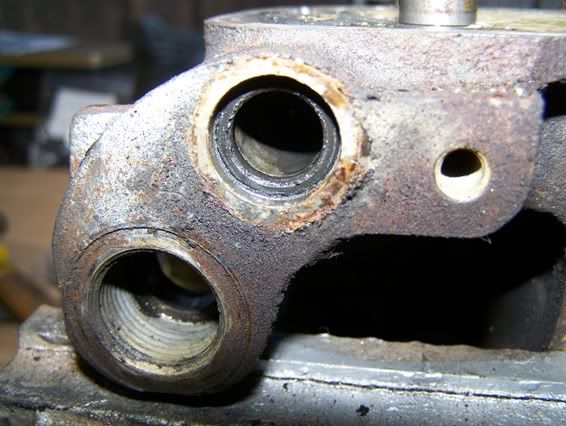
The cup assembly doesn't actually seal any oil so doesn't have to have a perfect surface to work as long as it's smooth, unless of course you want it to be perfect.

Blue paint looks good on the caliper covers though.
 
testrider said:
The cup assembly doesn't actually seal any oil so doesn't have to have a perfect surface to work as long as it's smooth, unless of course you want it to be perfect.

The cup assembly is actually pitted - looks like the chrome finish has peeled off leaving a sharp edge. I think it will damage the new seal quite quickly so will try to get another one as I don't wish to have them off again in a few years time - Would be a shame to have to do that.

I quite like the blue, although there won't be many people who will actually see it when it's on the car.

Richard
 
quattro said:
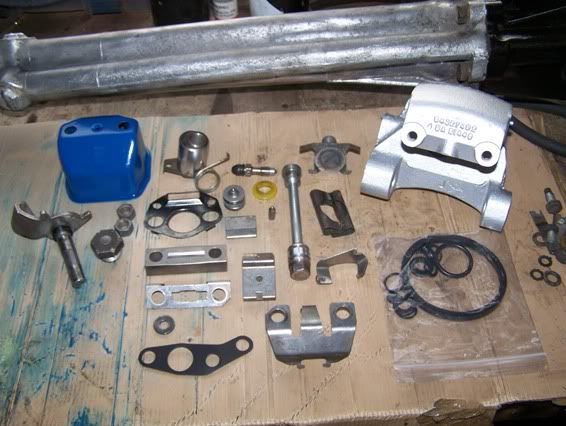
This bit does not appear in my Rover manual or my 1977 parts manual for some reason? Perhaps they are later calipers?
This nylon is not in the parts manual either?

Yes they are later calipers, you don't have that shim on the early ones with the tubes over the locating studs.

And that nylon has another nylon seal behind it, not an "O" ring, and as you say, neither of them come in the kits. My stock of these is disappearing fast, thanks to someone on here who keeps turning up on my doorstep with calipers in bits in boxes...... :roll:

I wouldn't be overly concerned with that cup assembly either. It may be a bit pitted, but it's not a hydraulic seal, and if you're showing the worst side in your pic, any new one will look as bad as that if not worse within six months.
 
Cheers Paul/Harvey

I will try to get the cup assembly a bit smoother, then chuck it back together.

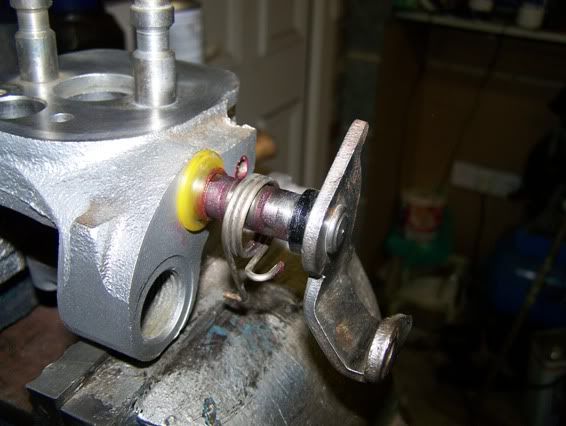
That's definately a rubber O ring in there Harvey, and there's one in the rebuild kit too. Unless the one in the kit goes somewhere else? I'll let you know when it goes back together.

a101_0322.jpg


Richard
 
harveyp6 said:
And that nylon has another nylon seal behind it, not an "O" ring, and as you say, neither of them come in the kits. My stock of these is disappearing fast, thanks to someone on here who keeps turning up on my doorstep with calipers in bits in boxes...... :roll:

Who is this scoundrel? His needs must be very great!! :mrgreen:
 
quattro said:
Harvey

That's definately a rubber O ring in there Harvey, and there's one in the rebuild kit too. Unless the one in the kit goes somewhere else? I'll let you know when it goes back together.

Richard

My mistake, as you show there is an "O" ring, as well as the yellow nylon, but there's a black nylon sleeve as well, which holds the quadrant shaft spring centrally over the yellow nylon bush
 
Next bit :)

I had a good look at every bit, and cleaned, de-rusted and painted where required. The cylinders were fine so no stainless sleeving was required - pheww
b101_0340.jpg

There are 5 O rings of about the same size. The chunkiest one fits inside the hand brake lever shaft aperture, followed by the nylon guide. Then apply some of the brake grease to the shaft and fit it to the caliper. The black nylon guide is still on the shaft as per picture. Clipped the spring into place, then fitted to stop pin to hold it in place.

b101_0343.jpg


Next, I fitted the new seal onto the piston, and with a quick wipe of brake fluid into the cylinder, slotted it back into place.

b101_0344.jpg


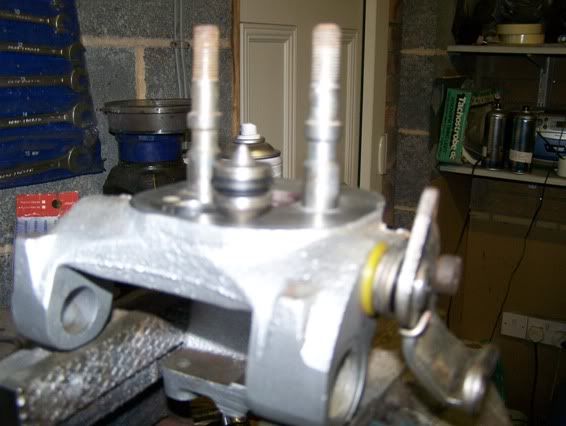
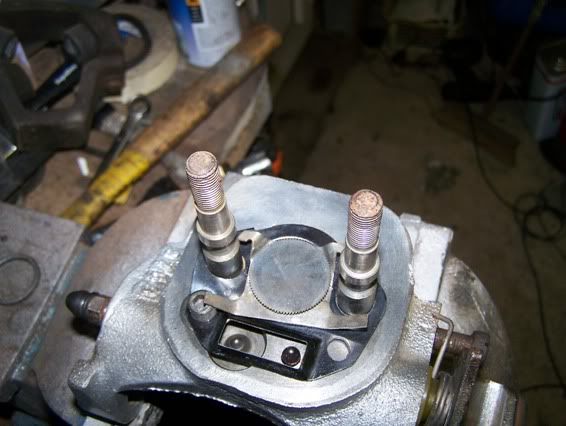
Then I greased the hand brake pin and dropped it in, replaced to piston stop washer, the plate and allen headed bolt. I then fitted the new rubber seal into the large cylinder from below, greased up the cup assembly and refitted it.

b101_0347.jpg


Next, I greased the thread on knurled bolt and screwed it back into the cup assembly, but only 3 complete turns.

b101_0348.jpg


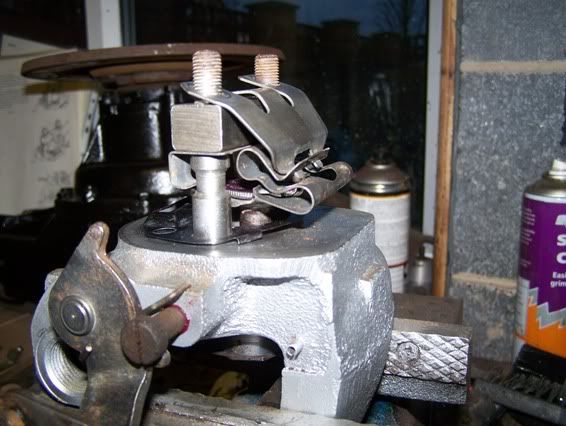
I then clipped the S spring back into place, dropped the beam along with its plate (if fitted to your calipers) and put the large spring back over the studs. It was then quite easy just to clip them together thus.
b101_0353.jpg


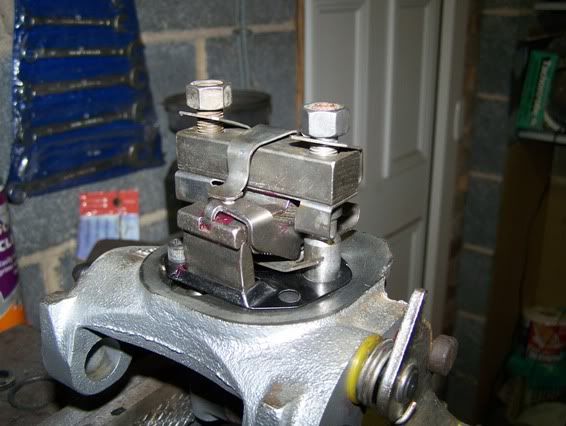
Put the nuts back on to stop the whole lot pinging apart (again). Then I greased up the strut/lever/pawl assembly and eased it into place. It did help by pulling the cup assembly down slightly to get the final upright in.

b101_0354.jpg


Then torqued the bolts down to 30lb/ft (should be 28 but my torque wrench only goes down to 30). Tested it by moving the handbrake lever back and forth, then just check that the knurled nut moves around a notch at a time. Then back on with the paper, two new rubber washers

b101_0357.jpg


And then the cover, brake pipe bracket and new nuts. Small drop of grease, then ease the new plug into place in the centre – job’s a good un.

b101_0358.jpg


Finally, just screwed the cup assembly back in fully.

Actually a lot easier than I expected it to be – hope it works now.
 
Cracking job there. Having done the a few times it is not a bad idea to test them before you put the diff back on.

A couple of calipers that I have overhauled the cups had corroded which meant that they wouldn't push out. If you have given them a good rub down have you painted them? I considered a thin coat of por15 or similar.

Colin
 
That really looks great work and excellent pictures Richard.

Good candidate for a sticky thread IMHO.
 
Cheers Colin

The diff is going back in but there is no servo and the front of the braking system is still in bits so I can't test it with hydraulic power. It works on the handbrake linkage which is now back on and working, so I will have to make do with that. I am sure it will work ok :?

Thanks Stan and Chris :D :D

Richard
 
Evening all and a big thankyou to Quattro.This is what the forum is all about.
I have read and re read the manual on the rear calipers and really am no wiser.Great pictures from somebody who has battled and won.
I shall be using them later in the year when I tackle my rear calipers.
Thanks again Quattro.

Regards to all phil.
 
Hi Phil, be confident when you start the rear brakes, they're really not that bad.

Take both calipers off (I disconnected the drive shafts and removed the discs for better access rather than dropping the diff mount)and remove the covers so you can see inside, but only work on one at a time.

Also change the flexy pipe between the calipers as a mtter of course when you overhaul them as it can collapse inside and make the brakes stick on.
 
Hello,

i have just had my rear calipers overhauled by a friend who is an acknowledged P6 expert. To be honest, i can only marvel at the build quality of these beasts and i would not touch them on my own. The P6 is bloody overengineered for that time, but i am always thinking that it is actually one of the most underrated cars in terms of quality in the whole vintage car scene. Looks to get used to, but such a reliable and well built car....

Just had to get that out of my system :D

CU Olaf
 
oport said:
Hello,

i have just had my rear calipers overhauled by a friend who is an acknowledged P6 expert. To be honest, i can only marvel at the build quality of these beasts and i would not touch them on my own. The P6 is bloody overengineered for that time, but i am always thinking that it is actually one of the most underrated cars in terms of quality in the whole vintage car scene. Looks to get used to, but such a reliable and well built car....

Just had to get that out of my system :D

CU Olaf

Parts like the rear calipers are actually pleasurable to work on because the engineering is so good. Many on this forum would totally agree with your sentiments about the P6 being underrated :D

From my own experience of MGs, many Triumphs & several modern cars, the quality of a P6 takes some beating. 8)
 
Having just rebuilt a set of rear calipers, I'm more in favour of KISS engineering, and then to put them inboard in front of a De Dion tube, is as I have stated previously, like wearing a Rolex up your a$se when a Casio on the wrist would suffice. :LOL:

John.
 
Which, of course is what Rover did in the first place. From launch in '63 to late '66 the P6 had Dunlop rear brakes, which are exactly as you would wish from KISS engineering. Then it doesn't matter that they are inboard.

The Girling brakes are an accident perpetrated by Lucas and Ford. Lucas took over Girling and also Dunlop's brake business. Then they produced the offending articles in response to a demand from Ford for self adjusting back brakes for the MkIV (aircraft carrier) Zephyr/Zodiac. There was a period in the 80's when there were bits for the Dunlops that were difficult, and a lot of people converted to Girlings. Now I think the tables are turned, and any serious engineer would convert back to Dunlops. Parts availability is now superior to the Girling's, thank to commonality with early Jag rear brakes. But perhaps I'm biased - I've got a set of Dunlops in the garage ready to go on Lucky next time the Girlings give bother!

Chris
 
chrisyork said:
From launch in '63 to late '66 the P6 had Dunlop rear brakes, which are exactly as you would wish from KISS engineering. Then it doesn't matter that they are inboard.

How come Jags of the period with the same brakes always had a cr*p handbrake if they're so simple to do even when they're inboard? I can see how the footbrake could be seen to be better, compared to setting up the Girlings, but not the handbrake.
Personally, I think that once the Girlings are sleeved, and then fitted and set up properly they work really well, and don't give many problems at all.
 
Harvey, why would they need to be sleeved if built up correctly with Girling grease?

I have a friend who has a Dagenham Flying Pig, and his description of Girling calipers makes mine suitable for a vicars tea party. (But he is a pure bred Yorkshireman!)


John.
 
Back
Top