Occie gets a 5-speed box!

vaultsman

Well-Known Member
Ever since I got her, I've hankered after the 5-speed box I've felt she was crying out for, so when I won what, on the face of it, seemed a decent box, bellhousing and remote complete...I'm afraid it was time for Rebekah to take (yet another) back seat.

As always, time to spare is the killer but, having discussed the job through a few PM's with Harvey and some notes from Dave McSweeney (many thanks both!) I plumped for getting on with it myself.

(Aside to Phil Robson - see how I'm leaving the field clear for you? :) )

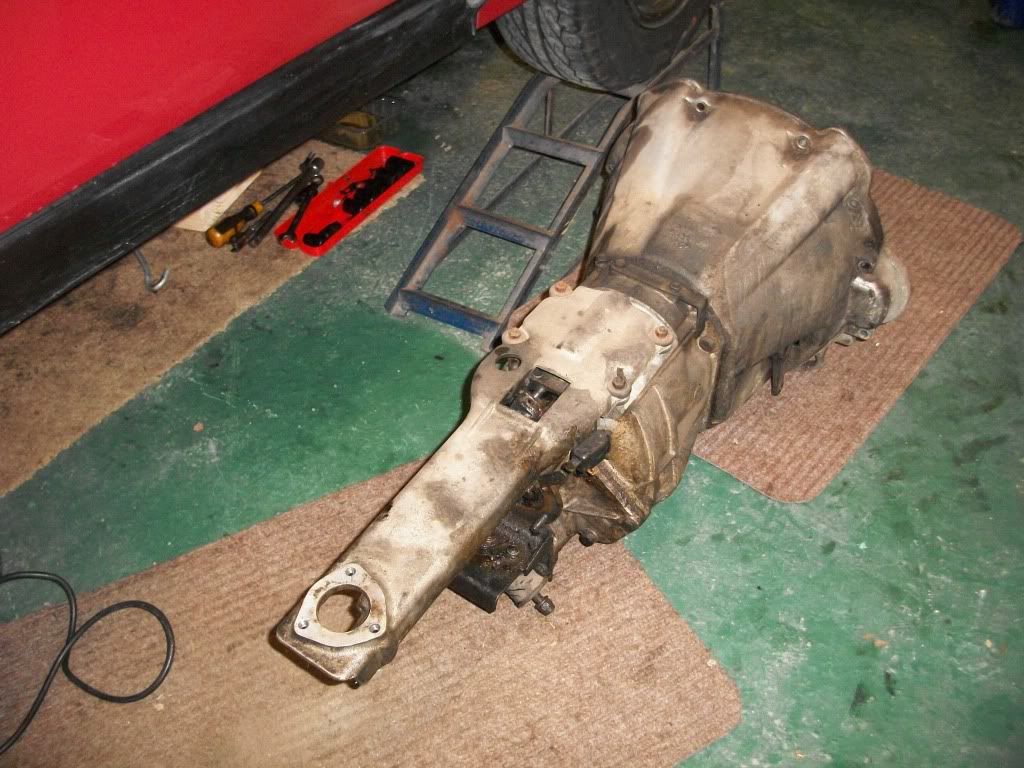
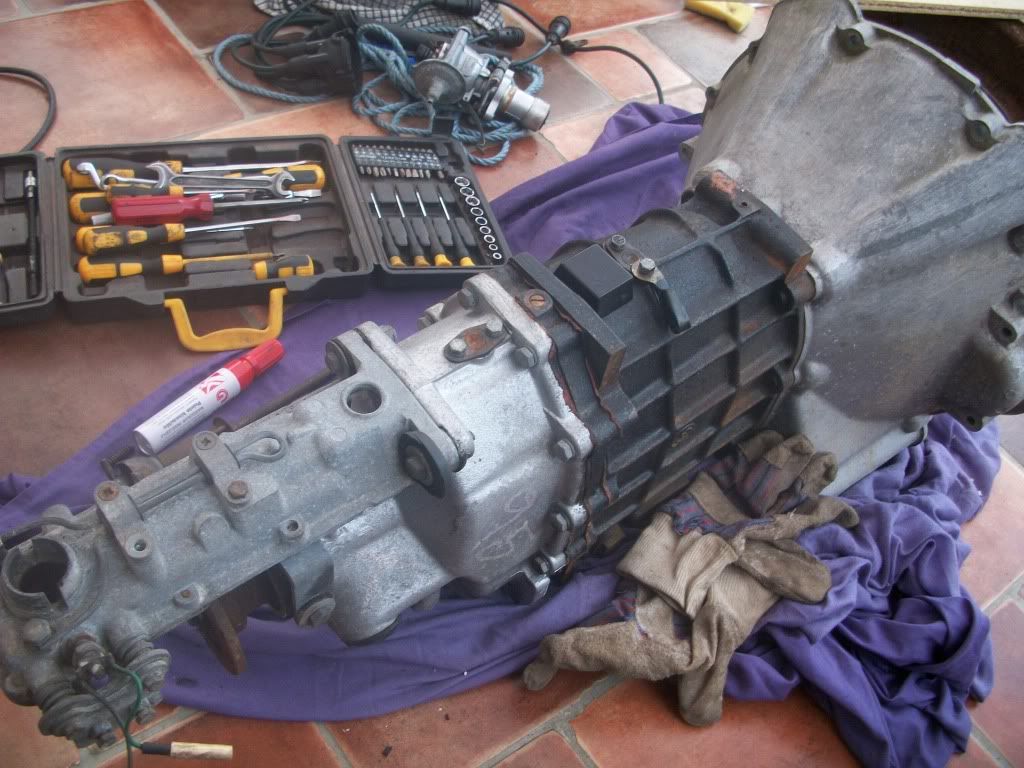
This is the baby...and a heavy old lump it is! :roll:
100_2819.jpg


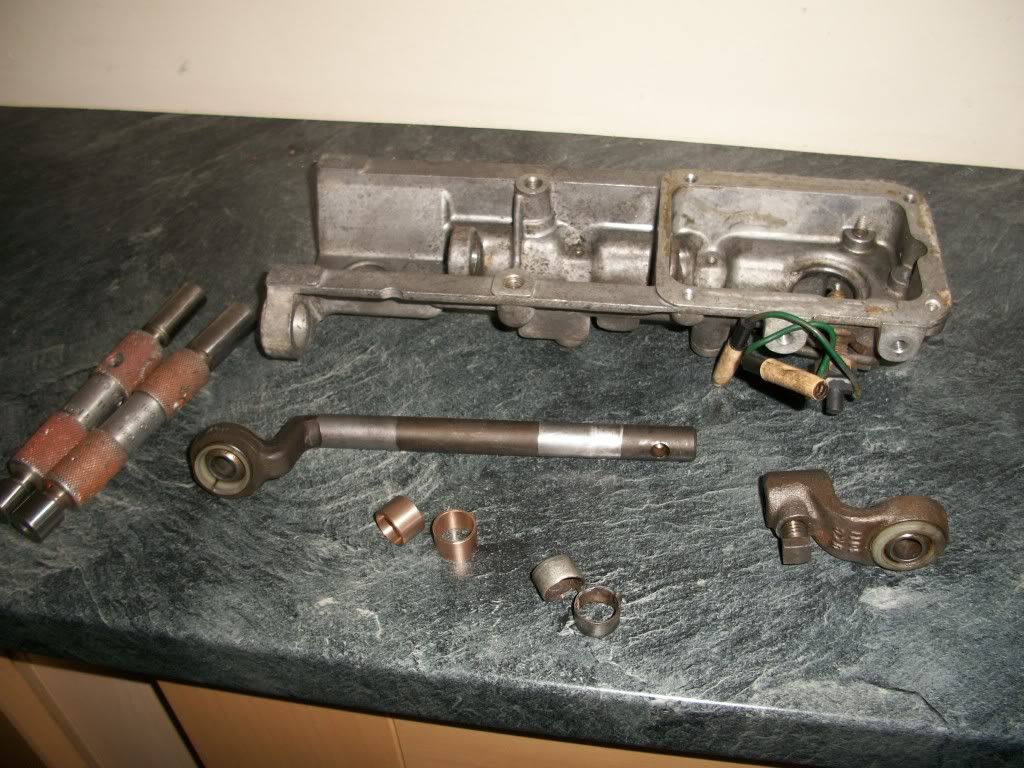
First job, have a good look over the remote. The mounting bushes were shot, and I'm not sure what that rubber blob was that passed for one of them!
100_2824.jpg


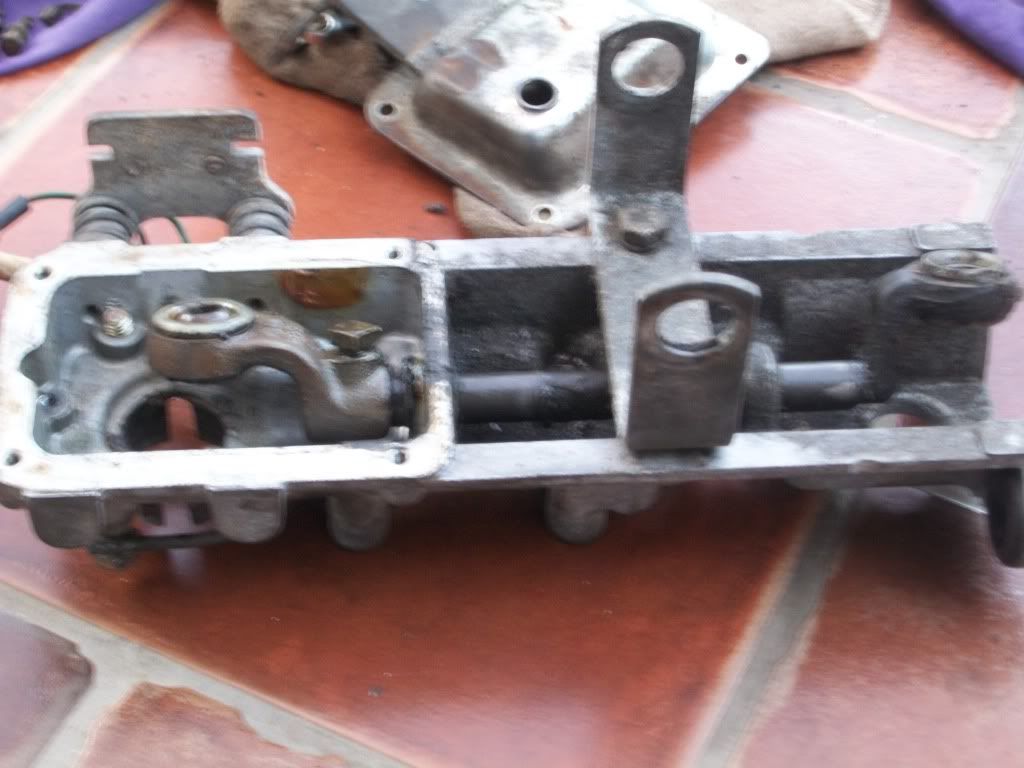
There was a tad too much play in the selector shaft for my liking, so I turned up a couple of phosphor bronze replacements...
100_2872.jpg


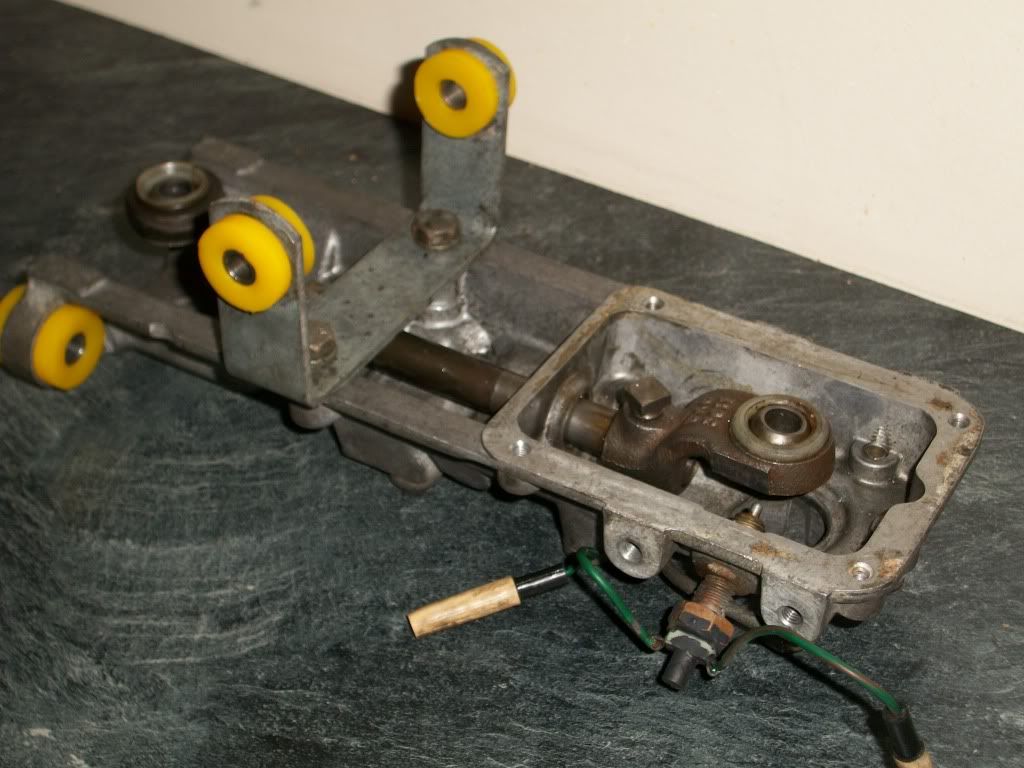
Reassembled with new polybush mounts...no play at all in the shaft now and, with a helping of grease, it moves like silk.
100_2884.jpg


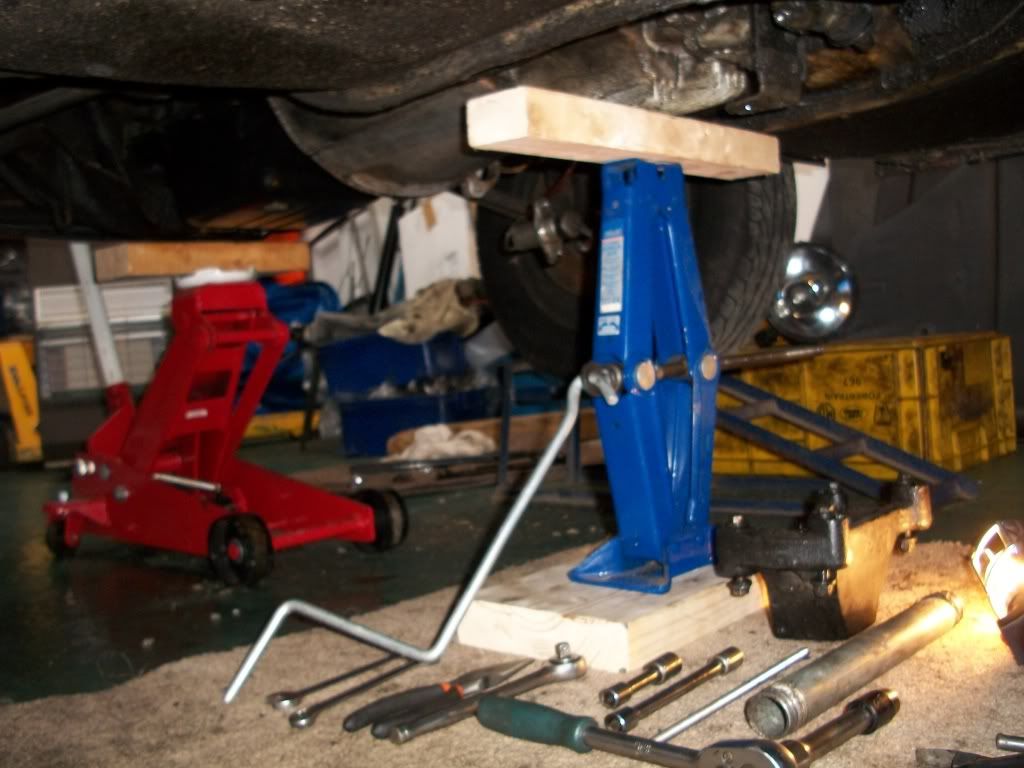
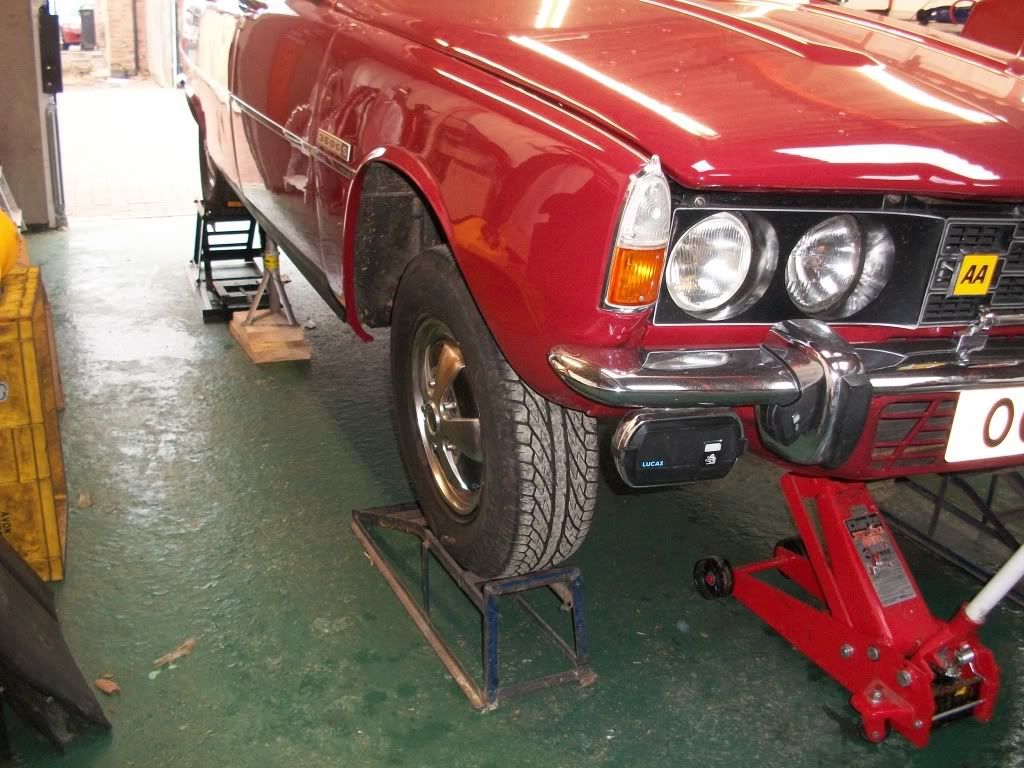
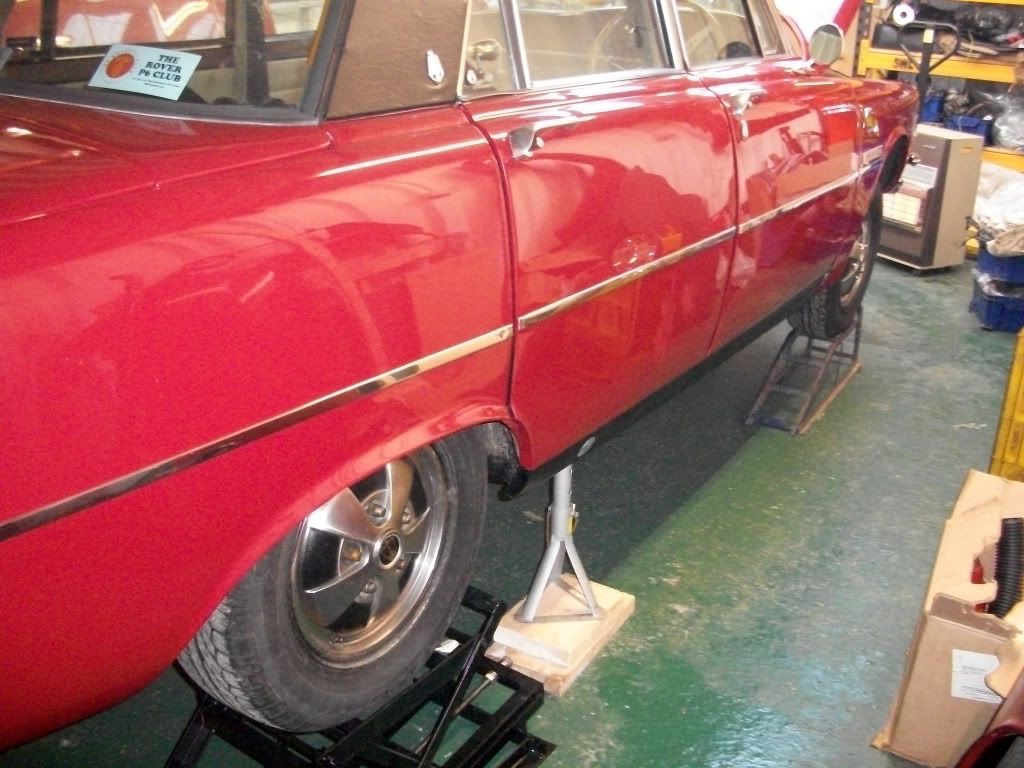
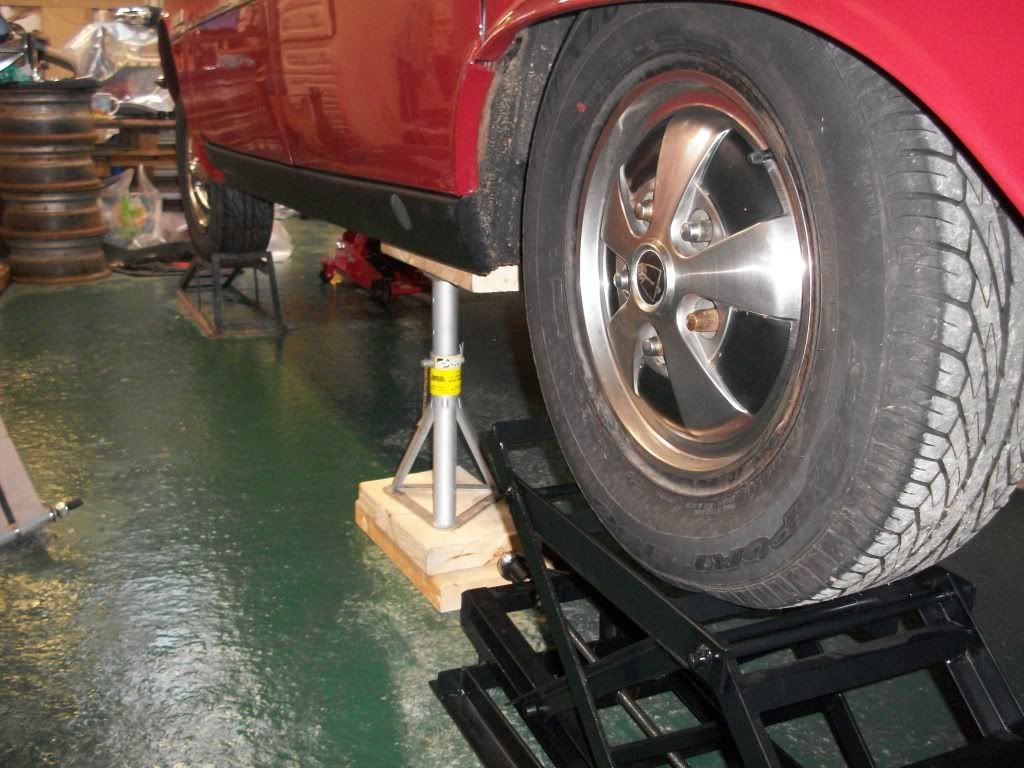
Having done the interior and engine bay prep work through the week, today was getting her jacked up ready for me to slide under...
100_2891.jpg

100_2888.jpg

100_2895.jpg

100_2901.jpg

100_2902.jpg

100_2903.jpg

100_2904.jpg


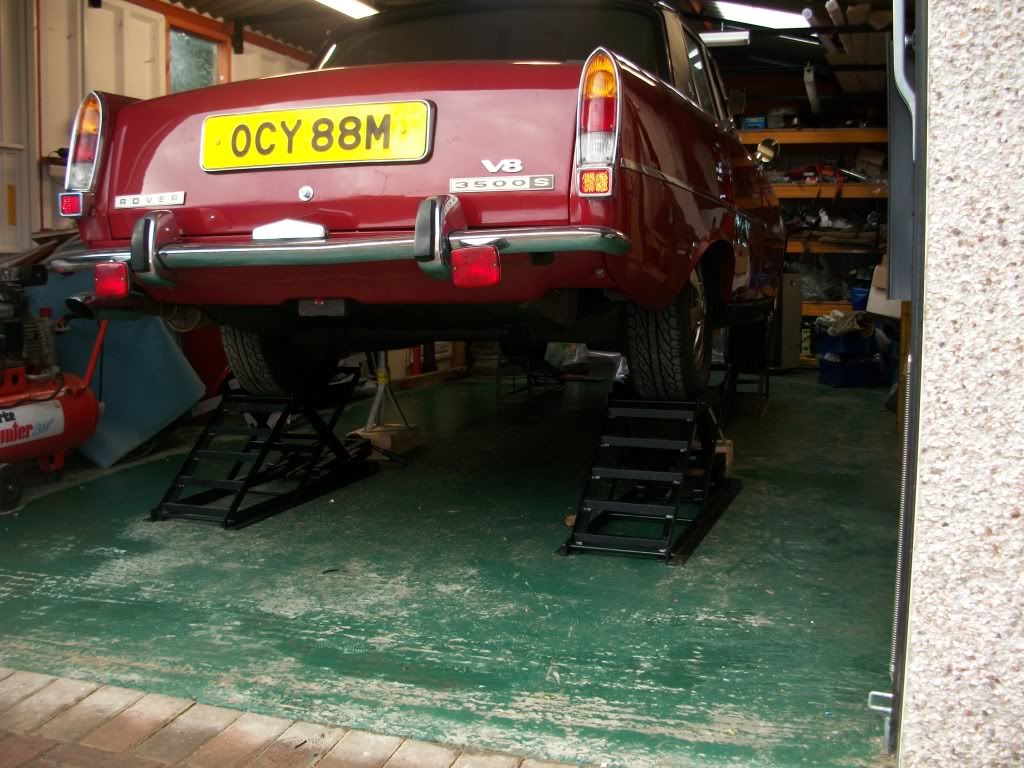
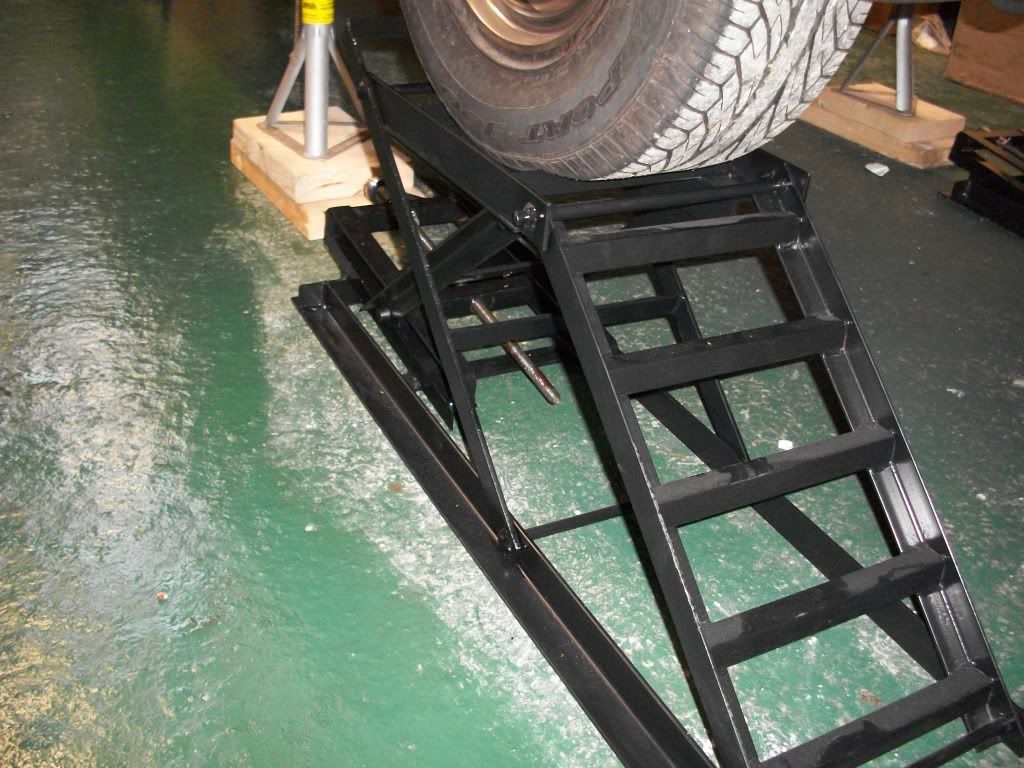
Loving these CJ Autos adjustable ramps - can't run to the hydraulic ones but these take no time at all with a socket...and a flexible wrist! :wink:

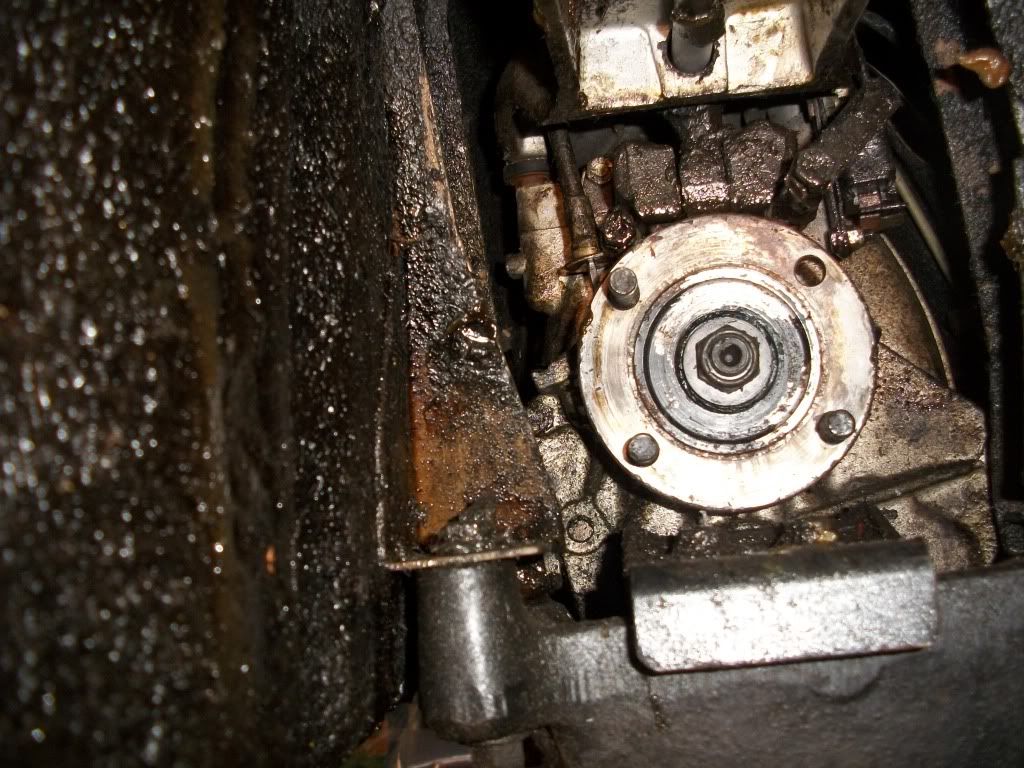
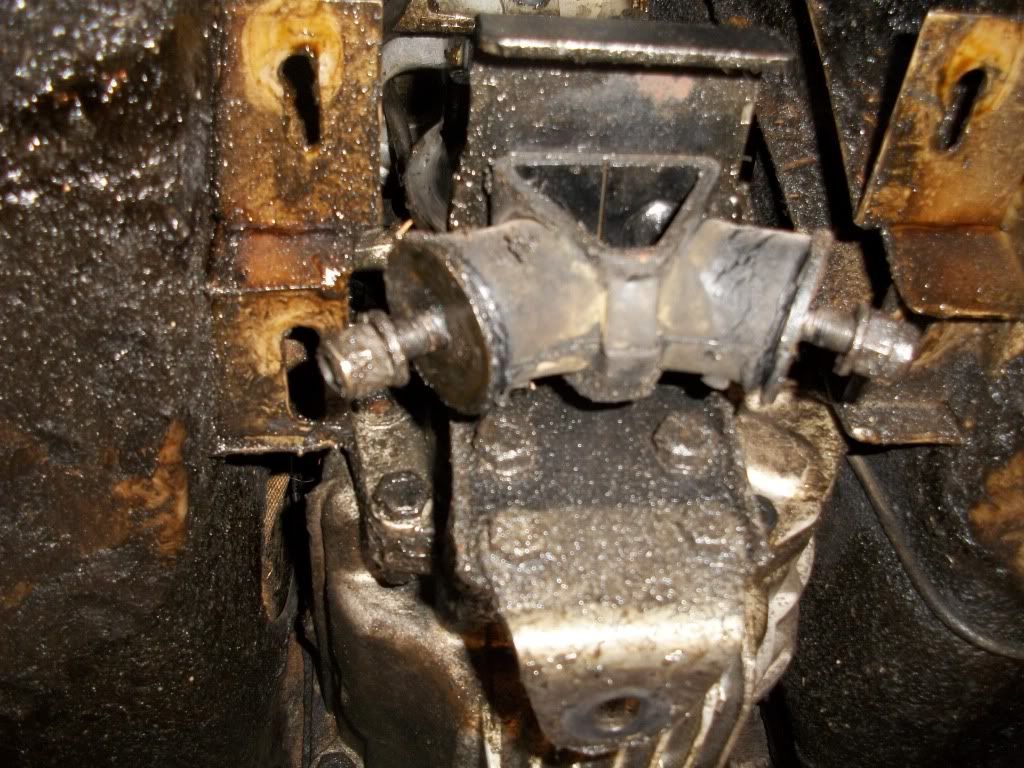
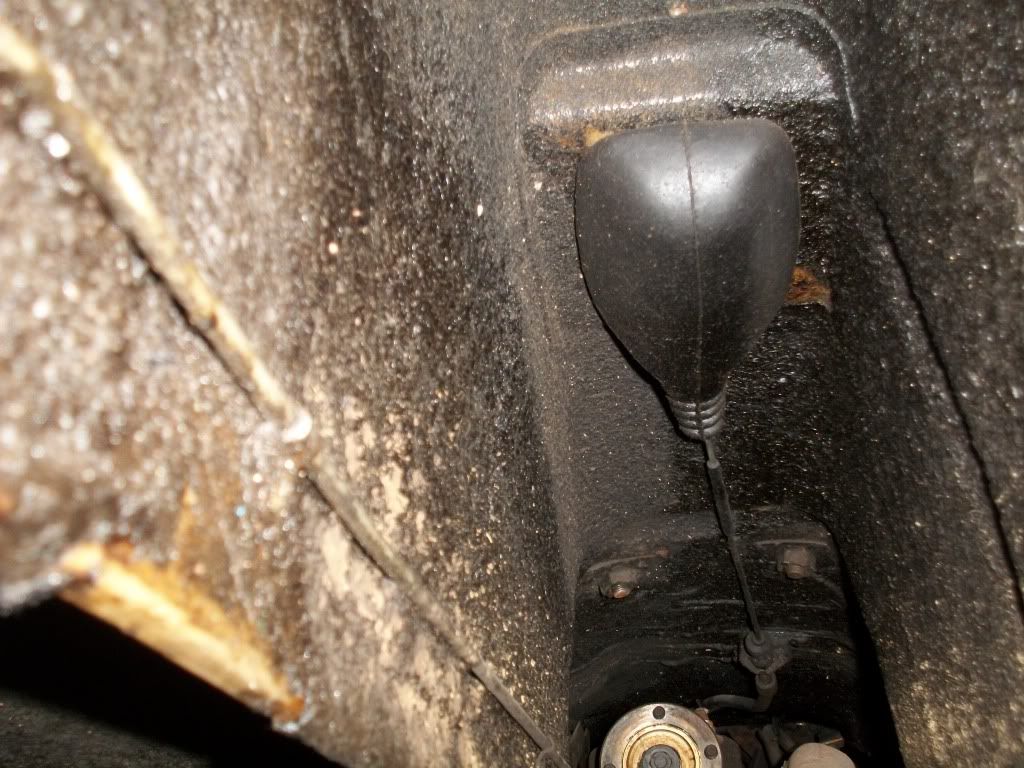
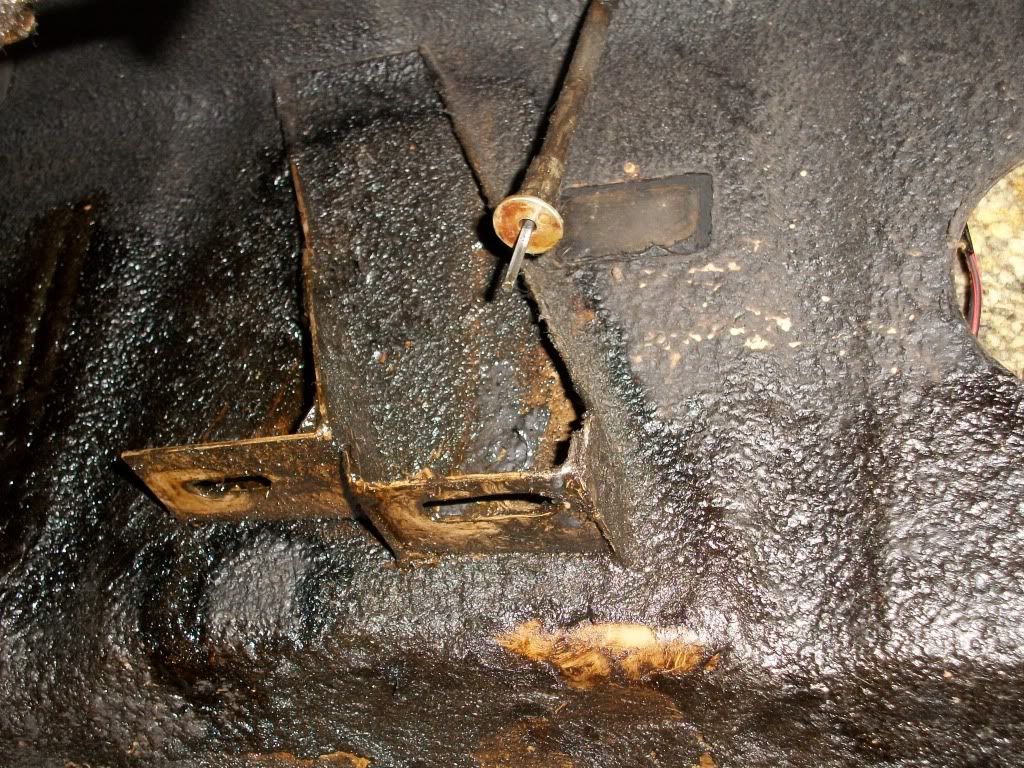
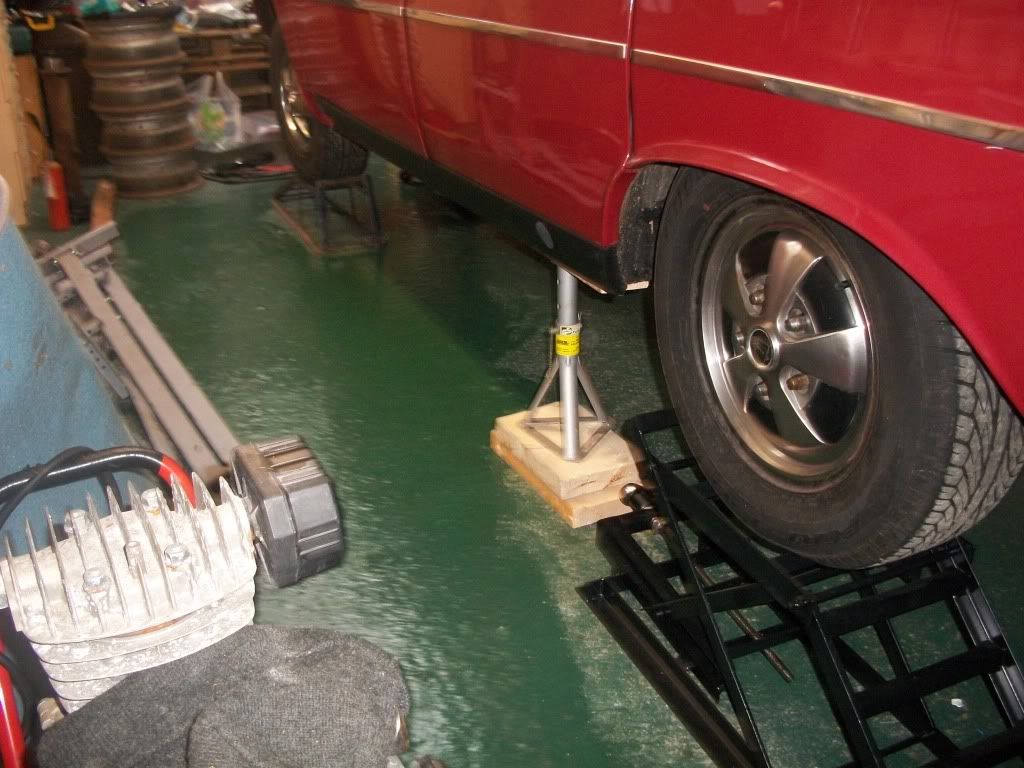
Downpipes and front exhaust section and the slave cylinder's off, rear flange of the prop dropped down but the front flange seems a bit reluctant to separate. :twisted:

More pics anon...but for now...SWMBO's visiting for the weekend and she's done me chicken, leek and potato bake! Excellent! :D :D :D
 
Don't forget to support the back of the engine on a trolley jack when you remove the gearbox mounting, and then use it to slowly lower it down, otherwise the o/s rocker cover can go back too far and break the petrol reserve tap. Make sure the fan (mechanical, if fitted) has the blades orientated with the widest gap at the bottom, otherwise that can go through the rad.
 
harveyp6 said:
Don't forget to support the back of the engine on a trolley jack when you remove the gearbox mounting, and then use it to slowly lower it down, otherwise the o/s rocker cover can go back too far and break the petrol reserve tap. Make sure the fan (mechanical, if fitted) has the blades orientated with the widest gap at the bottom, otherwise that can go through the rad.

Thanks Harvey, I've taken the fan off. Looking at the rear lip of the offside rocker cover it doesn't look as if it will travel far before it touches the bulkhead, but I'll have a looker there to keep an eye on it while I'm lowering.
 
harveyp6 said:
Make sure the fan (mechanical, if fitted) has the blades orientated with the widest gap at the bottom, otherwise that can go through the rad.

Wow! :shock: That's the kind of gotcha that you'll never think of until you've either been told or done it and killed a rad. No replacement for years of experience.
 
I like the look of those ramps, I think that's an intended purchase, I'm going to google them now! Could you speed up the lift, and save arthritic wrists, using an air powered wheel gun?
 
John said:
I like the look of those ramps, I think that's an intended purchase, I'm going to google them now! Could you speed up the lift, and save arthritic wrists, using an air powered wheel gun?

They're on ebay at £190 + carriage, but if you phone them and speak to Colin he'll do them for £180 - well he did for me!

You could possibly speed up the lift, but it really doesn't take long at all with a socket and ratchet. Plus by hand you get a good feel for what's happening with the car and keep readjusting the front chocks - the car moves backwards as you raise the rear wheels with the ramps facing the way they are in the pics. A point to watch for when you set the car's starting point for the lift.
 
Well the prop gave up and came free. There were only 3 bolts in the drive flange and, even though they're nylocs, only one of the nuts was torqued up! :shock:

100_2925.jpg


Harvey stressed the importance of getting the LT77 drive flange in the same relative position as the P6 flange. Even though the LT77 flange will be further back (hence the need for the shorter prop), it makes life easier to get the centreline at the same distance from the top and sides of the tunnel.

Dimensions I've got are 155mm down from the tunnel top, 94mm from the nearside wall of the tunnel, and 120mm from the offside.
 
adamhotrod said:
I'm loving this thread, I can learn from you doing it first!

What else is the forum for? When this is done, next project will be the Vitesse wheels and your thread will make it easier! :)

adamhotrod said:
Do you expect to do any tunnel mods Stan?

A lot of people who've done this talk about cutting away the mounting ribs. Harvey says this isn't necessary and they can just be folded back against the tunnel sides - providing the box is positioned right.
(I'm mentioning your name quite a bit in this thread H - but your advice has been carefully stored! :) )

OK...gearbox rear mounting removed and all ready for lowering - I think a scissor rather than trolley jack will give a more controllable movement Leaving it at this until my mate appears early next week to act as spotter in the engine bay. The engine doesn't look as if it will tilt back too far, but the rear of the head could end up fouling the reserve tap and/or the fuel line from it.
100_2937.jpg


These are the mounting ribs in question...
100_2933.jpg
 
when i put the five speed box in PCW191P back in the eighties i left all the original mounting brackets on the base unit untouched in case the need to replace the original box ever arose , i used the sd1 w shaped mounting but put the two cotton reel mountings into the two threaded holes on the bottom of the box close by where they are mounted normaly -you will also have to get the speedo recalibrated as although the p6 & sdi both use the same 3.08 - 1 diff ratio the drive ratio in the box is different i tried all sorts of drives black/orange to no avail.
mal
 
malky said:
when i put the five speed box in PCW191P back in the eighties i left all the original mounting brackets on the base unit untouched in case the need to replace the original box ever arose , i used the sd1 w shaped mounting but put the two cotton reel mountings into the two threaded holes on the bottom of the box close by where they are mounted normaly -you will also have to get the speedo recalibrated as although the p6 & sdi both use the same 3.08 - 1 diff ratio the drive ratio in the box is different i tried all sorts of drives black/orange to no avail.
mal

Thanks Mal,

How did the LT77 fit with the P6 mounting brackets untouched?

I've got the SD1 mounting and I'm planning to use those 2 tapped holes on the box as well and drill the mounting to suit. Did you also use the snub rubber in the SD1 mounting bracket?

I might have to get the speedo recalibrated, although I've got a Vitesse manual speedo that I can take the head from to replace the P6 head. Also a set of 15" Vitesse wheels wearing Vitesse-spec 205/60 tyres to go on...so it should all marry up (in theory! :) )
 
This is all looking good Stan. Where's the oil in the tunnel come from - the old gearbox?

Did you raise the rear wheels on the winding ramps then lift the front on to the fixed ramps with the trolley jack?

Hopefully you'll about break even in a year or so with better MPG when cruising.
 
testrider said:
This is all looking good Stan. Where's the oil in the tunnel come from - the old gearbox?

Did you raise the rear wheels on the winding ramps then lift the front on to the fixed ramps with the trolley jack?

Hopefully you'll about break even in a year or so with better MPG when cruising.

I won't know for sure until the box is out, but I'd imagine some has come past the tailshaft oil seal over the years.

That's just how I did it Paul, jacking the rear wheels onto the ramps and then winding to somewhere close to the final height, jacking the fronts onto the fixed ramps, then adjusting the rear wheels slightly to suit the axle stands. When I was unbolting the rear flange of the propshaft I unscrewed 2 nuts then wound one ramp down to clear the rear wheel, turned the prop to access the other 2 nuts, then wound the ramp back up again.

Don't know about breaking even, but I'm sure I'll enjoy the drive even more! It's easy to underestimate the cost involved of all the ancillaries over and above the box/bell-housing combo (guess who did! :oops: )

Not a definitive list yet, but the parts kit includes:
SD1 Rear Mounting Bracket & Metalastik Bobbins
SD1 3-part Clutch Kit
Clutch Operating Fork and Release Bearing Carrier
SD1 Slave Cylinder including pushrod and retaining clip
Crankshaft Spigot Bush
P6B Auto propshaft (if starting from a 3500S)

All of this adds £200-£300 to the gearbox cost. Plus the cost of recalibrating the speedo.
 
Bugger! Even with feller-me-lad spotting in the engine bay, the sharp edge of the offside head caught the flexi pipe from the fuel tap across the bellhousing. :twisted: :twisted: :twisted:

Which meant draining the fuel tank (7 gallons!)...not too disheartening, as the fuel gauge packed up on the way back from the National anyway and testing pointed to (probably) another punctured float. :roll:

Also not too bad as aforesaid flexi pipe is currently braided nylon hose, what I call compressed airline - hardly factory I think! How long's that been on there? Who knows? Maybe the guy who fitted the new clutch for me in 2008 punctured the original pipe and fitted that?

It's possible, because (as well as the missing drive flange bolt) there were only 6, rather than 8, bolts clamping the bellhousing to the block. Which made my life a little easier, but did nothing for my blood pressure.

Anyway, gearbox out time. Top tip, while you're underneath, loop a length of rope around the remote and feed the ends through the gearlever opening for your glamorous assistant to hold onto whilst you split the bellhousing from the block.

100_2962.jpg

100_2967.jpg

100_2971.jpg

100_2973.jpg


More anon, but a few pints of Sadlers Wee Shimmy in the local called loudly at that point. :D :D
 
Looking good Stan.

Now the fun bit begins :)

I messed around with a few oils for the LT77 and found one called Redline MTL which works very well and gives a nice slick shift even when cold.

Richard
 
quattro said:
Looking good Stan.

Now the fun bit begins :)

I messed around with a few oils for the LT77 and found one called Redline MTL which works very well and gives a nice slick shift even when cold.

Richard

Exactly so Richard...keep hefting the LT77 and thinking...bugger that's heavy!

Had a good scan of Ramon's excellent info on his site...

http://www.vintagemodelairplane.com/

...and as well as a great read, there's some good stuff there re gearbox fluids.
 
Hello Stan,

I am constantly impressed by your endeavours. I have said it before and I'll say it again,..I wish Iived close enough to just pop over.

You won't know yourself once the 5 speed is up and running. Your good lady wife will wake to the sound of the Rover V8 roaring off into the distance, the clock ticking just past 2am as you prepare for another night of hooning (high speed road testing) so as to establish a proper working relationship with your new gearbox.

Fantastic... :D

Ron.
 
Back
Top