New Project begins, 1974 P6 3500 V8

Thanks for the great feedback all, Mike/ cobraboy, yep I defo have taken too much of both gears , there was embarrassingly way to much float on the disty gear drive which explains all, I guess once the oil is hot then less viscosity and even less pressure with my current set up.
I'Il order a new kit, mine is the original P6 timing over so I used the spacer provided, I did same conversion on my last P6 but didn't 'mess' with gears so no issues so literally this is my own fault :rolleyes:. Hopefully it'll fix it :)
 
A couple pics from Sunday, still looks like scruffy shed as all the work so far has been underneath and under the bonnet lol. Oh a set of good seats now added as the leather ones had literally all but disappeared.
1647346761875.jpeg

1647346803369.jpeg

1647346864650.jpeg

1647346900842.jpeg
 
Yeeeey, oil pressure issue fixed, was my own fault for removing about a 1mm or less of both gears hence creating end float thus instantly losing pressure especially when the engine got hot. I still had the original gears so removed the upgraded pump and refitted the factory ones as for now, pressure way up and sitting at 30psi on tickover when hot!. Tadpole prsseure relief valve has helped too. Still running a bit rough on tick over but drives nice, did a 10 mile drive yesterday evening and all was good, both exhausts silencers are totally knackered and blowing badly, would this surely effect the running and tickover?
 
She lives, life in the ole dog yet, new powerspark electronic ignition kit with rotar arm , reset the timing which was oddly way out. So purrs nicely but stll could do with carbs sorting as still has its moments, hasn't helped that l stupidly snapped the small screw (with the small spring) that holds the jet adjustment mechanism inside the float chamber and no idea on how to get the remaining broken thread out..yeèey, probably now need a good 2nd hand carb body, so although its running its still up n down on the right carb, all good fun. Possibly though l maybe able to purchase an excellent 2nd hand chevy 305ci small block V8 of 89 vintage, almost the same size as the rover motor but 5.2ltrs & much more room to play with in terms of upgrades
 
  • Like
Reactions: Tor
See if you can spot which door I've replaced and painted
1f923.png
, tried to get an except match made but apparently this is the only shade available now for Almond without paying twice as much for a custom mix but for an aerosol can result it isn't too shabby after a bit of flattening and mopping & looks far better than what was left of the old door. Eventually but no idea when it'll all be repainted in a early 70's muscle car met blue.
So just another 17 panels to go! although I'll use a spray gun for these, the rattle can gave a good finish but the second one I used kept spitting big blobs of paint when laying it on, very annoying & cant be doing with that! Anyway its getting slowly, panel by panel lol.
1660723515635.jpeg1660723558879.jpeg1660723589498.jpeg1660723624649.jpeg1660723702194.jpeg
1660723734342.jpeg1660723765518.jpeg1660723813176.jpeg1660724059097.jpeg1660724102122.jpeg1660724157420.jpeg
 
I know it's very subjective, but to my eyes, through my laptop screen, your newly painted door looks indeed like almond. The rest of the car is more like an Austin - Morris yellow from the 1970's.
EDIT: I think it is called sandglow.
 
Last edited:
Hi all, Have bought camshaft & set of new lifters , these were the only parts I didn't replace during the engine rebuild. Also went for the uprated oil pump. The only thing is my rev counter doesn't work, silly question but is there a way of knowing when the car is at 2000rpm for bedding in the cam for 20mins ? I've not looked into the reason why its not working, if I remove it then can it be tested in any way, can it be wired direct to the coil to see if works as then I can set the RPM to bed in the new camshaft, many thanks Damian.

1666794269517.jpeg
 
Got some new rims fitted to the car last week, really wanted the Cragar 500P's as I had on my old red P6 but now obsolete, so went for a set of traditional American Racing Rims in the form of Torq Thrust D's, 7x15mm. I used the tyres from the SD1 rims fitted but at 205 65 15 they're to tall & too fat, even after D-Post mods ect they still hit the inside of the rear wings, spot the burnt paint marks :LOL:, so 195/60/15 for the rears & 185/60/15 for the fronts will sort it out as used on the red P6, I'll modify the curve of the D-Post where the door seal turn inwards as will remove any possible contact, I know it'll not be factory but it was never going to be from the start of the resto, it'll never be worth £50k anyways!
Fitted MGB expansion tank, will get a kenlow fan at some point, hopefully I can start to sort the panels & interior next year but for now I'm enjoying the cruzin, also at some point I'll get a recon 5spd LT77 G/box, this one is working well but I don't trust it;)
 

Attachments

  • 20230806_125123.jpg
    20230806_125123.jpg
    3.5 MB · Views: 25
  • 20230806_125135.jpg
    20230806_125135.jpg
    3.5 MB · Views: 25
  • 20230806_125158.jpg
    20230806_125158.jpg
    2.1 MB · Views: 26
  • 20230802_202846 - Copy.jpg
    20230802_202846 - Copy.jpg
    2.3 MB · Views: 27
  • 20230802_203529.jpg
    20230802_203529.jpg
    1.3 MB · Views: 27
  • 20230802_203537.jpg
    20230802_203537.jpg
    1.4 MB · Views: 29
  • 20230810_101345.jpg
    20230810_101345.jpg
    2.3 MB · Views: 28
  • 20230810_101413.jpg
    20230810_101413.jpg
    3.2 MB · Views: 29
  • 20230810_101038.jpg
    20230810_101038.jpg
    2.9 MB · Views: 28
  • 20230810_101125.jpg
    20230810_101125.jpg
    2.4 MB · Views: 24
  • 20230802_203513 - Copy.jpg
    20230802_203513 - Copy.jpg
    2.5 MB · Views: 24
For tracking revs, get a Tach/dwell meter , switch to revs. Much quicker, cheaper than worrying about fixing tacho. Good to see your HUCO pump high on the inner guard, (I was worried about the height), so now I will move mine up there.
Automotive DMM with Dwell and Tacho | Jaycar Electronics
Do you know the serial no on the LT77? if there is a flat pad near the drain plug, serial should be on it. If not, on the bottom of the front of the iron case, which will mean its early, and not very good - try to find at least a suffix C box, Serials starting CL are from a Triumph, 19A is SD1...etc.
 
My rev counter didn't work so I removed it, cleaned the connections then refitted it and it works fine now. Worth a go....
 
How did you manage scorch marks on the outside of that rear wing?
Admit it, you've been doing burn-outs 'coz you're getting new tyres anyway, right!? :cool:
 
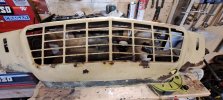
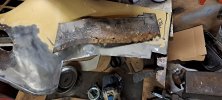
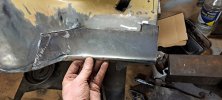
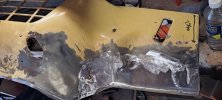
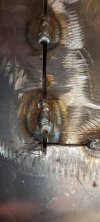
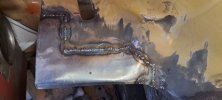
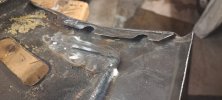
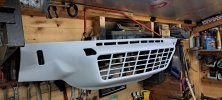
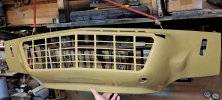
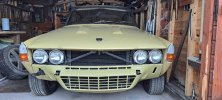
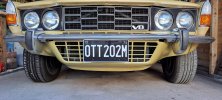
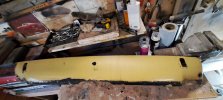
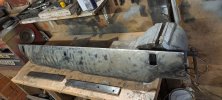
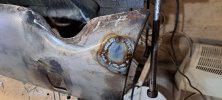
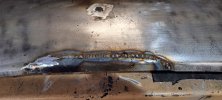
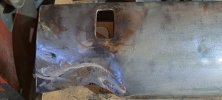
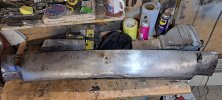
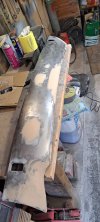
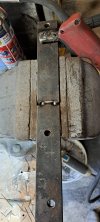
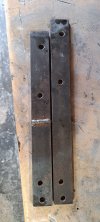
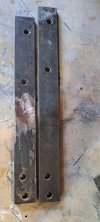
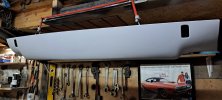
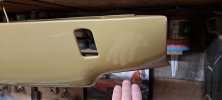
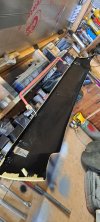
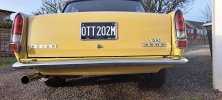
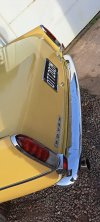
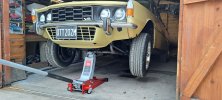
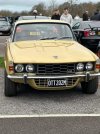
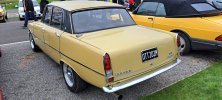
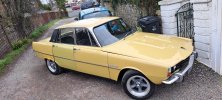
Hi all, been a while but much work completed in-between driving & enjoying the car. Now fitted slightly smaller tyres which vastly improved the clearance. Have had both front & rear valances off for restoration, bare metalled, rust cut out, new sections made n welded in, smoothed out the rear valance for a cleaner look and shortened the bumper irons by 25mm to bring it closer to car, just looks better in my opinion, stuck out too far before. Etch/Epoxy primered & 3 top coats of gloss to finish it off. New USA style number plates fitted.
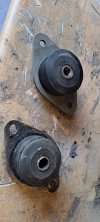
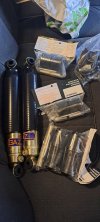
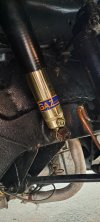
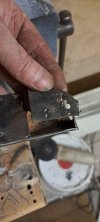
Have now 100% fully poly bushed the whole car including the three rear diff mounts, all new GAZ adjustable shocks too. Drives really well now, especially now being manual. One slight niggle is when the car is warm it judders when pulling away in 1st and also when selecting reverse gear. Absolutely fine when cold, the box is an old SD1 LT77, all new clutch components oil shaft seals, rear main seal as engine was fully rebuilt 2yrs ago. All l can think of is l haven't yet properly protected the clutch master cylinder with heat wrap, l have yet to fit the heatsheild which originally protected the brake mastercylinder , the clutch master cylinder is now fitted next to it so fairly close to the rear of the exhaust manifold, so once the car is hot is the excessive heat being soaked up the clutch master cylinder and causing it to not work properly? if l pull away in 2nd gear its fine. Took the car out this morning for a quick drive and absolutely fine, nice n smooth as didnt get hot, I did the same conversation on my last P6 (red one) but l wrapped the master cylinder in heat wrap, refitted the original heat shield and wrapped the exhaust manifold too. Also made and wrapped a heat shield to sit under both master cylinders for extra protection. I'll do the same to this car and see if that cures it.
 

Attachments

  • 20240216_094930.jpg
    20240216_094930.jpg
    2 MB · Views: 16
  • 20240216_094334.jpg
    20240216_094334.jpg
    1.5 MB · Views: 16
  • 20240216_142216.jpg
    20240216_142216.jpg
    1.2 MB · Views: 16
  • 20231224_160640.jpg
    20231224_160640.jpg
    2 MB · Views: 14
  • 20231224_171139.jpg
    20231224_171139.jpg
    2.8 MB · Views: 16
  • 20231224_171201.jpg
    20231224_171201.jpg
    2.8 MB · Views: 15
  • 20231225_111523.jpg
    20231225_111523.jpg
    2.8 MB · Views: 15
  • 20231227_130448.jpg
    20231227_130448.jpg
    2.7 MB · Views: 15
  • 20231227_135507.jpg
    20231227_135507.jpg
    1.6 MB · Views: 15
  • 20231227_140149.jpg
    20231227_140149.jpg
    2.6 MB · Views: 16
  • 20231227_154129.jpg
    20231227_154129.jpg
    2.3 MB · Views: 15
  • 20231229_143831.jpg
    20231229_143831.jpg
    1.5 MB · Views: 15
  • 20231231_142718.jpg
    20231231_142718.jpg
    2.6 MB · Views: 15
  • 20240103_182142.jpg
    20240103_182142.jpg
    2.4 MB · Views: 15
  • 20240106_094211.jpg
    20240106_094211.jpg
    2.7 MB · Views: 16
  • 20240107_115954.jpg
    20240107_115954.jpg
    3.3 MB · Views: 15
  • 20240113_154434.jpg
    20240113_154434.jpg
    2.1 MB · Views: 15
  • 20240113_165255.jpg
    20240113_165255.jpg
    2.7 MB · Views: 14
  • 20240115_175220.jpg
    20240115_175220.jpg
    930.7 KB · Views: 16
More pics
 

Attachments

  • 20240115_181212.jpg
    20240115_181212.jpg
    2.1 MB · Views: 18
  • 20240120_143538.jpg
    20240120_143538.jpg
    2.8 MB · Views: 17
  • 20240120_153049.jpg
    20240120_153049.jpg
    3.1 MB · Views: 17
  • 20240120_162734.jpg
    20240120_162734.jpg
    3.1 MB · Views: 17
  • 20240120_162751.jpg
    20240120_162751.jpg
    3.1 MB · Views: 17
  • 20240121_124533.jpg
    20240121_124533.jpg
    1.5 MB · Views: 17
  • 20240121_134610.jpg
    20240121_134610.jpg
    1.6 MB · Views: 17
  • 20240121_132401.jpg
    20240121_132401.jpg
    1.7 MB · Views: 17
  • 20240121_133112.jpg
    20240121_133112.jpg
    1.7 MB · Views: 17
  • 20240121_152442.jpg
    20240121_152442.jpg
    2.3 MB · Views: 16
  • 20240123_191000.jpg
    20240123_191000.jpg
    1.8 MB · Views: 17
  • 20240125_131720.jpg
    20240125_131720.jpg
    1.5 MB · Views: 15
  • 20240127_150459.jpg
    20240127_150459.jpg
    3.9 MB · Views: 18
  • 20240127_150537.jpg
    20240127_150537.jpg
    1.9 MB · Views: 16
  • 20240203_102328.jpg
    20240203_102328.jpg
    3.2 MB · Views: 17
  • FB_IMG_1707164444420.jpg
    FB_IMG_1707164444420.jpg
    84.4 KB · Views: 16
  • 20240216_144441.jpg
    20240216_144441.jpg
    3.2 MB · Views: 14
  • 20240204_095212.jpg
    20240204_095212.jpg
    3.7 MB · Views: 16
  • 20240204_130728.jpg
    20240204_130728.jpg
    4.5 MB · Views: 21
You've been busy! That's looking great and that's a lovely finish on the valence and the other parts you've painted. Cellulose again?

For the clutch issue, it could be the slipper pads. I had trouble getting the clutch to disengage fully when warm and the worn slipper pads were allowing the release bearing to either twist or rotate slightly (can't remember which, maybe both!), which was causing the problem. I'm fairly sure that judder in 1st was how it started.

These are the parts in question:

One thing I did to reduce the impact of any heat getting into the clutch system from the exhaust was to switch to DOT 5.1 fluid, which is compatible with 4 and has a higher boiling point as I thought heat might have been causing the problem. It didn't make any noticeable difference, so heat in the clutch fluid wasn't the problem in this case. Might still be worth doing for peace of mind though.
 
Hi Martin, thanks , not cellulose, l had several aerosol cans made up by my local paint supplier so l assume its a 2k mix, much better and stronger paint. I replaced the slipper pads two years ago do they should be ok, release bearing is new, clutch plate, pressure plate, uprated release arm ect. If the heatwrap doesn't work then I'll have to take the box off for further investigation, good tip on the Dot 5.1 fluid though!
 
Yep, shouldn't be the slipper pads then. How odd - with all of those new parts, nothing else springs to mind. Hope you manage to get it sorted!
 
Last edited:
Yes its odd one for sure, the only other thing is the gearbox could be on its way out, I've never tackled a rebuild with an LT77, I know you did a few years ago & a R380 ? One thought I had & again I'm too sure of the internal layout on these but are 1st and reverse gears on the same shaft and if so could the bearings be worn ? just a thought. Odd its fine when the car is cold...maybe I'll have to hit the credit card & go for a Tremac 5 spd conversion :)
 
I think it's unlikely to be the gearbox bearings - if it was bad enough to be causing that kind of problem then it would be making a terrible racket as soon as you released the clutch. I had a noisy one in at one point and it never caused any problems in that way. That's why I thought it could be the slipper pads, as I only had a problem when it was warm, cold it was perfect.

The reverse idler is on a separate shaft that's secured to the central plate of the gearbox, 1st is on the mainshaft. I did rebuild a couple of LT77's but must confess I got Ashcroft to do the R380...

I fancied one of the Tremec 6 speeds, but it's just crazy money, so went R380 instead. I understand that the Tremec is pretty much bulletproof though!
 
Back
Top