

You are using an out of date browser. It may not display this or other websites correctly.
You should upgrade or use an alternative browser.
You should upgrade or use an alternative browser.
My mean green hornet
- Thread starter corazon
- Start date


Baron von Marlon
Member
Ooh, looking good!
corazon
Well-Known Member
Had a very busy week at work and then some pressing exhaust welding to do on my v70 yesterday and today so little progress with the Rover since last time.
Here's my mig rig, it's a Furex Tradesmog 240

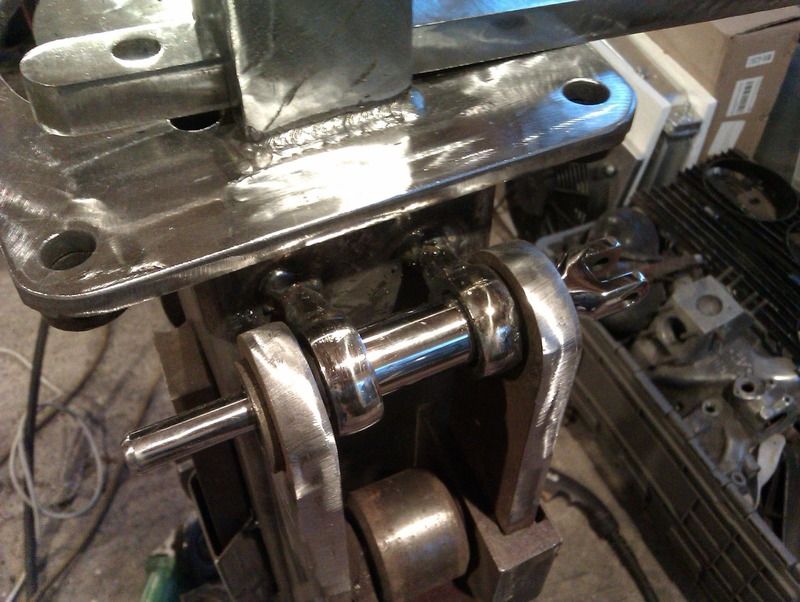
I've also spent a day upgrading my tube bender stand to accommodate all my formers and guides, it's nearly ready for paint.
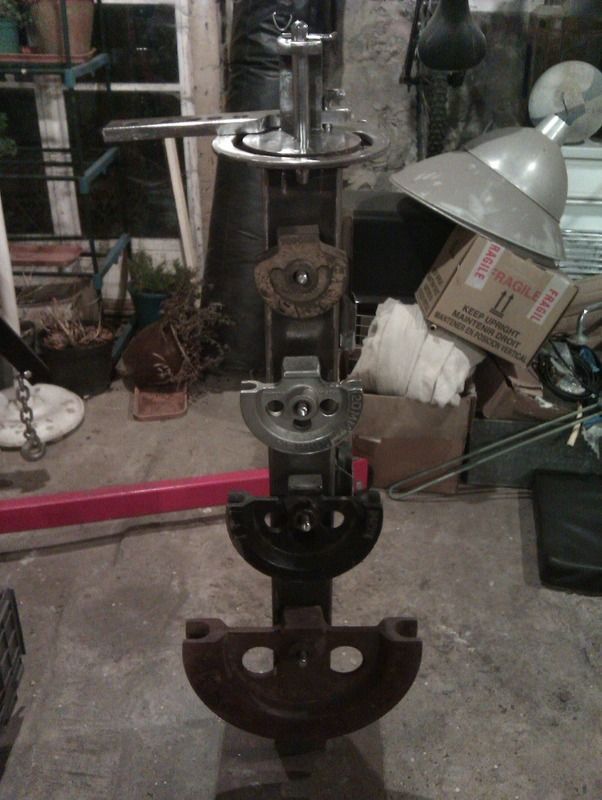
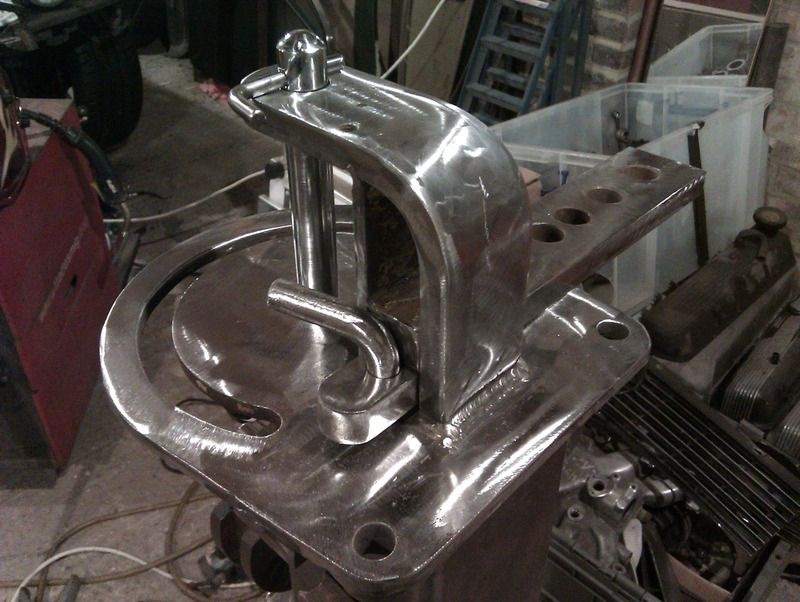
I have added a bracket on the back of the stand to hold the long handle when not in use. This bit of metal recycling included 2 scrap 3/8" ratchet handles, a scrap 3/8" breaker bar and a portion of rocker shaft. I'm polishing the chrome vanadium bits and the main pins for the bender and the rest will be painted black.
Jim
Here's my mig rig, it's a Furex Tradesmog 240

I've also spent a day upgrading my tube bender stand to accommodate all my formers and guides, it's nearly ready for paint.


I have added a bracket on the back of the stand to hold the long handle when not in use. This bit of metal recycling included 2 scrap 3/8" ratchet handles, a scrap 3/8" breaker bar and a portion of rocker shaft. I'm polishing the chrome vanadium bits and the main pins for the bender and the rest will be painted black.

Jim
I'm polishing the chrome vanadium bits and the main pins for the bender
Still got the polishing bug pretty bad then?
Nice Tradesmog.
corazon
Well-Known Member
Well it just lies dormant, I don't think it will go away that easily
It's more of a supplemental skill now though, I don't polish everything in sight any longer! I've also dramatically sped up my polishing process these days.
I've been spending most of my spare time trying to learn cad and cam with my desktop cnc mill. There has been a couple of teething problems, one quite major one with the spindle which went back to Italy for repair. I had a roughly milled part at this stage ( tube bending guide) but it wasn't fit for purpose yet as the sides hadn't been fully machined. Whilst the spindle was gone I decided to just go manual on it to get it to a functioning state, then threw a quick polish on the new aluminium to see how it will come up..

corazon
Well-Known Member
Well looky what came in the mail, the full Superpro V8 package
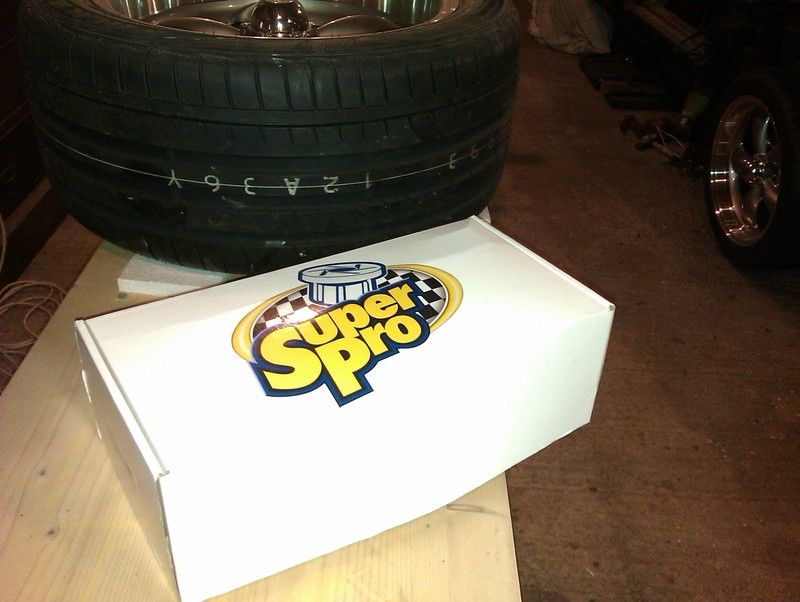
Also some Lechler Epoxy primer tinted black. So one of the next jobs is blasting/stripping/painting of suspension components and fitting the new poly bushes to all the removable arms. Anything I cannot fit in my blasting cabinet will be done down the road at a local blasters or with a strip and clean disc where applicable. The DeDion elbows will technically fit in my cabinet but I'm unsure how much maneuverability I would have around one..
I'm planning on getting a rotator/rollover jig/rotisserie for the base unit stripping, repairing and painting. This will be the next stage after I have truly finalised all the welding and fitment of the drivetrain.
I've just ordered upgraded 5/8" x 1/2" UNF rose joints for my diff installation, these are replacing the 1/2" thread version I originally purchased cheaply. These are already showing signs of corrosion and they haven't seen the road yet! The newer versions are chrome moly rather than zinc plated, chunkier, stronger and wont need lubricating!
I have a plan for the 1/2" versions, they will be used for the linkages on a shrinker/stretcher stand I'm planning to build
Jim


corazon
Well-Known Member
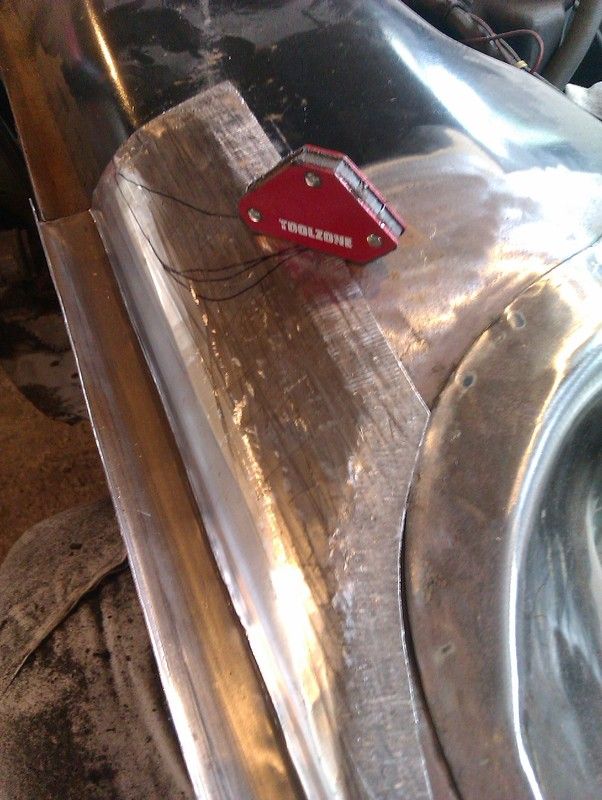
I've been playing with the bead roller and practicing at making my first full size complex repair panel. The rot in this area is not too bad but I thought I'd challenge myself to make a larger than needed panel, with compound curves and tipped edges/return flange.
I've been using a poly skateboard wheel in the bead roller to emulate forming closer to that of an english wheel, although nowhere near as smooth of course.
If I get or make a polished radiused steel die instead of the flat one I'm using, I would be able to get much closer in terms of smooth finish. I'm enjoying this so much that I am seriously contemplating building an English Wheel too.
For now I'm just happy to be roughly making the metal move to where I want it. Many problems with this first attempt, but that's what it's all about hey?!
I've also this week got my hands on a shrinker stretcher set which I've used a little on the top edge and curved edge. They are perfect for making the curved steel flanged channel for flush fitting the windscreen. I'll be making a foot operated stand for them as soon as I return from Athens for a well overdue holiday starting tomorrow!
Jim
I've been using a poly skateboard wheel in the bead roller to emulate forming closer to that of an english wheel, although nowhere near as smooth of course.
If I get or make a polished radiused steel die instead of the flat one I'm using, I would be able to get much closer in terms of smooth finish. I'm enjoying this so much that I am seriously contemplating building an English Wheel too.
For now I'm just happy to be roughly making the metal move to where I want it. Many problems with this first attempt, but that's what it's all about hey?!
I've also this week got my hands on a shrinker stretcher set which I've used a little on the top edge and curved edge. They are perfect for making the curved steel flanged channel for flush fitting the windscreen. I'll be making a foot operated stand for them as soon as I return from Athens for a well overdue holiday starting tomorrow!


Jim
unstable load
Well-Known Member
Nice work! A mate has knocked up a few small English Wheels and he is also having fun making shapes in metal.
corazon
Well-Known Member
I made a foot operated stand for my recently acquired shrinker and stretcher today.
It's not quite finished, but the other side should be quick now I've got all the angles and measurements sorted.
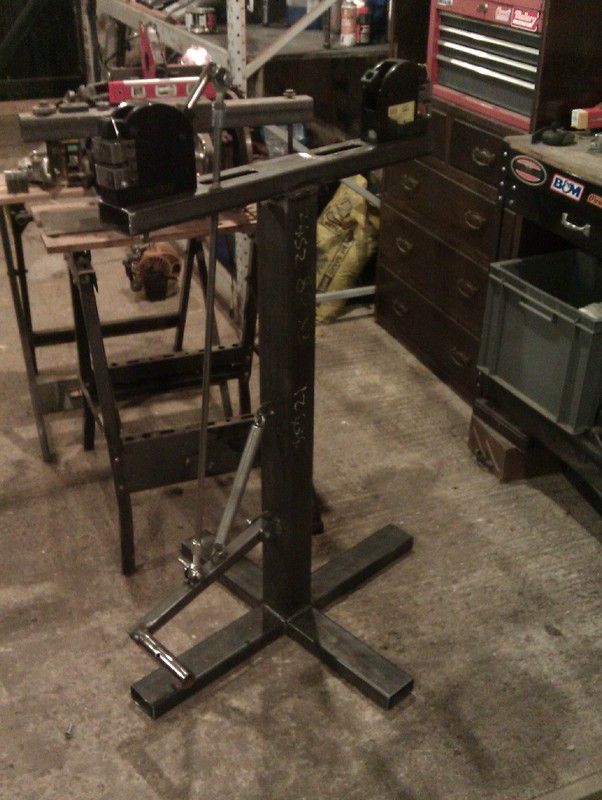
The most important aspect, the functionality, is great. So I'm pleased with that. I borrowed some design elements from a few different builds I'd found on google, and made it up as I went along to make it work as best as possible.
There is some adjustment in the rods and joints if needed, but it seems spot on in my first tests. Nice positive feel and dynamics from different pressure on the pedal.
I bought a couple of strong springs for the pedal return which I seemed to have got lucky with as it feels just right.
Jim
corazon
Well-Known Member
Some much needed progress today.
I had a friend come round to lend a hand with the diff fitment, it really saves so much time having four hands instead of just two.. He also happens to be a professional welder of many years.
He usually gives me welding tips and pointers but today I decided I wanted him to weld the critical structural points of my diff installation just to be completely sure of its integrity.
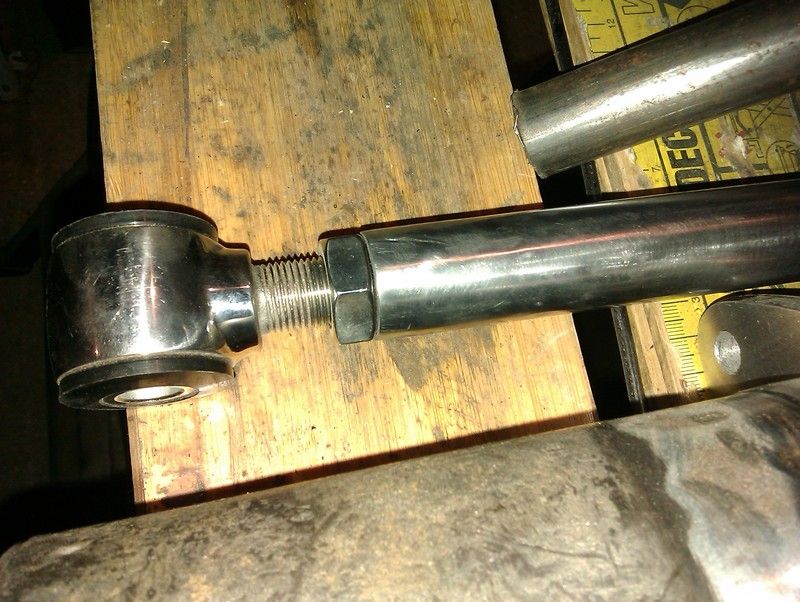
When I wasn't looking he also neatly plug welded some of the threaded bungs into the tubes for the ladder bars. Here they are after a little finishing work:
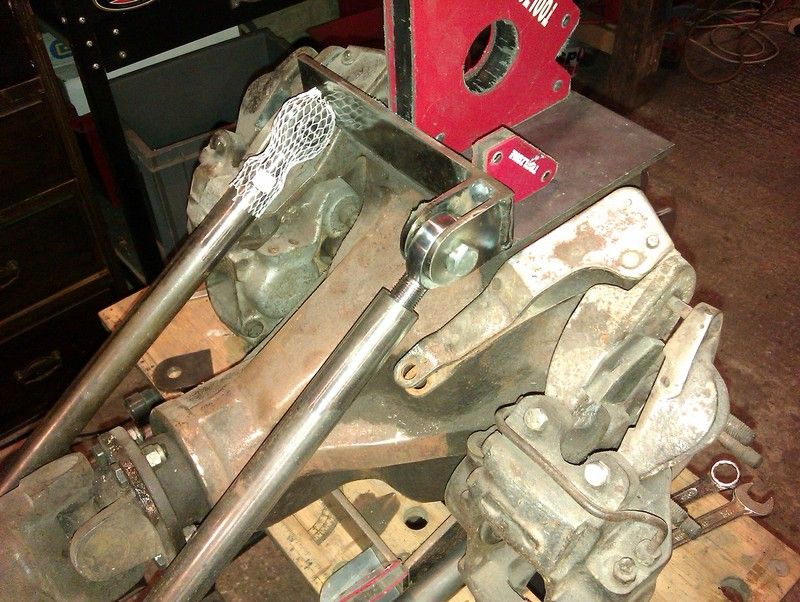
No photos of the mostly complete diff hanger mounting yet as I bolted it back in last thing today to triple check some measurements for the ladder bar links.
It's very sturdy however and we capped the ends of the box section after welding in spacer tube sleeves for the through bolts.
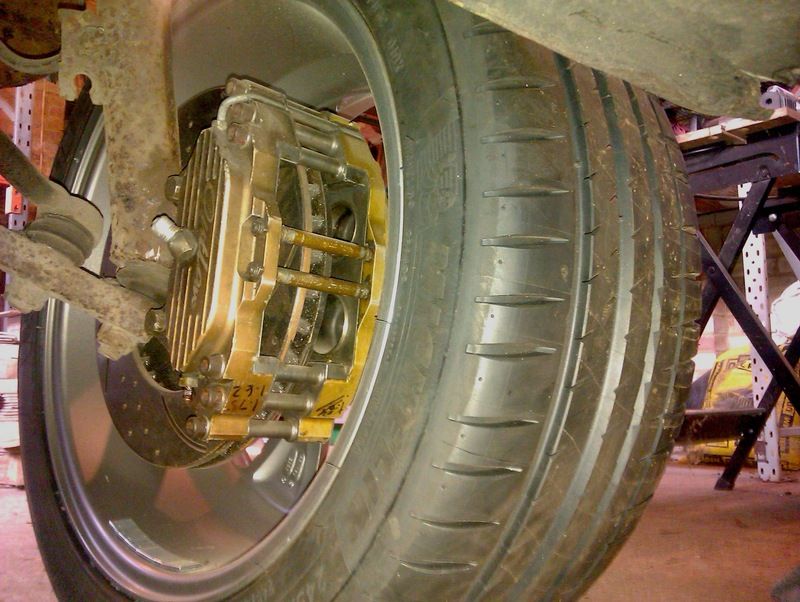
I realised I never showed any photos of my front brake setup after switching out the unsuitable outlaw calipers and fitting the better versions I bought. So here you go
Jim
I had a friend come round to lend a hand with the diff fitment, it really saves so much time having four hands instead of just two.. He also happens to be a professional welder of many years.
He usually gives me welding tips and pointers but today I decided I wanted him to weld the critical structural points of my diff installation just to be completely sure of its integrity.
When I wasn't looking he also neatly plug welded some of the threaded bungs into the tubes for the ladder bars. Here they are after a little finishing work:


No photos of the mostly complete diff hanger mounting yet as I bolted it back in last thing today to triple check some measurements for the ladder bar links.
It's very sturdy however and we capped the ends of the box section after welding in spacer tube sleeves for the through bolts.
I realised I never showed any photos of my front brake setup after switching out the unsuitable outlaw calipers and fitting the better versions I bought. So here you go

Jim
Baron von Marlon
Member
Looking good!
ButterFingers
Active Member
when I had a Morgan plus 4, there was a fellow on the "talk Morgan" forum who used to get under his Morgan and 'polish the S/S exhaust system', so there you go,Still got the polishing bug pretty bad then?
Nice Tradesmog.
the infection is alive and still living in the old dart...
Peter
corazon
Well-Known Member
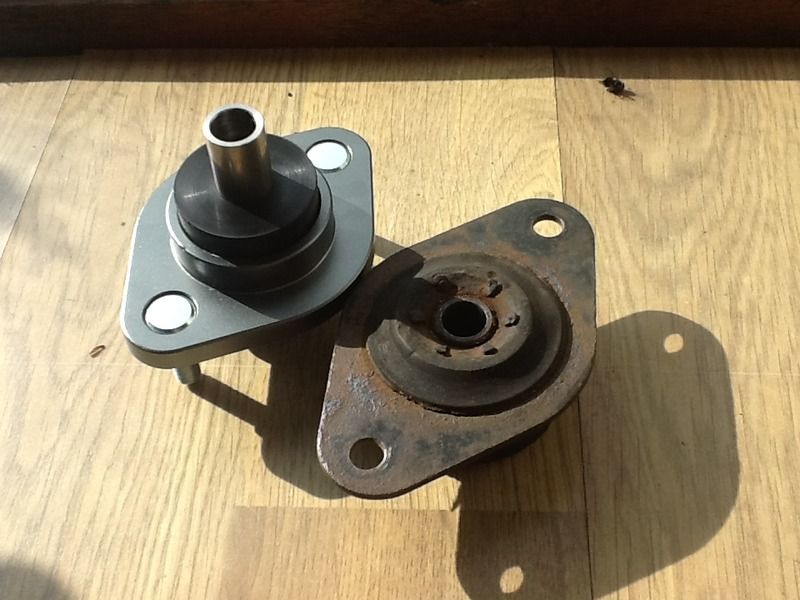
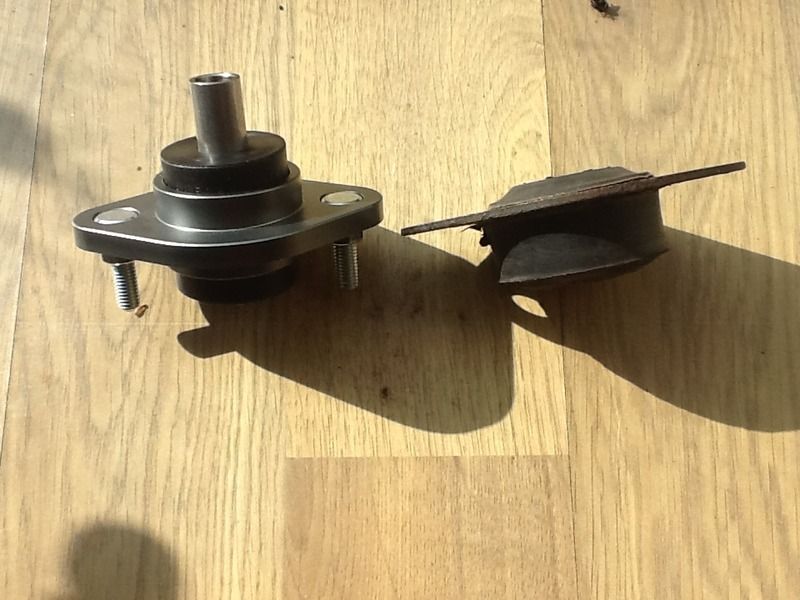
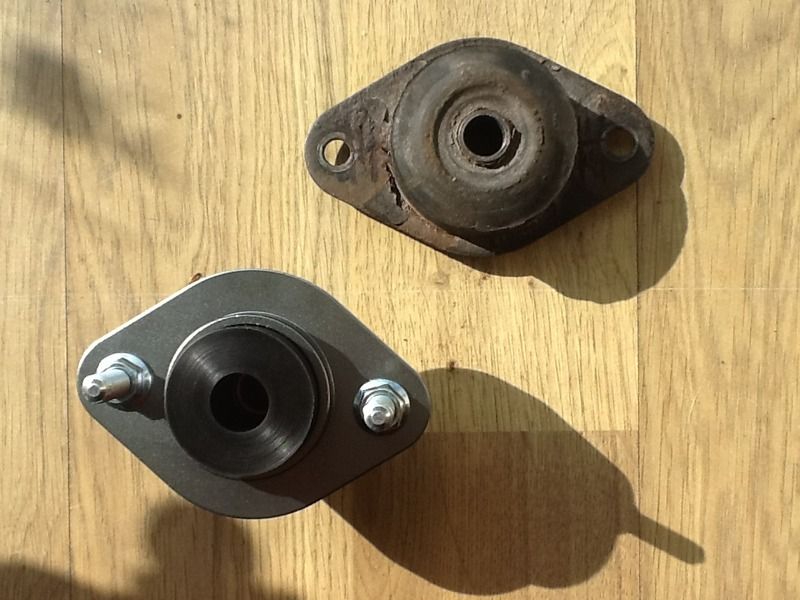
So instead of making these as planned, I coughed up the money for a pair from power flex which include a lifetime warranty (in their intended application of course).
I was planning to make them exactly the same size as the originals, these are a little smaller and the bolt spacing a little closer, but very easy to fit.
They are heavy duty aluminium and poly mounts for Bmw rear shocks, I went for the harder poly to match my front ladder bar rod ends.
Here are some comparison photos
Stock Rover metalastic rubber diff mounts VS Bmw Heavy Duty Poly mounts

Jim
I was planning to make them exactly the same size as the originals, these are a little smaller and the bolt spacing a little closer, but very easy to fit.
They are heavy duty aluminium and poly mounts for Bmw rear shocks, I went for the harder poly to match my front ladder bar rod ends.
Here are some comparison photos
Stock Rover metalastic rubber diff mounts VS Bmw Heavy Duty Poly mounts


Jim
Last edited:
corazon
Well-Known Member
Ah photobucket, ruining one person's life at a time
Here's some pics of the new bmw poly rear mounts fitted up


The next step is to strengthen the mounting points on the base unit. The idea is to weld or bolt a 5mm thick strap between the two mounting recessed box sections. To complete the stiffening exercise I'm going to join the two main bolts that hold the diff hanger to the mounts with a tubular brace bar.
Jim
Here's some pics of the new bmw poly rear mounts fitted up
The next step is to strengthen the mounting points on the base unit. The idea is to weld or bolt a 5mm thick strap between the two mounting recessed box sections. To complete the stiffening exercise I'm going to join the two main bolts that hold the diff hanger to the mounts with a tubular brace bar.
Jim


