My 3500s project - future daily drive

That 3.9 plenum certainly suits the underbonnet ambience better. But do you have any idea how good it is at gas flow? One of the things I took away from your previous work was that the P38 Gems manifolding and heads is the best there is in standard trim. I'd hate to take a step back from there.

Chris
 
Hi Chris,

The GEMS plenum is nearly identical, just being a little squarer so there is more distance between the top of the trumpets and the roof of the plenum at the front and rear. I imagine that this greater clearance would help increase the speed of air into the cylinders at higher revs, and probably moves peak torque up a bit compared to the 3.9 one...

From the drivers seat I can say that there is no real appreciable difference.

If you really did want to keep the GEMS plenum I am sure you could do something similar to the MGB mob where they machine a small amount off the plenum base and then the same amount from the trumpets, thereby lowering the whole lot but keeping the overall clearance between trumpets and plenum chamber the same.

Having said all this some TVRs I believe had no trumpets, and simply had radius' machined into the ports on the ram housing base. have a look at http://mez.co.uk/ms12-new.html for some examples.
 
Proper automotive porn there! I've seen the page before, but the injection manifolds have developed considerably....

Food for thought!

Chris
 
Hi Jamie,

What you are doing is very impressive indeed. :) I am enjoying reading your updates and seeing the progress that you are making. Awesome stuff!!

Ron.
 
Thanks Ron, that's very kind of you to say - its always nice to get some feedback :D

I will endeavour to keep things updated here as I refine and improve things with the EFI or tackle any of the other jobs that occasionally rear their heads at the most unexpected of times.

Like the fact that when it rains now I get a boot full of water. Must have disturbed the seal around the filler when taking the tank out to fix the leak. Bum!

For now I have just removed one of the bungs to allow it to drain...
 
SydneyRoverP6B said:
Hi Jamie,

What you are doing is very impressive indeed. :) I am enjoying reading your updates and seeing the progress that you are making. Awesome stuff!!

Ron.
Ron has spoken for a lot of us .
I too marvel at your catalogue of work . Impressed
 
GRTV8 said:
SydneyRoverP6B said:
Hi Jamie,

What you are doing is very impressive indeed. :) I am enjoying reading your updates and seeing the progress that you are making. Awesome stuff!!

Ron.
Ron has spoken for a lot of us .
I too marvel at your catalogue of work . Impressed
Agreed - I'm certainly finding this very interesting, as it's a road I want to go down as well, probably sometime next year.
 
whaaaaaaa!? How have I missed this thread?

Stand by for some serious copying! And some questions! Great write up, thanks. I've had a Microsquirt with MS3 on it delivered this week....
 
Small update - still haven't got a Throttle position sensor fitted as I have been busy, although I am not really sure with what!

Consumption is generally in the 25's now unless I drive like a looney in which case it can drop to 20-21 or so. It has been up to 28 on a run, and I think that I can probably get another 1 or maybe 2mpg on the average figures, however with it returning fairly reasonable figures trying to eke out that last bit has not been much of a priority. Performance is still great, I can easily break traction when pulling away, even if I am rolling already - something I do my best to avoid if possible as I worry about the poor transmission!

Other things that have been addressed since my last update (in no particular order) are:

  • Had water leaking in around the rear passenger door top. Adjusted that top so that it closed a bit tighter on the seal, which resolved that.
  • Two new front tyres fitted before Christmas, they now match the rears (Dunlop Sport Bluresponse)
  • The clock now keeps time rather than losing 2 minutes a day like it did before. That was a long winded job - adjust, leave a week or so, adjust, leave, repeat.
  • Heater efficiency seems to have dropped off recently, but upon removal all the foam I replaced a while ago looked ok. I fitted a bleed to the top hose on the heater box to get rid of airlocks which has helped a touch. May need to investigate linkage setup to see if anything has gone wonky there.
  • Electric fan is now controlled automatically by the Megasquirt via a relay.
  • Thermostat is now an 88 degree one (trying to get more heat from heater).
Niggles that need sorting are:
  • Lack of TPS and associated waste of fuel from not using fuel cut and imperfect Aceel enrich tuning on 100% MAP based.
  • Wiper delay non-functional.
  • Wobbly speedo.
  • PAS pump has started squeaking - fluid level is fine and as clean as clean can be...
Other things that I have simmering are:

  • LT77 five speed conversion - I finally won a bellhousing for the box that I have had sitting around in the garage for ages! I can start stripping that now with a view to rebuilding ready for installation. Just need a prop from an auto now!
 
LT77 five speed conversion - I finally won a bellhousing for the box that I have had sitting around in the garage for ages! I can start stripping that now with a view to rebuilding ready for installation. Just need a prop from an auto now!
You could use the auto bell housing with an adapter plate. It will need a hole machined for the clutch lever and a bracket for the slave, but it is doable. That's how I ended up doing my LT77 conversion after I couldn't locate a manual bell housing.
 
So Friday afternoon I came home to this:


And 10 minutes later I had offered it all up/loosely bolted on, which allowed to check selection of gears for the first time since I bought the box - all seems to be ok :D


Today I decided to make a start on cleaning bits, the bellhousing needs more, but the shifter mech came up nicely:


The serial number on the side of my box is odd, all it says is "D2" with a very large capital D. Need to look into what that means exactly.
 
HI, I am also considering upgrading my 3500s 4 speed box with a 5 speed box.
Have you or anyone else produced a list of parts required? or documented the process?
Regards
Dave
 
Dave - really sorry for not replying sooner, I have no information on the 5-speed conversion other than what is here on the forum.

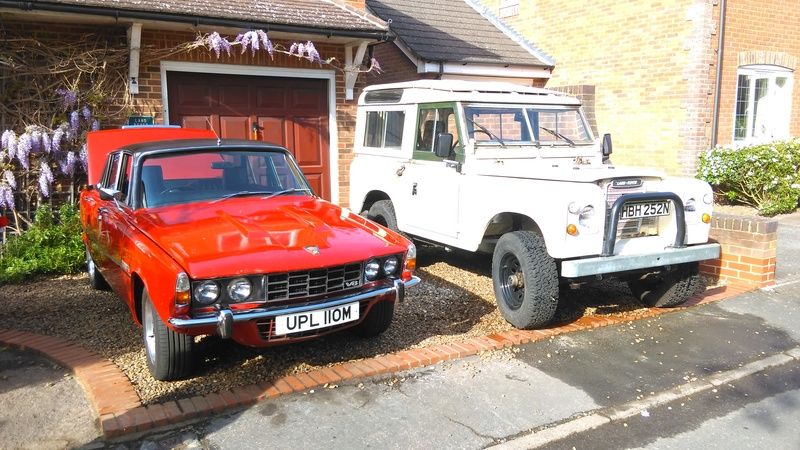
Update time.... Here it is next to my youngest brothers Series 3 - it got its first MOT in 14 years a few weeks ago.


So an update here is well overdue, the car has been, well…. Just running – not really missed a beat at all in the last year until recently.

With this new state of equilibrium my attention had mainly turned to my Land-rover 90, so it was the niggly little things that got sorted on the P6 here and there.

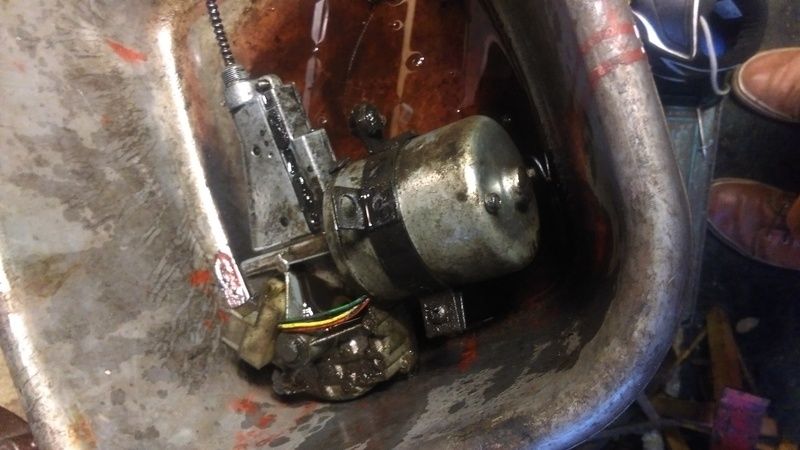
First of these was the non-functional intermittent wipe. Following the guide here on the forum I removed the motor, stripped, cleaned and regreased it, and sorted out the vacuum capsule on the delay unit. I am glad I did this, as it turned out that two of the rubber mounts had parted company and it was only held in place with one!


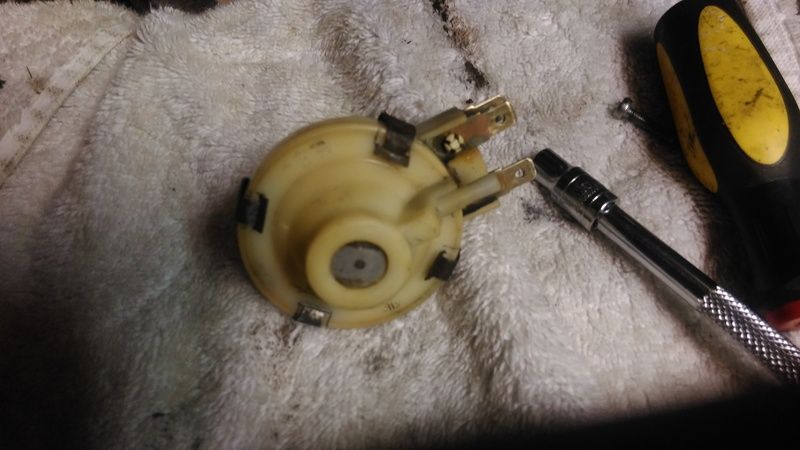
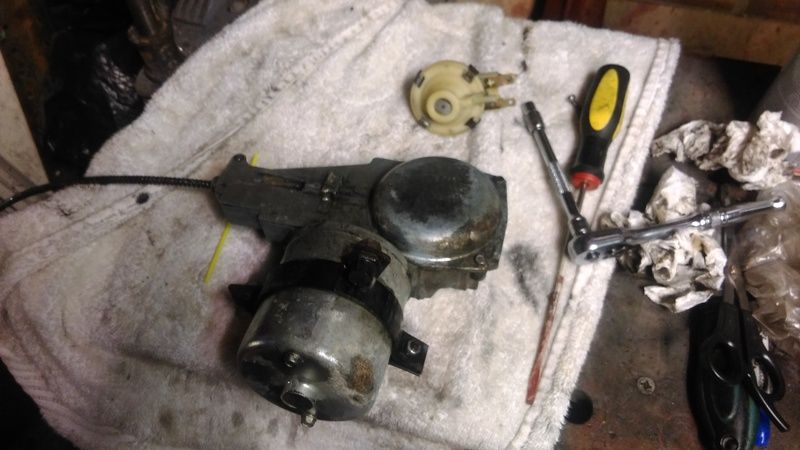
With everything refitted the wipers now work as they should, including intermittent – I no longer have to switch on,off,on,off,on,off in light drizzle – bliss! The upshot to having cleaned everything, regreased and secured it to the base unit properly is that my sweep is slightly better and the wipers definitely run quicker.

After running around with my acceleration enrichments barely adjusted from stock I decided that I had had enough of the slight hesitation sometimes apparent when hitting the throttle. Data logging my journeys, reviewing and making small incremental adjustments has got things dialled in a lot more closely now, although I still haven’t got it perfect yet. A few big changes that helped were changing the MAP lag factor to reduce response time (MS2 defaults everything to 50 out of 100, with 100 being no lag- MS1 doesnt have these lag factors so there isn't an issue).

This extra fuel going in then meant my fuel consumption dropped slightly, so I had to look at where I could pull it back! An obvious one was the warm-up enrichment. Megasquirt tuning is done through an excellent piece of software called “Tunerstudio” and with this you can tune your VE-table and warm-up automatically.

On reviewing the warmup tuning settings I had previously used I noticed that Tunerstudio was applying an offset to the warmup. Rather than simply tuning to achieve your target AFR, it can make the mixture richer/leaner depending on temperature. I had used the default curve previously which was adding half a point of richness when cold. This was removed so that the software was targeting normal mixtures throughout the warmup cycle, then after leaving the car overnight it was retuned. This entailed starting the car with the laptop connected and letting it idle up to normal temperature, while the software did its thing. Easy!

This pulled things back to previous normal levels of approx. 25mpg and things were good for a while.

Then about a month ago I started to get a small bit of bucking now and then when accelerating, the car would do it once or twice over the course of my 35 mile trip to work. I firstly assumed that this was down to my latest changes to accel enrichment, so took some datalogs – I couldn’t see any reason for it, so continued using the car and continued logging.

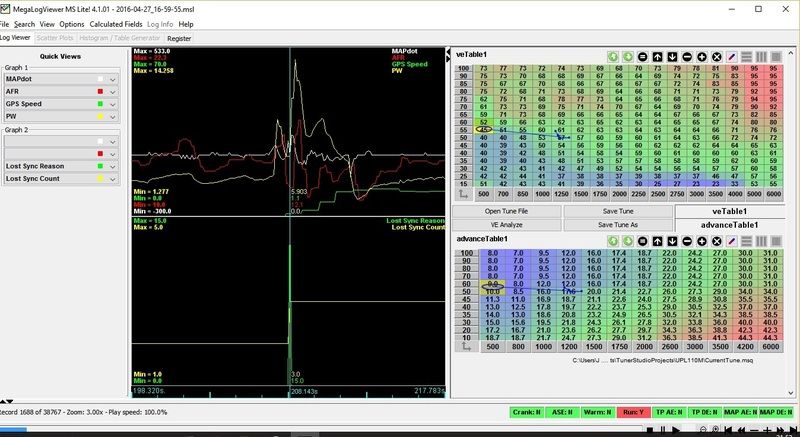
Then one afternoon on the way home it was particularly badly behaved – and it was during one of these episodes that the car bucked, and I noticed the rpm picked up momentarily and ramped down again. This behaviour was exactly the same as starting a hot engine, with the idle air stepper opening to its full position and then rapidly closing down. This was my eureka moment and I realised that the car was effectively dying for a split second and then “restarting”. The ecu sees rpms below a certain threshold as “cranking” and then it was picking up again into the normal “run” mode. I added an extra gauge to the dashboard layout on my phone for “Lost sync counter” and saw this incrementing everytime the car sputtered. This confirmed my suspicions, so now I had to find out what was causing it.

Reviewing the logs again I found a field that I had not previously checked “Lost sync reason” and this was giving a reason “15” for every event in the log. This denotes a loss of communication with the EDIS module.


I checked all power feeds and earths to the MS and the EDIS and everything was fine and secure, I then decided to check my HT leads as if one had gone bad then the electrical noise could be enough to cause the resets.

All HT leads were removed, visually checked and measured for resistance. Most were between 9-12kOhm, apparently 5k is the minimum needed. Cylinder 3 was not good and had corroded green at the coilpack end – I must not have seated the boot down correctly. Its resistance was measured at 15MOhm! The terminal was cleaned up, but the end of the cable was in too bad a state, so I shortened it and re-terminated it with a new connector.


I am happy to report that since then all of my reset issues have gone, and what it shows really is how powerful MS can be with its ability to datalog and really review what is going on with your engine.


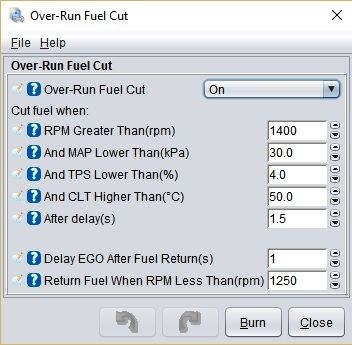
One last change I have made was to fit a throttle position sensor on a couple of weeks ago. This has allowed me to enable overrun fuel cut for the first time, so that under certain conditions the ECU will shutdown the injectors just as a modern vehicle does.


The first tank I had a really bad week of traffic and still got 25mpg - I have since been down to Cardiff for the weekend, as pictured here with my mate Tim:


Filling up down there, and again later in the week back at home i got 27.5mpg on both tanks. Promising!

Looking forward I have the 5 speed still sat in the garage looking at me, and perhaps (if I can collect the bits I need) I might try to get this in during the early autumn this year.
 
Just read through your thread, awesome stuff you're doing there.

Keep up with the updates, I need the info on the EFI conversion :) I've made a start on mine.

Cheers

Richard
 
Filling up down there, and again later in the week back at home i got 27.5mpg on both tanks. Promising!
Impressive - you'll be getting unheard of MPG figures once you've done the 5 speed conversion! Mine will do around 27mpg on a long run, but I'm still running carbs, so you should be well in the 30's.
 
Well after the car passed its MOT back on the 15th things had been continuing to go smoothly.

Until this Friday that is.

I got home from work and the car sounded bad, something sounded like a bearing was going. I suspected the alternator but when listening to it with a screwdriver it was ok.

That left the waterpump, and sure enough that sounded crunchier than a box of Kellogs Crunchy Nut Cornflakes.

I set to work stripping it down, and sure enough the pump wobbled about all over the place once the belts were off. I started to undo the pump bolts and exactly as I feared two of them snapped without me even trying to undo them. Arse!


Oh well i thought, as long as the ones going into the block through the case dont go ping, i'll be ok...

With careful application of penetrating fluid and steadily working them back and forth i got them all out. Happy days!

Until I got the bottom right hand one out fully. The thread was no longer attached to the end! Balls!


That'll be the timing cover coming off then. So I took the rad out to give me some more room:


The crank pulley came off fairly easily and the boot started filling with bits:


I got the power steering pump bracket out the way and the timing chest off.


Heres the offending bolt:


Zap with welder! (Actually it took a few goes to get it to go, i kept shearing the nuts off that i had welded. On the last go i went for broke and cranked the current to maximum, which did the trick).


And here it is in my hot little hand after winding it out:


So that left me the job of cleaning up the timing cover, and removing the two broken bolts from there. Well I got one out but the second has resisted all attempts to be shifted with the welder. Worst case I use the spare timing chest i have in the garage.

Needless to say the Landrover will be getting pressed into service this week, at the cost of £10 a day to park and with a buttock-clenching 18-21mpg consumption average... Argh!

That gives the incentive to get the P6 sorted ASAP.

Flipping waterpumps!:eek:
 
Nasty :mad: I always use copper grease on everything when I put working on Sparky's engine.

I'm sure you'll have it all working again soon
 
Copper grease is a must I reckon - I am slowly, slowly getting to the stage where most of the bits on the car have now been removed under my ownership and should therefore come undone again (in theory) a bit easier next time.

Unfortunately the waterpump is one bit that I haven't had to touch so far, and as soon as I realised it was toast a deep sense of foreboding came over me! Rightly so it seems...
 
If you have the patience, getting the broken bolts out the cover is doable.
Carefully centre punch the broken stub to give the drill a point of purchase and, starting with a small (eg 1.5mm) drill carefully into the bolt, keeping it square as you can. Repeat with gradually increasing sizes and using lots of oil to keep it cool and slippy. The heat from the drilling and the oil will most likely loosen things up so you can use an Eezy-out or maybe even a LH twist drill for the final step.
Seeing as the pump is scrap, I'd also blast it with a heat gun to get the process started.
 
Had a late start this morning so spent an hour in the garage - I am going to use my spare timing cover for three reasons (pics to follow):

1- The sump bolt hole on the passenger side has been cross threaded, and the material around the bolt hole is slightly proud. The only way I can describe it is if you imagined putting the bolt in a couple of turns and then giving it a hefty sideways knock with a hammer, with it pulling up the aluminium on one side as a result. :mad:

2- The back of the water pump area on my current cover is heavily pitted from what I can only assume is a combination of cavitation and/or corrosion.

3- Using the spare cover means I have no bolts to drill out of the timing cover. ;)

I degreased the whole thing, and have disassembled the oil pump so that I can clean everything before building it back, the oil pump cover was lightly scored but not badly. I will strip my original pump next and see if that cover is in better condition and use the less scored of the two.

Have also ordered some "Duralac green" anti corrosion goop to use on the bolts when they go back in (after reading a thread on here that recommended it), and have a variety of gaskets and seals winging their way to me as I type. Hopefully it'll be up and running in the next week.
 
Back
Top