Blue '73 2000

8866nk said:
that looks terrific
i love the look the wheels give
it never fails to amaze me the difference something simple like different wheels make

Thanks

grifterkid said:
Just clocked the position of the radio aerial on the rear wing... Very intriguing! Is it an electric aerial by any chance...?! I thought the normal location is on the roof or on the rear decker panel (opposite side to the petrol cap)...?!

Yes it is an electric aerial on the rear wing. It was on the car when I bought it, although I've not tested it out yet as the radio doesn't work. Might get myself a radio after Christmas and see if it works! 8)
 
herts2000 said:
New number plates will smartern her up :D

Yes I've been thinking about some metal black and silver ones but being on an 'M' plate not sure if they would be legal. I don't like new plastic plates on a classic as they just don't look right! :shock:

Been busy this week. Took the car for MOT and it failed on the rear brakes and a rear wheel bearing. One of the brake pads was down to the metal due to a dodgy caliper. I've replaced both discs and pads and also rebuilt both calipers with new seal kits. I quite enjoy rebuilding the calipers, but not laying under the car getting the b***ard things out! Oh well hopefully I won't have to touch them for a while now. Next job is to tackle the rear wheel bearing. :?
 
I believe that white on black plates are only legal for cars registered before 1st January 1973 as far as I know.

However, I think they look out of place on a series two in any case.
 
Johnny E said:
I believe that white on black plates are only legal for cars registered before 1st January 1973 as far as I know.

However, I think they look out of place on a series two in any case.

I believe it's only legal for cars manufactured before 01/01/73.
 
adamjack said:
Very nice ,those wheels really set it off 8)

Thank You

Willy Eckerslyke said:
Framptons http://www.pl8s.co.uk do proper riveted, reflective plates in the correct size for the Rover P6. I.e. same as what you have, but new. (Personally I believe silver and black plates look wrong on a Series 2 P6.)

Thanks for the link Willy, I've used Framptons in the past and was pleased with their service. I may treat myself to a new set at somepoint. :)

Wheel bearing has been replaced and TJJ now has a new MOT.
 
Well I got the spanners out again yesterday and replaced the exhaust manifold. As you can see, the old one had split and the car has sounded a bit like a VW Beetle for the last week! :LOL:

14372129498_e35f4e383a_z.jpg


Luckily I bought a secondhand one off ebay which was going cheap a few months ago. It was quite an easy job to change and none of the bolts had seized which was a bonus. :D
 
Getting ready for the winter!

During the last few weeks I've managed to get on with some jobs on the Rover. Firstly I changed the front windscreen and rubbers. The old rubbers were causing water leaks into the footwells, also the screen had a stone chip. The bottom rubber was so bad that it was crumbling when I removed it. I managed to pick up a screen for 99p off ebay which although had a couple of minor scratches was in excellent order. As a sealant I used Arbomast on the new rubbers and it looks to have done the job of keeping the water at bay.

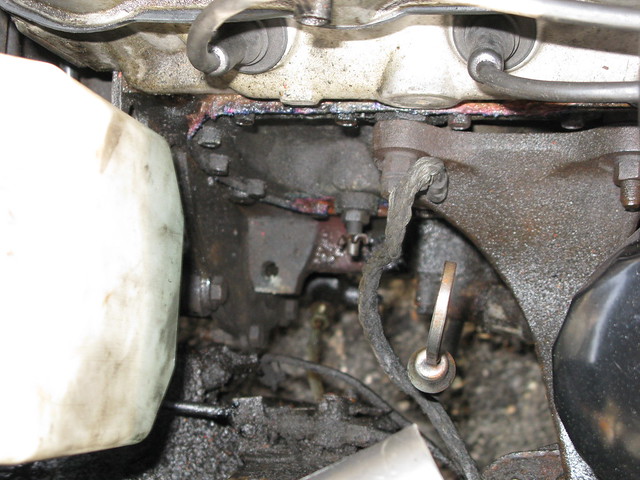
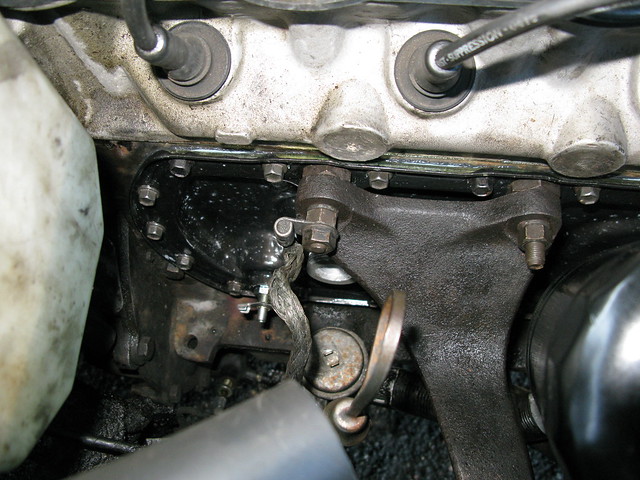
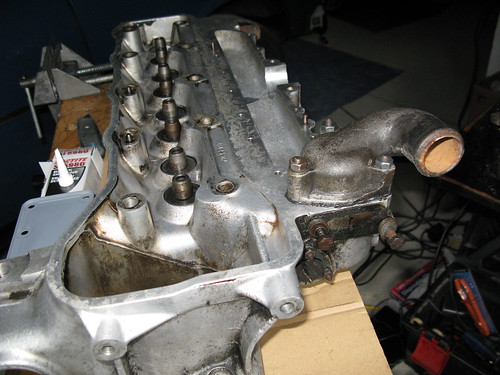
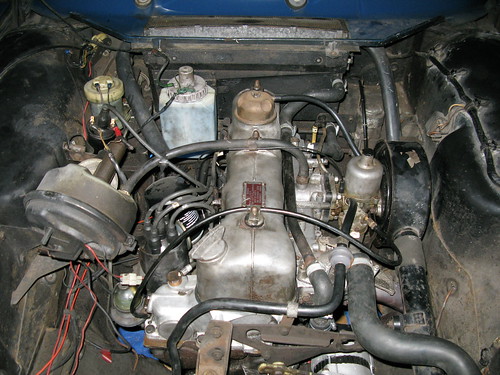
This week I changed the Driver's side engine plate as the old one had been leaking in the bottom lefthand corner. I hadn't been looking forward to this job as it looked like it could be awkward to get at all the 22 little bolts out, and then get them back in!

15277903656_01f67d5f90_z.jpg

(A rather damp looking engine side plate which was leeking from the bottom left corner.)

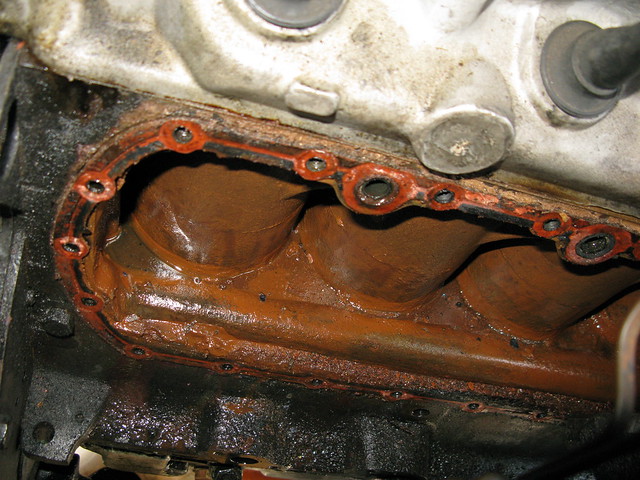
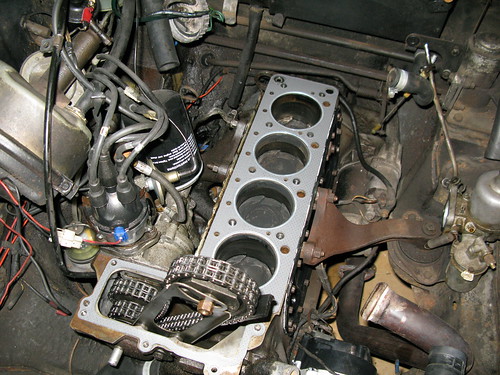
With the engine mount removed and a fair amount of patiences I managed to remove all the bolts. I was worried that some might have seized in the block but fortunately they all came out without too much trouble.

15300953805_300bbc8ebb_z.jpg


15300574202_d491ef4c09_z.jpg


15114180099_a49e972c2e_z.jpg


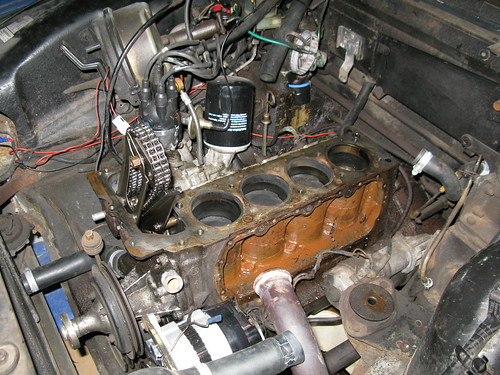
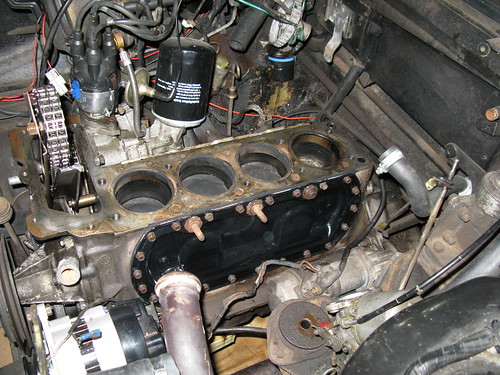
On removing the plate there didn't appear to be too much of a build up of sludge. The engine was apparantly a recon unit about 25000 miles ago. Anyway I got the garden hose out and gave the inside a good blast to get what was there out. Next I scrapped all the old gasket off with a blade and installed a new plate complete with new gasket, sealant and new drain tap and immersion plug.

15114352728_9a3ab74167_z.jpg


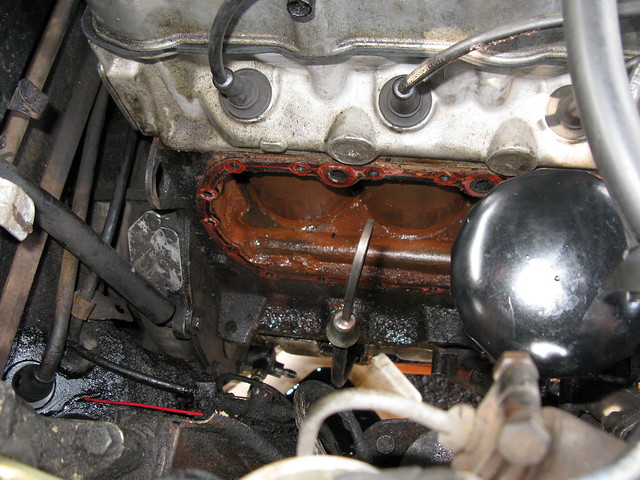
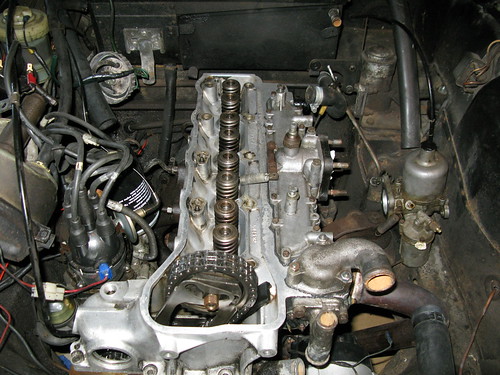
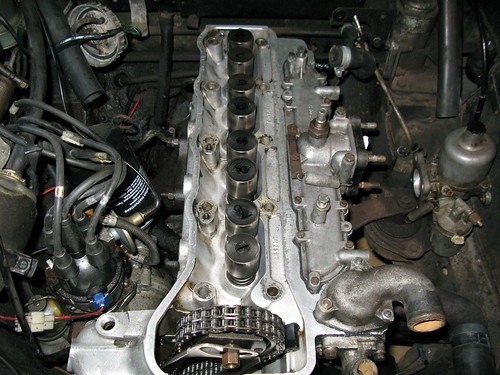
It was rather fiddly getting the new bolts back in around by the oil pump, but with a bit of perserverence and countless dropping of the bolts on the floor I eventually managed it! Before filling up with new coolant I replaced all the water hoses as they were looking past their best. Whilst I was under the car I also swapped the old SC oil pressure pipe for a TC one which will allow me to rig up an oil pressure gauge via the sender unit.

All in all it 's been a good few weeks on my daily driver and hopefully I will have a leak free car now ready for the winter. 8)
 
It's been a while since I posted anything here so here's the latest...

About 2 months ago the Rover's Head Gasket blew and just prior to that wasn't running all that well. So I ordered a new Head Gasket set and set about removing the head. On removal I noticed that the waterways of the head had badly corroded so I set about trying to find a replacement head. I rang up a few specialists but alas no joy. Then I saw a guy on Facebook was breaking a 2000sc so I went up to see it, struck a deal and brought the head home.

I set about stripping the secondhand head and all was going well until it came to removing the thermostat housing. The nuts on the top came off easy but the housing wouldn't budge. After some persuasion with a rubber mallet it did eventually come off but snapped all three studs in the process. I ended up having to drill out the studs in the head and tap in new threads.

The valves on the secondhand head looked in good order except for one which had a very slight bit of distortion. So I replaced that one with one of my originals. The valve seats again were very good unlike one on my original that had dropped out! I then ground in all the valves and seats and put them all back together. I have an old engine block in my shed from a TC that I broke up years ago, and I bolted and torqued down the head to that to check the valve clearances. I had to swap a few shims around and grind a couple of spare shims down to acheive the correct clearances.

Whilst the head was off I also replaced the N/S engine side plate which had seen better days.

Putting it all back together was fairly straight forward. I rechecked the Valve Clearances just to be sure, filled up with fresh Antifreeze and Distilled water and fired her up. There was quite a bit of smoke on start up but that cleared after a minute or so and she is now running better than ever.

I've done about 100 miles since and everything looks good with no leaks. I couldn't find any infomation in the workshop manual about having to retorque the head after a certain amount of miles so presume this is not necessary??


28986720106_b43ba107ce.jpg


28402190623_9e9704f067.jpg


28943460031_8bb8ec7519.jpg


28986715046_45c6099d0a.jpg


28733222650_dc1f91179b.jpg


28986711806_1203d2dca0.jpg


28402181793_22a0068e5d.jpg


28402179483_291898f4e0.jpg


28402177403_8240da2cbd.jpg
 
Back
Top