I came to Sydney last Tuesday so as to provide assistance to a good friend of mine. Rob too has a 1974 Rover 3500, in British Racing Green. The task was to remove and refit his front springs, refurbishing the top links with new bushes in the process.
It was over 20 years since we last removed the springs from his car. The top links at that time were fitted with locally sourced remanufactured bushes, which proved to be far too soft for the task at hand. Consequently, they suffered from extreme wear. Fortunately, the car had not seen too many miles in the years that followed, so their replacement was not an immediate priority.
Now the time had arrived to do so, and as changing the front springs really needs two people, I came down to assist. With the car facing out from the garage and the guards already off, the car was raised and placed on stands. The front wheels were removed along with the off side shock absorber, as this side would be undertaken first.
The seal between the taper of the top ball joint and the top link was broken, thus allowing separation between the two in due course. Using the trolley jack, the swivel pillar was raised so as to compress the spring. The retainers were fitted directly opposite each other, thus establishing the optimum safe position for retaining the spring in the compressed state. The stored potential energy within a compressed spring can, should it convert to kinetic energy, result in personal injury or death, so correct positioning can minimise the possibility of such an occurrence.
The retainers are slowly tightened so as to withhold the spring, each time raising the swivel pillar will ease the difficulty encountered in compressing the spring. With the spring now compressed to the point where it is no longer exerting force against the spring cup, (this can be identified by the ability to rotate the spring between the base unit and the spring cup), the top link retaining nuts are removed and the link withdrawn whilst another pair of hands holds the spring from dropping out.
The near side now followed suit, and the with the process fresh in our minds took less than 50 minutes to accomplish, less than half the time, which was excellent.
The next day I dropped off the top links along with new JRW inner bushes for fitting, which was undertaken at Sydney’s most reputable Land and Range Rover Engineering centre. The following day we went to collect and were very pleased with the work done.
Refitting is a reversal of removal, except that the spring must be compressed on the ground, which does take a little longer. The outer bracket along with a pair of new JRW cone bushes and locally sourced ball end rubbers are also refitted into the top link. The position of the inner bracket mounting face being at 90 degrees to the anti roll bar mounting face also adds to the difficulty of fitment. With Rob holding the spring up, I positioned the tynes of the top link within the base unit guide holes. The top link must now be pulled down against the static position whilst simultaneously pushing the link towards the base unit. Once the tynes exit their locating holes, the washers and nyloc nuts can be refitted.
The top ball joint is refitted into the top link, and the shock absorber follows suit.
The procedure is exactly the same for the near side. Once complete the anti roll bar can be positioned and refitted to both top links.
With the wheels reacquainted with the hubs, Rob’s Rover was ready for a short and successful test.
The following photos present a pictorial of the procedure.
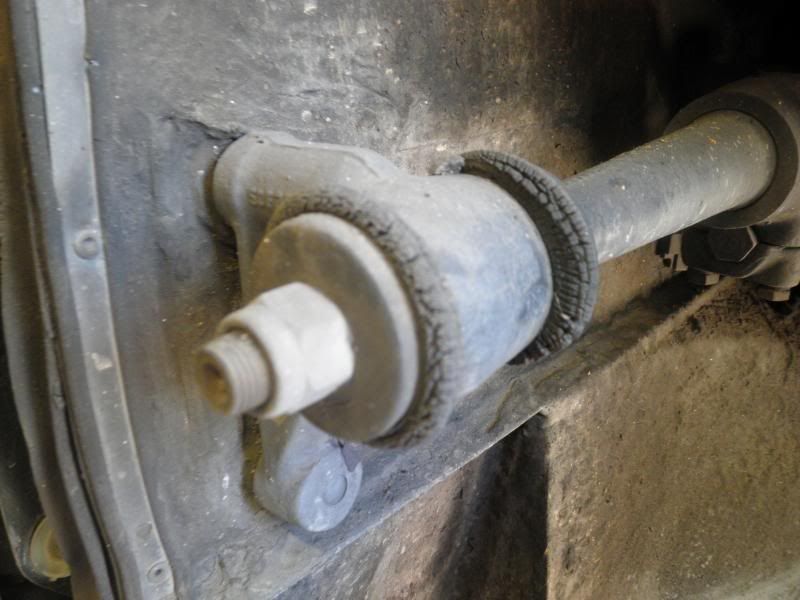
Heavily worn replacement bushes
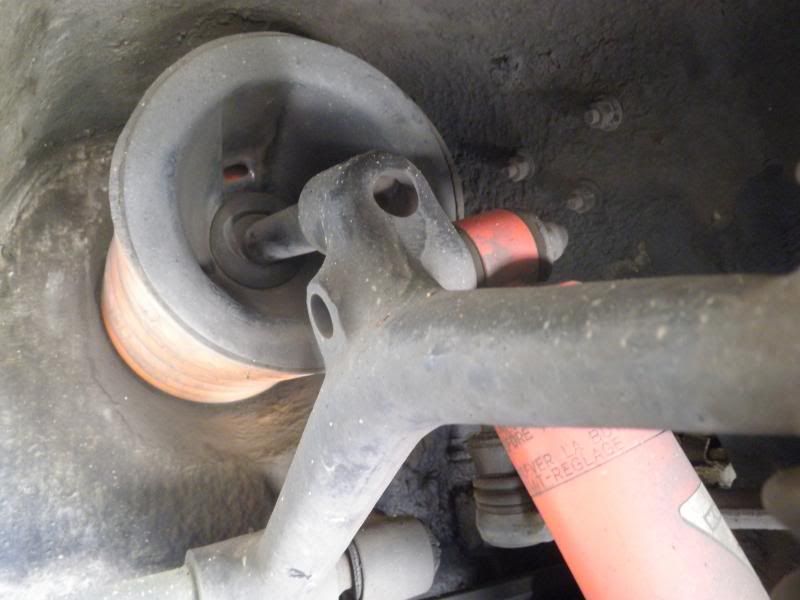
The ball end bushes proved to be in very good condition, but were replaced nonetheless.
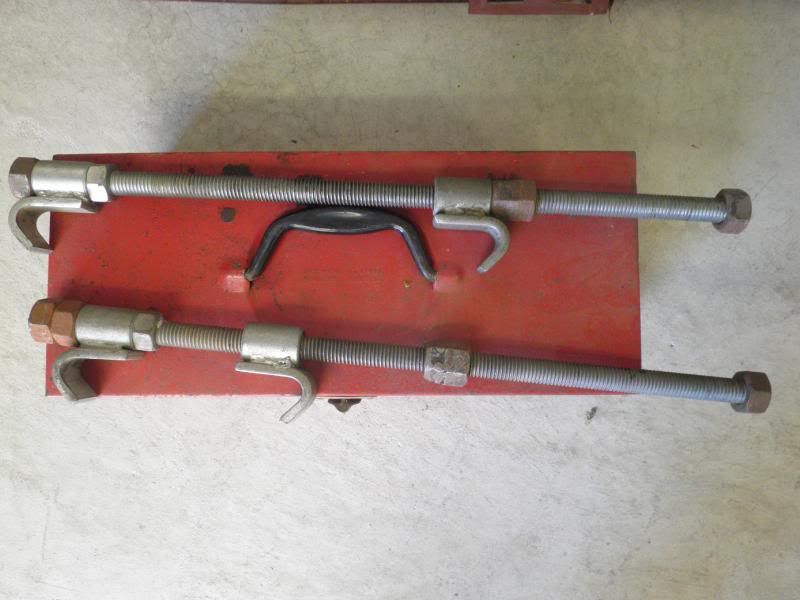
My custom made spring retainers.
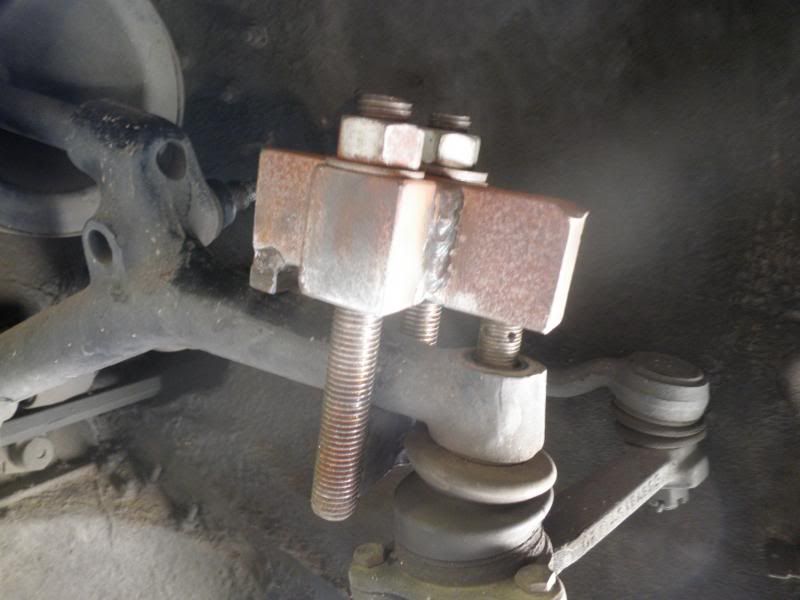
Separating the top ball joint taper from the top link.
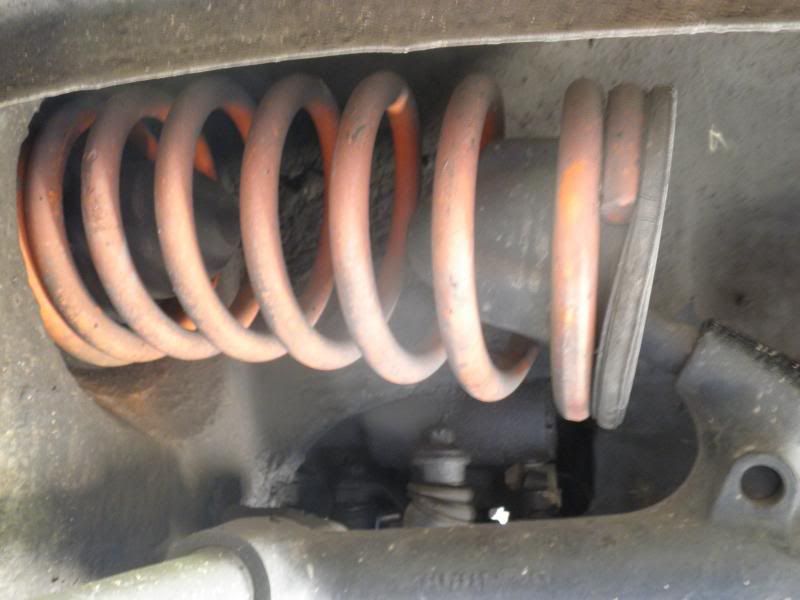
With the shock absorber removed and the swivel pillar not supported, the spring will open as shown.
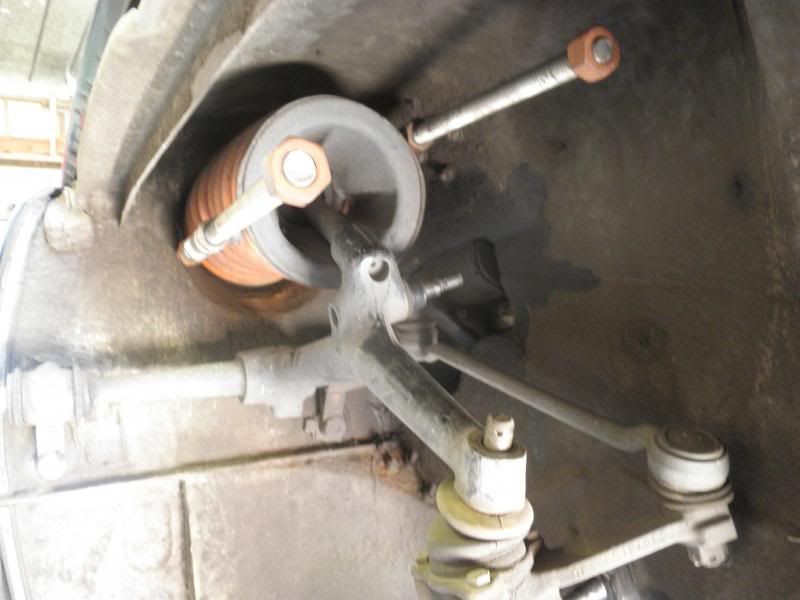
The retainers fitted at essentially 180 degrees to each other.
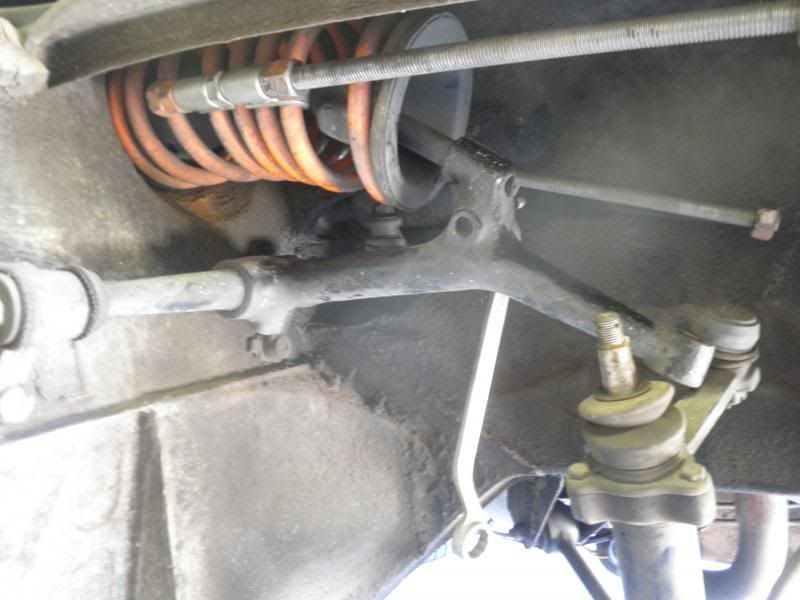
The spring has been compressed and is retained.
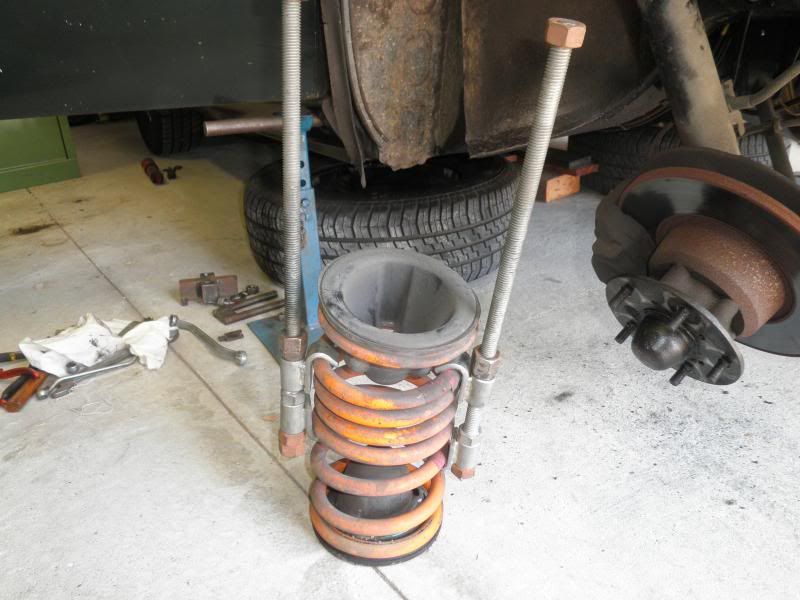
The retainers are longer than the free length of the static spring, so no difficulty is encountered in their removal.
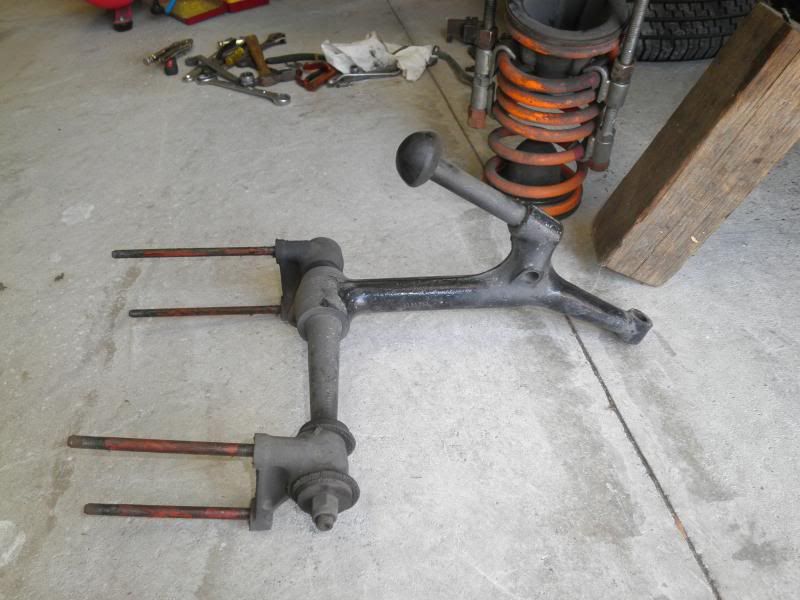
Top link
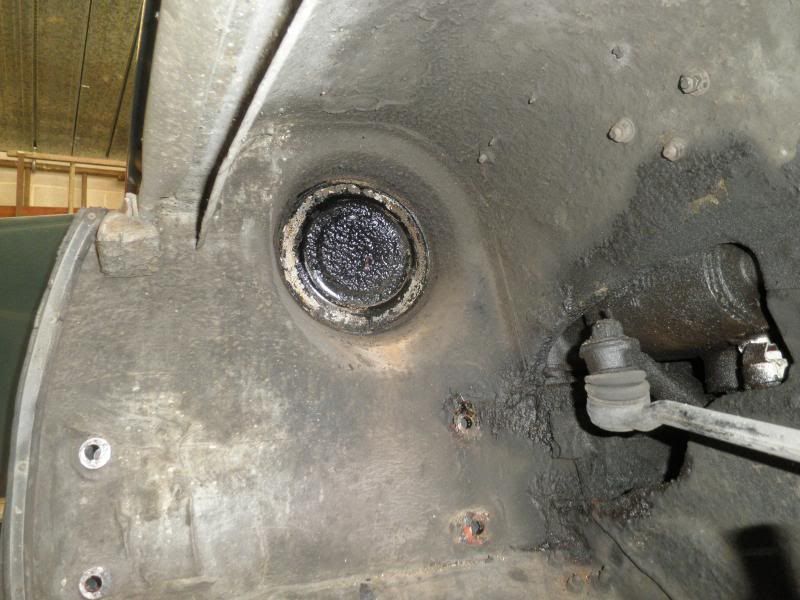
Corrosion free is always a pleasing sight.
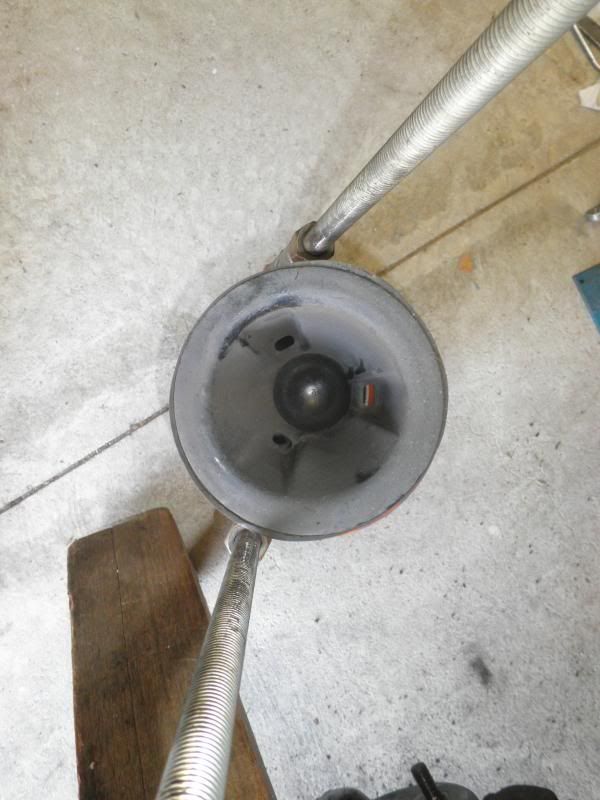
Spring retainers await removal.
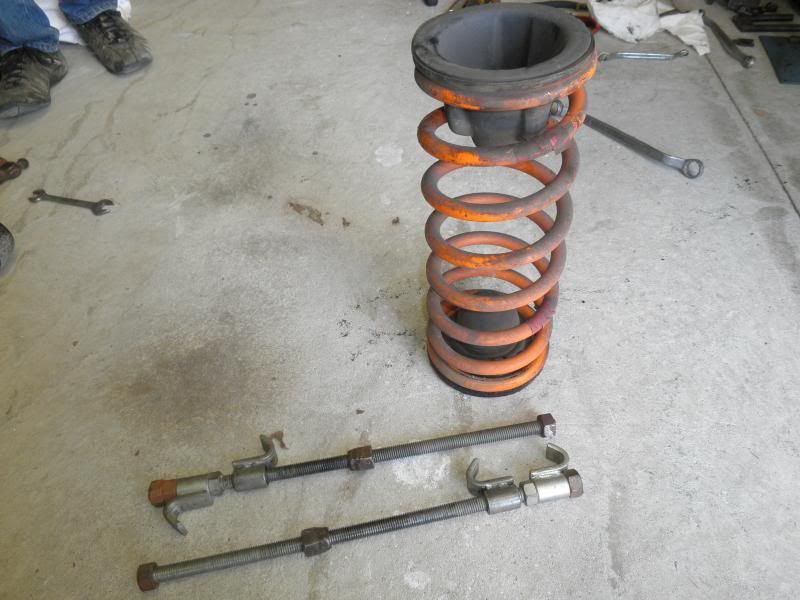
Spring retainers removed.
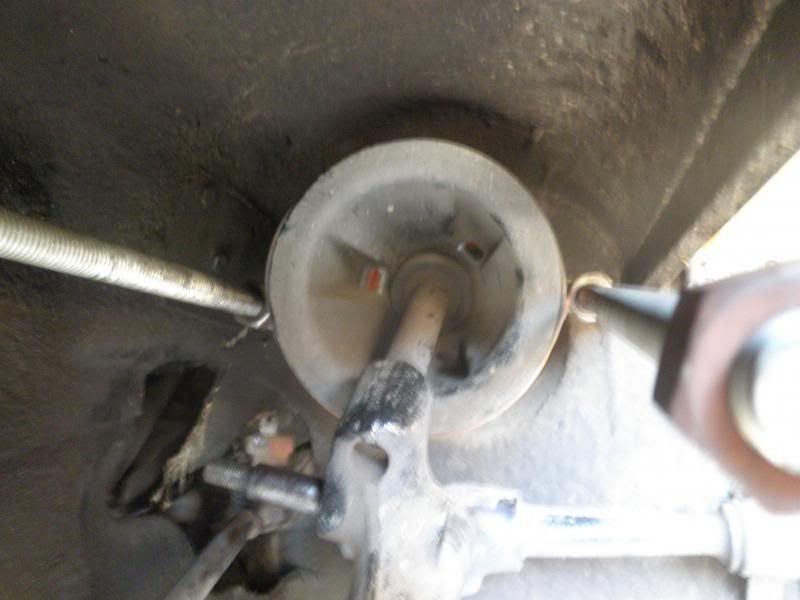
Retainers fitted to near side spring.
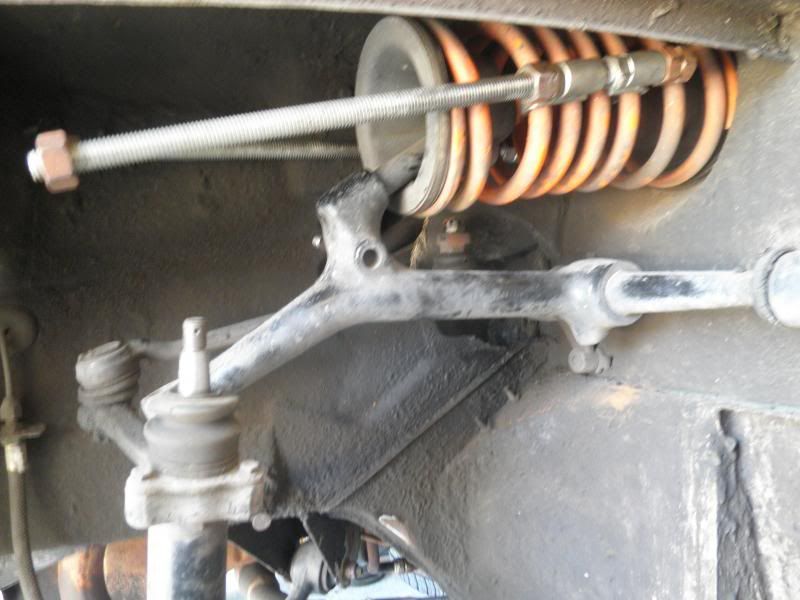
Spring compressed awaiting top link removal.
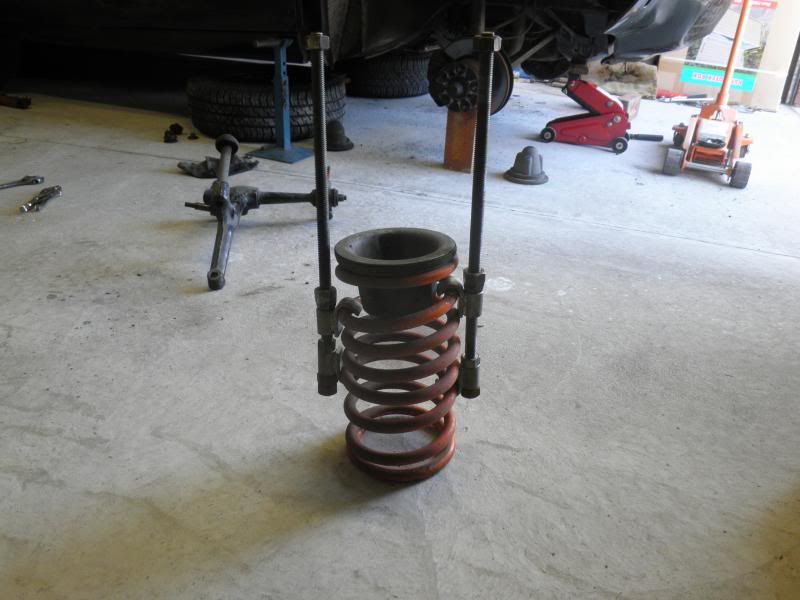
Near side spring out and on the ground.
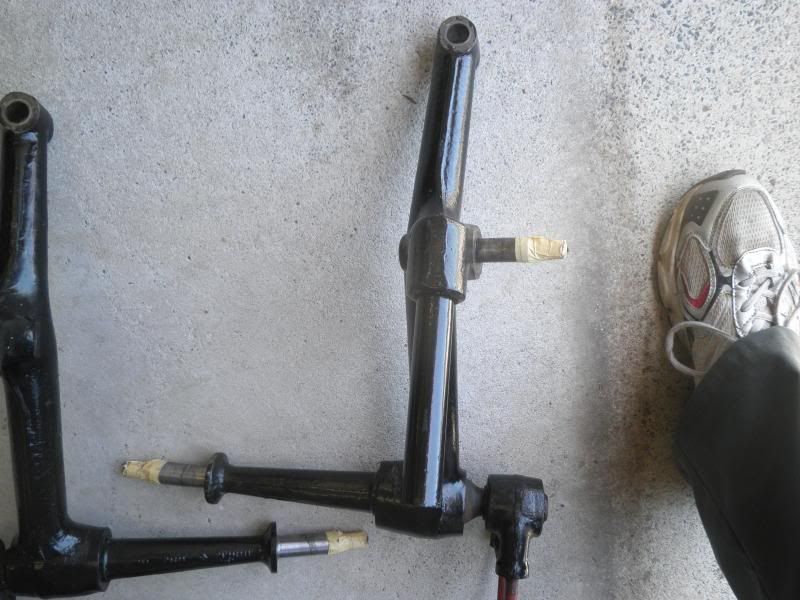
The complex shape of the top links is clear to see.
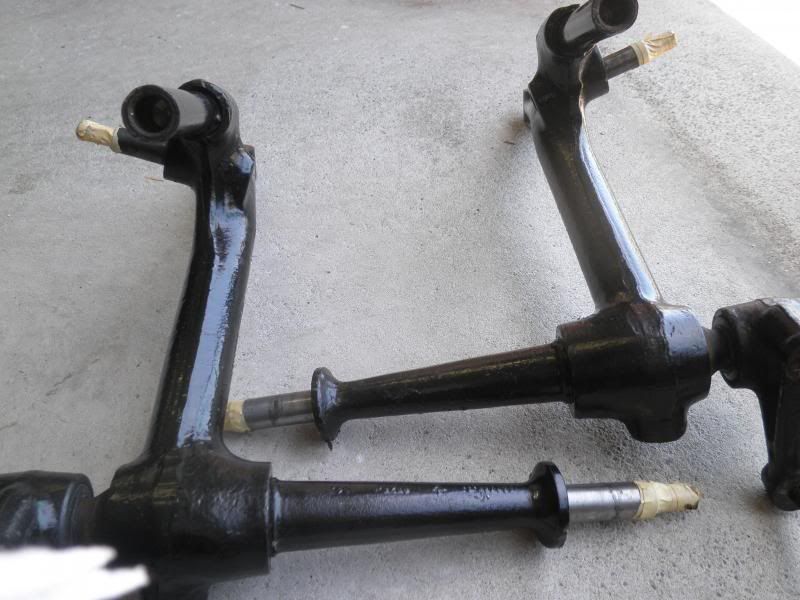
The main arm exhibits curvature along two planes.
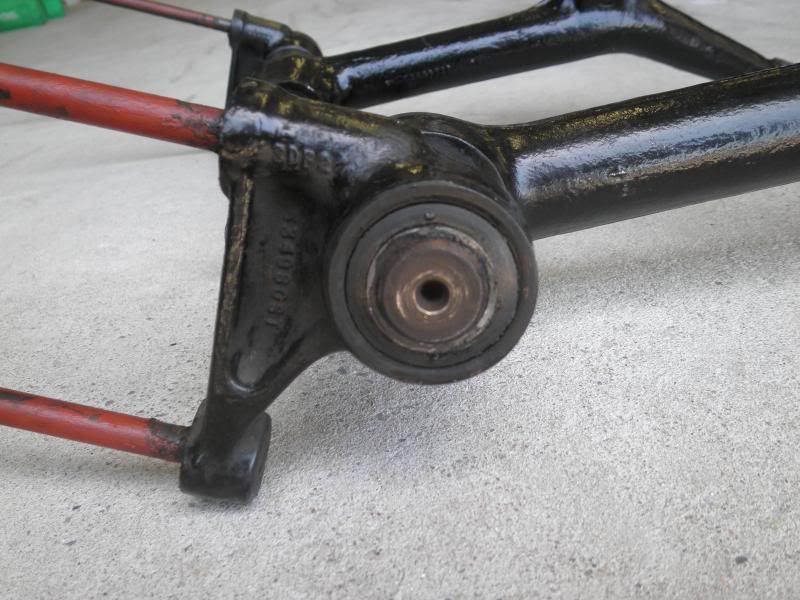
New inner bush perfectly positioned.
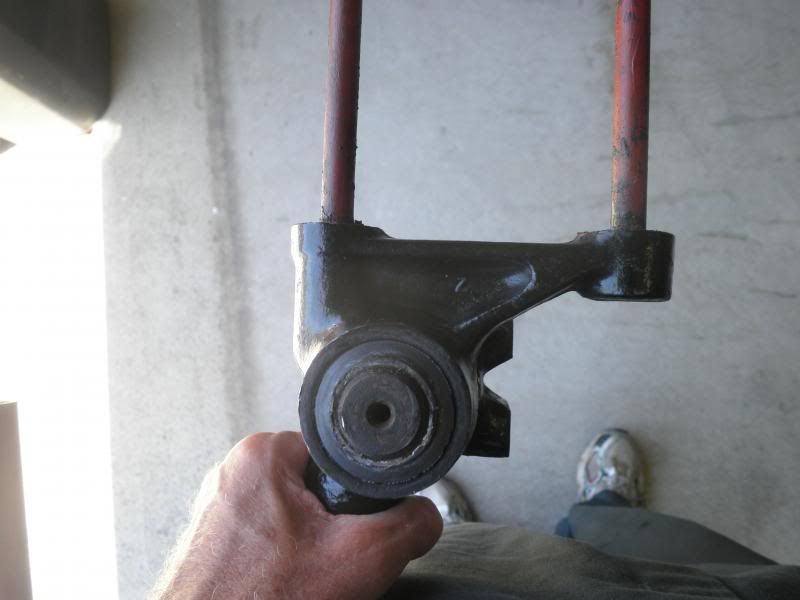
The necessary 90 degree angle between the two mounting faces can be clearly seen.
Retainers fitted to replacement spring. Although there was nothing wrong with those springs removed, Rob decided to fit his new set of the same brand.
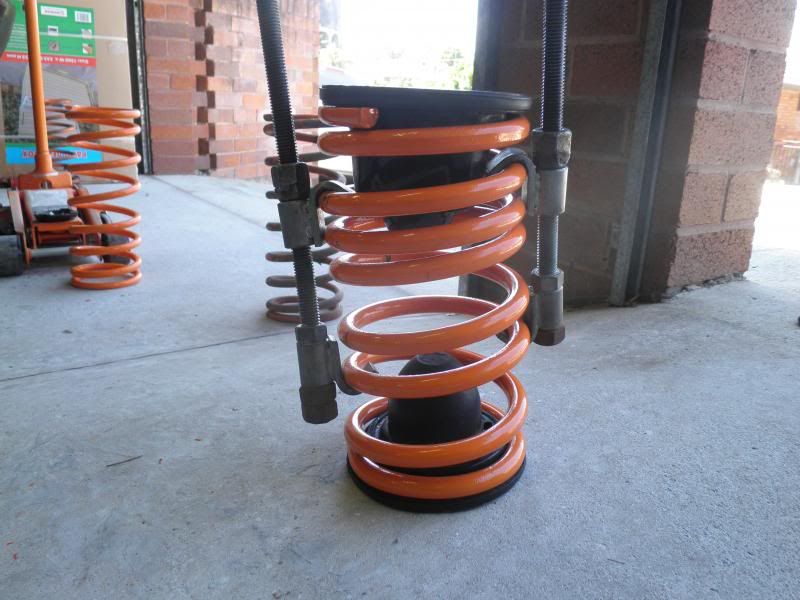
Compressing the new spring.
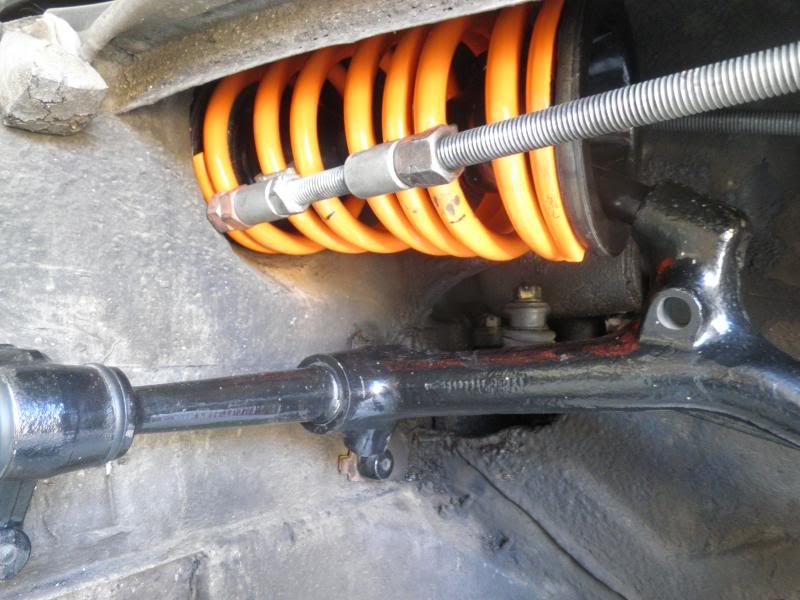
Off side spring and top link refitted. The shims for ensuring the correct camber can be seen beneath the inner top link bracket.
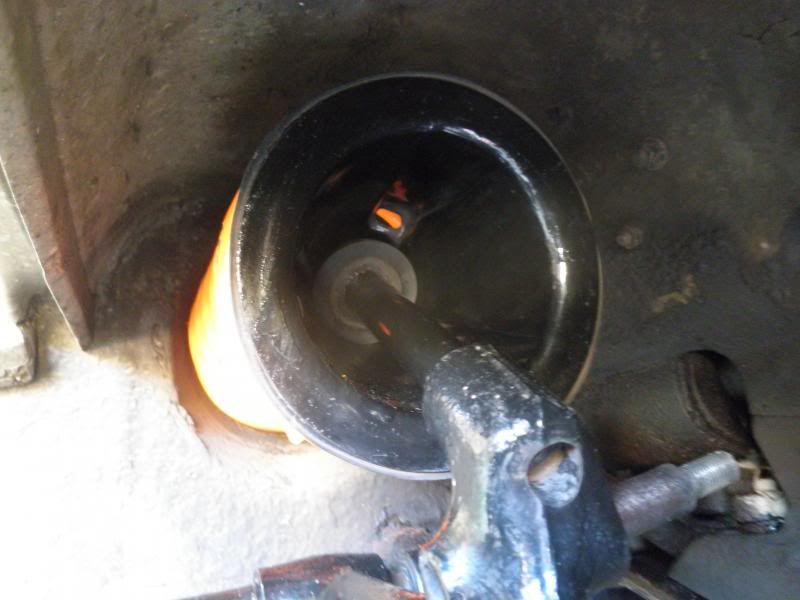
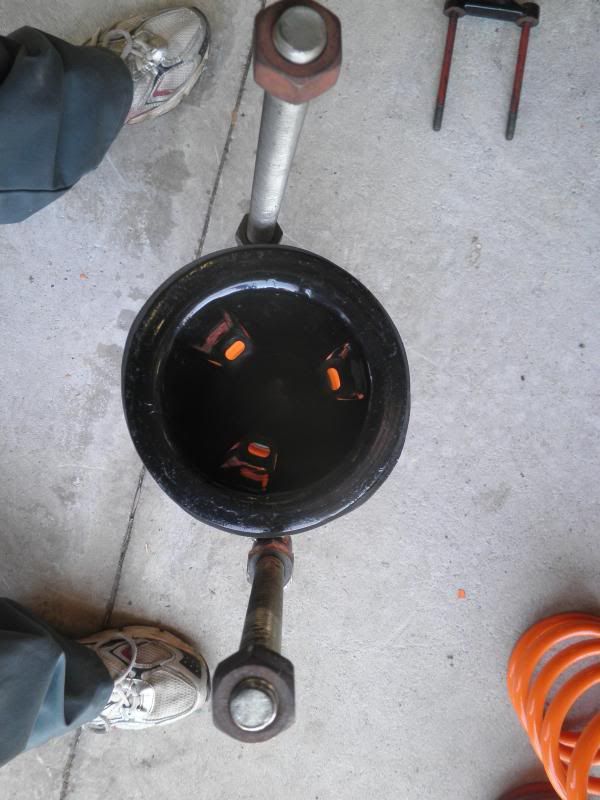
The new ball end rubber can be seen along with the three channels that form the spring cup.
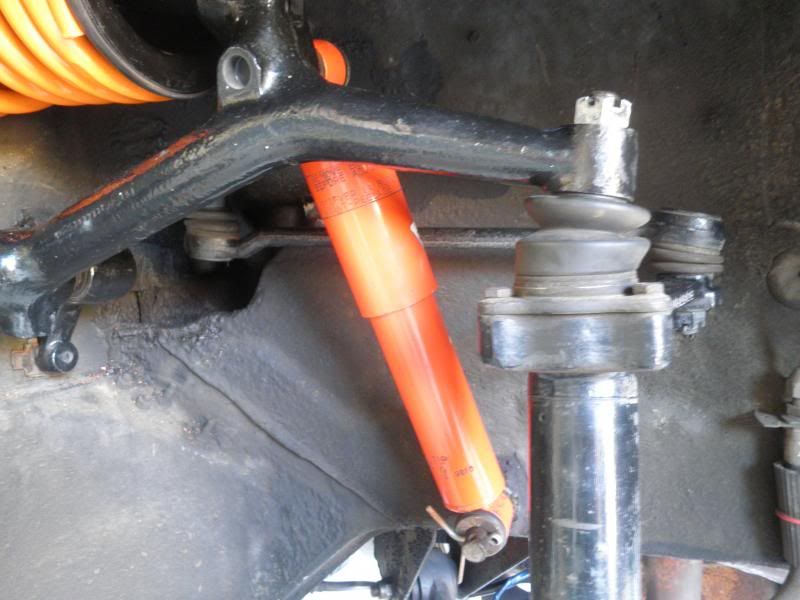
Top ball joint and shock absorber refitted.
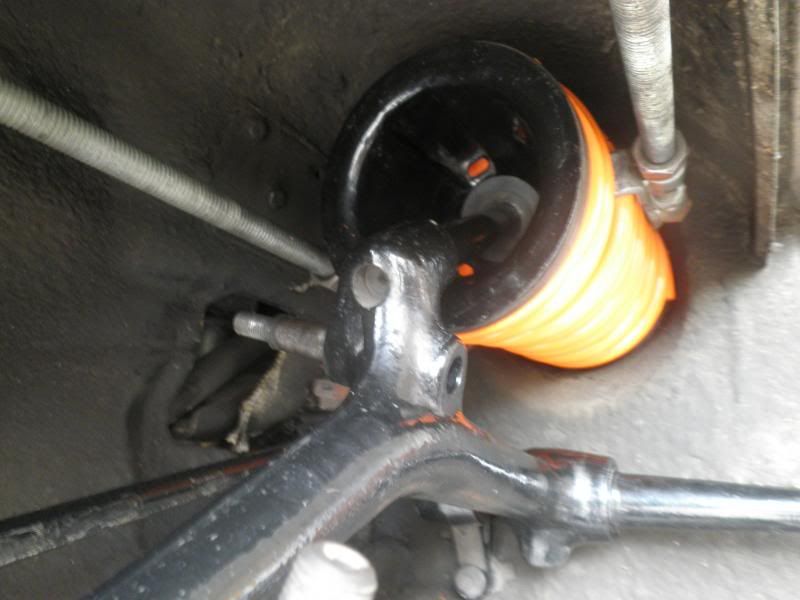
Near side spring held by retainers and in position.
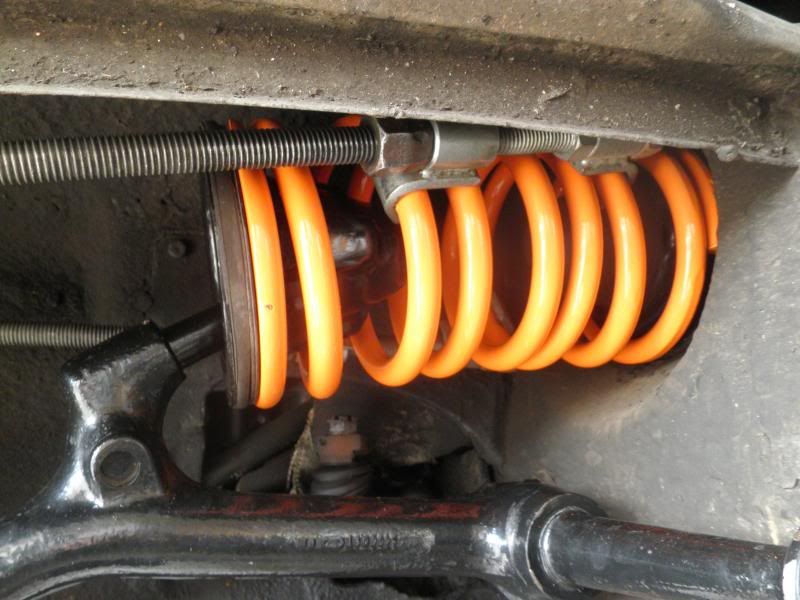
Awaiting retainer removal.
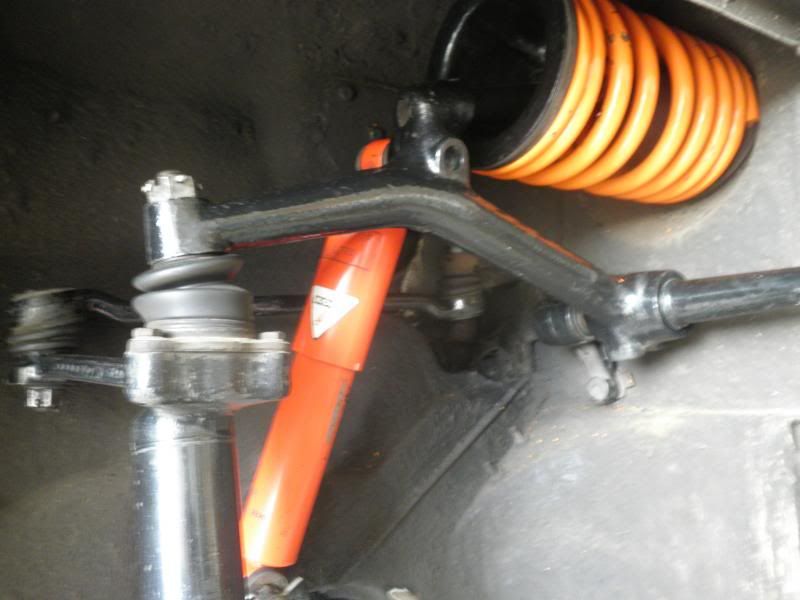
All back together.
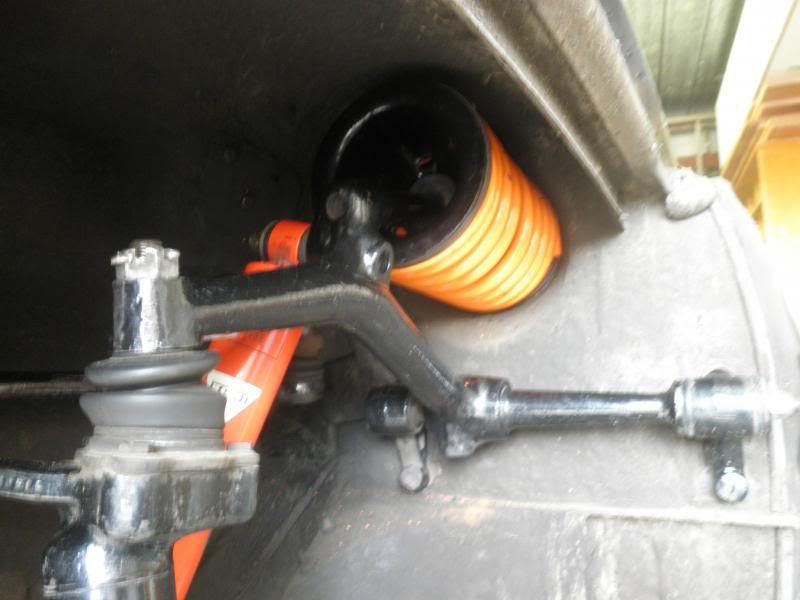
Looking very nice indeed.
Ron.
It was over 20 years since we last removed the springs from his car. The top links at that time were fitted with locally sourced remanufactured bushes, which proved to be far too soft for the task at hand. Consequently, they suffered from extreme wear. Fortunately, the car had not seen too many miles in the years that followed, so their replacement was not an immediate priority.
Now the time had arrived to do so, and as changing the front springs really needs two people, I came down to assist. With the car facing out from the garage and the guards already off, the car was raised and placed on stands. The front wheels were removed along with the off side shock absorber, as this side would be undertaken first.
The seal between the taper of the top ball joint and the top link was broken, thus allowing separation between the two in due course. Using the trolley jack, the swivel pillar was raised so as to compress the spring. The retainers were fitted directly opposite each other, thus establishing the optimum safe position for retaining the spring in the compressed state. The stored potential energy within a compressed spring can, should it convert to kinetic energy, result in personal injury or death, so correct positioning can minimise the possibility of such an occurrence.
The retainers are slowly tightened so as to withhold the spring, each time raising the swivel pillar will ease the difficulty encountered in compressing the spring. With the spring now compressed to the point where it is no longer exerting force against the spring cup, (this can be identified by the ability to rotate the spring between the base unit and the spring cup), the top link retaining nuts are removed and the link withdrawn whilst another pair of hands holds the spring from dropping out.
The near side now followed suit, and the with the process fresh in our minds took less than 50 minutes to accomplish, less than half the time, which was excellent.
The next day I dropped off the top links along with new JRW inner bushes for fitting, which was undertaken at Sydney’s most reputable Land and Range Rover Engineering centre. The following day we went to collect and were very pleased with the work done.
Refitting is a reversal of removal, except that the spring must be compressed on the ground, which does take a little longer. The outer bracket along with a pair of new JRW cone bushes and locally sourced ball end rubbers are also refitted into the top link. The position of the inner bracket mounting face being at 90 degrees to the anti roll bar mounting face also adds to the difficulty of fitment. With Rob holding the spring up, I positioned the tynes of the top link within the base unit guide holes. The top link must now be pulled down against the static position whilst simultaneously pushing the link towards the base unit. Once the tynes exit their locating holes, the washers and nyloc nuts can be refitted.
The top ball joint is refitted into the top link, and the shock absorber follows suit.
The procedure is exactly the same for the near side. Once complete the anti roll bar can be positioned and refitted to both top links.
With the wheels reacquainted with the hubs, Rob’s Rover was ready for a short and successful test.
The following photos present a pictorial of the procedure.

Heavily worn replacement bushes

The ball end bushes proved to be in very good condition, but were replaced nonetheless.

My custom made spring retainers.

Separating the top ball joint taper from the top link.

With the shock absorber removed and the swivel pillar not supported, the spring will open as shown.

The retainers fitted at essentially 180 degrees to each other.

The spring has been compressed and is retained.

The retainers are longer than the free length of the static spring, so no difficulty is encountered in their removal.

Top link

Corrosion free is always a pleasing sight.

Spring retainers await removal.

Spring retainers removed.

Retainers fitted to near side spring.

Spring compressed awaiting top link removal.

Near side spring out and on the ground.

The complex shape of the top links is clear to see.

The main arm exhibits curvature along two planes.

New inner bush perfectly positioned.

The necessary 90 degree angle between the two mounting faces can be clearly seen.

Retainers fitted to replacement spring. Although there was nothing wrong with those springs removed, Rob decided to fit his new set of the same brand.

Compressing the new spring.

Off side spring and top link refitted. The shims for ensuring the correct camber can be seen beneath the inner top link bracket.

The new ball end rubber can be seen along with the three channels that form the spring cup.

Top ball joint and shock absorber refitted.

Near side spring held by retainers and in position.

Awaiting retainer removal.

All back together.

Looking very nice indeed.
Ron.


