1965 2000 SC rolling resto (or not so rolling)

darashen

Member
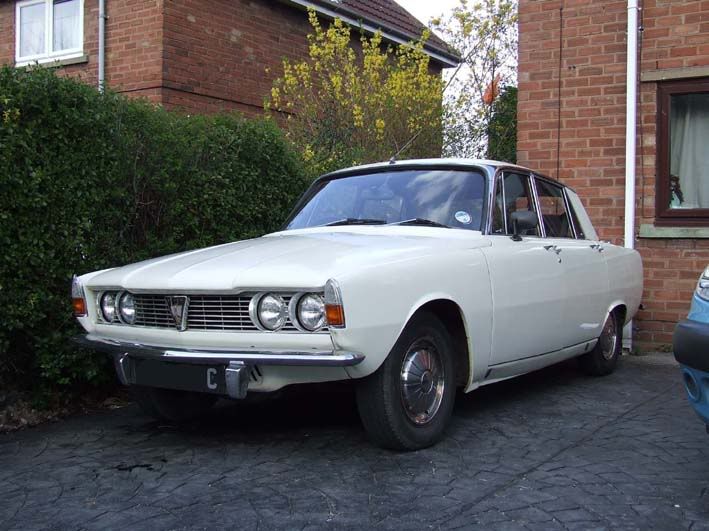
I have been meaning to put something up for a while here is our family 1965 Rover 2000 SC.
frontview.jpg

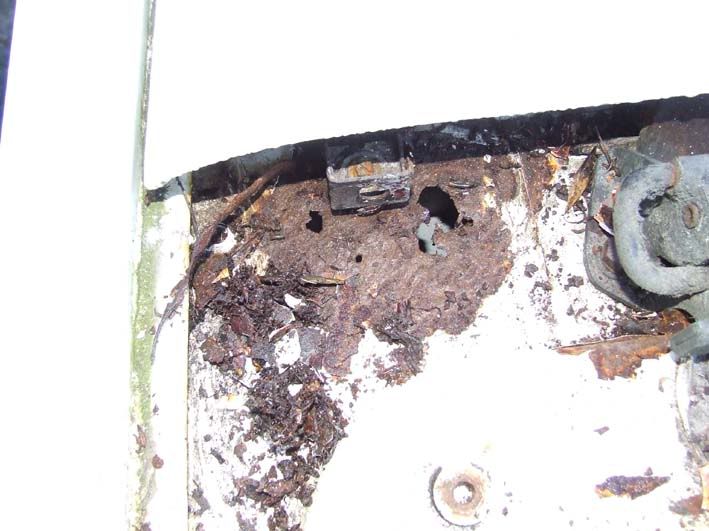
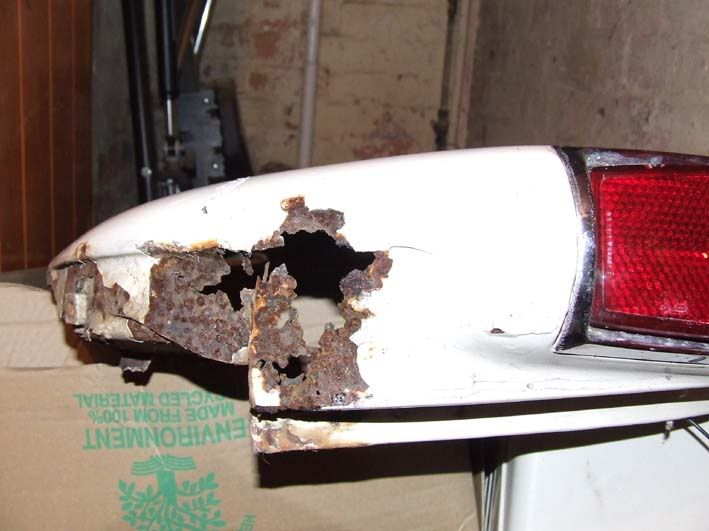
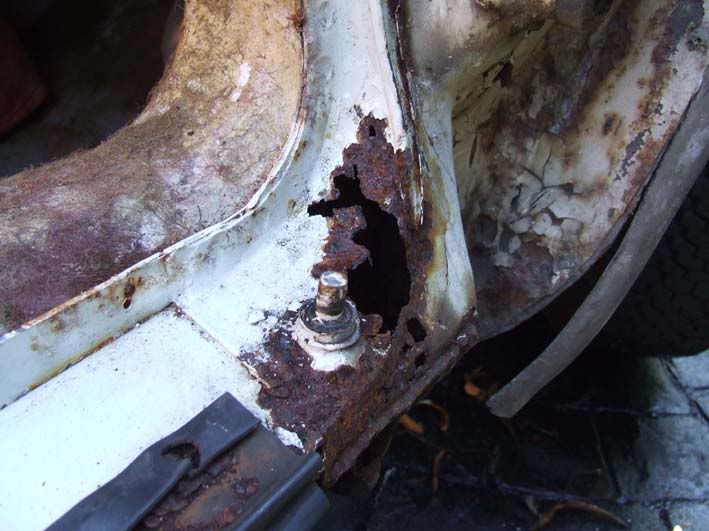
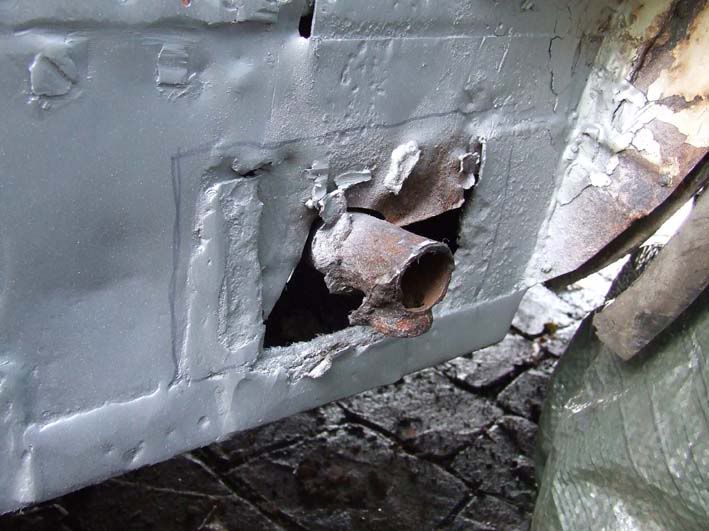
Having bought the car 12 months ago we decided to run it for a year to see if we could live with it. As I am sure you have all found they are extremely easy to live with so it is staying. A year later the dreaded MOT comes around again and unfortunately the dreaded tin worm has been busy since it's last test. It has got into the normal areas, front jacking points and bottom of the A post, the ridiculously thin seal channels and under the rear scuttle panel. Having gone around the car and estimated the cost of getting all the work done professionally to be in the region of £1500 to £2000 and therefore not cost effective, I have decided to have a go myself starting with the worst section the offside front jacking point and A post. If I can do that the rest should not be too much of a challenge as the rest of the car is in much better shape.

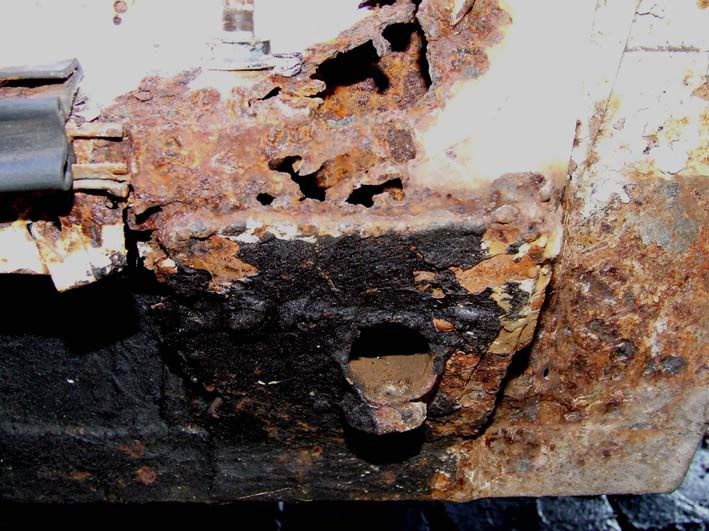
This is what I found when I removed the fibreglass a previous keeper had covered the rot with at some point in the past. Somebody clearly liked his fibreglass a little too much rather than welding in new metal. A theme which seems to follow through the car unfortunately, such as the six inch long hole gap between the inner sill and floor in the drivers foot well, which has now been replace with a seam welded repair plate.
apostrot.jpg

offsidefrontjackingpointrot.jpg

offsidefronttreadplaterot.jpg


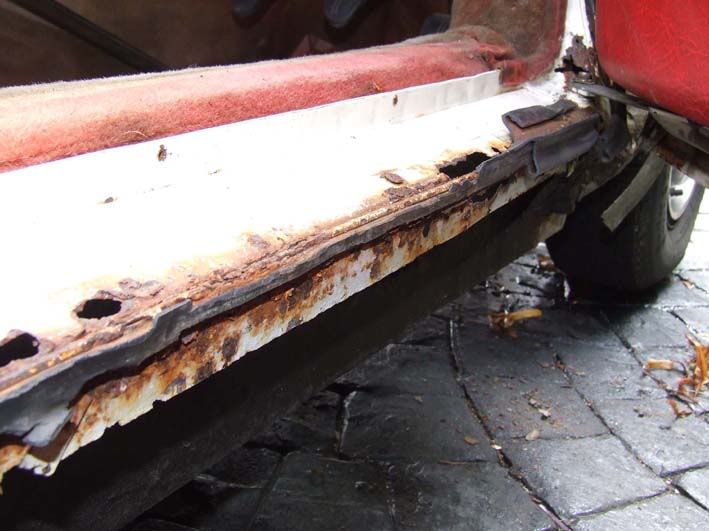
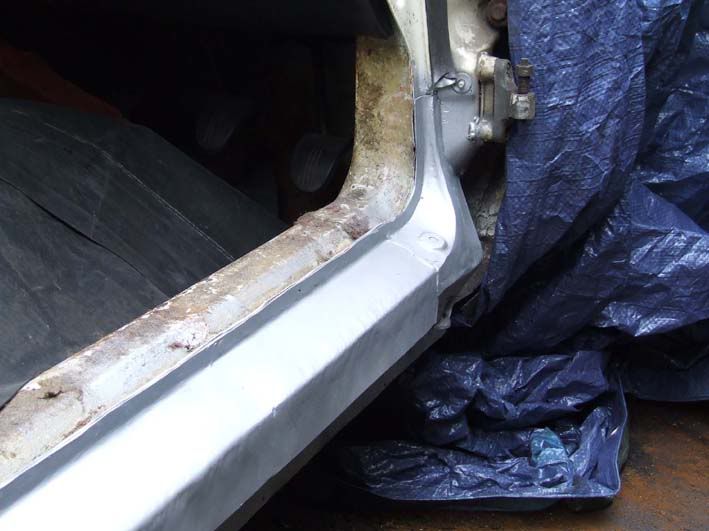
With the spot welds drilled out and the rusty metal removed the outer sill was found to have been repaired previously with heavier gauge steel which whilst not pretty, was very solid so I am leaving most of it along. Unfortunately the section around the jacking tube appeared to have been stitched together from scraps of steel off the garage floor of differing gauges and had rusted badly so I cut it out and seam welded a repair section in around the jacking tube.
outersillrot.jpg

outersillpriorrepair.jpg


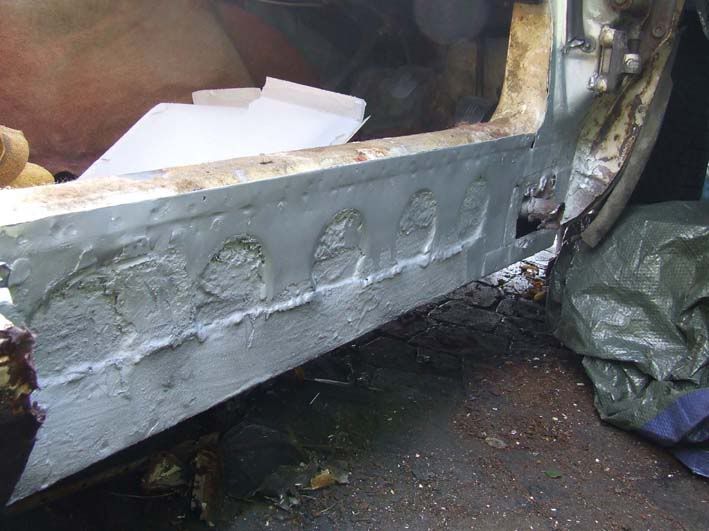
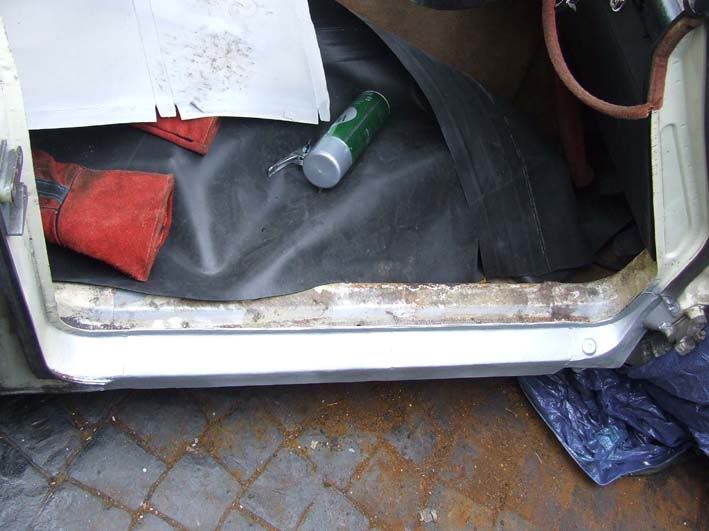
I was unable to source panels for the front corner of the base unit/bottom of the A post so I fabricated my own which once spot welded in was almost the right shape with only a mm or so of difference from the original. I will adjust this out with a few gentle taps before fitting the seal channels and painting. Tread plates were also fabricated in 2 sections, as I was limited on the length of steel I could fold in one section. As a slight change to the original design I have folded the flange on these up against the flange on the outer sill as this makes plug welding them in considerably easier than with the flange folded down and having replaced the door it does not effect the door gaps.
newmetal1.jpg

newmetal.jpg


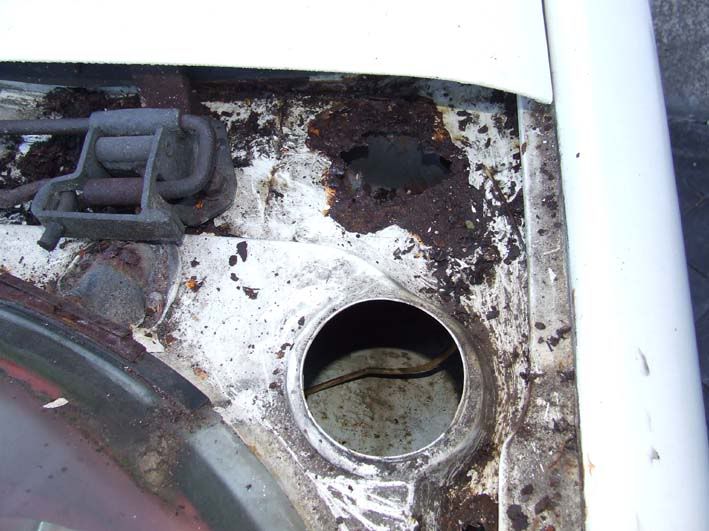
Next step is to graft new metal into the two holes under the rear scuttle panel that let water into the boot and decide if I want to go mad and tidy up the old boot floor repair patch.

Sorry about the length of this first post I had intended to put it up sooner in instalments.

Why are wasps so attracted to U-Pol zinc weld primer, not quite the buzzing you want to hear whilst mig welding.
 
Well done you for having a go. It never ceases to surprise me what people think good old fashioned steel can be replaced with. At least now the car is in the hands of someone who will look after it.

Good luck with the resto and keep the pics coming

Dave
 
It's nice to see such an early car being kept on the road!

Also, the state of the a post bottom area just demonstrates what damage is done by covering up rotten areas & so allowing trapped water to do its work. I bet the damage there was much less when it was first covered with fibreglass. :(
 
I am pleased with the way the welding is coming out but I am still having to do a fair amount of grinding. I had never welded on a car until a few weeks ago and I’m finding it fairly easy to pick it up although I guess buying a good quality welder helped with that and the welders already paid for itself in savings against paying a body shop to do the work.

I was inspired to dive in and have a go by one of the other members on here who bought a welder and dived in learning as he went. Like me his first few welds looked a bit rough but he very quickly got better so thanks to the members on here for inspiring me.

Subject to the weather I will weld up the rear scuttle tomorrow as there is a large hole either side weather the rear deck panel bolts on but fortunately the screen apron is surprisingly solid. Will try and post a further update tomorrow night.
 
Well it's a long time since I posted but that does not imply I have given up. Despite adverse weather and the holiday season conspiring against me progress has been made.

On further investigation of the rot in the rear scuttle panel it turned into 2 gapping holes.
offsidescuttlerot.jpg

nearsidescuttlerot.jpg


The rot has been completely removed and new metal let in fortunately the rust had not spread as far as the walls of the rear cross member so the body integrity was not compromised and it is now much stronger. I have now cleaned up the old poorly finished repairs to the boot floor and rear inner wings along with seam sealer and undercoat in all these areas which did not seem to have been done when they were patched in the past.

Both rear wings were rotten below the lights so these have received a temporary cosmetic repair with fibreglass until I can get the new set of wings I have sprayed at least the repaired wings will get it through an MOT and I aim for this to be the only area of the car with any fibreglass in it once I have finished.
nearsidewingrot.jpg


On a high note I managed to get the engine running again at the weekend after c9onverting the car to negative earth and installing a discrete electronic ignition system in place of the points. An upgrade I highly recommend as once installed it is virtually impossible to see that it has been done as all the electronics are contained within the distributor.

I at least feel like I am getting somewhere now, just one jacking point and several sections of seal channel to go before paint.
 
Bless....keep going, any early 2000 should be saved. That's quite extreme rot there, but it will be worth it :D
 
Nice project you've got coming along there and well done for braving the forbidding temperature outside, you know I'm sure it would've taken the previous owner more effort and time to carry out the bodges than it would've done doing the job properly in the first place, but good to see you getting stuck in, repairs are looking good too, oh and BTW the fibreglass repair on the wing isn't such a crime that would be a hard shape to fabricate without a bodyshop and tools to hand, and as long as you get rid of the bad stuff there and start fresh I think you'll end up with a good repair,
Best of luck.
 
Familiar sill rot, but that rear scuttle has really suffered hasn't it. None of mine have needed any work there at all....up to date. ;)
She's well worth the work.
 
Very nice car! Happy to see it being rescued. I have a similar car; a 1965 2000 in wedgewood blue. It cueing for restoration at the moment, waiting for my 1972 3500 s to be finished. I will certainly keep an eye on your thread. Some excellent photos you have put in. I don't think my car is this bad with regard to rust, but some welding is required. Your repairs to the fron jacking point area lokked very good. I wish you good progress with the Rover!

regards, Barten
 
I suspect the reason for the rear scuttle going so bad was that the rear deck panel was not fully tightened done so instead of the majority of the water washing over the rear screen seal it ran under the desk panel and tended to sit around the brackets. The centre section of the scuttle was perfect. I will make sure when I bolt it back together that the seal is tight to the screen.

Not too worried about fibreglass in the wings as they are so bad elsewhere they will have to be scrapped in the long run anyway and I have a full set of near perfect series 1 wings and a new roof just waiting to be painted but want an MOT on the car before I commit to the cost of paint.

Of course the closer I get to finnished the more time I have to think about the interior. It is currently finnished in red leather with red door cards and trim panels which be definatly stay the same but the carpets need replacing however we cant decide what colour to put in. The originals were red but are so faded you can't get an idea of the original colour but I am concerned that that much bright red will be too much. For this reason I recovered the glove boxes black to match the dash but I feel black carpets would not compliment the car. What colour carpets have people seen combined with a red interior.
 
I have a Davos white series 2 2000, it has a Toledo red interior with red carpets and IMO I don't think it's too OTT. Many people comment on the interior (Favourably that is :) ) I think it's very fitting for the time that these cars were produced. Also I have the darker "wood" cappings on my doors and dash which seem to compliment the colour scheme fairly well.
 
Managed a few more hours this afternoon. I have now managed to attach new seal channels along the bottom of the drivers door including the curved section at the bottom of the A post, I went with the method of cutting small wedges out to get it around the tight radius corners. Only job on the drivers door opening left is to put in the holes where the sill cover screws on and then paint it so given how bad this section of the car was it's starting to feel like real progress is being made.

Also fitted the seal channel in the rear driver’s door opening including the dogleg section at the bottom of the D post. The D post had started to go at the very bottom so I have already made up a small repair section and welded this in. That job was a challenge due to previous repairs to the D post that had slightly altered the shape at the bottom. I had made templates from the passenger side and made these up as a repair panel but it would not fit. In the end I made the section by eye with no templates, fortunately the hole was only a couple of inches at the very bottom but now looking reasonable and just needs a little high build primer to hide the welds.

Soon I will be able to start on the front nearside jacking point and then paint the floor pans which have remained remarkably solid given the age of the car.
 
I agree that red carpets are entirely in keeping for this age of car. If you're not sure you like the result black floormats will tone it down nicely.

Well done with the rapid progress, you must have a very well organised garage to work in!

Chris
 
No garage I am working on the driveway subject to weather although I do have a small workshop for fabrication, panel prep and painting but no way to get the car in there not that it would fit. I'm also working with minimal tools and equipment i.e set of hammers and dollies a good quality welder and an angle grinder. All panels that I have made have been formed using just these tools and lengths of angle iron to fold the sheet metal over.

Right now as it's raining again I would give my right leg for a garage to work in so I could get a bit more done.
 
As a cheap alternative to a garage, I often use a cheap Gazebo to cover a vehicle whilst working. Just make sure it is well tied down ! :LOL:
 
I use a gazebo for certain shows and have bought 4 of those cork screw like dog anchors.

Screw them in about a foot or so and then connect them to the top corner of the gazebo with some ratchet straps.

Works a treat (on grass)

Richard
 
darashen said:
No garage I am working on the driveway subject to weather although I do have a small workshop for fabrication, panel prep and painting but no way to get the car in there not that it would fit. I'm also working with minimal tools and equipment i.e set of hammers and dollies a good quality welder and an angle grinder. All panels that I have made have been formed using just these tools and lengths of angle iron to fold the sheet metal over.

Right now as it's raining again I would give my right leg for a garage to work in so I could get a bit more done.

Tell me about it...you get all your kit set up and the cover off, then the Rain Fairies decide it's your turn again! :evil:

darashen said:
...a good quality welder and an angle grinder.

Which welder did you go for?
 
Bought the Clark 135T which once you get used to setting the wire tension produces really good welds. This was the most powerfull welder they stocked rated for domestic power socket but it can handle all the gauges of steel on the P6. I use this with the large capacity disposable co2 bottles. Definitely worth the few extra pounds for the high capacity bottles as they last twice as long as the others as long as you remove the value from the bottle between welding sessions. I did experiment with the other blends of gasses but found CO2 worked best for my style of welding and it just happens to be the cheapest option as well.

I have considered the gazebo idea but not seen one cheap yet and it's difficult to tie down on one side as my drive is very wide so I would need to weight the one side down. At the moment I'm using some large roofing rubber off cuts as welding screens and wind breaks when welding to protect the neighbours from the glare. I am lucky to have understanding neighbours although 3 of my neighbours also have resto projects on their drives that they are working on so they set a precedent. I think most of the non-car mad neighbours are just fascinated to watch the cars come back to life.
 
Back
Top